
Hello my Steeminions !
Today I will share with you a tutorial of the Christmas FancyBear I have painted last year,
this year it will be translated for my french people as well ;-)
I started on Steemit in May 2017 with posts exclusively in English, and since January 2018, I have written 99% in both languages.
... this was part of my resolutions for this new year; -) and even if it takes more work and time, I think it is normal that I also express myself to be understood by my community _
Aujourd'hui, je vais partager avec vous un tutoriel de l'ours fantaisie de Noël que j'ai peint l'année dernière,
cette année, ce tuto sera traduit pour mes amis français aussi ;-)
j'ai commencé sur Steemit en mai 2017 avec des posts exclusivement en anglais, et depuis janvier 2018, je les écrits à 99 % dans les deux langues.
...cela faisait partie de mes résolutions pour cette nouvelle année ;-) et même si cela prend plus de travail et de temps, je crois qu'il est normal que je m'exprime aussi pour être comprise de ma communauté _
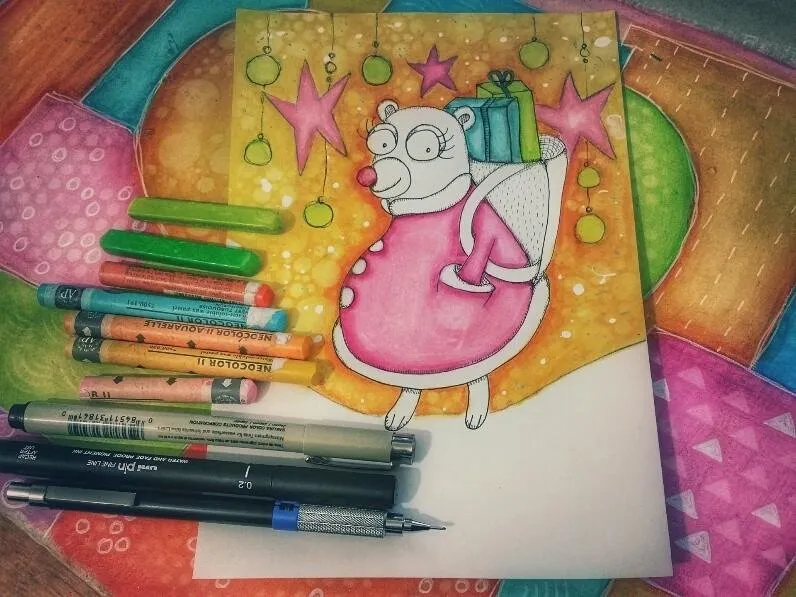
You can find on this pic almost all the tools I have used for the making of this drawing/painting
- a pencil for the sketch
- fine liners 0.2 and 0.005, pigma micron and Uni,
- Water-soluble wax pastels Neocolor II (my all time favourite tools..._)
- Ink blocks from Derwent (the green ones in the pic)
Vous pouvez trouver sur cette photo presque tous les outils que j'ai utilisés pour la réalisation de ce dessin / peinture
- un crayon pour le croquis
- fine liners 0,2 et 0,005 Pigma micron et Uni
- Pastels à la cire hydrosolubles Neocolor II (mes outils préférés de tous les temps ... ^ _ ^)
- Blocs d'encre de Derwent (les verts sur la photo)
Now to My Behind The Scene _
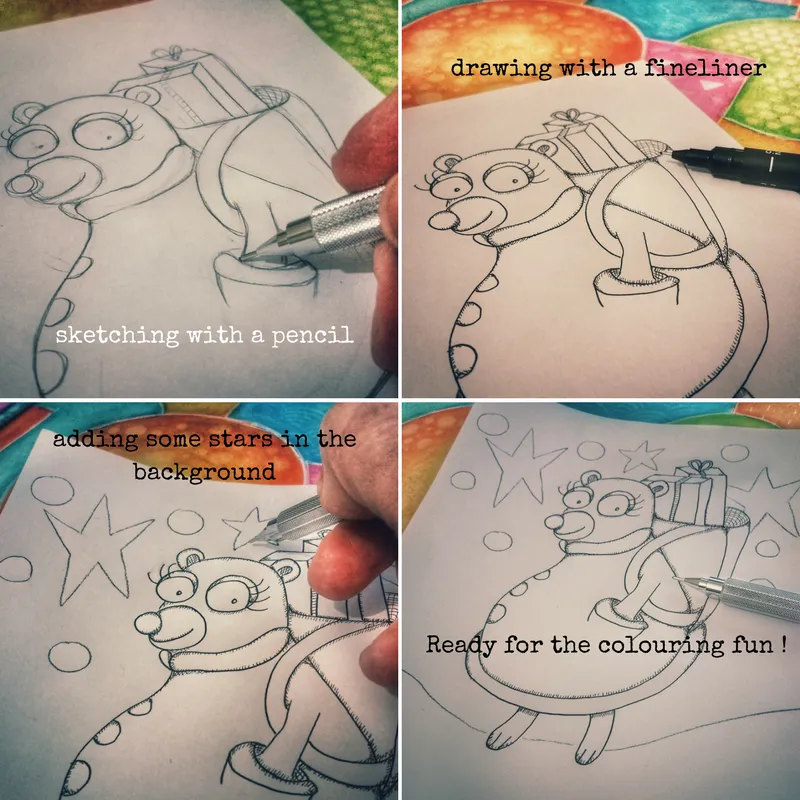
My process is quite alwas the same at the beginning...
those who read my posts for a certain time know now that I begin with a rough sketch and that I then draw with a finelinerOnce that made, I've decided that I will let the bear as an illustration and would focus the coloring part on the background and the details (christmas suit, nose, gifts), so I then add some adornments and stars on the background
Maintenant voici les coulisses ^ _ ^
Mon processus est toujours le même au début ...
ceux qui lisent mes articles depuis un certain temps savent maintenant que je commence par un croquis au crayon et que je dessine ensuite avec un feutre ultra finUne fois cela fait, j'ai décidé de laisser l'ours comme une illustration et de focaliser la partie colorée sur l'arrière-plan et les détails (costume de Noël, nez, cadeaux), j'ai donc ajouté quelques ornements et étoiles sur l'arrière-plan.
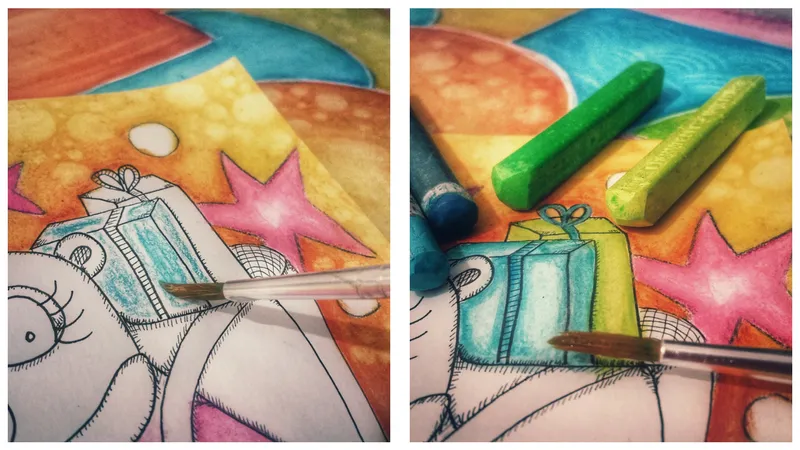
Yesss ! the colouring part ! My favourite part at equal distance with the drawing one _
(you will discover that ALL PARTS of a creation are my favourite...LoL)
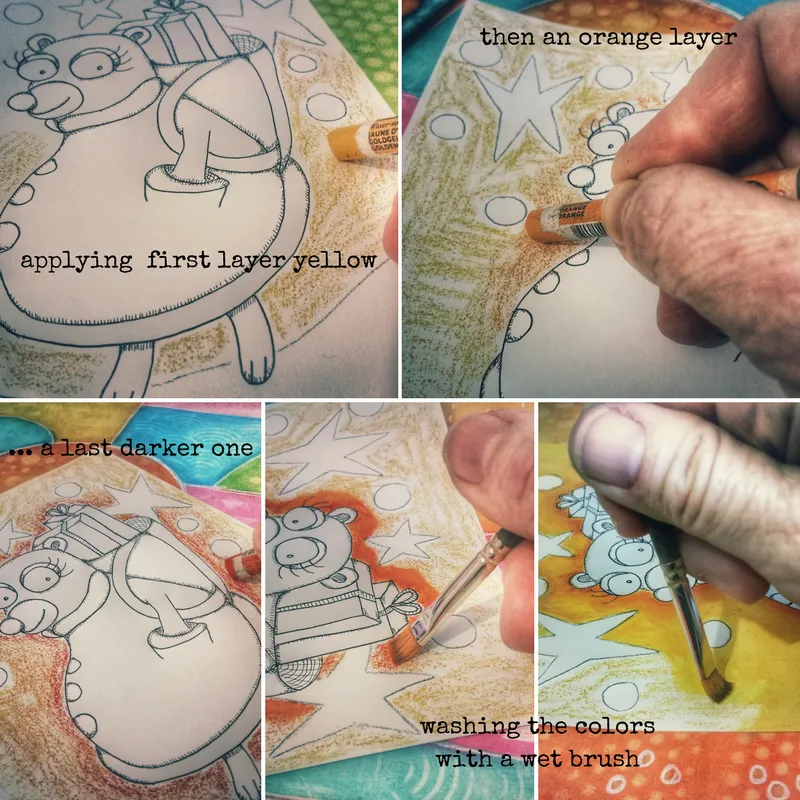
Let's take my beloved Neocolor II and apply multiple layers...
one of golden yellow, one orange and a last vermillon
I like to see the color appearing under the action of the water, which sweetly spreads the pigments ;-)..This is my enjoyable-ish moment =D
Yesss! la partie colorisation ! Ma partie préférée à égalité avec le dessin _
(vous découvrirez que TOUTES LES ETAPES d'une création sont mes préférées ... LoL)
Prenons mon bien-aimé Neocolor II et appliquons plusieurs couches ...
un de jaune or, un orange et un dernier vermillon
J'aime voir la couleur apparaître sous l'action de l'eau, qui étend doucement les pigments ;-) .. Ceci est mon moment de délice _
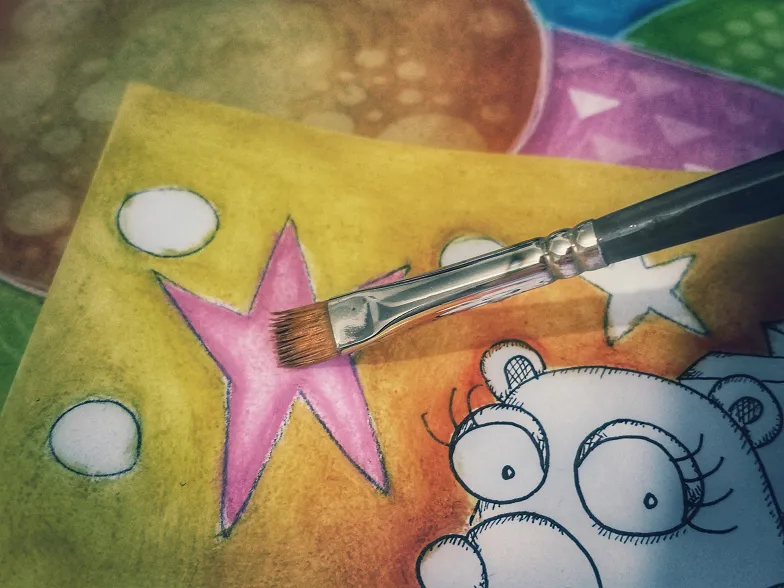
Same action on the stars with the pink Neocolor...
To obtain this lighter tint in the middle (which shapes my star and gives it some volume) I just dilute a bit more the color, by being more insistent with my (not to) wet brush, which kinda remove the color...
Même action sur les étoiles avec le Neocolor rose ...
Pour obtenir cette teinte plus claire au centre (ce qui forme mon étoile et lui donne du volume), il suffit de diluer un peu plus la couleur, en insistant davantage avec mon pinceau humide (mais pas trop mouillé), ce qui enlève un peu la couleur
The green ink sticks are acting like the Neocolor II, they are water-soluble, it is the water that reveals the ink on the paper, I love that ! ;-)
Les bâtons d'encre verte agissent comme le Neocolor II, ils sont solubles dans l'eau, c'est l'eau qui révèle l'encre sur le papier, j'adore ça! ;-)
Here I show you another of my (Q) tip _ :
after applying the felt (Pitt Artist Pen from Faber-Castell) of a darker color to create the shadows,
I blend it with a cotton swab so that it mixes perfectly with the rest of the color
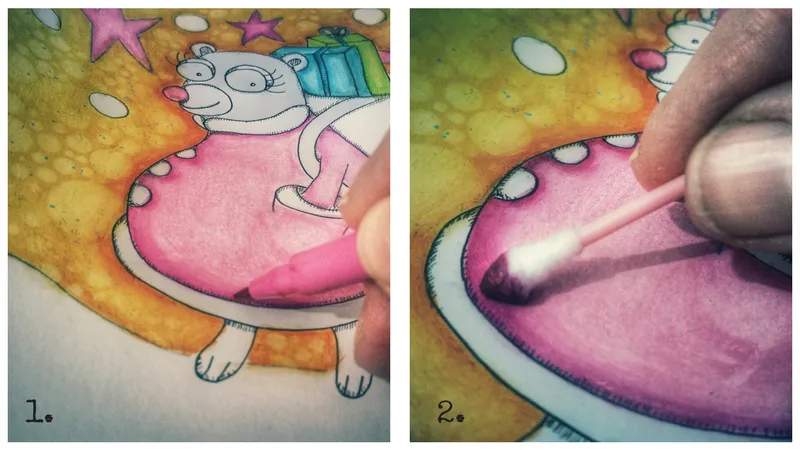
Voici une autre de mes astuces _
après avoir appliqué le feutre (stylo-artiste Pitt de Faber-Castell) d'une couleur plus foncée pour créer les ombres,
je l'estompe avec un coton-tige afin qu'il s'intègre parfaitement au reste de la couleur
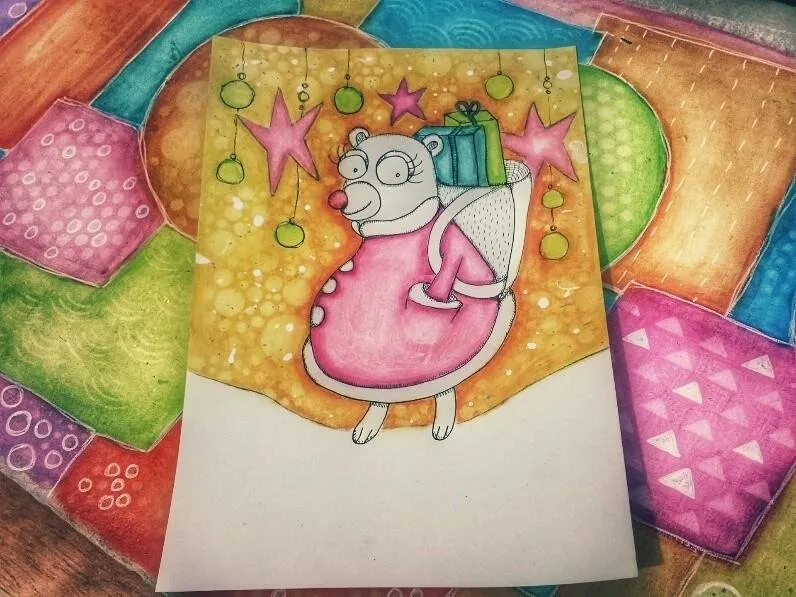
Et voilà my Lovelies !
My christmas FancyBear, ready to entertain you
and bring you some Smiiiiles during this festive Time !
Et voilà les amis !
Mon ours fantaisie de Noël, prêt à vous divertir
et vous apporter des Smiiiles pendant ce temps de fête!

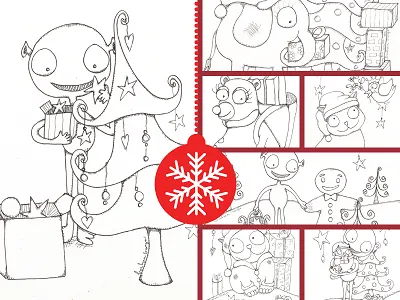
For less than the price of a cup of coffee(2,5 SBD) you can have an instant download of 7 coloring pages, including this one
...Contact me here or on Discord ;-)


My christmas FancyBear, ready to entertain you
and bring you some Smiiiiles during this festive Time !
Et voilà les amis !
Mon ours fantaisie de Noël, prêt à vous divertir
et vous apporter des Smiiiles pendant ce temps de fête!
For less than the price of a cup of coffee(2,5 SBD) you can have an instant download of 7 coloring pages, including this one
...Contact me here or on Discord ;-)
Mon ours fantaisie de Noël, prêt à vous divertir
et vous apporter des Smiiiles pendant ce temps de fête!
For less than the price of a cup of coffee(2,5 SBD) you can have an instant download of 7 coloring pages, including this one
...Contact me here or on Discord ;-)