
A commented photo report from my current job: A spacecraft docking next to the SFH433 colony, in the tritocluster 77ZQS.
Extract from transmission:
Commissioners: X:Ploration // Electro & Techno events
Time event: Luxus Varta live, Quadratschulz live, Hinode
Location: Suicide Circus Club // R.A.W. Zone // Berlin // Germany
Manufacturer: Haedre inc.
Location: Forbidden Industrial Zone GH6 // Berlin // Germany (No information)
End of transmission.
After the commissioners having chosen a dock and craft type, let's head to the plan room to pencil the first perspective lines and volumes. On a tensed watercolour Arches paper 300g of course.
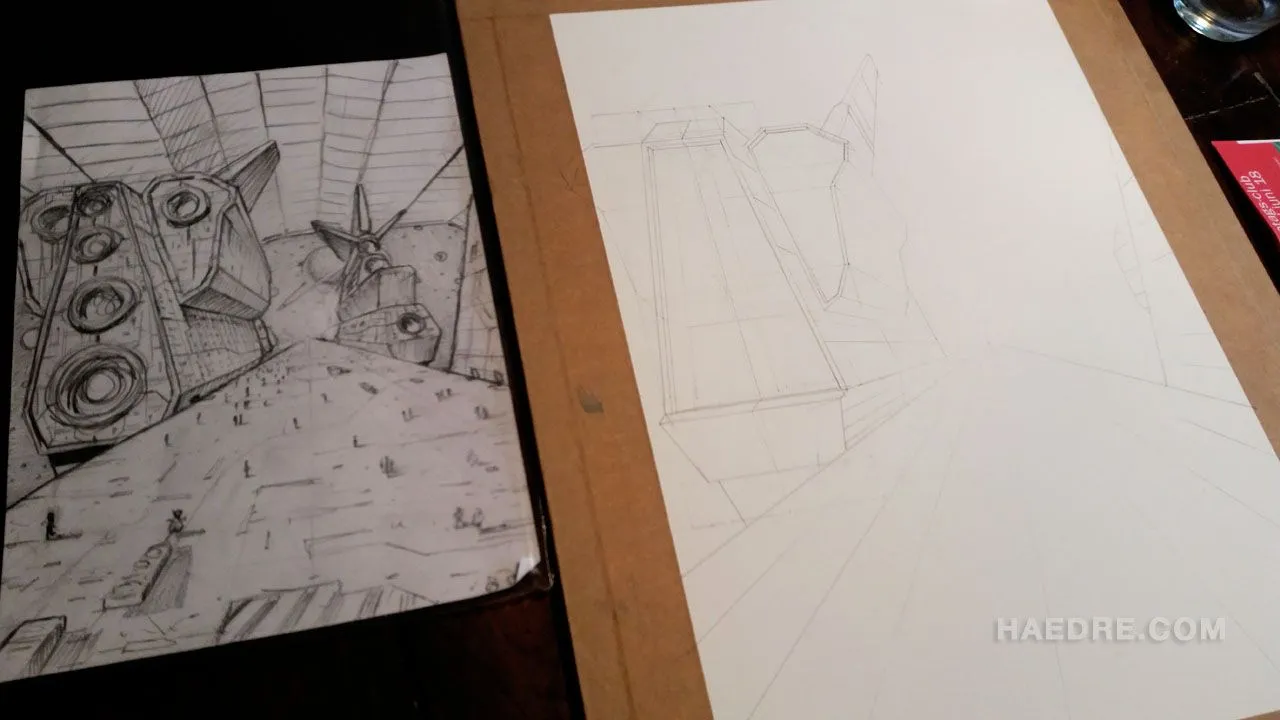
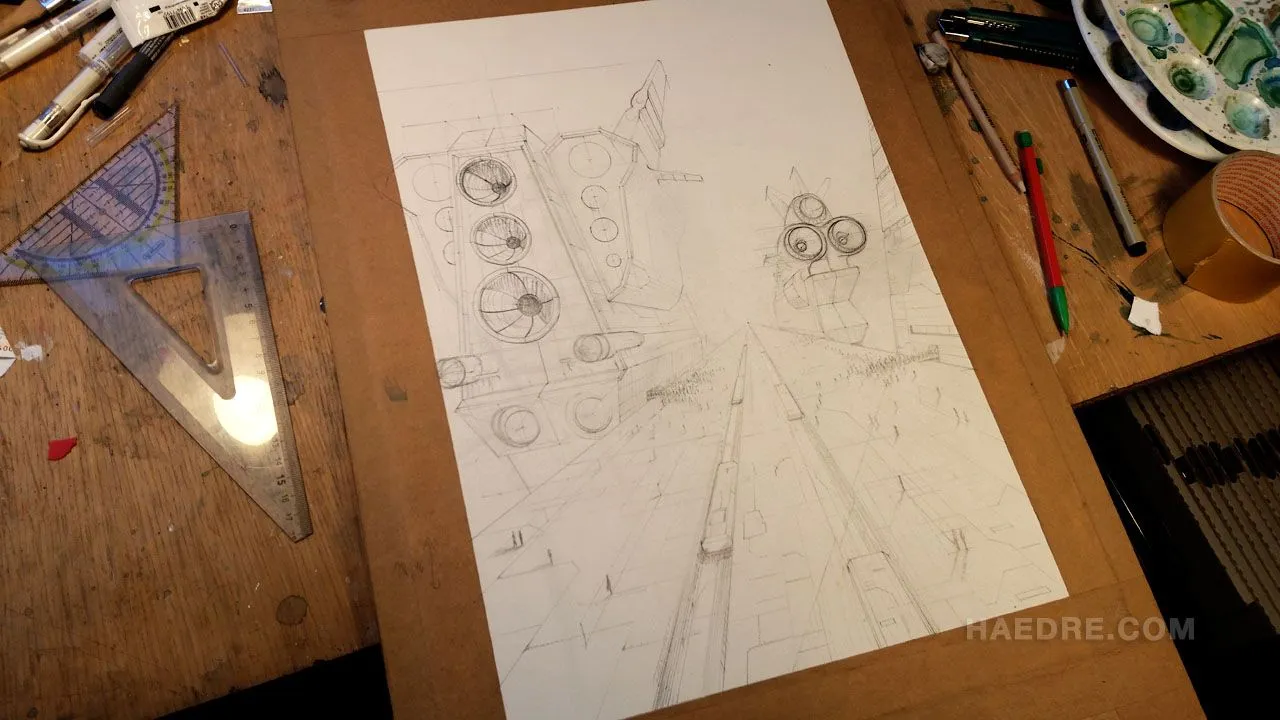
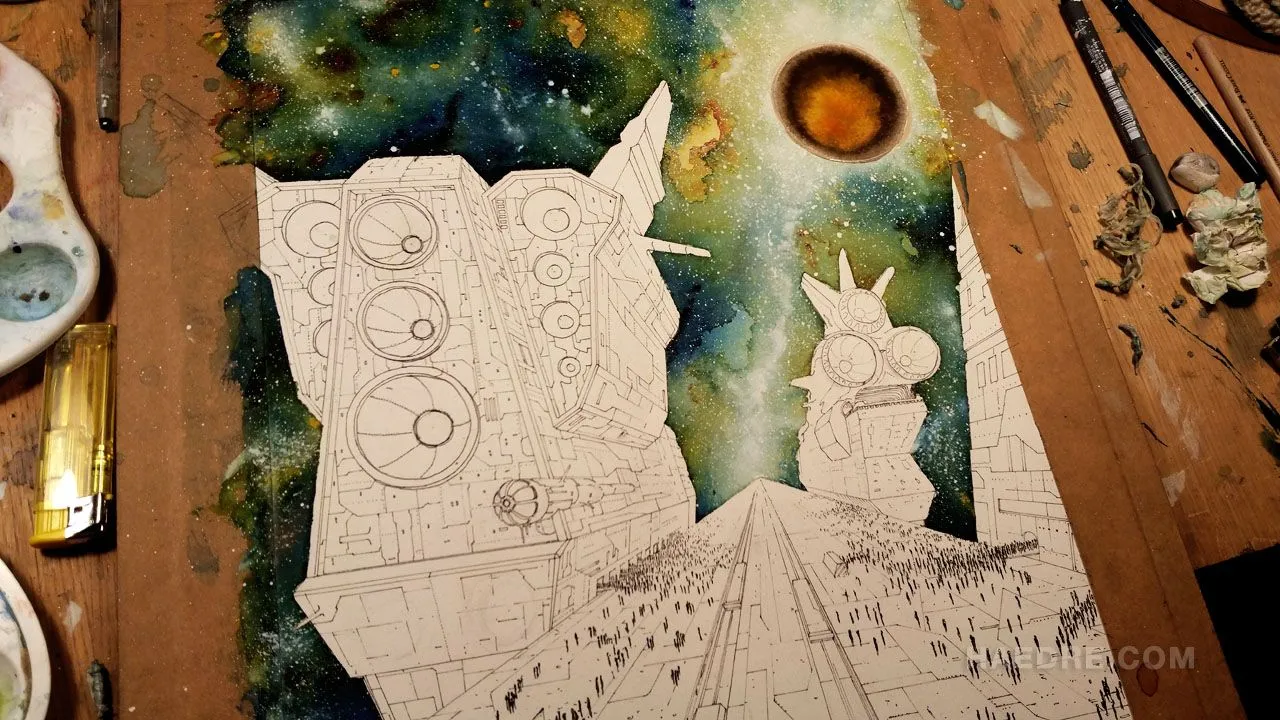
You can see that I dropped off the initial "ceiling" planned on the sketch, added two lanes with some sort of trains and other details. The sketch being in this case, really just for the composition and the main volumes.
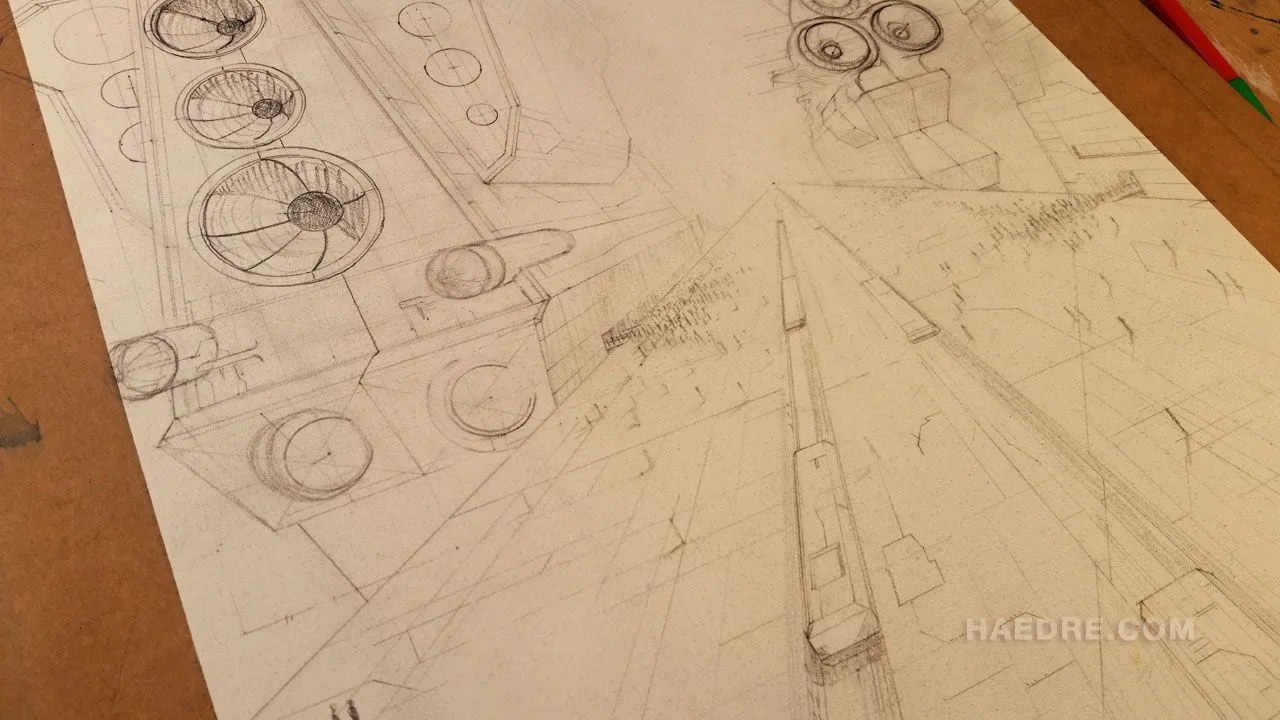
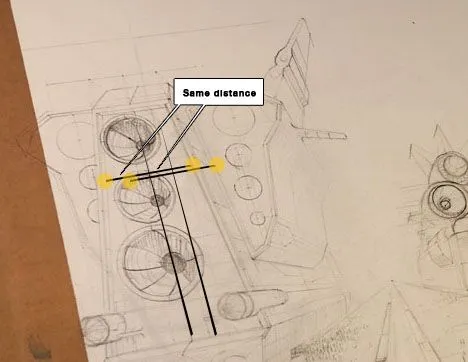
I opted here for a unique vanishing point, this makes the ship building less complicated. It is "just" needed to find the center of a volume to report the same distance from any point, finding its place on the other side. I tried to illustrate a bit.
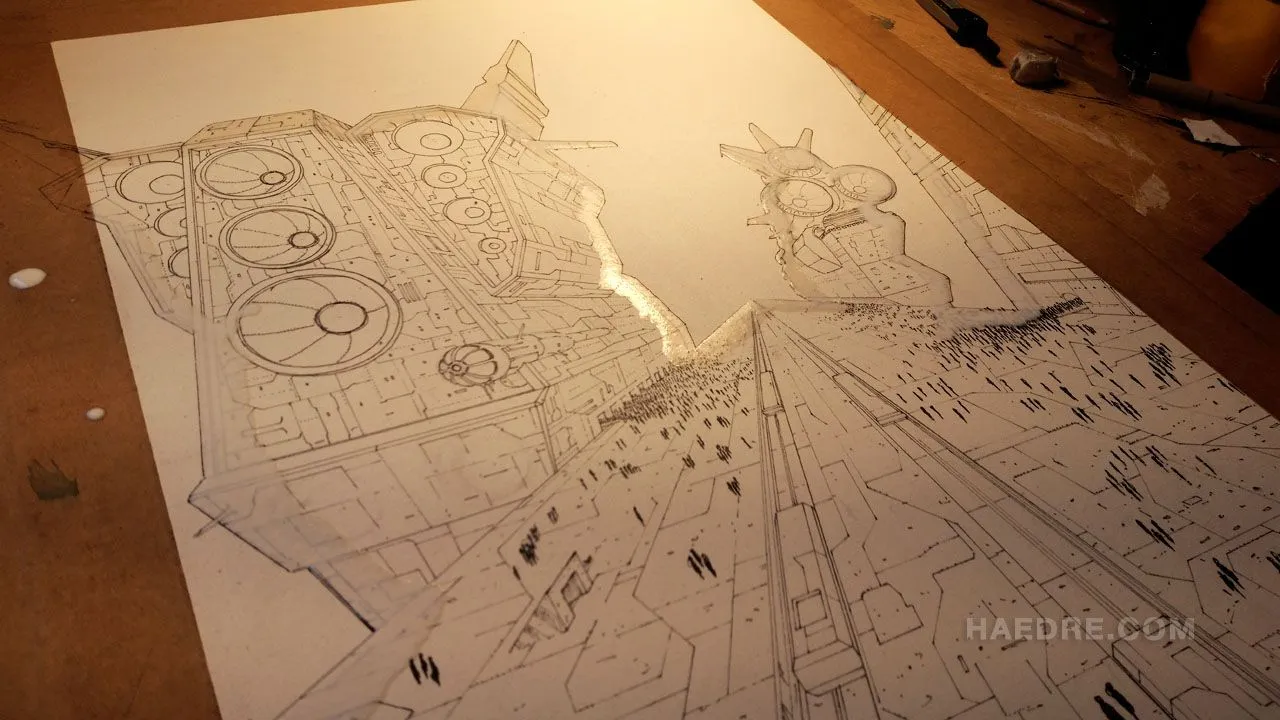
Now starting to ink with thinliners.
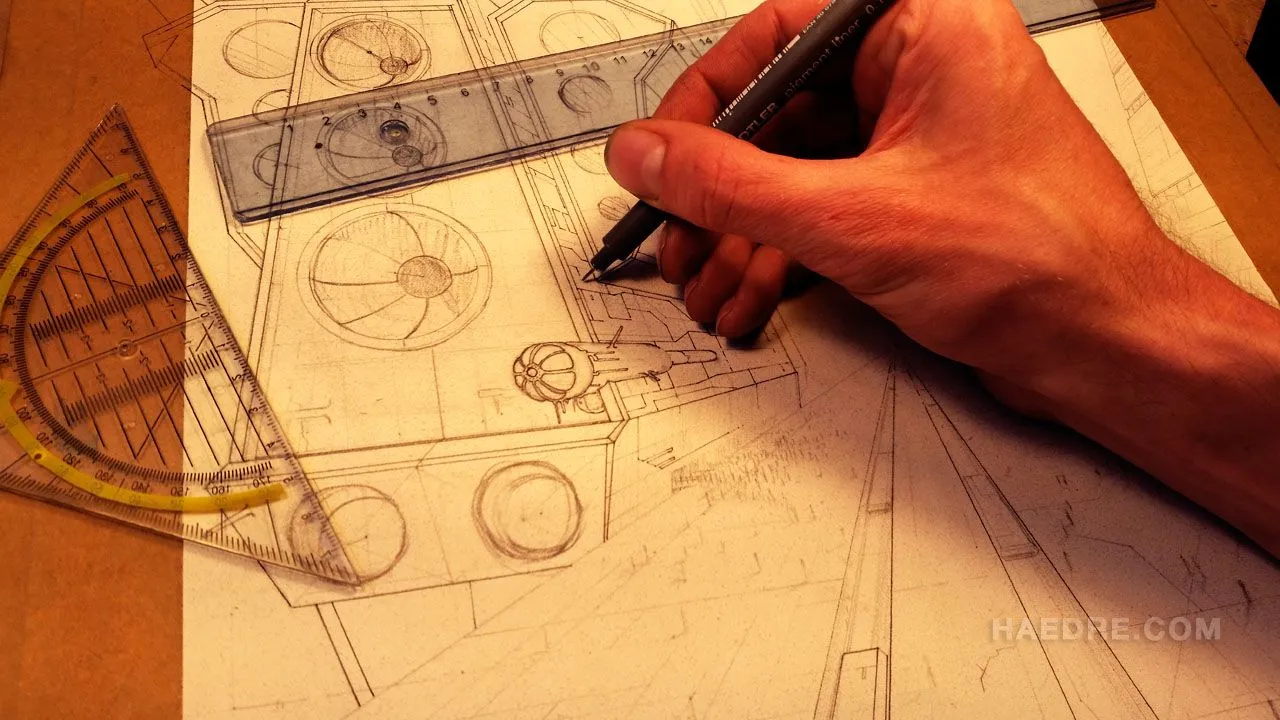
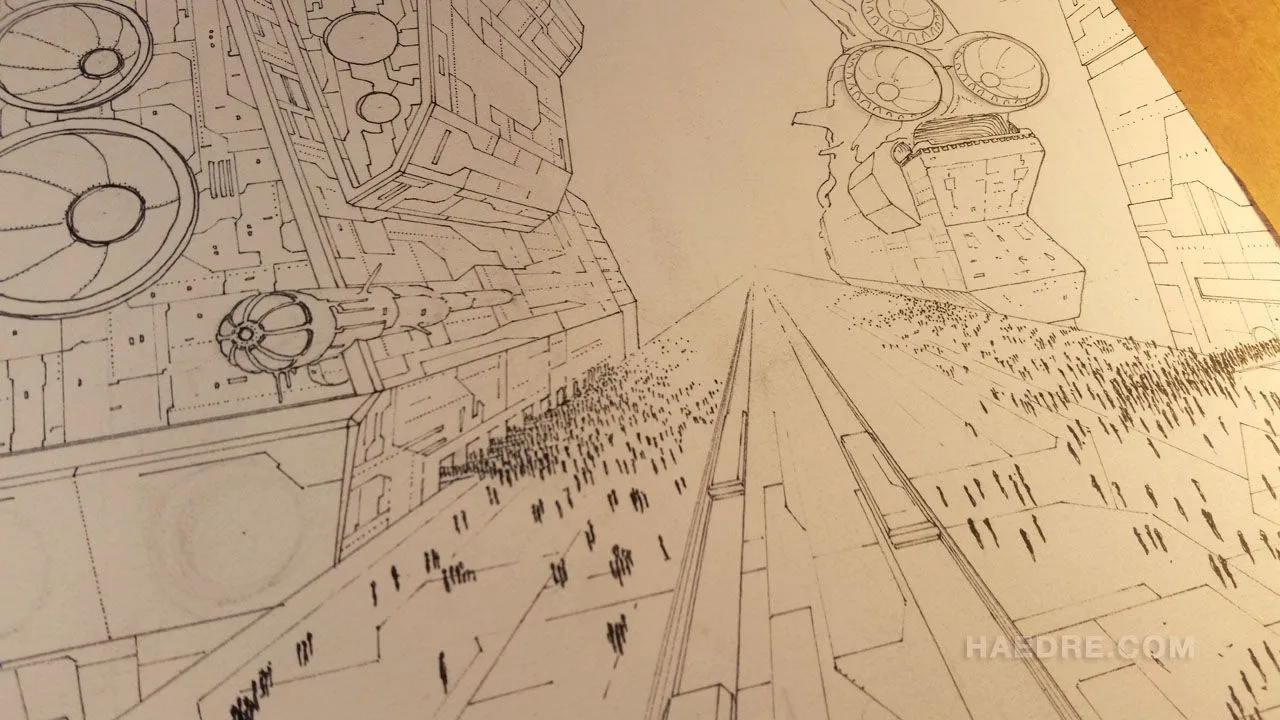
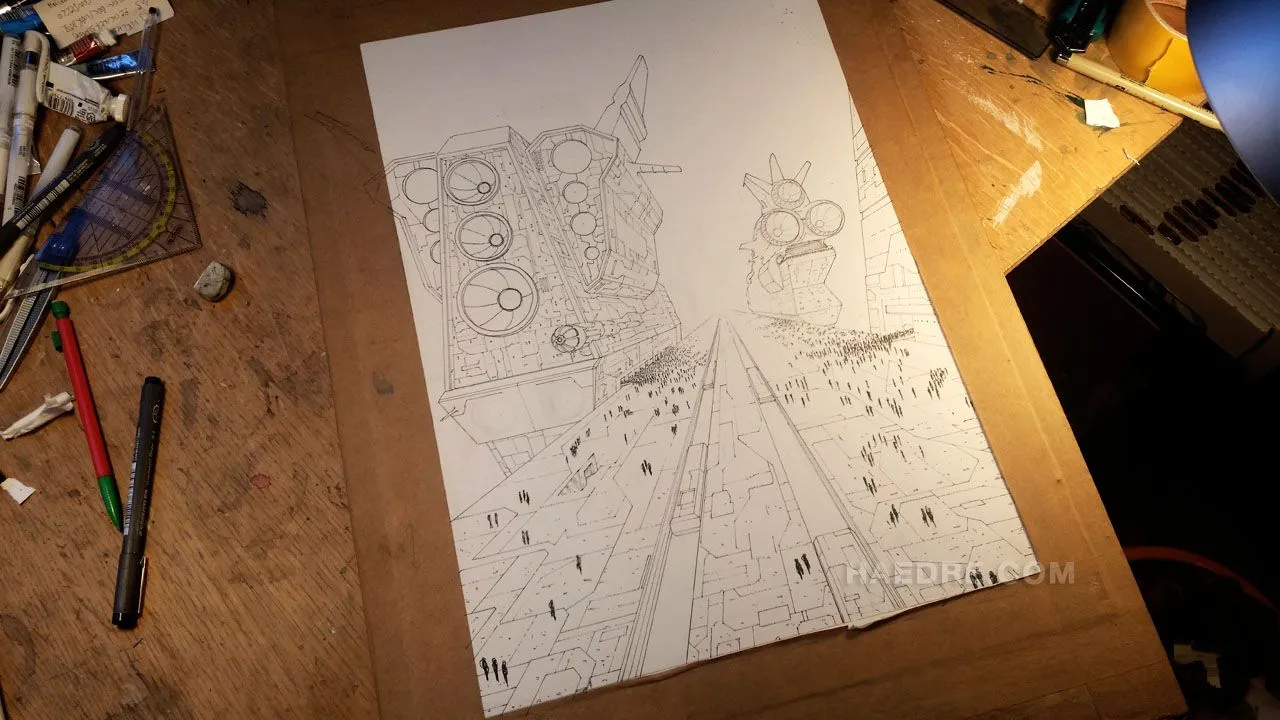
Pencil is erased, it's clean.
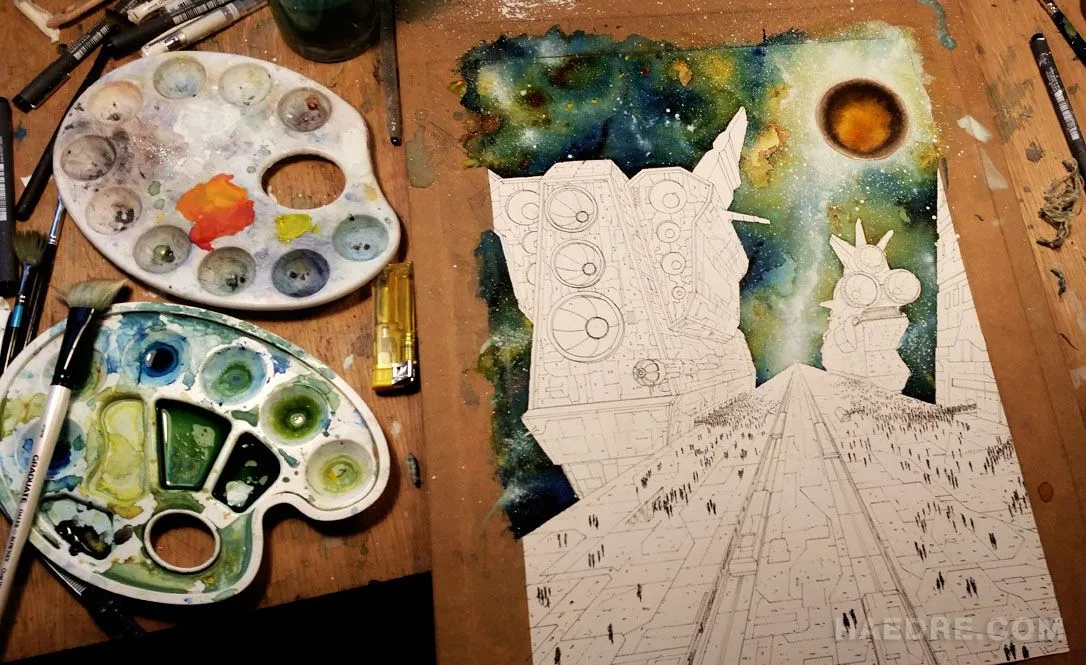
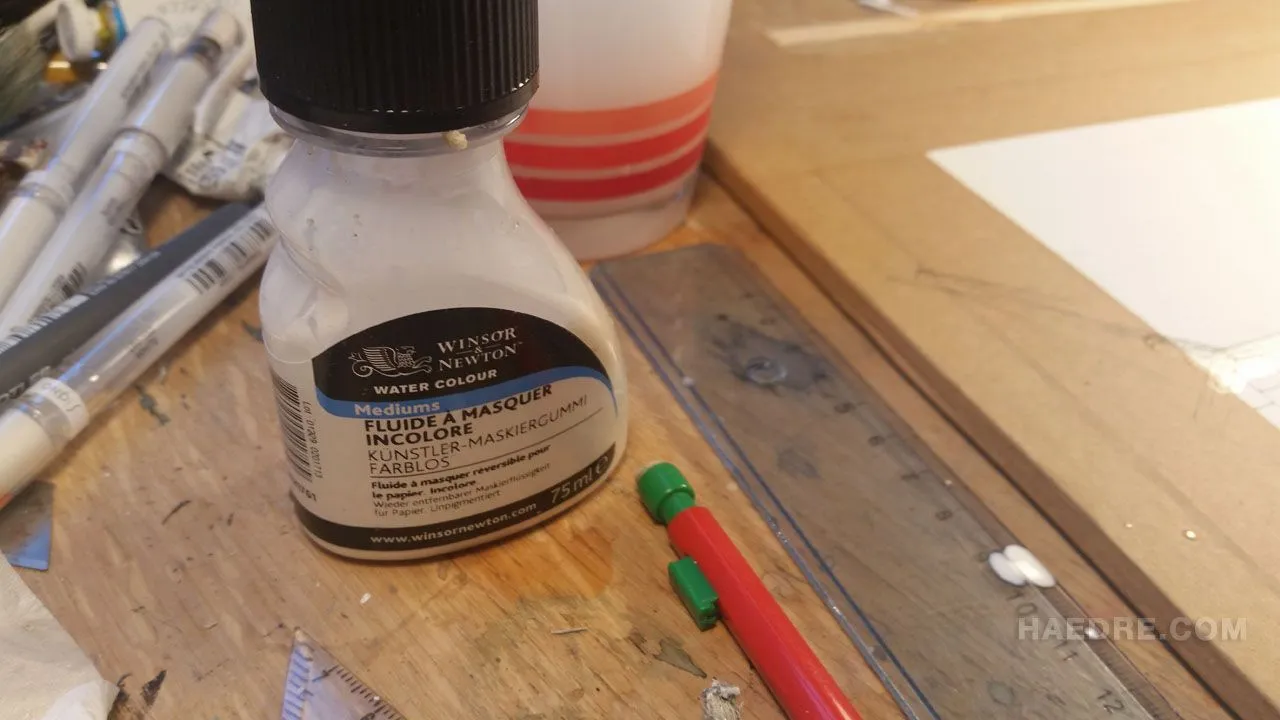
This time I really wanted to use masking fluid again, I recommend the grey one (or incolor), as it reflects good while not tainting the paper, like the yellow one does. Masking fluid is pure rubber, it isn't easy to use. You need to know exactly what you will do because it dries very fast. Use old brushes, as it ruins them and soapy water.
Here you can see well that I masked the border with everything that touches the future cosmic background.
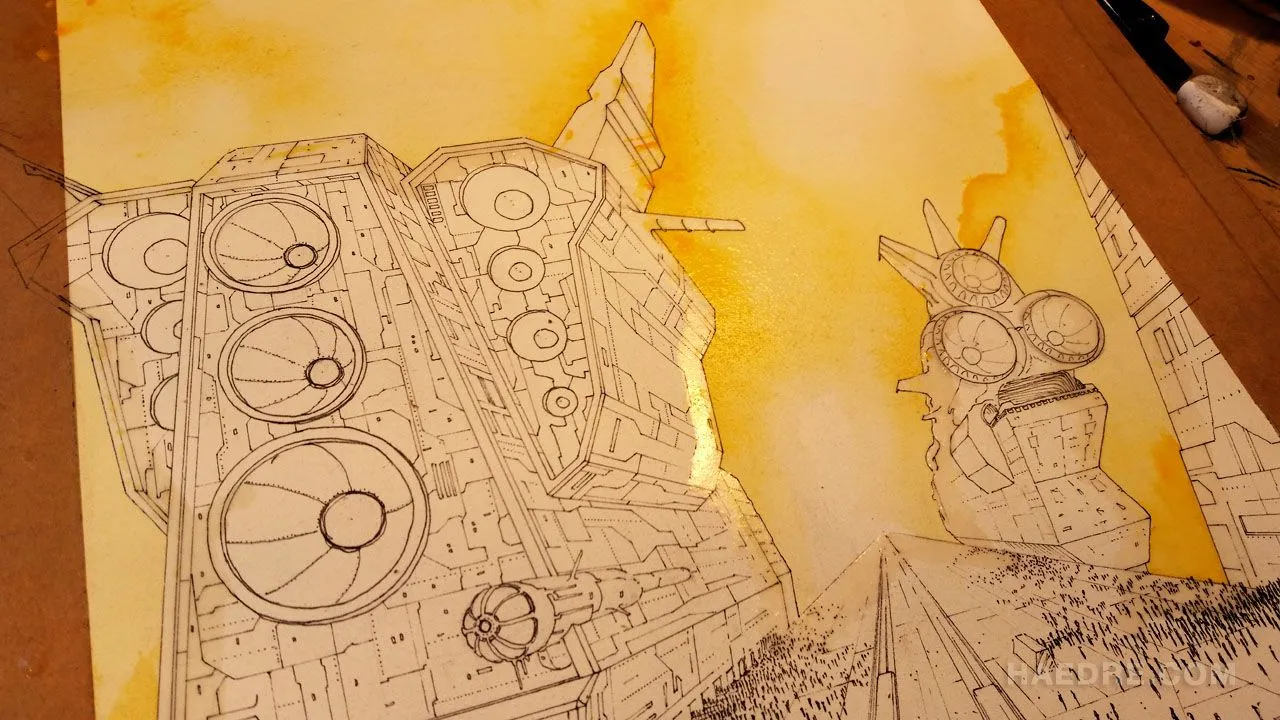
Now I apply light indian yellow. Depending the kind of cosmos you want to obtain but I personnally always keep good zones with white, untouched paper, to shed interesting contrast.
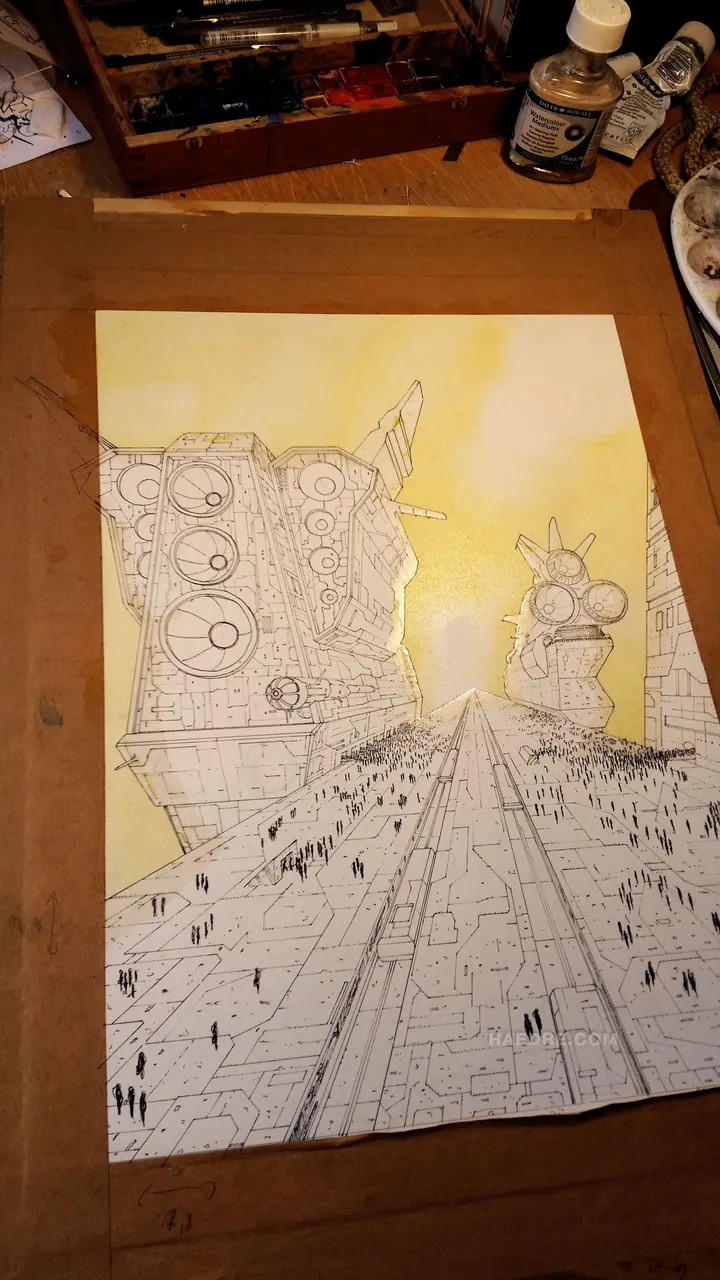
Adding more yellow, by clusters, with various drying time in between.
Now more ultramarine blue and different mixtures of greens. By small strokes and again with various drying time between the layers.

Tiny spats of Quinacridone Gold and more yellow. Greens and thin orange dots.
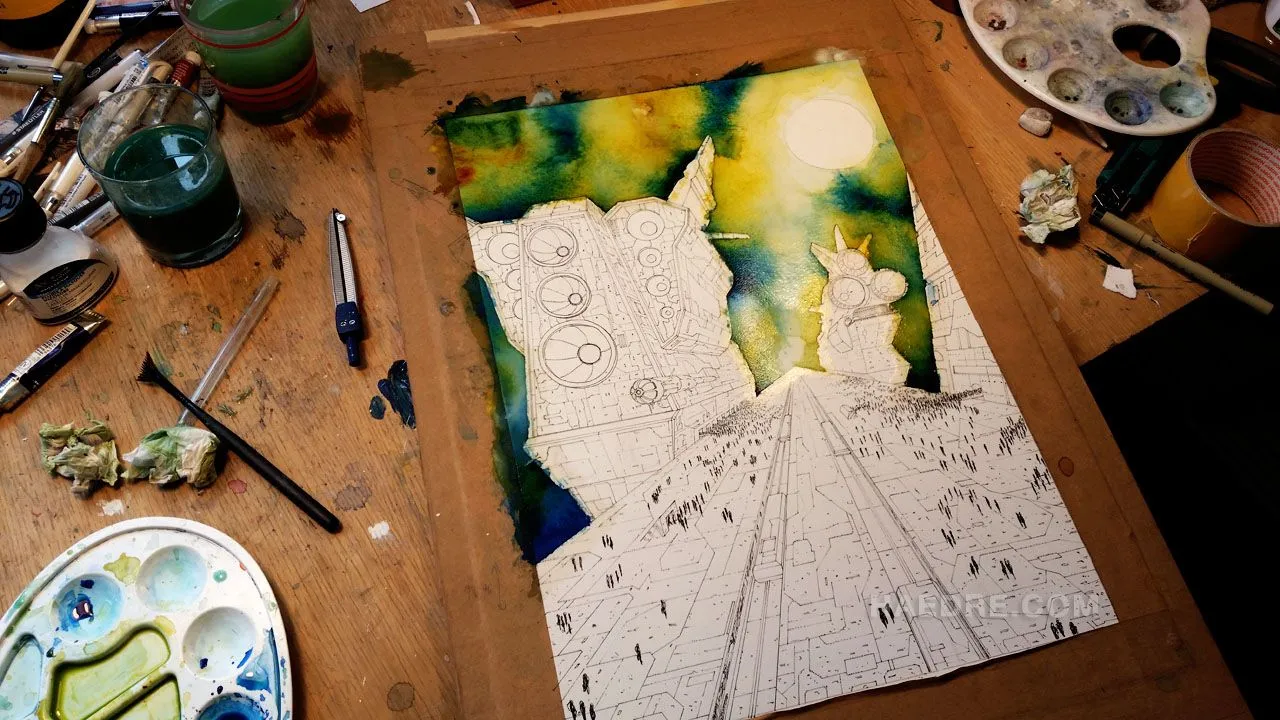
Black and white. Be spartan with these.
Again, between all these steps, there are various drying times, which makes the layers to appear superposed. They randomly create depth.
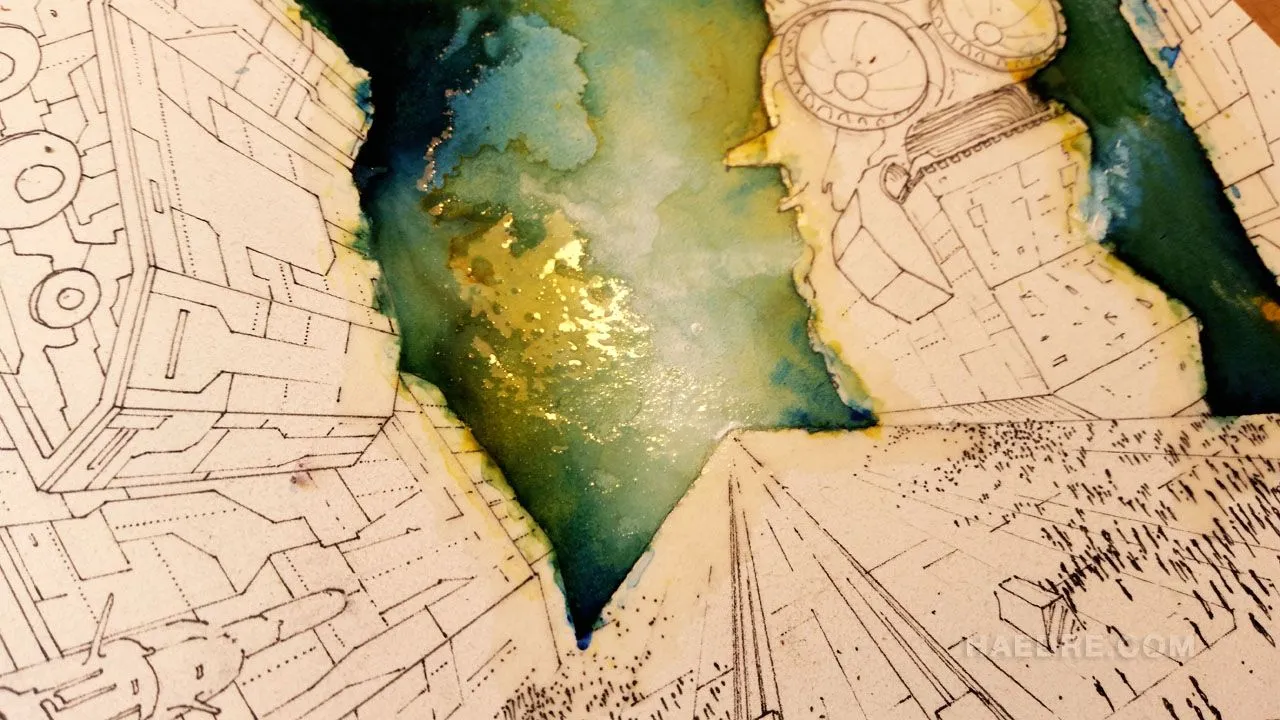
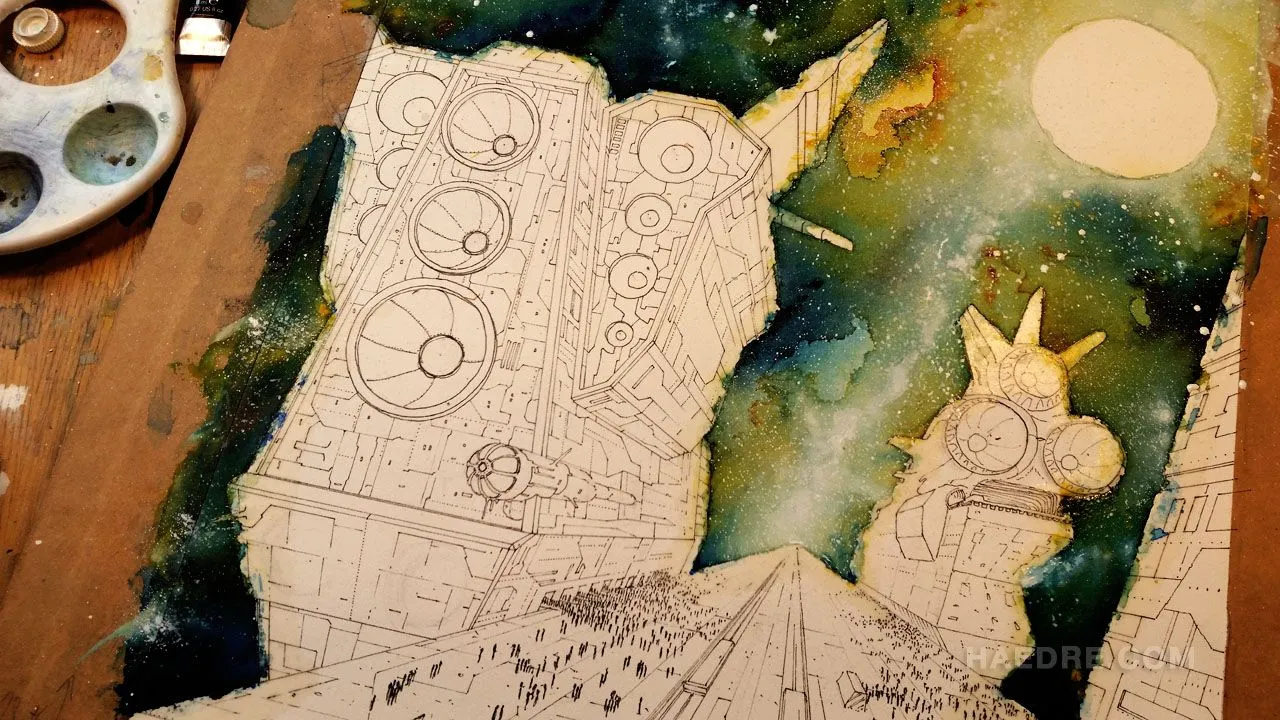
And last, when everything is dry and looks ace, the stars. Pro tip: I recommend gouache as it's very fluid and makes really round spats as opposed to acryl that makes more elastic spats (better for blood). I dilute it with little of water and hit the brush against another one to spread dots. I concentrate on zones, mostly where light comes.
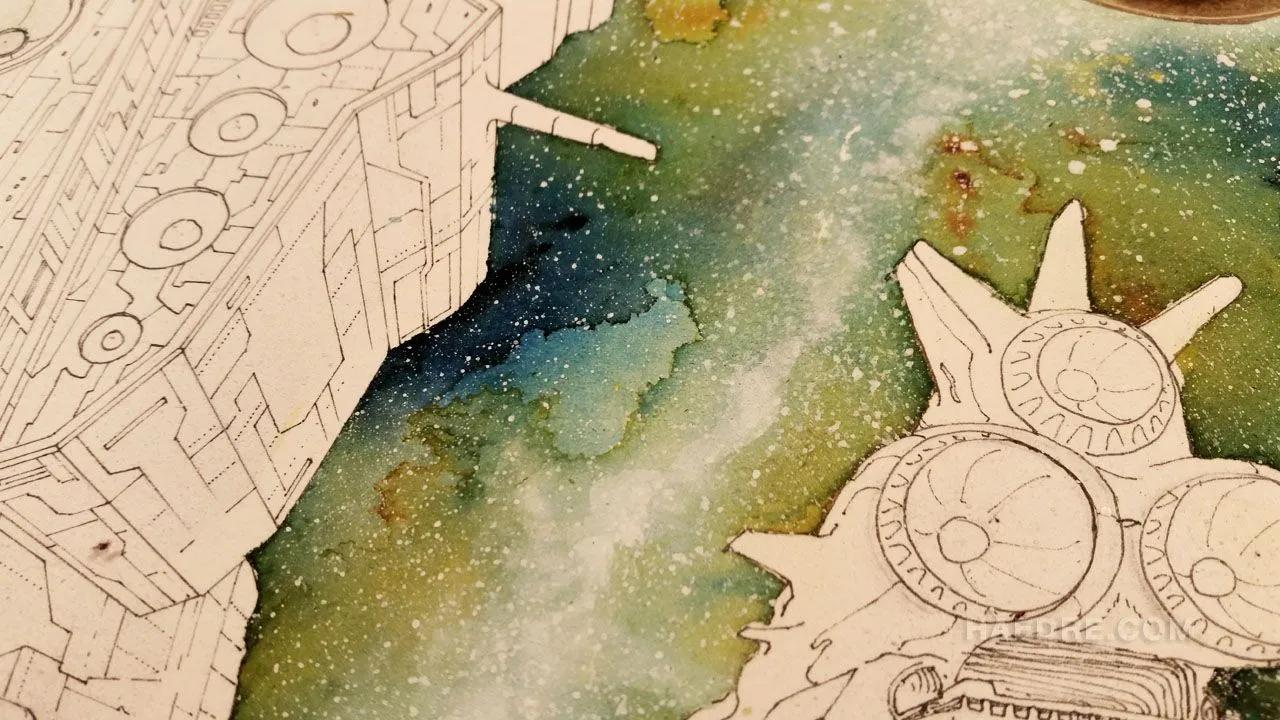
Close up.
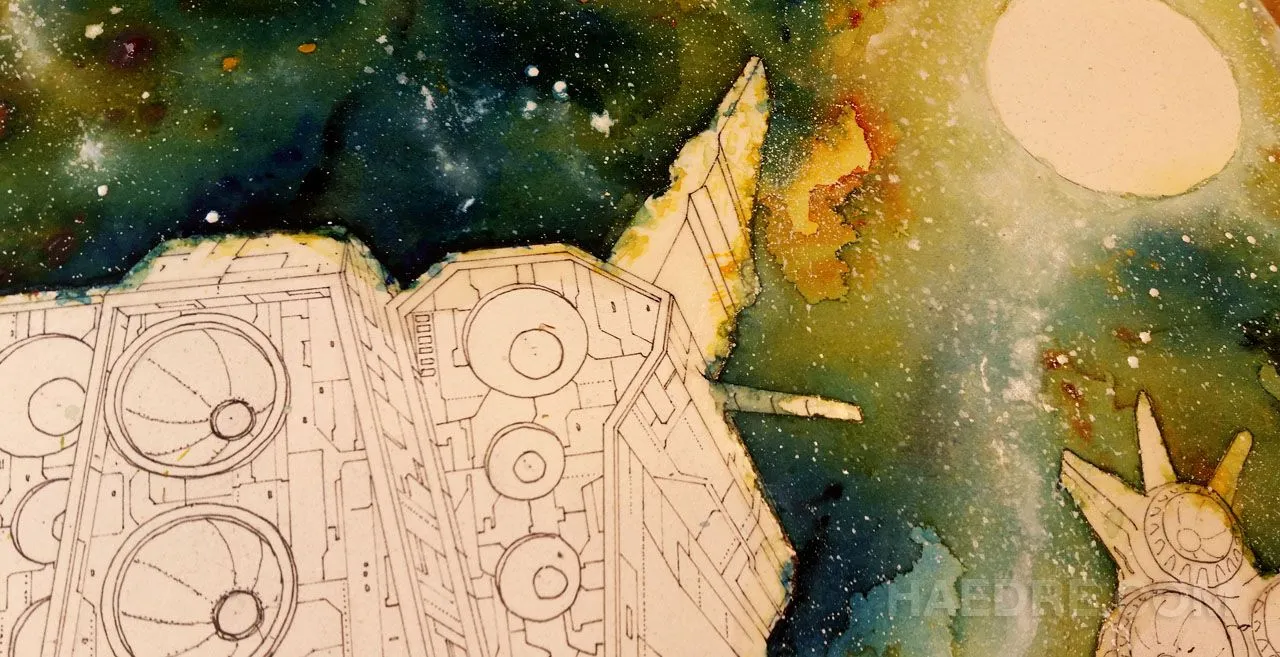
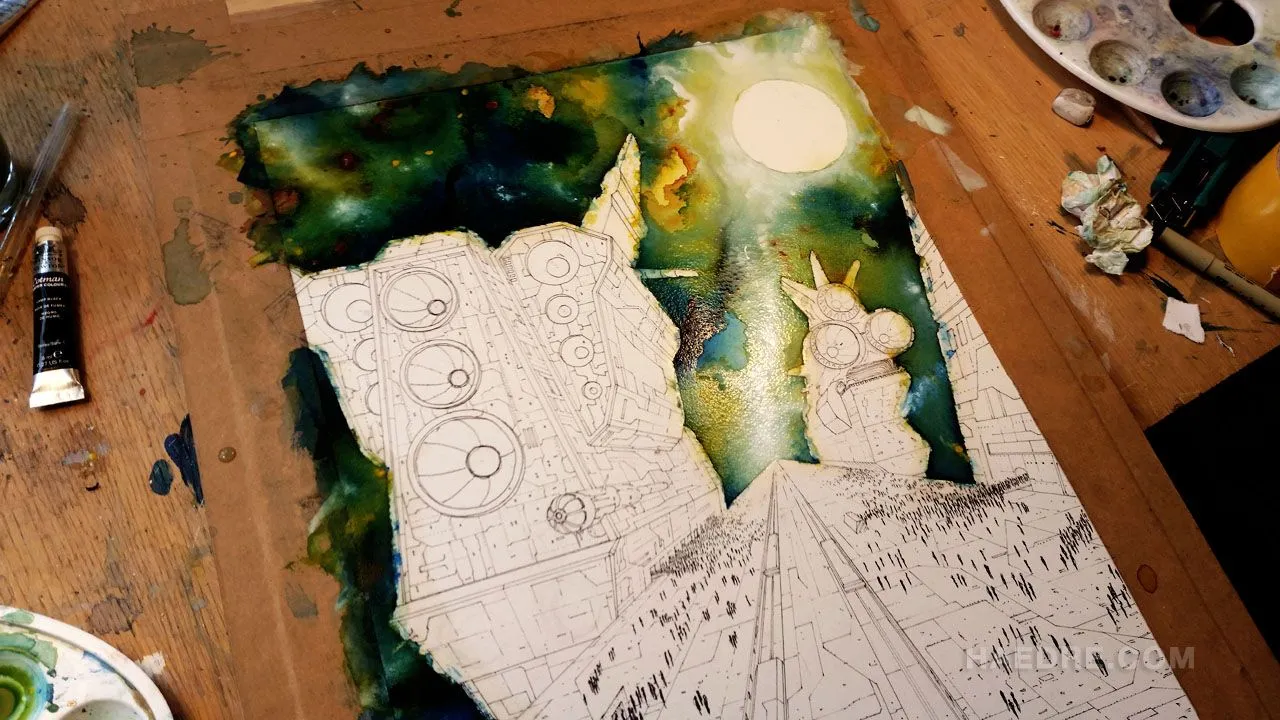
And now voilà! The mask is peeled off (and meanwhile I started the planet).
Here you can see how the mask was protecting the edge of the ship against the colour. Of course it's never 100% perfect but it's still a very cool tool. I use it in a very formal way but it can be very fun to do random strokes and spats with it to experiment.
That's it for now! To be continued in my next post: Part II: Ship!
Thank you for having read!
For more art, visit my website: http://www.haedre.com
Committing to art is not always the dream life! Consider supporting me and my family through http://www.patreon.com/haedre
Or better, directly with cryptos!
BTC: 13crkJP7G23sPeud2WnBmM9hbjze57f4o9
ETH: 0xa7B61e88d8ce1aBD543f80924F5f6D9f33E85648
Thanks again!
