A few years ago, my interest in drawing was revived. I had started working and needed something that would let me disconnect when I returned home. First I drew animals, some portraits and nostalgia led me to draw characters that shaped my childhood, eternal evenings watching cartoons, especially Japanese, Dragon Ball, Pokémon, and Saint Seiya were inevitable.
While slowly returning to drawing I noticed that these characters were the simplest to reproduce. My father saw the ease that I had in this style and decided to give me a book in which the ultimate goal is to get to draw your own Manga. I hope you will join me (and let's learn together) in this learning journey that I finally decided to take.
The starting point is given with this book, "How to Draw Manga Vol. 1", written by the Association for the study of manga techniques (Hideki Matsuoka, Tatsuhiro Ozaki, and Takehiko Matsumoto), which when I read it really taught me many useful things. It serves both for those who want to dedicate themselves professionally and to someone who coincidentally wants to devote an afternoon to draw.
The book begins with a brief introduction to the materials, the format of the paper, some traces of what is the life of the mangakas, the Japanese comics professionals. With a very fun manga, they show a small group of artists and their day to day development from a sketch to the publication of their art.
What we are going to practice together today is ...
Chapter 1 How to draw facial features
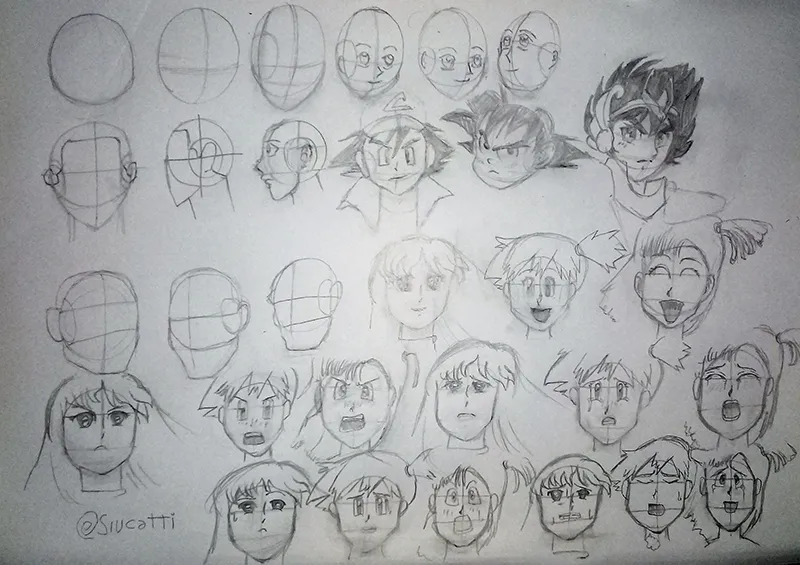
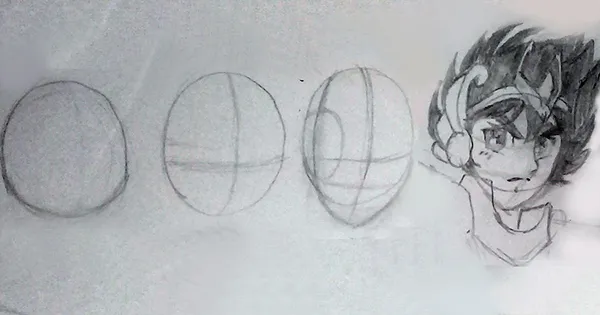
The authors begin this chapter by talking about finding ways to transport a face to two dimensions. They give us a basic format that we must practice until we have completely mastered it, a circle and a cross.
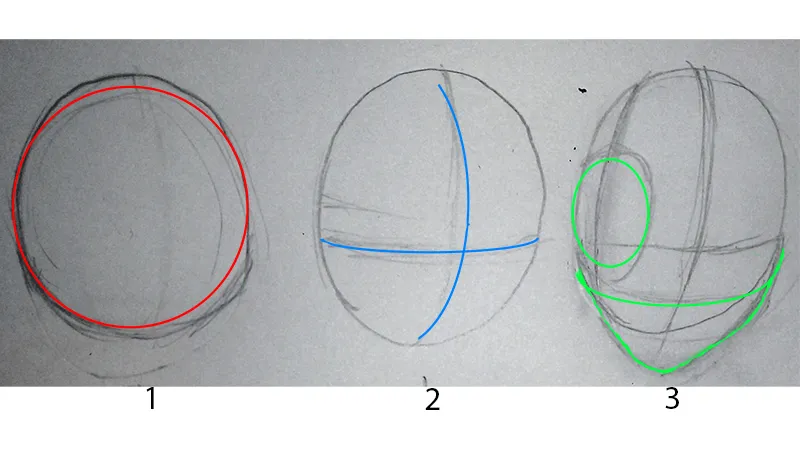
2 Seeing this we can get an idea that the circle represents a portion of the face, the vertical line serves to separate it into two parts, which must be balanced and the horizontal helps us determine the position of eyes and ears.
3 We add a line that will serve as a reference for the nose, jaw, and mouth. Also, from that line will come a circle on the side of the face that will position the ears.
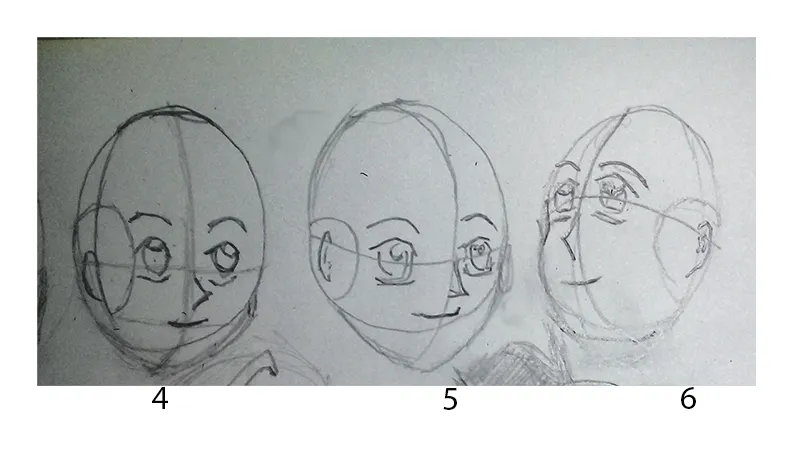
If we place the eyes, nose and mouth correctly in this structure, we can change the angle.
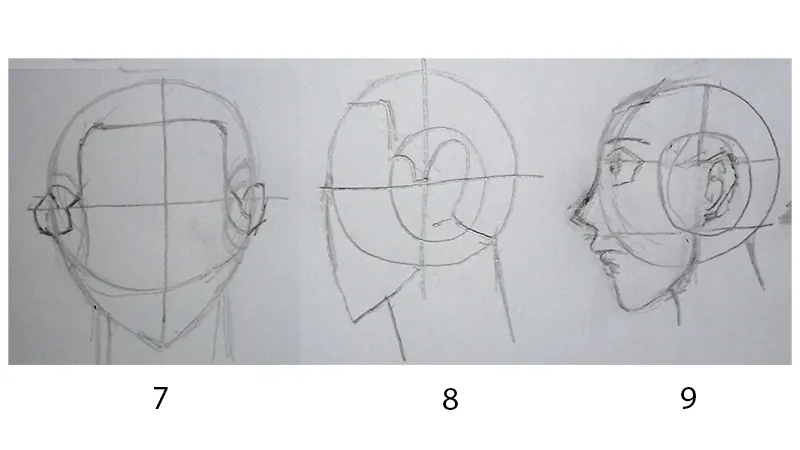
Let's see the front and profile plane. In 7 we can see the line of the hair and how the line of the vertical position of the ear is perceived. The authors mention that the position between the two eyes must be exactly the measurement of an eye from end to end.
8 The hairline marks about 45º from the beginning of the ear. We add for the first time the mouth and the nose in 9, we will notice that the nose ends in the second horizontal line and "is born" of the first.
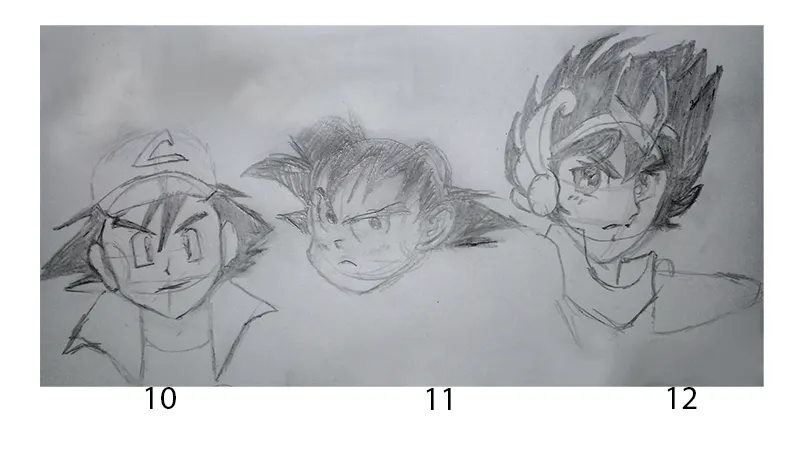
With these tips, we can draw our favorite manga characters with relative ease. I would love for you to try this technique and leave a comment below your attempts. You could draw recent characters like Naruto, Ichigo or Luffy. The same applies to characters from other generations, Koji Kabuto (Mazinger Z), Doraemon, Astroboy. or the legendary Captain Tsubasa.
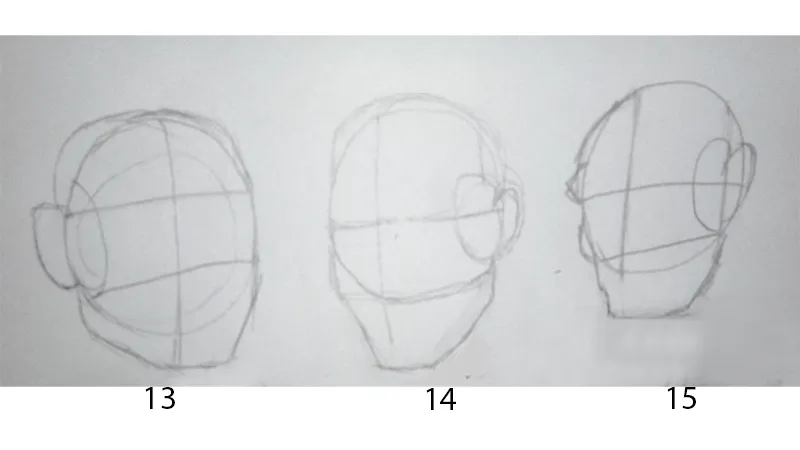
Depending on the type of face (which we will see later as it also affects the attitude of the character), we can lean towards thinner and longer or more square faces.
FACIAL EXPRESSIONS
Considering the case of a visual medium, reflecting the feelings and emotions of the characters through the drawing is almost even more important than the correct positioning of their features.
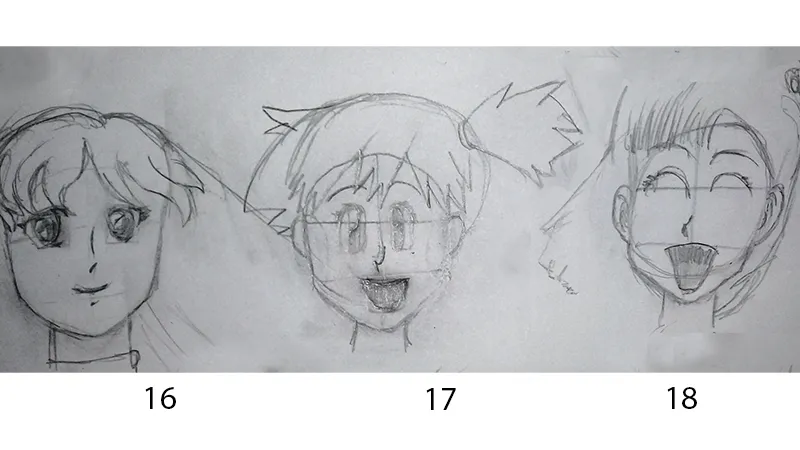
16. Smiling, the face relaxes and the eyes, eyebrows, and mouth are drawn with curved lines.
17. Laughing, The eyes narrow as the laughter increases.
18. Laughter, The mouth is enlarged and can be added, if we wanted, lines outside the face that express laughter.
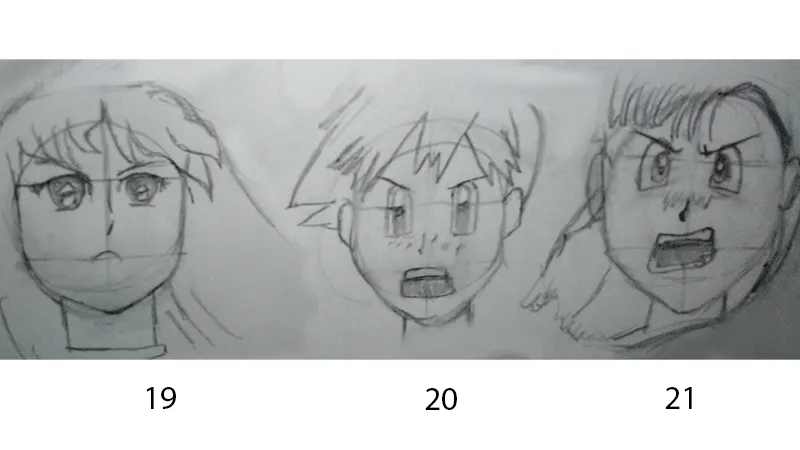
19. Disgusted, muscles tend to crowd in the center.
20. Angry, The mouth opens and depending on the anger wrinkles appear on the face.
21. Very angry, the teeth are shown, the ends of the eyes are raised.
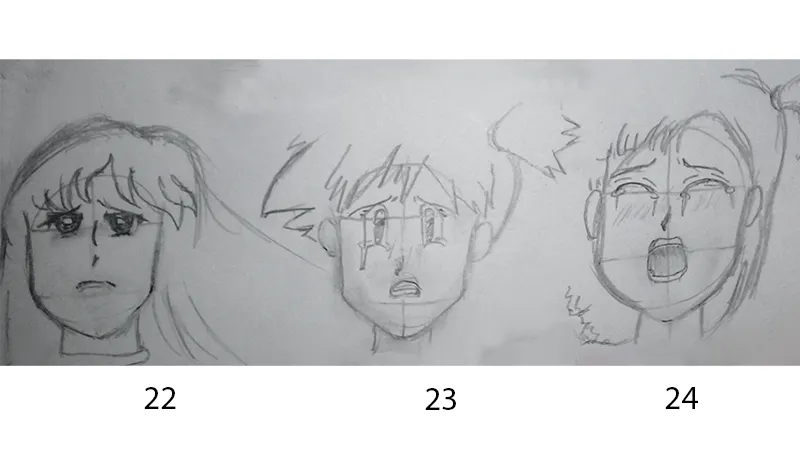
22. Sad, Eyebrows move backward.
23. Crying, The eyebrow muscles pull the eyelids
24. Desolate, Depending on the force you want to give emotion the eyes can open.
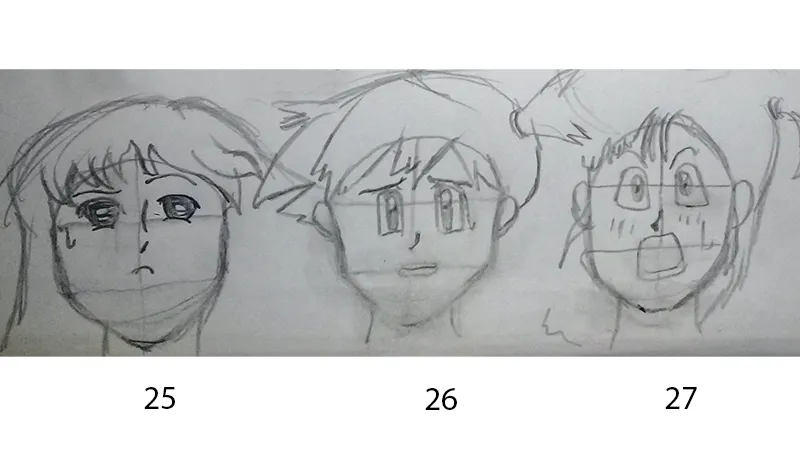
25. Thoughtful, eyes can get lost.
26. Uncomfortable, An expression similar to sadness but you can add a drop of sweat.
27. Surprised, the eyes are enlarged also sweat drops are added.
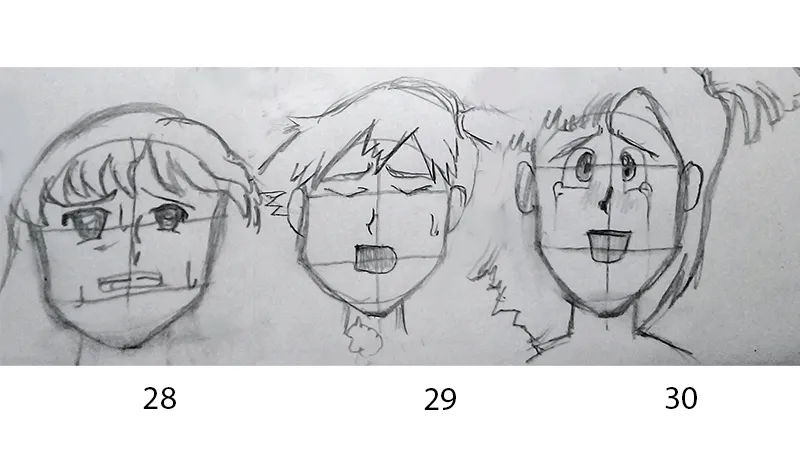
28. Scared, with fear the face becomes tense.
29. Relieved, the eyes are the ones that express the most relief
30. Crying with joy, Same as the expression of crying but with a smile.
As we see the expressions are composed of the movements of the eyebrows, eyes, and mouth. The authors point out that the difficulty of expressing emotions lies in a wide range of nuances depending on the situation.
I think we have enough to go practicing until a next class. I hope you liked it and continue to join me.