For the better part of the last two weeks I have been eating, breathing, and dreaming about bikes. Oh, and of course working on them. At Recyclistas volunteers are always welcome, and usually the first days they are given the important duty of taking bikes apart. Many donations come in, almost on a daily basis, and they need to be disassembled. What seems to be mundane busywork is actually an important job in many aspects.
After the bikes are evaluated by experienced mechanics, the volunteer has to learn how they are put together, in order to take them apart. So the first challenge is learning all the parts. Parts of a bike? Like pedals and wheels, frame and fork, sure seem obvious. But what is a bottom-bracket or a headset? Then, one has to know the tools they are disassembled with, and the right way to use them. Many times (though not always) these are the same tools and techniques for putting them together. So paying attention and remembering each step is important.
After a the first few days of this, the volunteer may feel confident enough to remove all the parts from the frame, and place them where instructed: 1. into the pile that will go back on it, after it has been thoroughly cleaned, 2. into the second-hand basket, properly taped and zip-tied to keep all components together, or 3. into the scrap pile, which will be recycled for the raw materials. Additionally, certain parts too shoddy or too common for the second pile, but too good to be scrapped, go into a special crate for Bicycles for Humanities, who take them to Africa or some place where they’re valued. It all depends on the bike, the part, and the mechanic making the final decision.
Once the volunteer can fully disassemble a bike without much help, they can start building up a bike from scratch, of course with the aid of a mechanic. This can be quite tricky. The volunteer usually feels quite confident from knowing the names and locations of the tools, and being able to identify all the parts on a bike. But going upwards is a way more challenging task. Lots of time the experienced mechanic has all kinds of other work at the same time, either building a bike themselves, or attending customers in the shop. So the volunteer is stuck with figuring out most things themselves. The nice part is that there is no time pressure, whatsoever, so even taking a smoke-break to ponder things over is not frowned upon.
In the end, when the volunteer thinks they’re ready, having accomplished something, the mechanic will look it over, and more often than not will ask the volunteer to make some changes to it. Usually, this means removing the part and re-installing it in a different way. Frustrating as this may be, it is full of learning experiences. In fact, I would say that these moments of working backwards is what actually teaches someone to be able to make decisions on their own, as each bike and each combination of components is unique, in spite of being mass-produced.
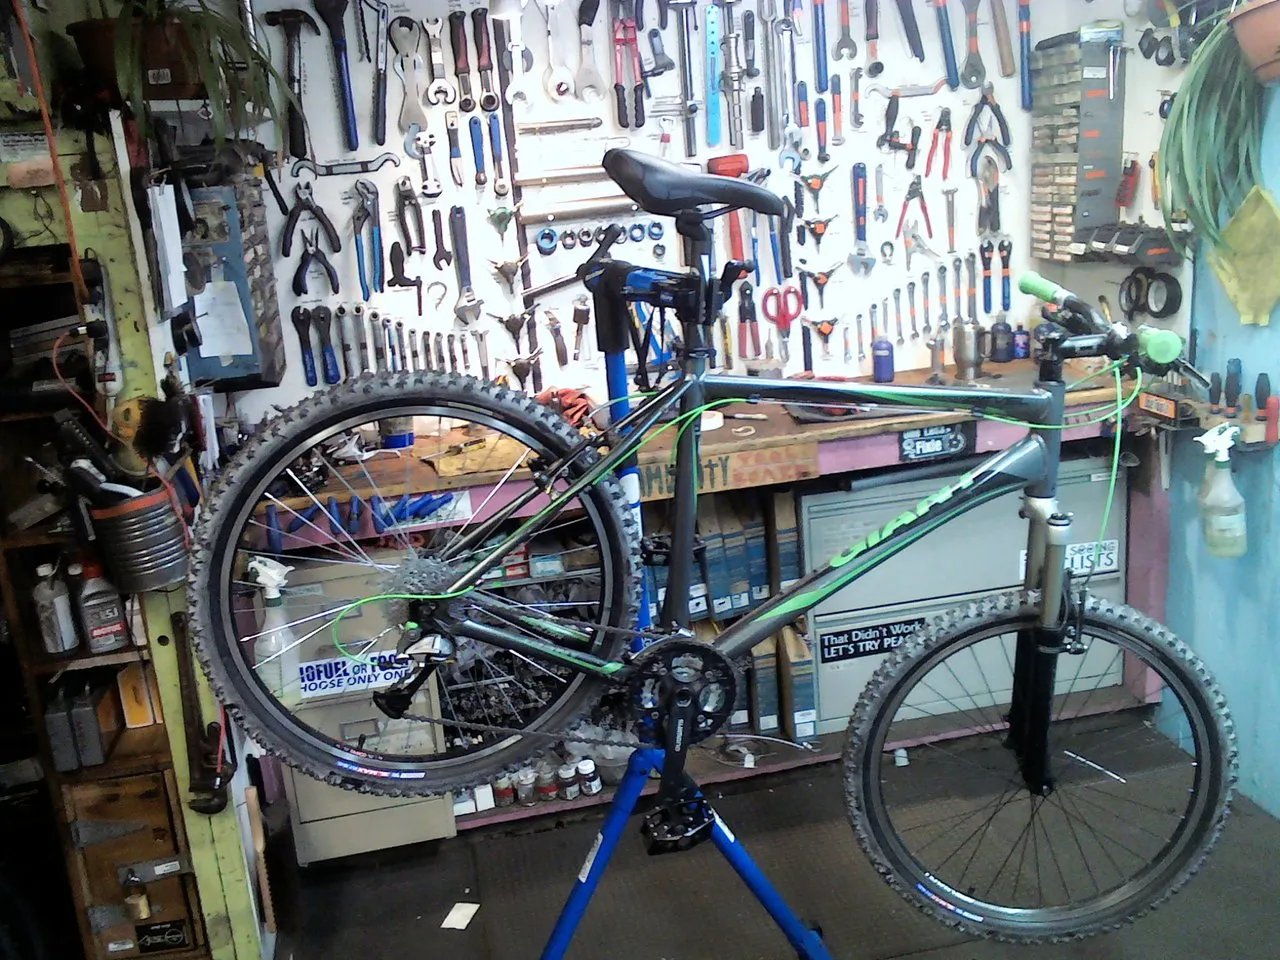
For me, the first bike I built up from a frame was a green mountain-bike by Giant. The assembly went relatively smoothly, except for the bottom-bracket. Once the crank was in, there seemed to be an excess of friction on it. Things didn’t seem right, so I asked for help. Indeed, it was just too tight, so I was told to take it apart, and grind down the crank with a power-grinder. An hour of disassembly, grinding, and reassembly later, the problem persisted, so I was told to repeat the whole process. Another hour later, when the problem was still just as bad, we discovered the actual cause: the bottom bracket was the wrong size! With 73 mm instead of the usual 68 mm, this Giant was truly a giant! The rest of the assembly was relatively smooth, though not without minor hiccups. But finally, I got to be super proud of my Jolly Green Giant, the first bike I built!
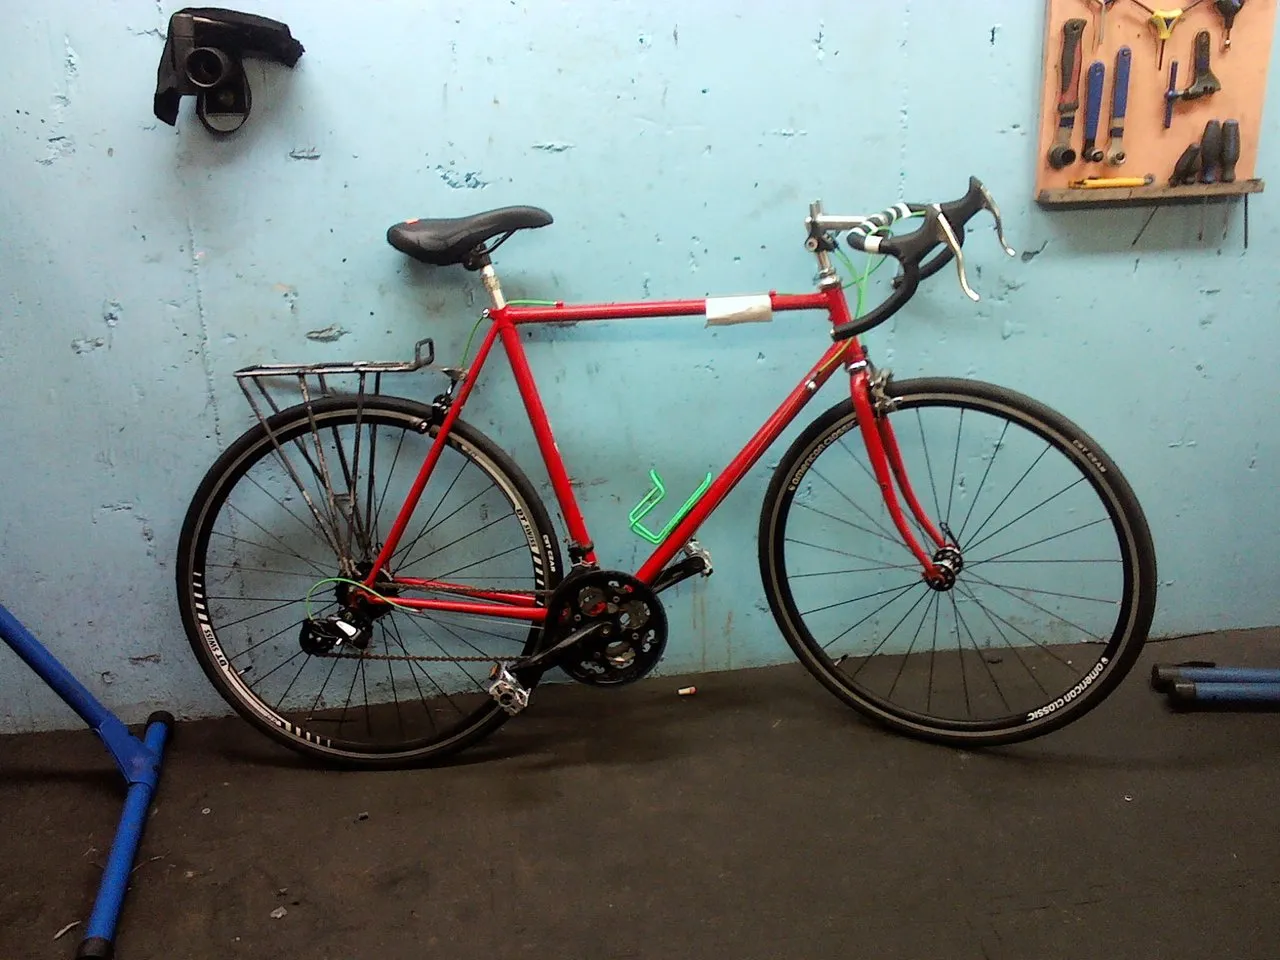
My second bicycle to build was a red road-bike, I learned to loath. I’m not a big fan of road-bikes anyway, but this one I found highly frustrating to work on. The frame had its dark spots, which were not oil or rust, but places where the paint had worn off, so rubbing it with alcohol or degreaser would not make them go away. As I later found out, this would be the least of all issues. The wheels of the originally donated bike were a borderline case: either they would need a lot of work on the truing-stand, resulting in acceptably adjusted, though at best very mediocre wheels… or be replaced by a pair of beautiful wheels in excellent condition, adding a few hundred dollars of value to the bike. Hmmm… what a decision!
In the end we went for the second option, which opened up a can of worms: First, the tires. We had a pair of bright green ones hanging around the shop, just waiting for a bike like this. After I’d been working literally for hours trying to put them on, we decided that though the size was right, in practice they would be a poor match. Even if I got them on the wheels, a flat would be a bitch to fix for anyone. So back to regular black tires, which I managed to put on in no time. Then came various brake related issues, since the present brakes would not reach the side-walls of the nice new tires! The new brakes (also second-hand) had a stiff spring, which I only noticed once they were perfectly in place. So back again… And so it went with the brake levers, and a number of other things. By now the bike has become way more expensive, as almost all parts have been replaced to brand-new ones. Now it’s onle the frame that looks sadly a bit used and ugly. Nevertheless, this Red Roadie provided a great deal of learning experiences.
I will probably get to build a couple of more bikes before getting down to the one I want to ride to California. By then I should be really confident at working on my own, on the various types of parts, being able to know exactly what it is that I want, and how to do it properly.
Please check out these great communities I'm contributing to:

#homesteadersonline | Website | Discord Community