
Hi everyone! In this walkthrough guide, we'll explain the special features and usages of two-factor and multi-sig Bitcoin wallets. We'll also give you a step-by-step guide on creating and using such wallets with the Electrum Bitcoin Wallet. Lastly, we'll show how to use these wallets to send/receive bitcoins.

This article is also Part 3 of @mooncryption's Electrum BTC Wallet Series, where we explore the features and functions of one of the world's most popular Bitcoin wallets. Click here for Part 1 (a feature list and explanation) and here for Part 2 (creating/using a standard wallet.)
This article will be divided into these sections:
- 1. 2FA Wallets (Overview)
- Creating a 2FA Wallet
- Using a 2FA Wallet
- 2. Multi-Sig Wallets (Overview)
- Creating an M-S Wallet
- Using an M-S Wallet
Let's start!
Two-Factor Authentication Wallets (2FA)
A two-factor authentication wallet, or 2FA wallet is a Bitcoin wallet that doesn't just use one private key or password to authenticate transactions; instead, every time you want to make a transaction (send BTC), you need to enter a special code from a service.
Two-factor authentication is used all over the world and on many websites from Google to Apple to many more. Even if a hacker got access to your password on such a service, they'd have to have physical access to your phone or your trusted device to get into your account. Companies use different methods to send you your two-factor code when you try to login; Google lets you use an app called "Google Authenticator" on your phone to get your codes, while Apple sends the codes as notifications to your phone, and other companies simply text the code via SMS to your phone number.
In Electrum, the best way to get your code is by using an app like Google Authenticator or Authy. You can search up these apps for guides on how to use them, but we'll be using Google Authenticator for this guide.
Creating Your 2FA Wallet
Let's go over how to create your 2FA wallet :)
Step 1. If you haven't already, download Electrum from the downloads section of Electrum.org. Make sure to get the latest version available. If you already have Electrum installed, you can skip this step.
Step 2. Open Electrum and create a new Bitcoin wallet (on Mac, you can do this using File > New/Restore).
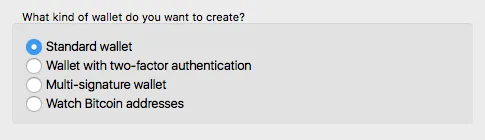
Step 3. When you get to the below screen, choose "Wallet with two-factor authentication":
Step 4. After pressing 'Next', you'll see a disclaimer/text screen similar to the one below. Make sure to read over this screen fully.
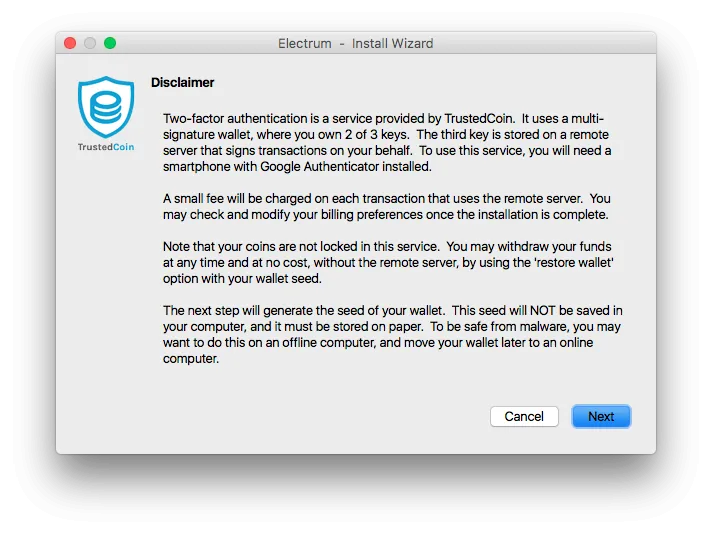
Understand that:
- You'll need a phone with the Google Authenticator app installed. (The app is available for most phone platforms from Android to iOS to others)
- Two-factor authentication relies on a service called TrustedCoin, however, at no time can TrustedCoin access your coins.
- An extremely small fee is added to two-factor authentication transactions, that can be paid every 5 or 10 transactions, to make sure the two-factor authentication transactions go through.
- You always have full access to your coins from your seed, which is a long piece of text (like a password) that you need to backup on paper when Electrum tells you what it is.
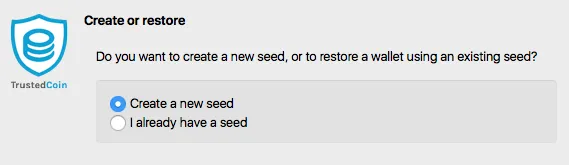
Step 5. On the next screen, Electrum will ask you if you already have a seed. Check the "Create a New Seed" option and continue.
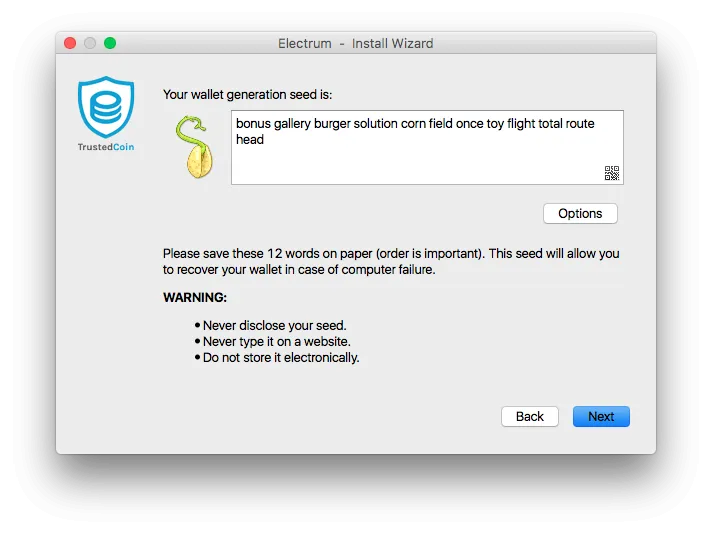
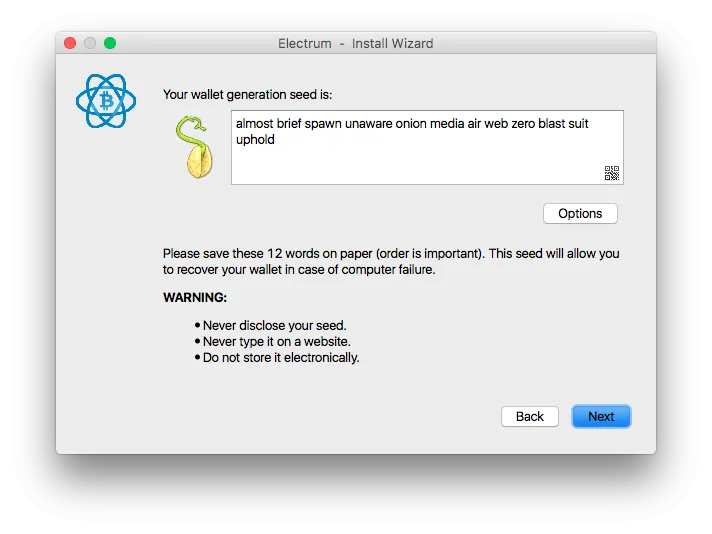
Step 6. After pressing "next," you'll see your wallet seed. It's incredibly important that you copy this seed down on paper (not on a computer) and store it very safely. Even if the two-factor authentication service (TrustedCoin) disappears or your phone gets stolen, you can always use this seed to restore your full wallet and access your bitcoins. It's like a recovery passphrase, so you need to keep it very safe.
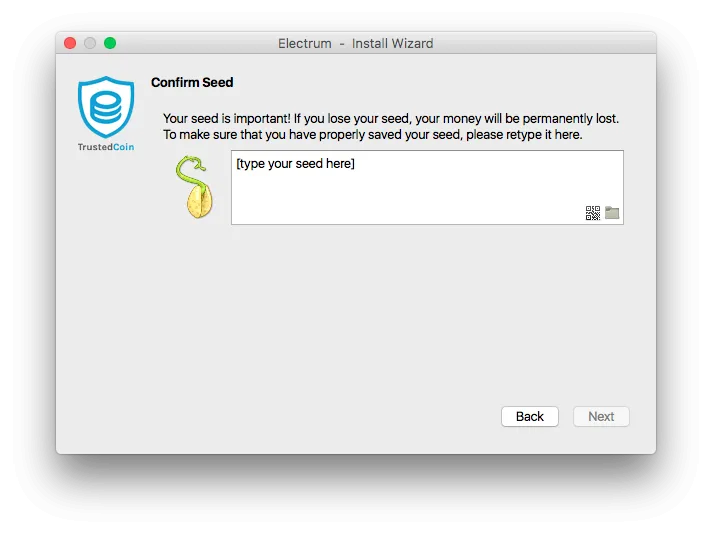
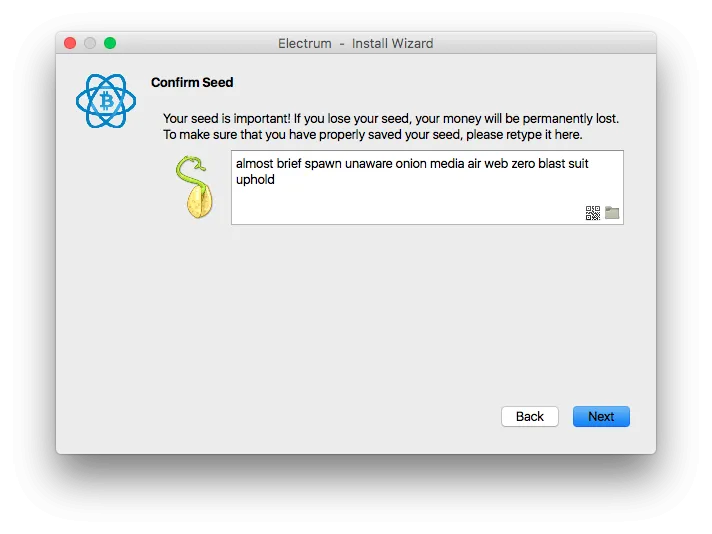
Step 7. Now, Electrum will ask you what your seed was, to make sure you copied it down and kept it safe. Type your seed in and press "next." If you forgot to copy it down, press "Back" so Electrum can regenerate your seed.
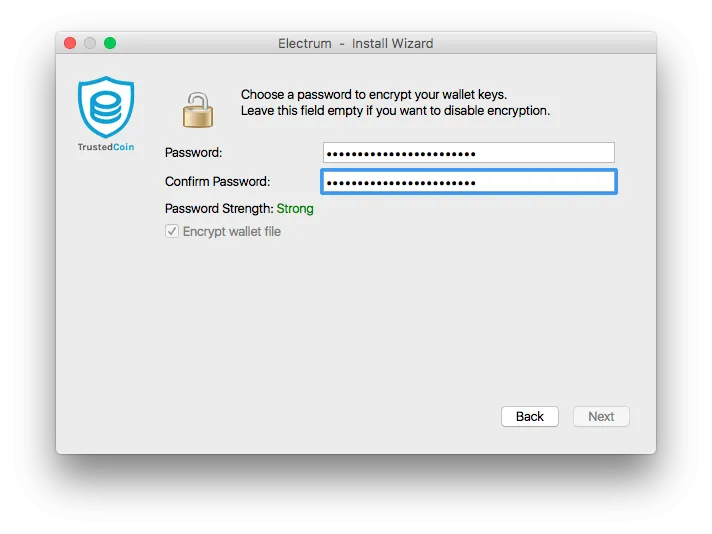
Step 8. Now you'll need to choose a password to encrypt your wallet. Enter a strong yet memorable password into the boxes to encrypt it. If you really don't want to encrypt your wallet, you can leave both boxes blank, but it's highly recommended to do so for security reasons.
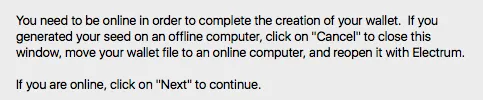
Step 9. The next screen will ask you if you are on a computer connected to the Internet. If you are, press "Next"; if not, move your wallet file (the path should be shown on the screen) to an online computer and reopen it with Electrum.
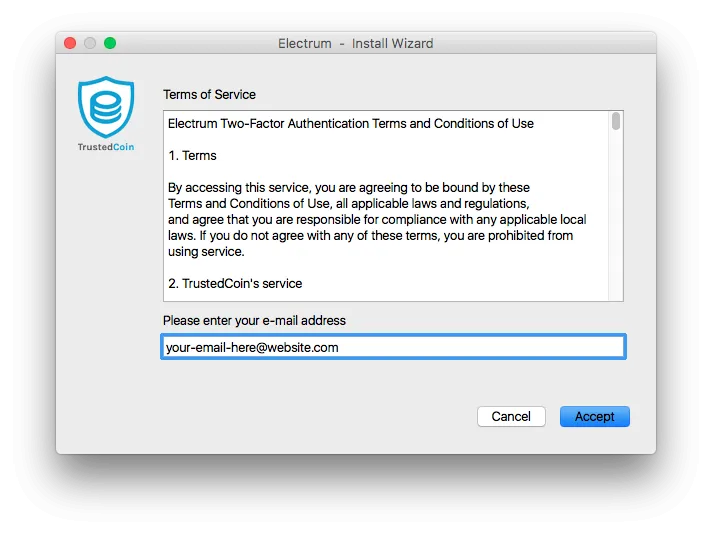
Step 10. The next screen will be a terms-of-service agreement screen. Type in your email and agree to the terms.
Step 11. Now, you'll need to get out your phone and install the Google Authenticator app. Press the "+" button and scan the QR image on Electrum:
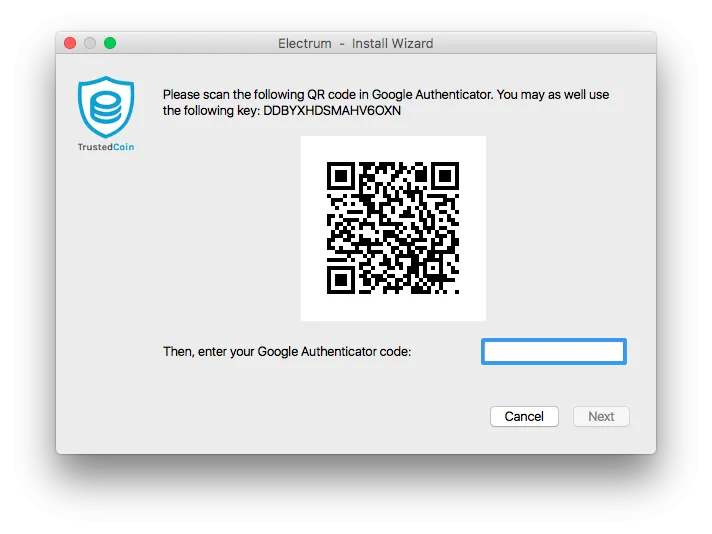
Save the service to Google Authenticator, then copy the code from the Google Authenticator app to the box in Electrum.
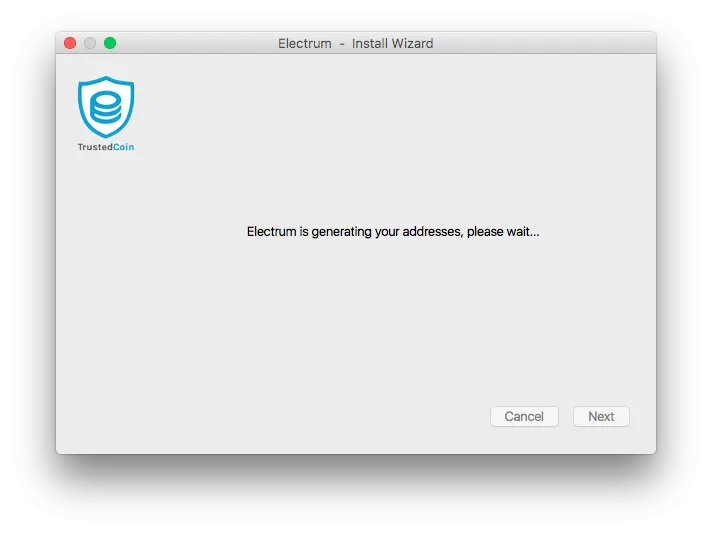
Step 12. Electrum will now generate your addresses. This may take a few minutes, but shouldn't be that long (it took about 30 seconds on my testing computer).
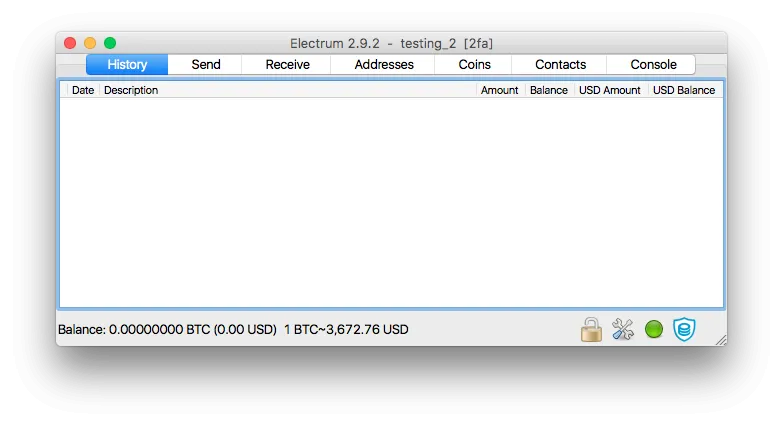
Step 13. When the Electrum wallet home screen pops up, you're done setting up your wallet! We'll cover how to use your wallet to send and receive bitcoins in the next parts of this guide :)
Using a 2FA Wallet
Now let's cover how to use your 2FA Wallet to send/receive bitcoins.
Sending
In order to send bitcoins with your 2FA Wallet, navigate to the "Send" screen/tab in Electrum:
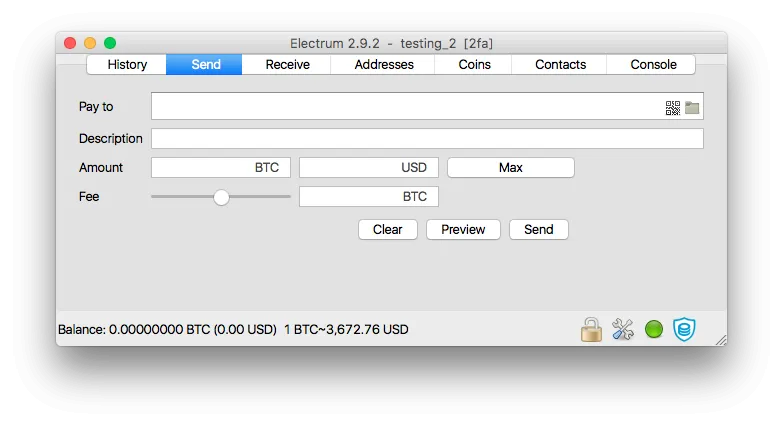
Then, populate the "Pay to" address and Amount of BTC you're sending. If you want, you can add an optional description as well for you to label your payment. Lastly, use the fee slider to enter in a transaction fee you want to pay. Higher fees mean your payment goes through faster, so choose your fee wisely.
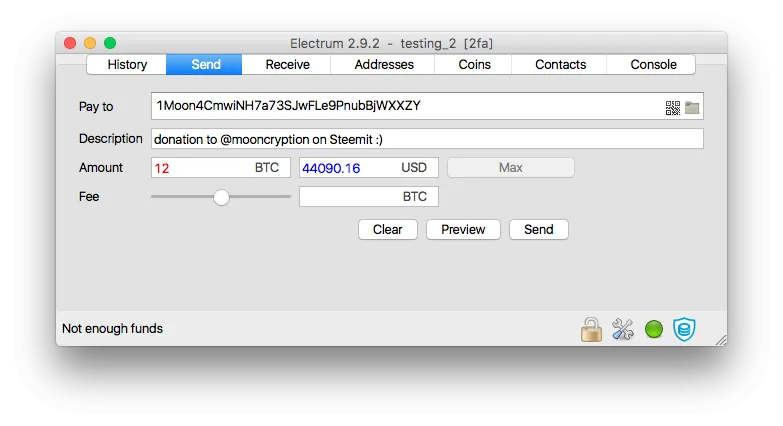
When you want to send, press the "Send" button. Electrum will ask you for a 2FA code from Google Authenticator on your phone; type it in. After that, hit "enter" and your payment will go through!
Receiving
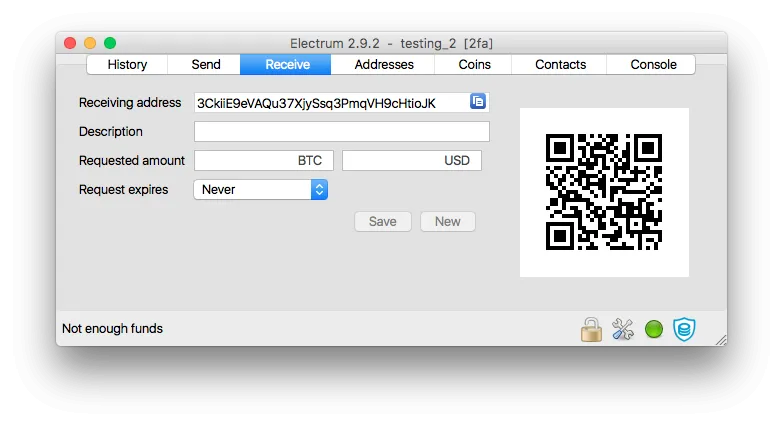
To receive bitcoins with your 2FA wallet, simply navigate to the "Receive" screen in Electrum and give your receiving address to the sender (person who's paying you):
That's how to use a 2FA wallet with Electrum. 2FA wallets make your bitcoins very secure because they require more than just a password to unlock your wallet.
Multi-Sig Wallets
Multi-Sig Wallets are very similar to 2FA wallets, in that they consist of multiple keys. In a 2FA wallet, two of the keys are held by the user and one of the keys relies on a Google authenticator code. In a multi-sig wallet, the keys can be split in any way you choose; there can be any amount of keys you want, and you can either place them in different devices (one on your computer, one on your phone, one on paper, etc) or you can give them to different people.
Either way, a transaction requires a certain threshold of keys (also decided by you) to go through. This can be used to share bitcoins with a partner/spouse or share funds with a group of people (such as a board of directors/shareholders of a company).
Creating a Multi-Sig Wallet
Let's go over how to create a Multi-Sig wallet.
Step 1. Just like the 2FA wallet, you'll need to download Electrum (see the 2FA wallet step 1) and start creating a new wallet (File -> New/Restore).
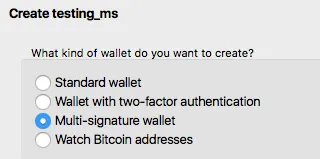
Step 2. When you get to the choosing screen, choose "Multi-signature wallet."
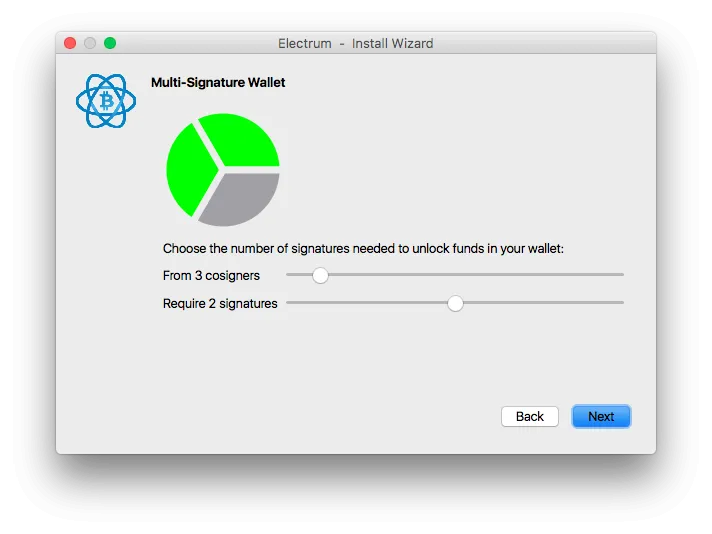
Step 3. On the next screen, you'll choose the number of keys the wallet has, and the number of keys needed to initiate a transaction. For example, a 2 of 3 wallet (shown below) has 3 total keys (divided between, say, a man, his brother, and his wife) but only requires 2 keys to start a transaction or move coins.
Step 4a. Important: Follow the below steps for each key/cosigner on your wallet. On the next screen, choose "Create a New Seed." You'll see your seed (or recovery passphrase) in Electrum. Make sure to copy it down on paper and store it in a very safe/secure place.
Step 4b. Type in your seed so Electrum can make sure you copied it down properly.
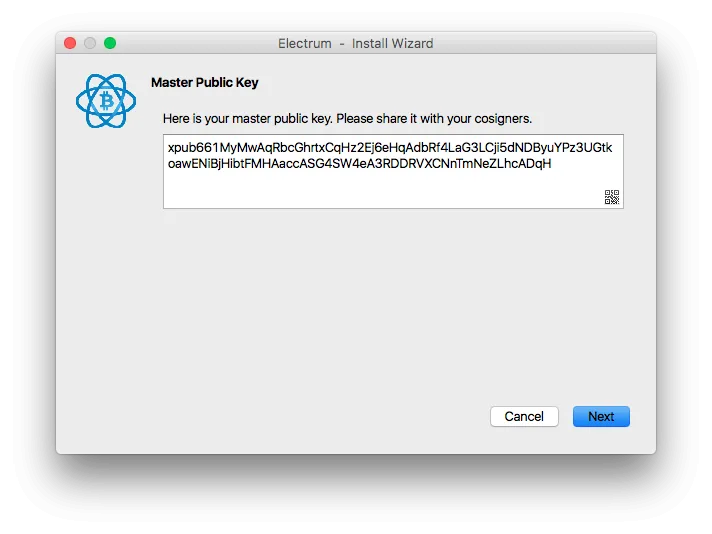
Step 4c. Now, Electrum will show you your master public key. If the other keys are to be held by you, you can store it in a safe place; otherwise, you'll need to give it to the other key holders or cosigners.
Step 4d. Now, Electrum will allow you to add the next cosigner. Chooses "Enter cosigner key". You'll need to ask your other cosigners/keyholders to give you their master public key so you can enter it in, or if they want to create the wallet, you can give yours to them.
Step 4e. Go back to Step 4a or 4d and repeat until your wallet is complete. You're done!
Using a Multi-Sig Wallet
Using a Multi-Sig wallet is actually exactly the same as a 2FA wallet, because underneath the surface (in the software), 2FA wallets are designed to be Multi-Sig wallets. Simply scroll up to the steps for 2FA wallets and follow those directions to send/receive bitcoins :)
Hopefully, this guide on 2FA and Multi-Sig wallets was helpful to you. I highly recommend Electrum for being one of the most useful, versatile, and secure BTC wallet apps, and advise you to use it!
Thanks for reading,
— @mooncryption
image sources: The first image is from DynamicYield.com. All other images are screenshots of the Electrum App running on my computer (macOS Sierra).
notice: Please don't send bitcoins to any of the addresses or seeds shown in the screenshots above!
the series continues: This was Part 3 of @mooncryption's Electrum BTC Wallet Series. Part 4 on hidden gems/features and settings of Electrum will come out in the next few days. Make sure to follow @mooncryption to be notified when it releases!