I shall take you through the process of embroidering a small circle of felt; it isn't really a tutorial because I'm not showing you the stitches - though I have found great links to follow. I am showing how I did my work and have numbered the main stages.
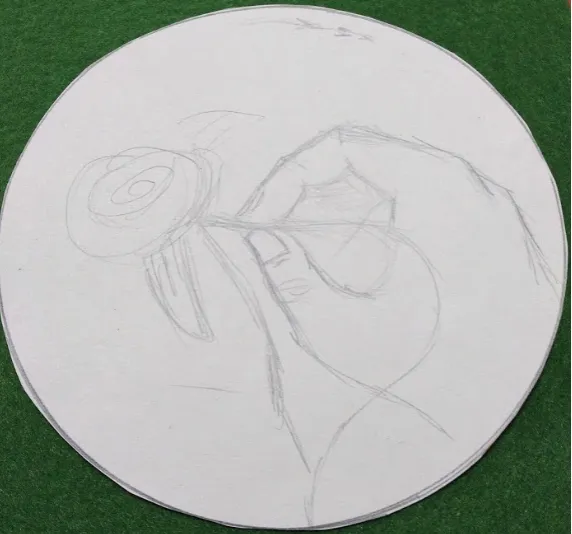
1 - My creation started with sketching my hand holding the pencil while drawing. This is extremely 'low-tech' : just basically focus on something you can see up close, ie my own hand.
As you can see I couldn't think of how to make a rose, but I placed there. Then from the pencil line I thought I might continue that on.
2 - Transferring that drawing onto the felt was impossible, but I used the transfer process I described in this post a couple of months ago.
I used this same paper sheet with the design and sewed along the line drawing using running stitch. I then had to tear the paper off the sewing line and rearrange the loose stitches.
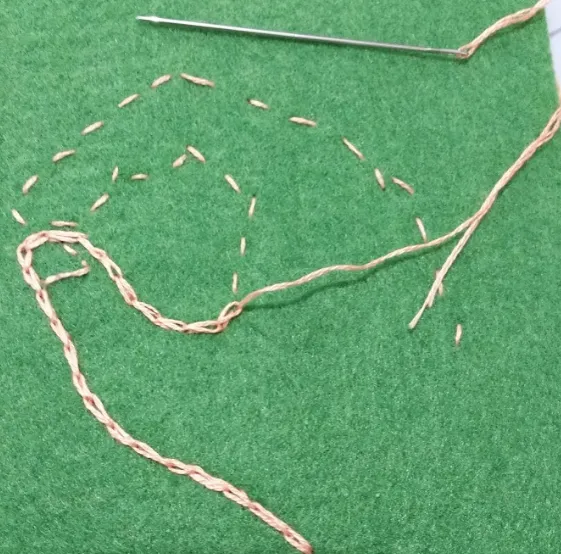
The main limitation of this type of transfer is losing the subtlety of the drawing on the knuckles and thumb nail. I kept on going because it was a different medium so I had to adapt my expectations, but it became less delicate.
It is a good way of transferring the 'general design' knowing that you'll have to adapt and adjust.
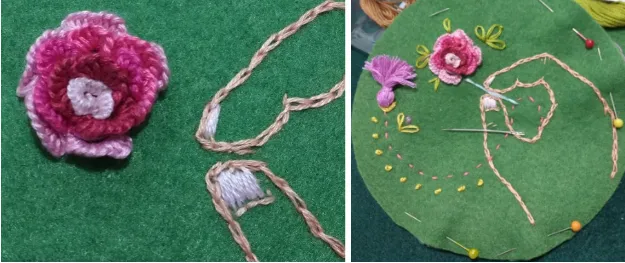
3 - In the photo above I have already started doing chain stitch 'covering up' my own running stitch track.
I also then tried to use satin stitch to cover the nail.

4 - The briefing was to embellish a piece of felt so I really wanted to try out different stitches I had seen on magazines and pinterest mainly.
All photos make it look so achievable, but there's an element of practice that's missed out of the photos. Although my work is not perfect, I am confident with with time and practice I will get better.

I was really interested in a stitch called 'cast on' stitch because it's like casting on for knitting but using a needle. The result reminds me of tatting and crochet.
Here's a video on how to do it.
I don't manipulate the photos so you can see that the stitches are not perfect, but can you detect 'happy stitching'? I was really pleased to achieve that much.
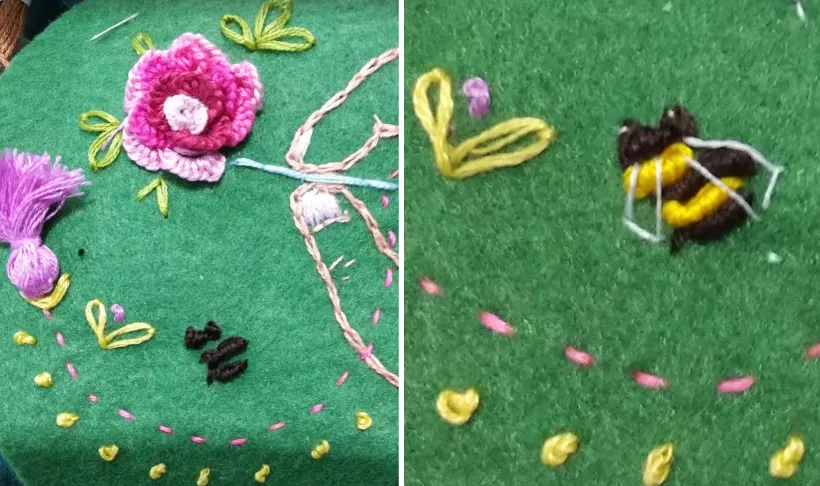
5 - I remember watching my mum who then taught me how to make the 'bullion' stitch. This is basically just winding the thread on the needle and then pulling through and fixing the 'worm' onto the fabric. Again, here's a video if you are interested. That's the technique I tried for the bee and the little dots.
I also love the colour of thistles and I thought that upside down tassle looked a bit like one. I used the same technique that @jicrochet showed us in this post some time ago.
As you can see I need more practice. Incidentally, I have been really keen to embroider some of the insects I see around my garden so attempting a bee is all part of a bigger plan and long learning process.
6 - I finished my piece by cutting another circle out of a felt square and joining the two with blanket stitch. In this way I hid all of the 'messy' back.
And the icing on the cake ?
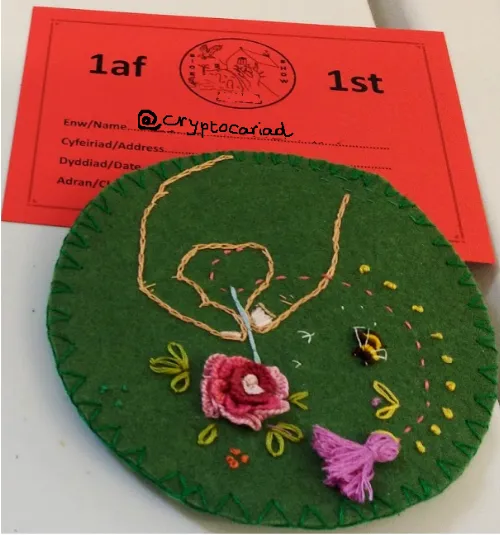
I came first in our village fair embroidery challenge - closely followed by @jen0revision- double yay! Please notice that I deleted my real name on the certificate :D
all photos and text are by @cryptocariad