
ENG: Here's a simple, quick, but effective photo tutorial. In less than 2 hours everything should be in the box.
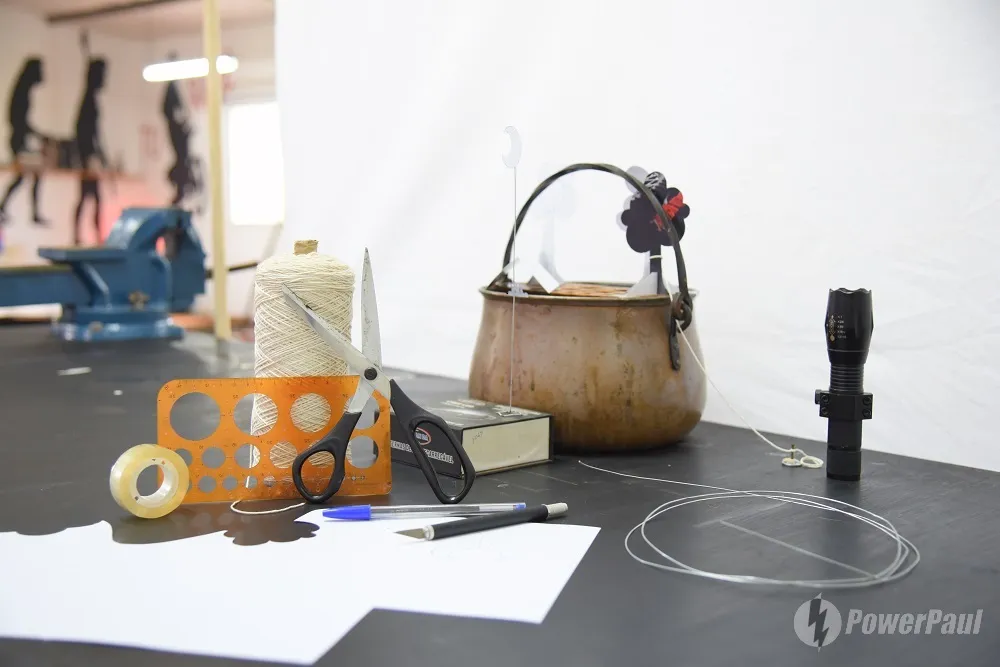
You need some solid paper, a pair of scissors, a torch and an idea. In this example, I also used some woolen thread (for the rope to the tree) and fine wire (for the moon). If you want to cut paper ultrafine, a scalpel will help.
As a trick, I used a box of sugar - more on that later.
You also need a projection screen. You can use a bed sheet or even fine paper. Remember: different materials give different styles.
DEU: Ein einfaches, schnelles, aber effektvolles Foto-Tutorial. In weniger als 2 Stunden sollte alles im Kasten sein.
Du brauchst festes Papier, Schere, Taschenlampe und eine Idee. In diesem Beispiel habe ich auch etwas Wollfaden (für das Seil zum Baum) und feinen Draht (für den Mond) verwendet. Möchtest du Papier ultrafein schneiden, hilft ein Skalpel.
Als Trick habe ich eine Box mit Zucker verwendet - mehr dazu später.
Ebenfalls brauchst du eine Projektionsfläche. Du kannst ein Bettlaken oder auch feines Papier verwenden. Bedenke: unterschiedliche Materialien geben unterschiedliche Stile.
Draw the objects that you would like to later have silhouetted onto the paper and cut them out. You can support very fragile areas with some tape. This also shows why the paper should be a bit more stable: paper that is too thin is difficult to sustain.
Male die Objekte, welche du später als Silhouette abgebildet haben möchtest, auf das Papier und schneide sie aus. Sehr fragile Bereiche kannst du mit etwas Klebeband unterstützen. Hier zeigt sich auch, warum das Papier etwas stabiler sein darf: zu dünnes Papier steht nur schwer aufrecht.

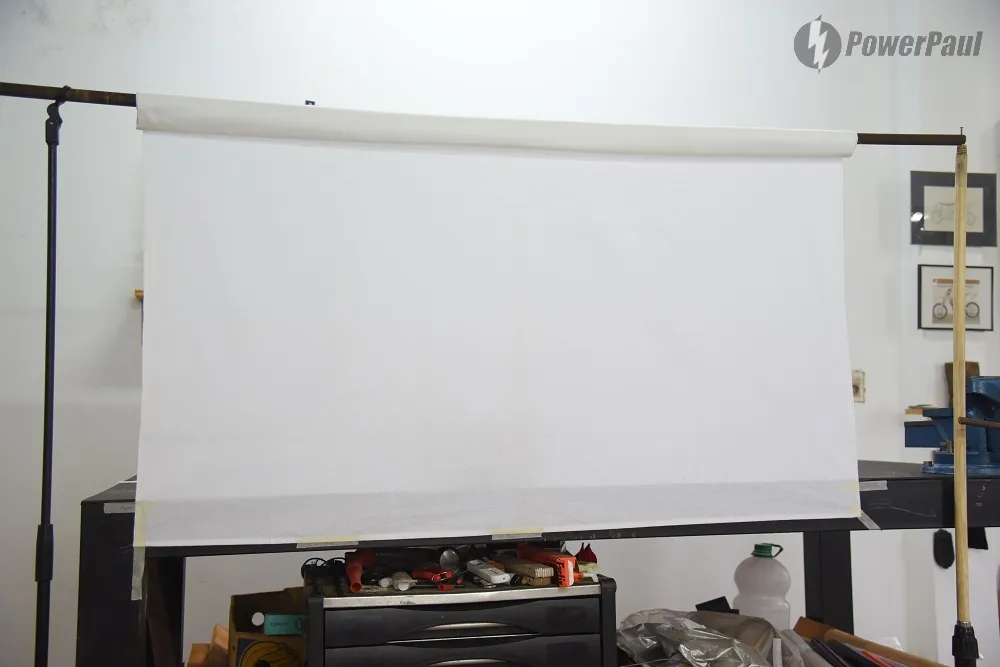
At least now the projection surface, here a cotton sheet, should be finished. At the bottom, it is clipped to the edge of the table to bring it to light tension. At the top it is rolled up by a long pole.
Spätestens jetzt sollte die Projektionsfläche, hier ein Laken aus Baumwolle, fertig sein. Am unteren Rand ist es an die Tischkante geklebt, um es auf leichte Spannung zu bringen. Oben ist es um eine lange Stange aufgerollt.
Now you can position the flashlight, try it on and set up the scenery and tune everything together: flashlight focus, distance of the lamp to the projection surface, distance to the objects, etc.
Nun kann man die Taschenlampe positionieren, probeweise anschalten und die Szenerie aufbauen und alles miteinander abstimmen: Fokus der Taschenlampe, Entfernung der Lampe zur Projektionsoberfläche, Abstand zu den Objekten usw.
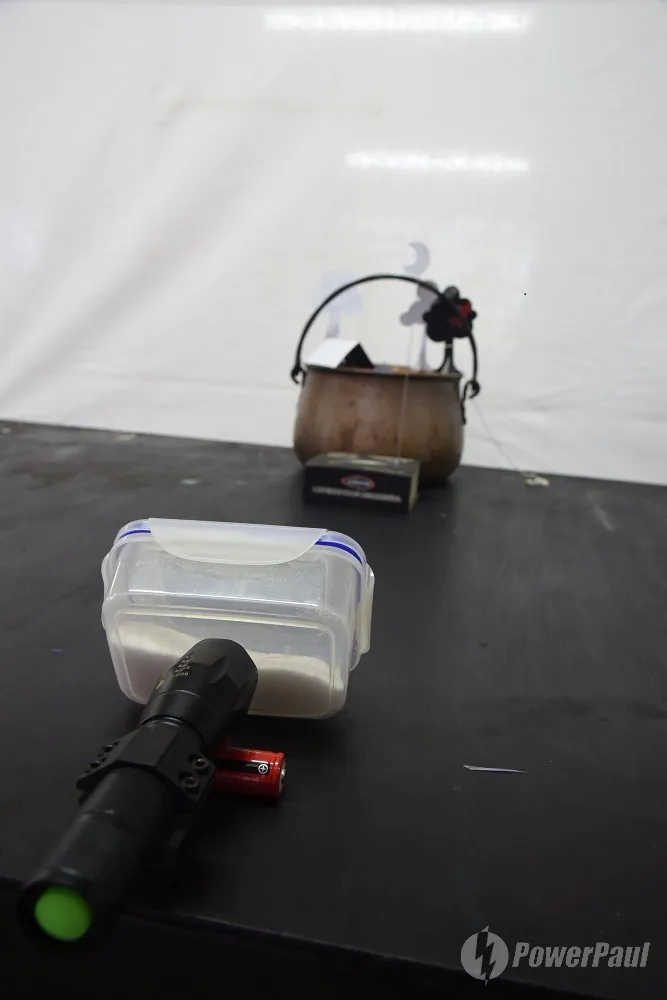
Trick: the sugar in front of the lamp is used, so that the light gets a pleasant brightness course. Here you can experiment a lot!
The moon is held by a piece of wire, to which I bent a small foot. A woolen thread, tied to a small nail, will look like a rope on a peg in the photo.
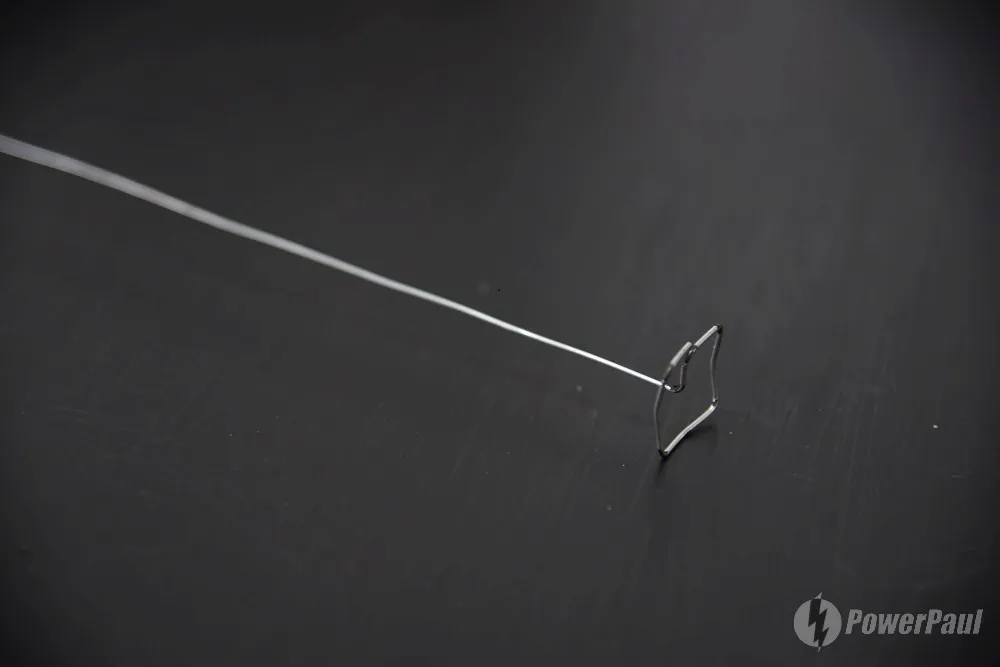
Trick: der Zucker vor der Lampe dient dazu, damit das Licht einen angenehmen Helligkeitsverlauf bekommt. Hier kann man viel experimentieren!
Ein Draht mit Standfuß hält den Mond. Ein Wollfaden an einem Nagel geknotet, wird auf dem Foto wie ein Seil an einem Pflock aussehen.
Ein Draht mit Standfuß hält den Mond. Ein Wollfaden an einem Nagel geknotet, wird auf dem Foto wie ein Seil an einem Pflock aussehen.

In the end, it might look like:
Am Ende könnte es aussehen wie:
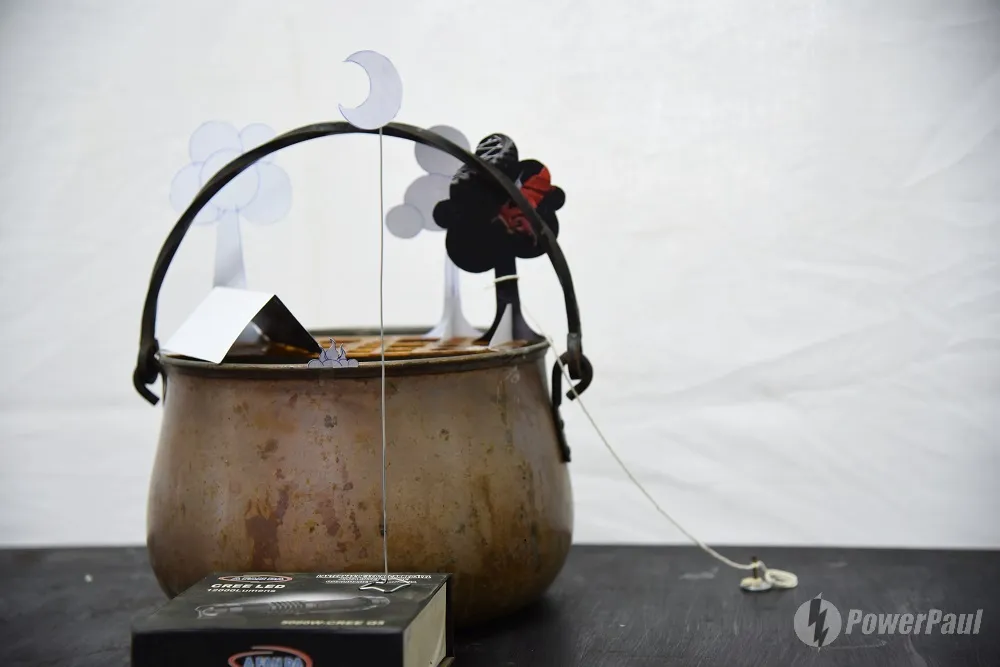
Flashlight turned on, every other light in the room off. Camera on the tripod and try settings!
3 examples of different exposure or distribution of the sugar in the transparent can:
Taschenlampe eingeschaltet, jedes andere Licht im Raum aus. Kamera auf das Dreibein und Einstellungen probieren!
3 Beispiele zu unterschiedlicher Belichtung bzw. Verteilung des Zuckers in der transparenten Dose:
3 Beispiele zu unterschiedlicher Belichtung bzw. Verteilung des Zuckers in der transparenten Dose:
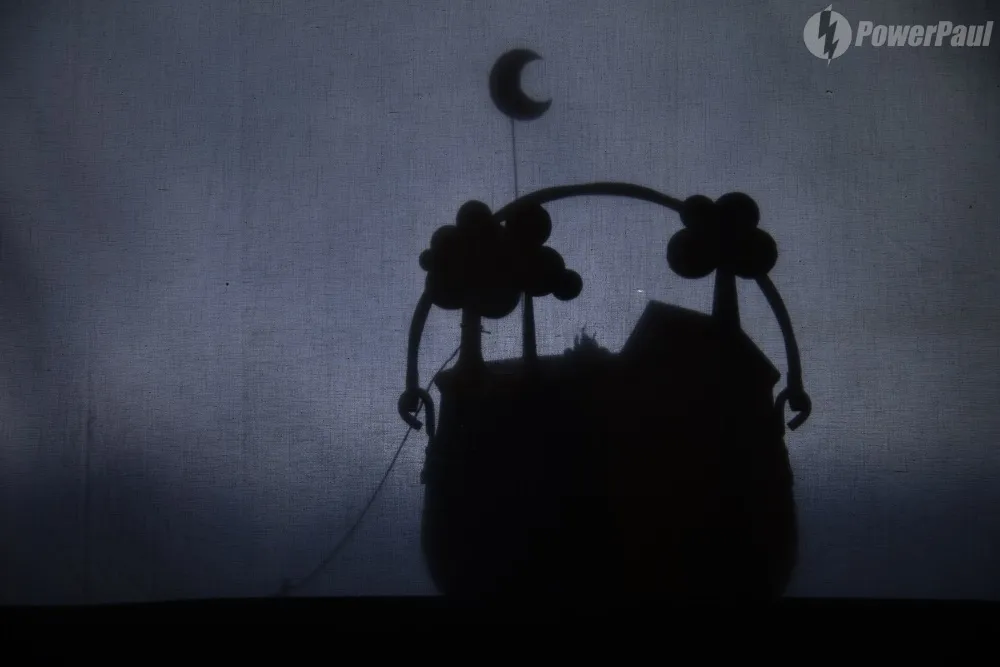
ISO 100, 4 sec., F/5
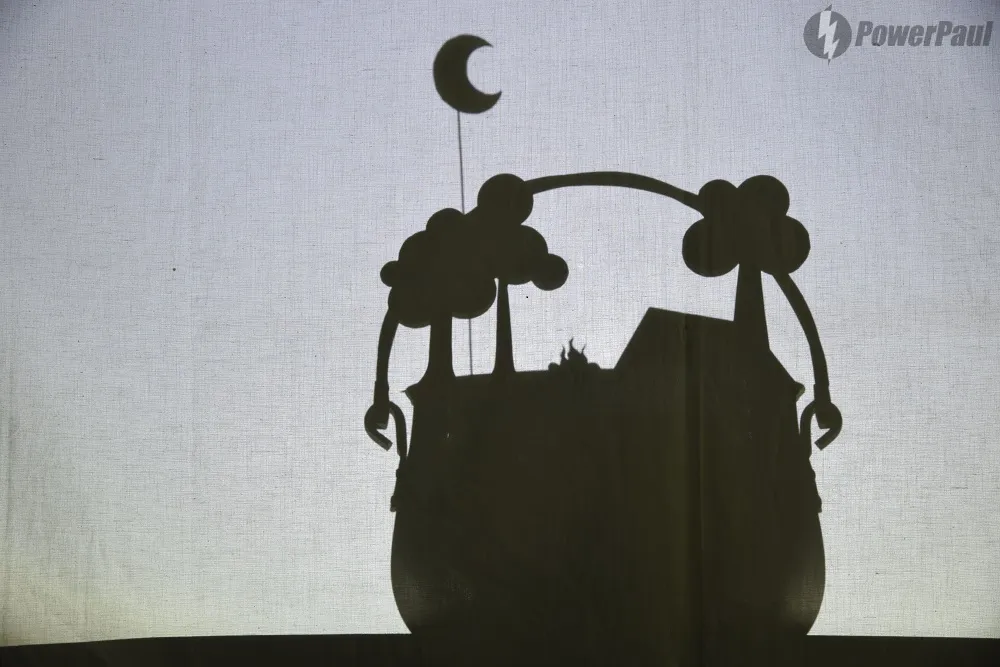
ISO 100, 4 sec., F/8 (illuminated screen)
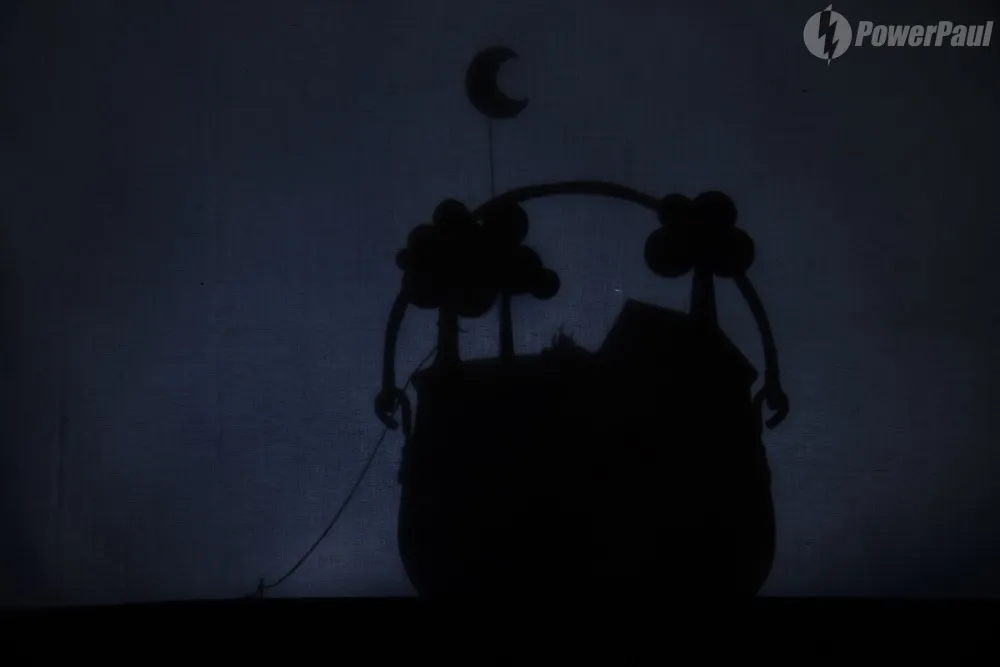
ISO 100, 4 sec., F/8 (non-illuminated screen)
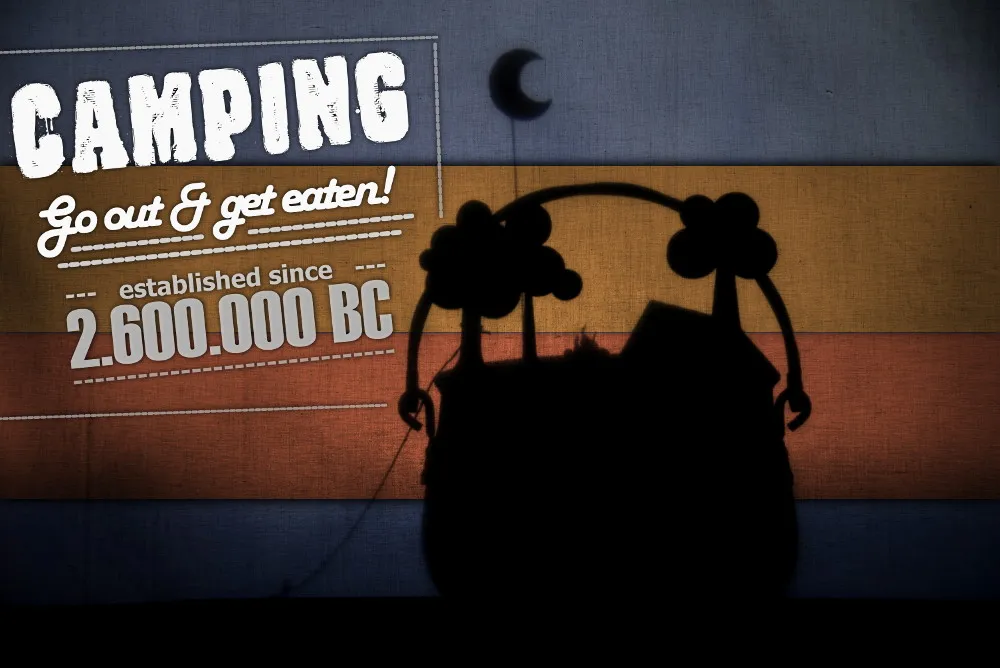
In Gimp I cut the photo into 4 horizontal parts and colored the middle 2 bars. Likewise, these two bars have got a subtle shadow, so some room acts.
After just a few clicks in the Gimp, the graphic looks like this.
In Gimp habe ich das Foto in 4 horizontale Teile geschnitten und die mittleren 2 Balken eingefärbt. Ebenso haben diese beiden Balken einen dezenten Schattenwurf bekommen, sodass etwas Räumlichkeit wirkt.
Nach nur wenigen Klicks im Gimp, sieht die Grafik wie folgt aus. Fertsch.
Nach nur wenigen Klicks im Gimp, sieht die Grafik wie folgt aus. Fertsch.
I myself have done this "project" for fun and photography. Then came the idea that I could inspire you with it. I hope I could serve you!
If you want to see/listen more of me, visit me at Patreon!
Stay clean & safe!
Ich selbst habe dieses "Projekt" aus "Spaß" an Neuem und der Fotografie getan. Dann kam die Idee, das ich dich damit inspirieren könnte. Ich hoffe, ich konnte dir dienlich sein!
Wenn du mehr von mir sehen/hören willst, besuche mich auch bei Patreon!
Bleibe sauber & sicher!

