The underfloor heating for this bathroom remodel is installed with no problems. In the Schluter system, you have to lay out the heater wire in a pattern that keeps a space of three studs between the loops of wire. If you get the spacing too close it will overheat; bigger gaps leaves a cold spot.
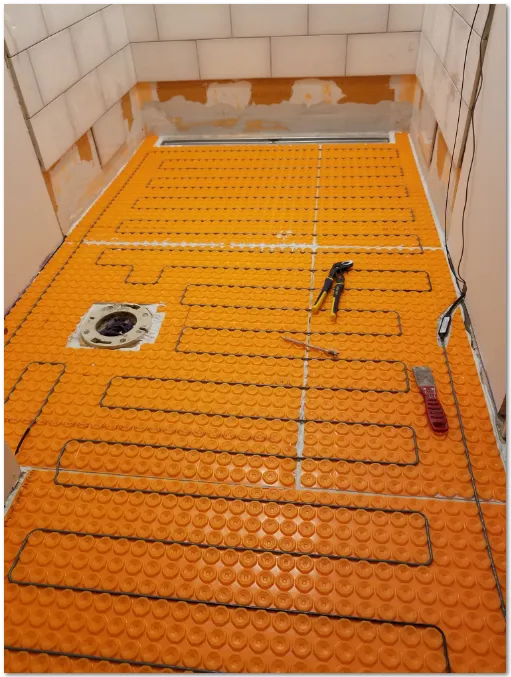
It took me two tries to get the layout right. This wire was a little too long to fit comfortably in the available space, and you can't cut the end of the wire off. It is better to order a piece of heater wire that is too short rather than too long. If the wire is a little too short you can just put it on the spots where people are likely to stand and leave low-traffic areas unheated. If the wire is too long there is really nothing you can do except send it back to order the next smallest size. In this layout I had to heat every square inch of the floor, including behind the toilet, because the wire was too long.

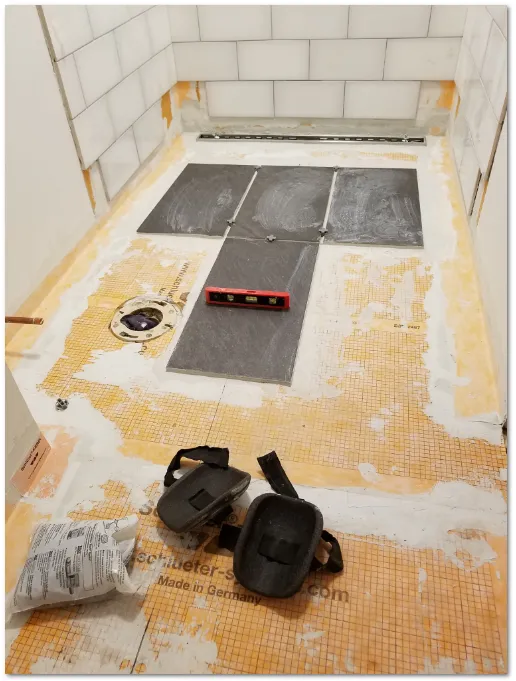
The next step was bedding the heater wire in mortar and adding an extra layer of waterproofing membrane on top of it. The membrane covers the whole bathroom and is bonded right to the wall. If you stopped up the shower drain the room could flood an inch or so deep without damaging the subfloor or walls. Of course the water would be running out the door and into the hallway at that point, but it is still good to know that all my hard work on the floor tile would be safe.
In a previous post (Checking the heater wire), I showed how I used a high-voltage insulation tester to make sure the heater wire was intact. I repeated the test again after the wire was buried in the floor and everything is fine.
I also tried finding other things to test with my new toy. The picture above shows how the insulation tester can measure a 21 megaohm resistance through the damp mortar under the floor, but the common multimeter just shows an overload. It is pretty cool to see the insulation tester at work because it makes a little spark when you make the final connection. I guess I should have expected the spark - it is applying 1000 volts after all.
At the end of the weekend I had the drain trim mortared in place and the first four tiles installed.
Stay tuned to see the glass shower door go in and a custom vanity with a DIY soapstone top using stone from a local quarry. I'm looking forward to visiting the quarry to pick out the stone in a few weeks.
Cheers, Professor Bromide