
Hello, steemians, and welcome to da workshop, eh!
Last week, I decided to start a new guitar amplifier build after fixing an amp for my friend and getting the urge to do another build. This amp will be another small amp, about 10 watts output power. It will have 3 tubes, a preamp tube, a power amp tube, and a rectifier tube. I've had the transformers sitting around for a while, but I didn't have a decent chassis to use for the build.
About 3 months ago, I ordered a chassis from the on-line place where I get most of my parts, this chassis was for a tube powered effects project that I wanted to build. After getting the chassis and trying to test fit all the parts for the effects project into it, I realized that the chassis just wasn't big enough for all the parts that I wanted to put into it. I set that chassis aside and ordered a larger one for the effects project.
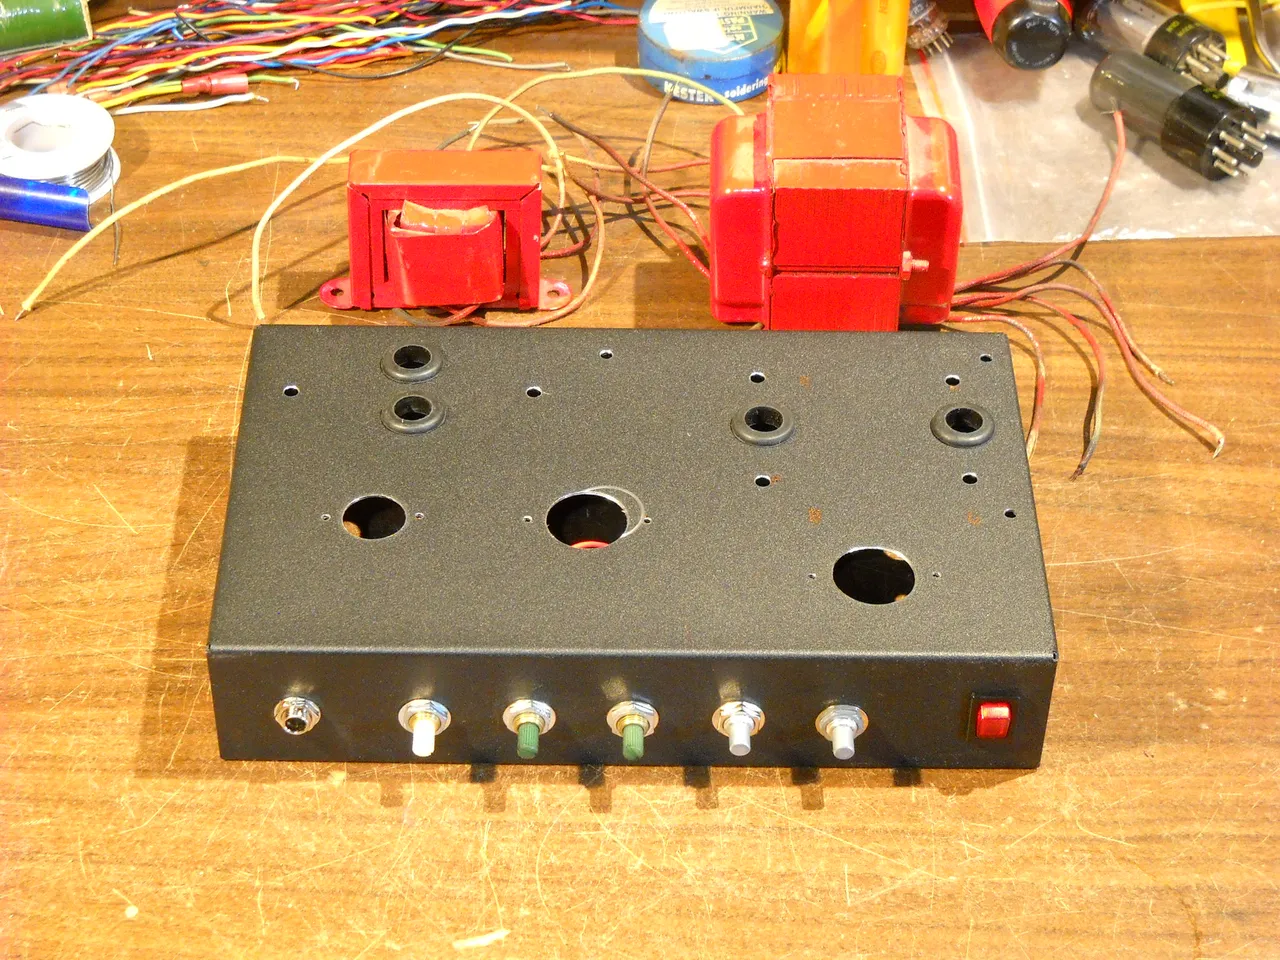
I was looking at the smaller chassis, wondering what to do with it, when I decided to see if I could build a small amp on it since I already have it. It turned out that the chassis is about the same size as the other small amp that I built a couple of years ago using salvaged transformers. I remembered having the two transformers in my parts supply, so I got them out and did a test fit to see how they would fit on the chassis. It turned out that there is enough room on this chassis to build an amp using the transformers that I have.
This is the chassis and the 2 transformers. I drilled the basic mounting holes for the transformers before I took this picture.
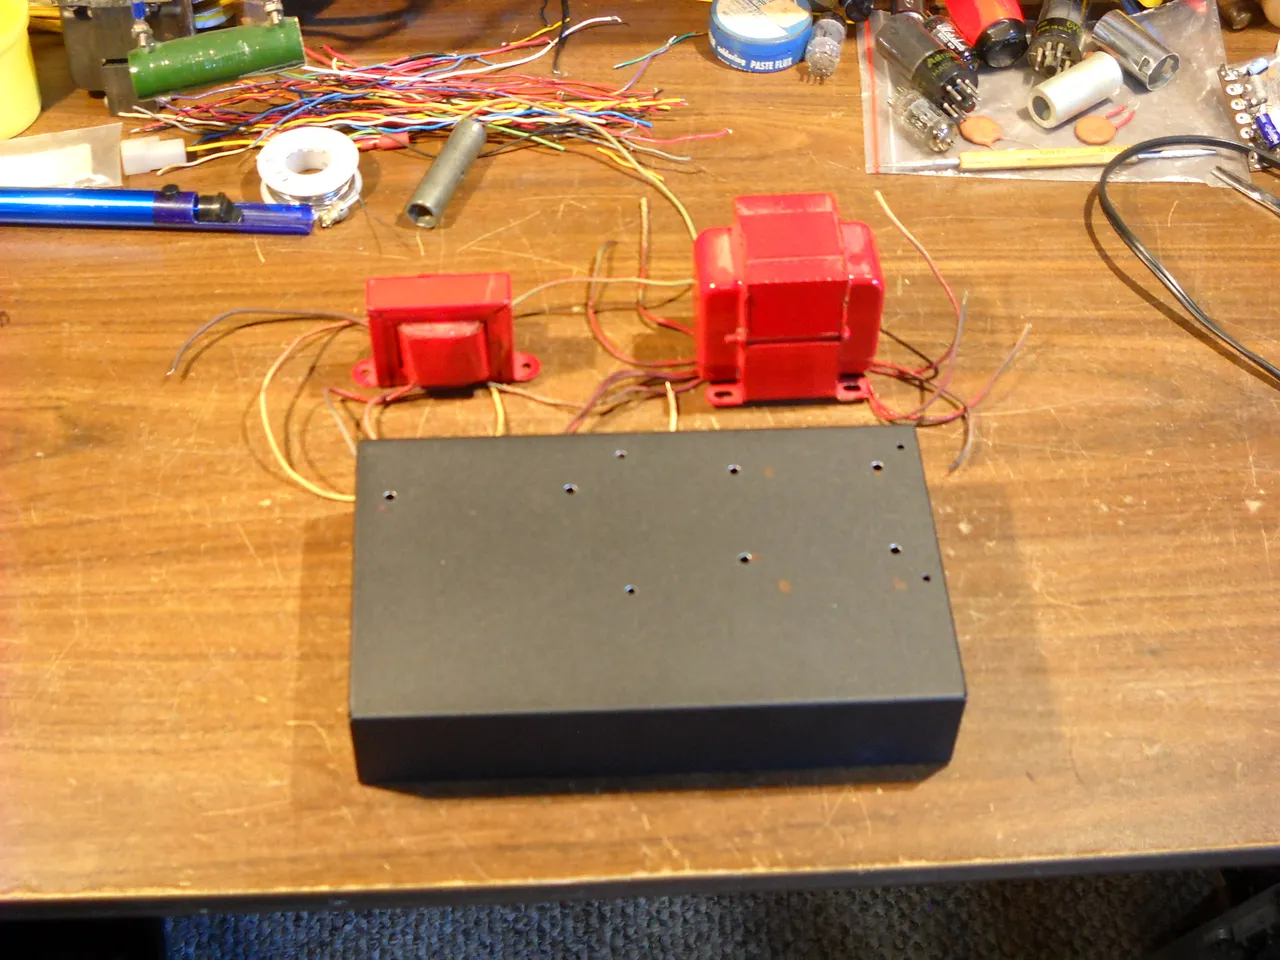
As you can see, the chassis is black and the transformers are red. So, the temporary name of this build will be the "Red and Black" amplifier. I'm planning on using red knobs for the controls, but I still need to order them.
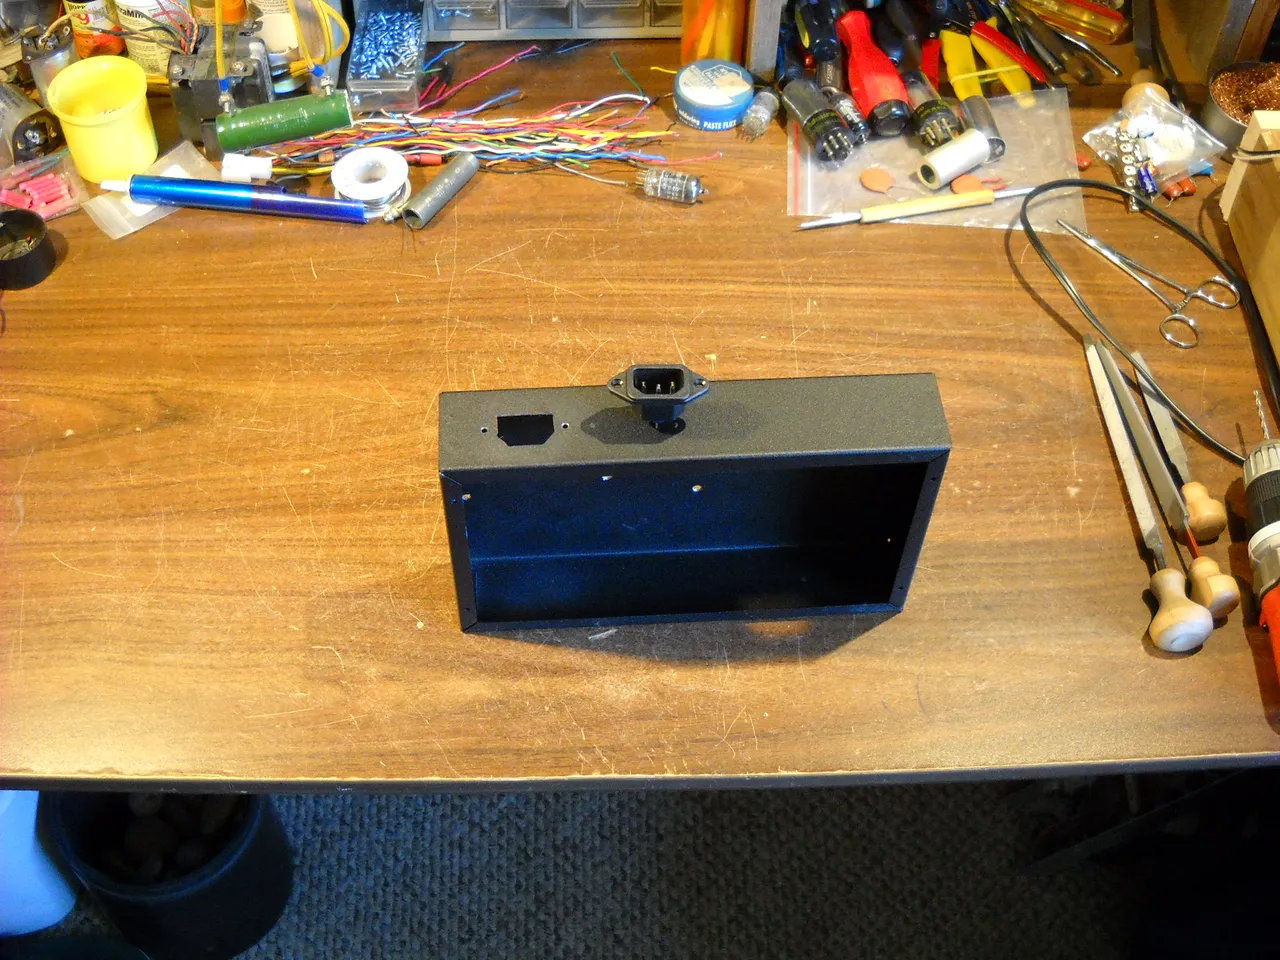
The next thing I did to the chassis was to drill and file the hole for the power plug socket. This amp will use a standard removable power cord.
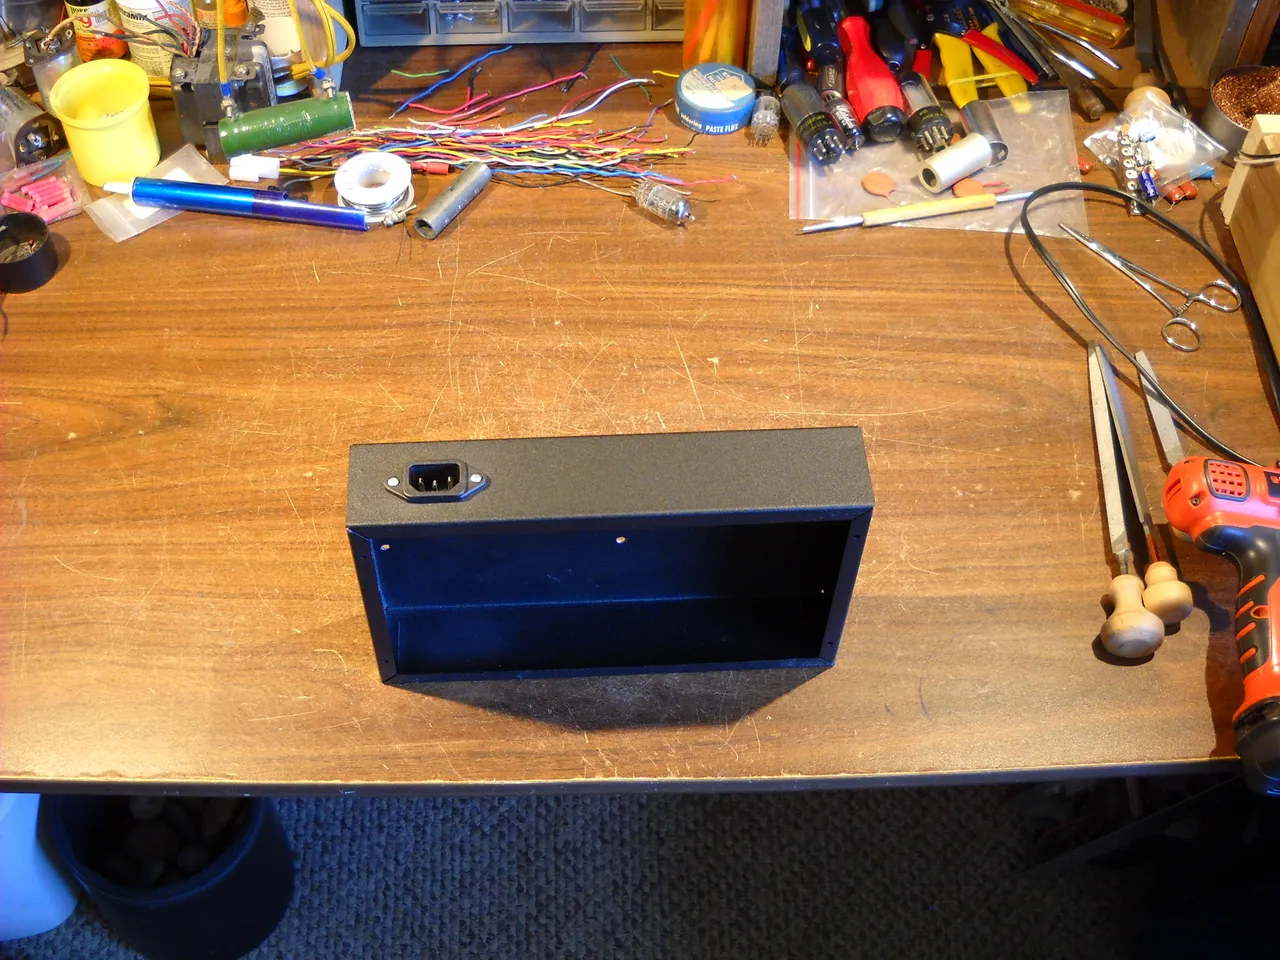
Then I needed to drill the holes in the chassis for the transformer wires to go through the chassis. I used a 5/8ths inch hole saw to make the holes.

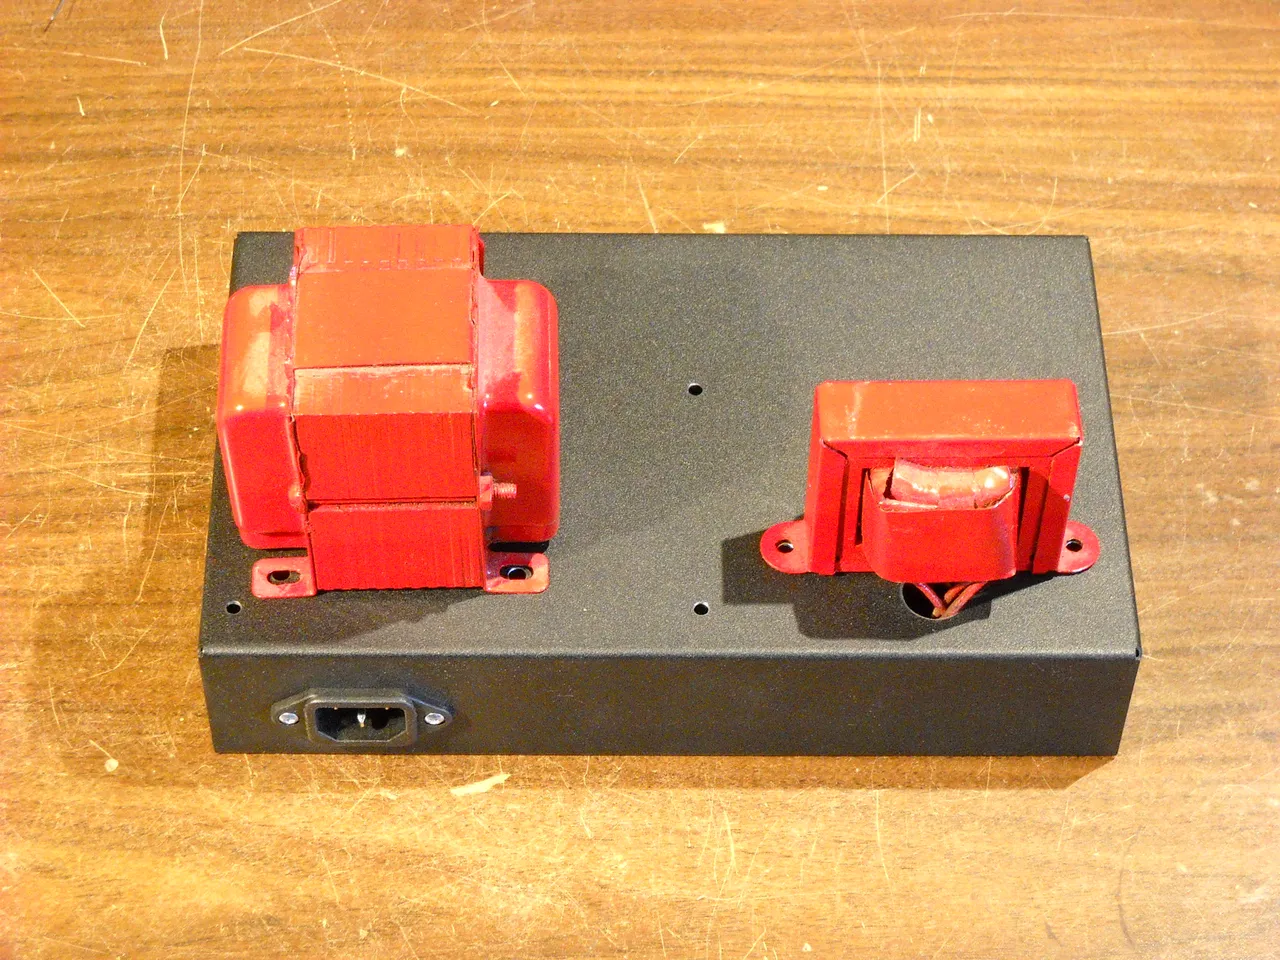
Then a test fit of the transformers.
The next thing to do was to drill all the holes in the front panel for the input jack, the power switch, and the controls. I forgot to take a picture until after I mounted all the controls. I could have taken them back out for a picture, but I figured there wasn't much point in that.
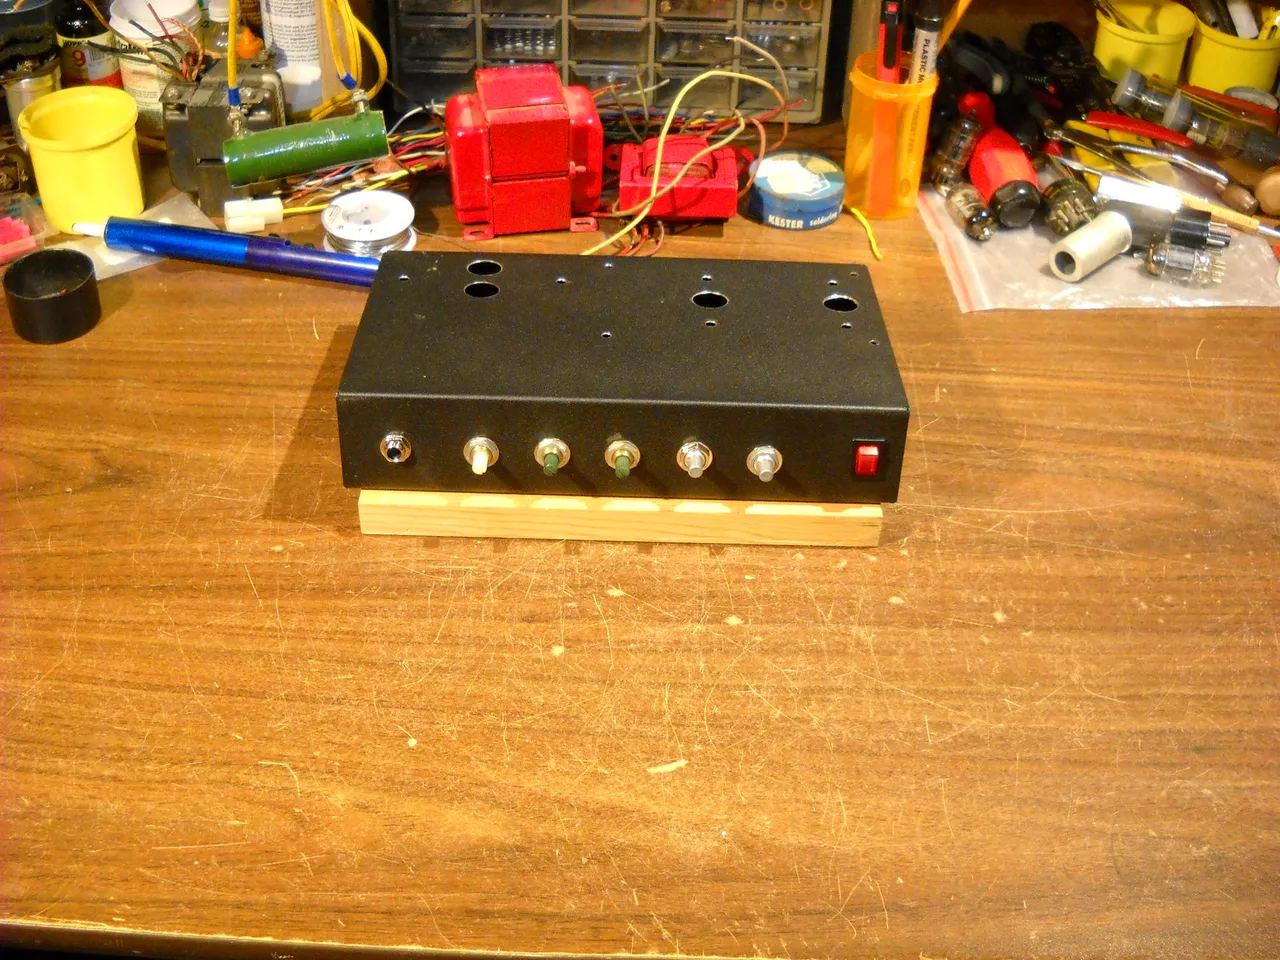
From there, I had to figure out the positions for the 3 tube sockets. I need to mount 1 small 9 pin socket for the preamp tube, and 2 large 8 pin sockets for the power tube and rectifier tube. I had to figure out the spacing from each other and from the transformers. Once I got that figured out, I marked the holes that were needed and then drilled them. I also put rubber grommets into the holes where the transformer wires go through the chassis to protect the wires from the steel chassis.
The next steps will be to mount the transformers, mount the tube sockets in the holes, and drill the holes in the back for the fuse holder and the speaker output jack. I will probably also put a 2 way switch on the back for switching the output impedance to the speaker. The output transformer has wires for 2 choices of speaker impedance. Once all of that is done, the next steps will be to install all the internal parts and wire them up.
I will continue on with this build in part 2.
Well, that's all I have for this post, I hope you found it interesting!

Thanks for stopping by my page and checking out my post, eh!
As always, feel free to leave a comment or a question if you would like.
May the Steem Force be with you!


