
Hi This is Chef Malvika and welcome to @foodehouse12. Today I just thought of doing something different so,
The main difference between a LaCava Brioni and Hyderabadi biryani, which actually defines the world of biryani in India, comes in the masalas. Well, a biryani is supposed to be eaten with your hands rather than your fingers no spoons no Fox no cutlery anything well in my personal knowledge biryani is also one of the oldest rice preparations from them Mughal era well well the major difference between a LaCava Brioni and Hyderabadi biryani which actually defines Alok Navi biryani is a biryani tanah Hyderabadi biryani is a touchy Brioni. The biryani or the of the Brioni is also cooked under dump; the process is customarily known as cooking on low flame under its own steam.
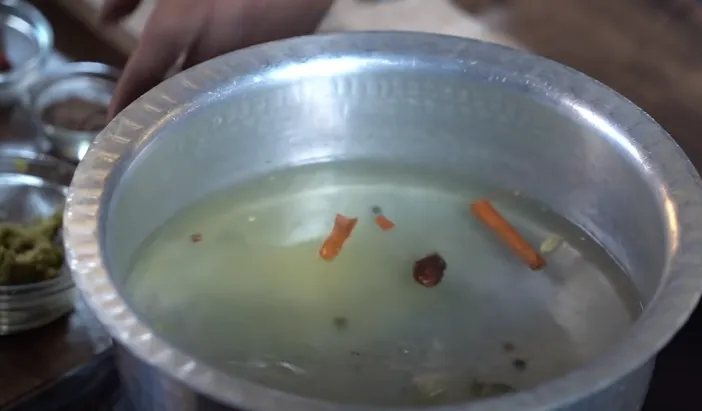
Well, let's get to the kitchen to learn how to make a good-quality traditional lava Brioni. Like most Brioni recipes that have been demonstrated in the past, I'm breaking this recipe into two parts. The first part is obviously getting the rice in place for this. I'm using regular water, which would be four to five times the amount of rice. Let's flavour this with some whole spices starting with sticks of cinnamon, then black cardamom, then green cardamom, and then Lastly, I'm adding some peppercorns and cloves to this, along with a tiny amount of ginger, garlic, and green chilli paste.
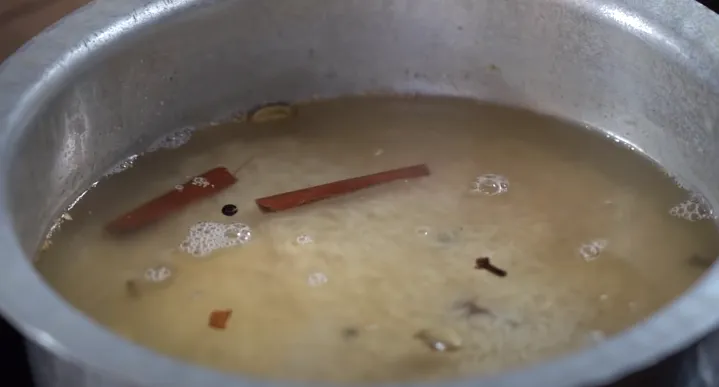
The idea of getting the amount of salt right in this recipe is absolutely crucial because that really defines the quality of rice. The water needs to be salted as salted as sea waters remember that the waters come to roll boil let's add in a little more salt because the salt will of course get absorbed and the water get strained out stir this well and allow this to roll boil on high flame.
Well, this would help flavour the rice from the inside out. I'm also adding a bit extra salt since the salt would naturally get absorbed and the water will get filtered out. Stir this well and let this to boil on high heat.
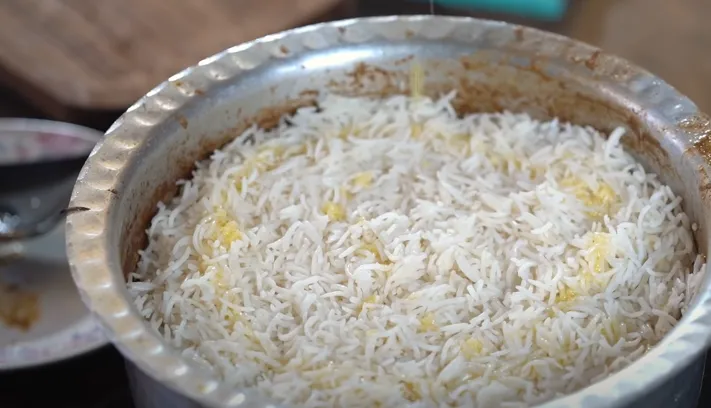
It's very important to strain the rice into a colander as soon as it's about three-fourths done because if you're making something like a biryani, this rice will continue to cook. To do this, we obviously need a colander with this of course the flame and the rice gets strained straight into a colander. In my humble opinion, it's always recommended to cook the rice a little less the first time because if you end up cooking it more it's going to get sluggish almost like a pulao or even worse a khichadi rinse this and bring it back because the next step revolves in this itself let's keep this aside and let's reduce the bathroom the next component is making the spice mix.
which, in my opinion, is the vital ingredient in this recipe. If you happen to be passing through Lucknow or any of those areas, stop by one of the Penn Saris, which are the Khurana shops at the supermarkets, and pick up some garam masala. There are actually three different kinds of garam masala, but I usually choose a la caada garam masala and the second one that's available.
I enjoy using what is known as a "la serda thumb," which is used in many dishes such as llama biryani, galati, kakori, and many others. However, when I use it, I'm essentially making an instant garam masala, which is amazing.
When making a Lucknow briyani, the first ingredient is peppercorns. Next, I add fennel seeds. If you notice, the flavour of this is more on the sweet side. Next, I add a stick of cinnamon, some cloves, and some green cardamom. I also add a piece of nutmeg. However, this is a very big piece of nutmeg; I've just chopped it down further and I'm using half of it.
Ingredients
For Cooking Rice:
Water ( 4-5 times of rice)
2-3 Sticks Cinnamon
1 Black Cardamom
3 Green Cardamoms
4-5 Cloves
3-4 Black Pepper Corns
1/2 tsp Ginger Garlic & Green chilli Paste
Salt
750 gms Rice (washed & soaked)
For Preparing Spice Mix:
1/2 tsp Black pepper corn
1 tbsp Fennel Seeds
1 Cinnamon Stick
4-5 Cloves
3-4 Green Cardamoms
1/2 Nutmeg (chopped)
1 tbsp Cumin Seeds
Mace (Javitri)
1 Bay Leaf
1 tbsp Red Chilli Powder
1 tbsp Ginger Garlic & Green Chillies
2 tsp Curd (out of 250 gms in Spice mix)
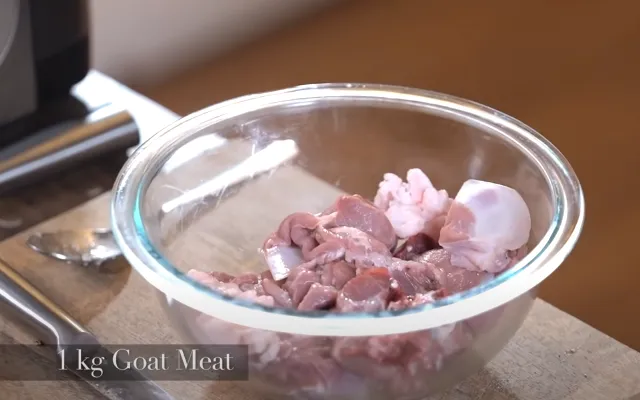
For Marinating Meat:
500 gms goat meat
Spice Mix
Re-meaning Curd
Salt
3 Onions (sliced)
4 tbsp Oil
1 tbsp Ghee
Bay Leaf
Marinated Meat
Water
1/2 cup Milk
2 tbsp Fresh Cream
saffron strands
rose Water
Kewra Water
cooked Rice
Ghee
Orange Color (food Grade)
Yellow Color (food Grade)
I'll add cumin seeds next; alternatively, you may use half cumin and half shahe jeera. Royall human to this, I'm adding maize or Java three, and lastly, to this, I'm adding a bay leaf. Well, just cut it into pieces or just break it like so and add it into the grinder well elizabethtown like I mentioned has a lot of ingredients it also has things like Husky Giada which of course adds a wonderful aroma to the biryani if you can lay your hands on that nothing like it let's grind these spices until they're absolutely fine.
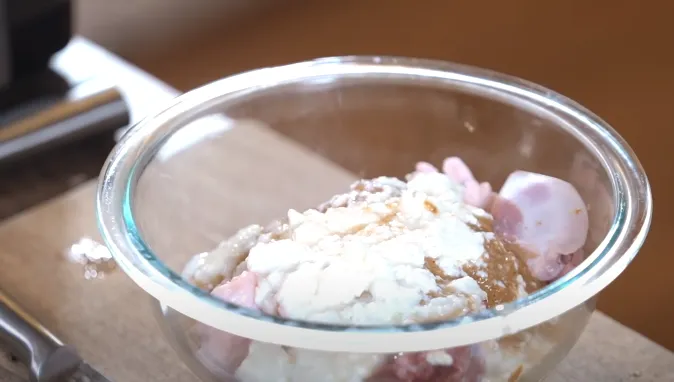
The first ingredient is red chilli powder, to which I'm also adding paste of ginger, garlic, and green chilies. To this, I'm also adding some curds because, as I said, I'm just upping the quantity. However, if the quantity is as much as I am taking, well, you'll realise that the spice is still a little gritty to Eve that I'm adding in to three more ingredients so that the quantity kind of increases.
However, this one is only and only to make this nice and smooth let's transfer all this into the meat while the meat is taken into two parts, of course one is the meat per se which is on bone and yeah I also like taking in goat fat. While this is the same measured portion of yoghurt, I'm going to use the remaining while marinating the meat well.
which gives the biryani some nice fats and gives it some Chika's or some fat to this I'm adding the remaining amount of curds, our yoghurt, whatever you please, and to this finally I'm going to add in some salt as necessary mix all of this well and with this your meat is ready to be marinated. You can keep this for two hours or overnight as a complete personal choice, but I personally like keeping this overnight and for two hours.
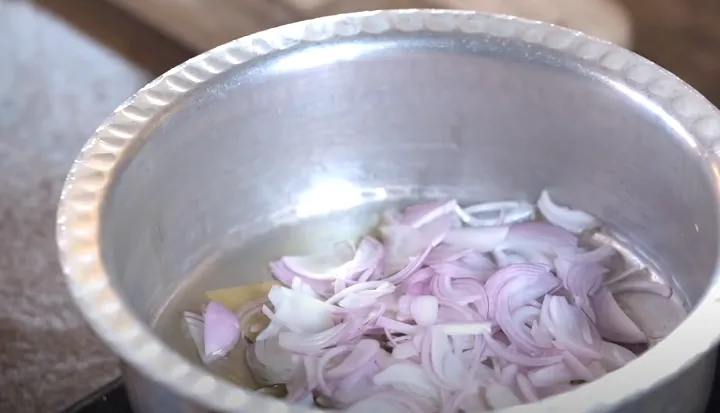
Let's move on to the third step, which is cooking the meat. For this, we obviously need onions; regular red onions that we need to slice thinly. The next step is cooking these; I'm using a mixture of vegetable oil and key, of course for flavour; we also want to reserve a little because when we add that later first things first we'll add in bay leaf and to this sliced onions; the idea here is not to cook the onion. The objective is to simply sweat them until they get golden brown because we need to kind of sauté them with the meat and the curds.
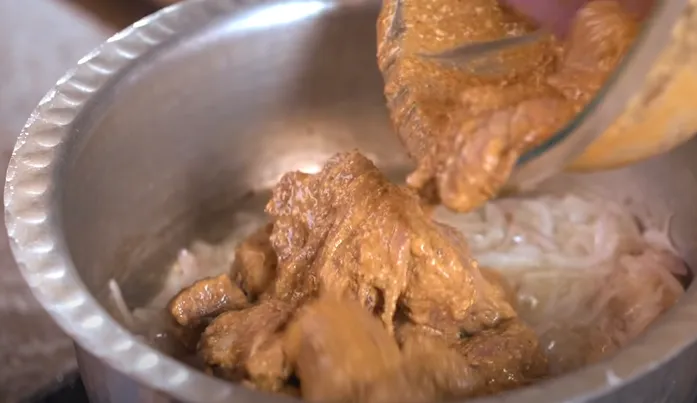
At this point, the onions have started to sweat. I'm going to add the marinated meat, and this needs to cook until the water or moisture starts releasing from the meat itself. We need to stir this well on high flame for at least two to three minutes, or until the ghee and oil just kind of start releasing the sides of the pan. The next step is to cover this and place it to cook for 20 minutes on medium flame. At this point, the meat also starts releasing water or moisture and that's important because the meat for 20 minutes is one of cook in the same liquid.
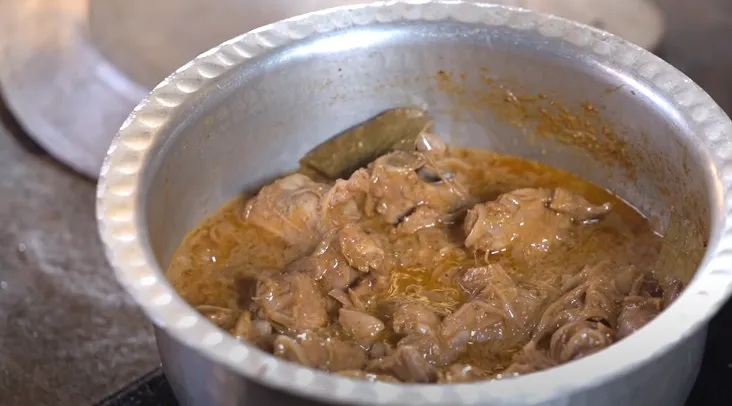
The flesh must be of a wonderful, sticky quality. It's been 20 minutes and the meat is kind of semi-cooked and also if you notice it's released a lot of moisture; the next 20 minutes are all about cooking the meat until it's really well done; however, now I'm going to add in a cup full of water we need to cover this and cook it till The meat may also be cooked in a pressure cooker until it is perfect. Since it has been 40 minutes, the meat should be nicely cooked. Let's quickly check. Alternatively, you can cook the meat until it is absolutely well done.
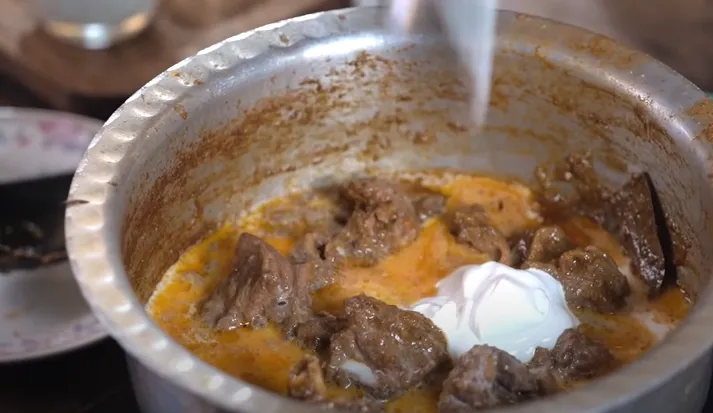
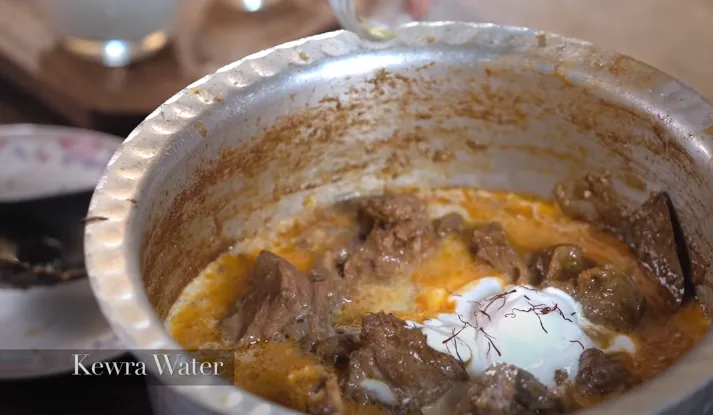
The point now when you need to make the biryani absolutely nice and rich goes in with full fat milk to this I'm just making kind of richer and adding in some cream now this is regular dairy cream also known as malai of Balai. If you look closely, you can see that the meat has naturally cooked beautifully well, the onions have kind of dissolved in the gravy, and the fat has also started releasing on the sides. Balai, as it is known in Lucknow, is where the flavour of the Lochner or the Lochner will be thoroughly examined. I'm adding strands of saffron, rose water, and quebra ormita to this; mix well, and cook on high for only 3 to 4 minutes.
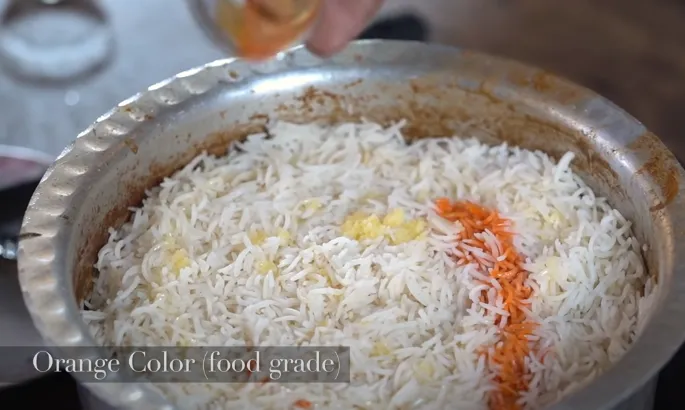
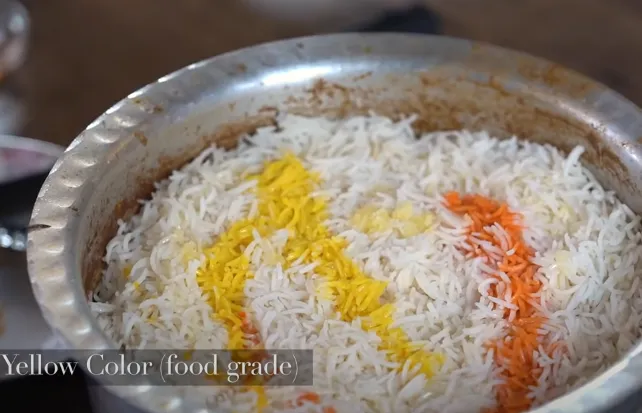
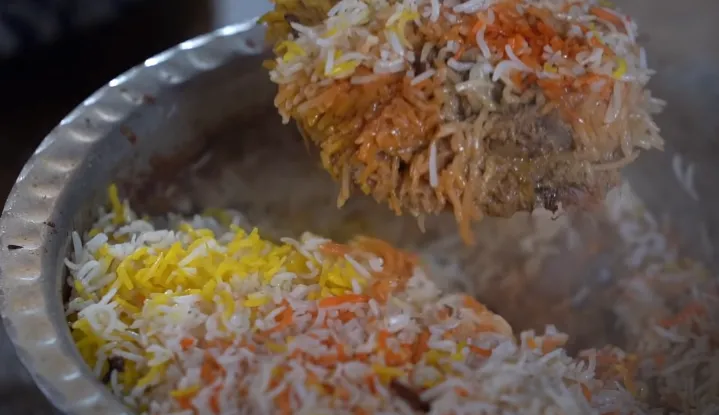
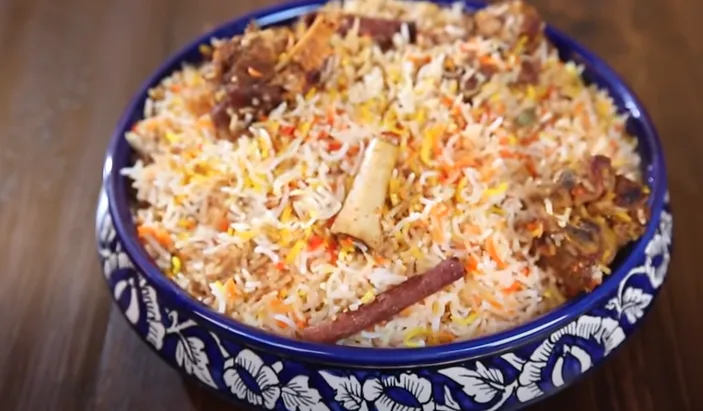
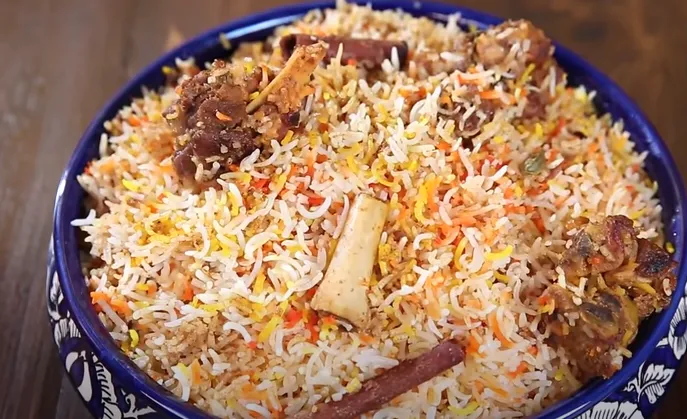
the following step is to add the cooked rice; at this point, we need to reduce the flame and add the Desi Ghee and two optional ingredients; this one is food-grade orange in colour; as I've said before, this is completely personal; I'm showing it to you because traditionally colours have been added; of course, it's a personal choice; you add it on one side as shown, and similarly on the other side, I'm going to add yellow; the last and final step is to cover. a top grade biryani should be tasty sticky and totally sandwiches, so do this and leave this to cook on a very low heat for 15 minutes. The rice also has to be glossy, separate, and unclogged.
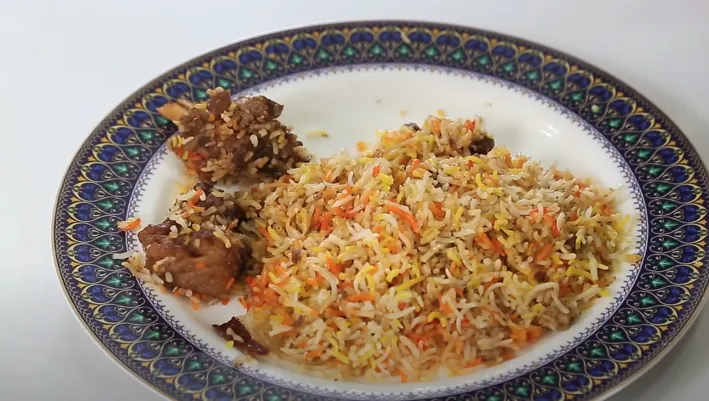
When the time is up and a biryani is finished and ready, it is immediately served at the dinner table. It is crucial to handle each grain of rice with the utmost care because this greatly influences how people will perceive the flavour or quality of the dish. According to legend, when the Nawab of Lucknow Asif Adana made the bar, what was served to the guests was biryani.
It was a combination of meat, veggies, and rice. One day, when he was walking by and couldn't resist the perfume of a great biryani, he naturally requested his housekeeper to make one for him. In this way, the Nobel family's famous biryani came to be considered royalty.
Do try making this at home and share it with your family.
But before you go, don't forget to upvote, reblog and follow to @foodehouse12.

![]()
| 📷 Picture | Photography |
|---|---|
| Model | Galaxi A72 |
| Android | 11 |
| 📷 Camera used | Handphone + Macrolens |
| 📷 Photographer | @foodehouse12 |
| Location | 184 Broad St, Birmingham B15 1DA, United Kingdom |