
Un grato saludo mis queridos amigos de @HiveDiy y a todos los compañeros de la hermosa plataforma de @Hive.
Para mí es un honor unirme a la iniciativa con temática del regreso a clases ya que ahora me vuelvo a iniciar después de muchos años en el pre-escolar, kínder o jardín de niños como lo llaman en otros lados o países del mundo.
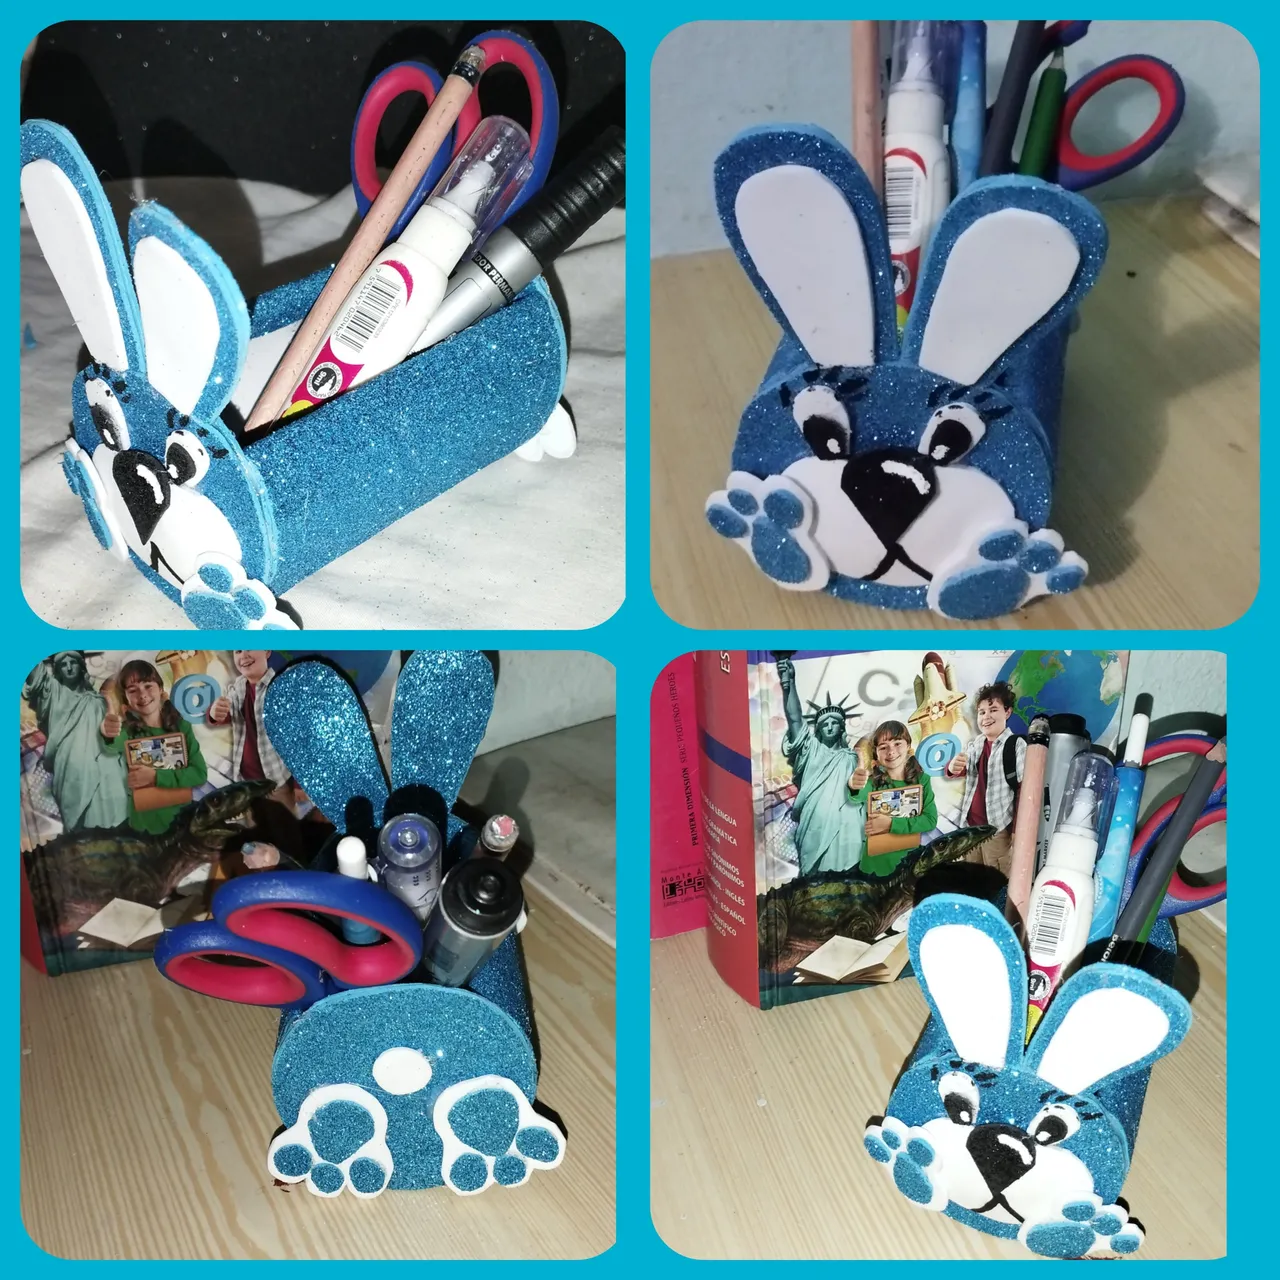
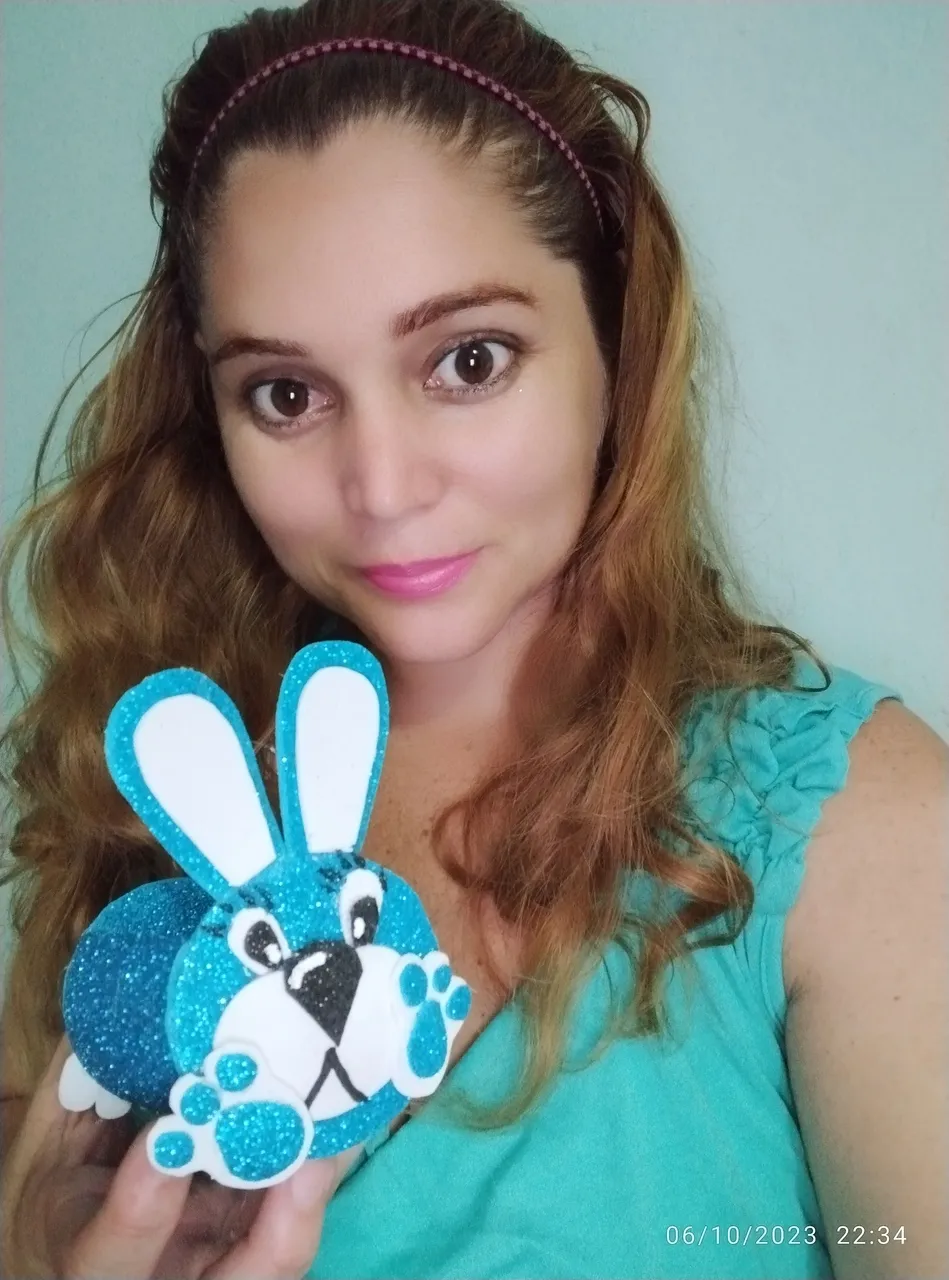
En esta oportunidad elabore un hermoso porta lápices de conejito lindo,práctico y delicado.
Los materiales Utilizados en esta creación son los siguientes:
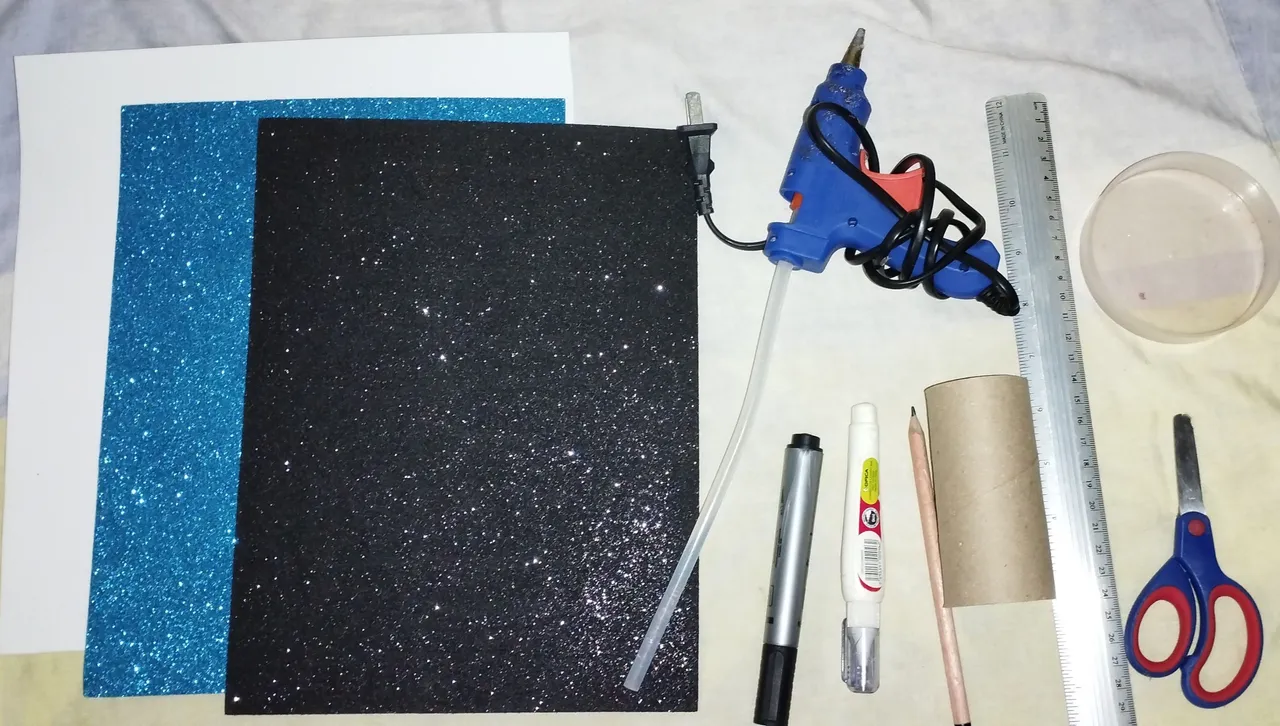
Materiales:
✓ Foami color: Azul, blanco y negro.
✓ Silicón caliente.
✓ Un Rollo de papel higiénico.
✓ lápiz.
✓ Tijera.
✓ Regla.
✓ Marcador Negro.
✓ Corrector o Tiper.
PASO A PASO:
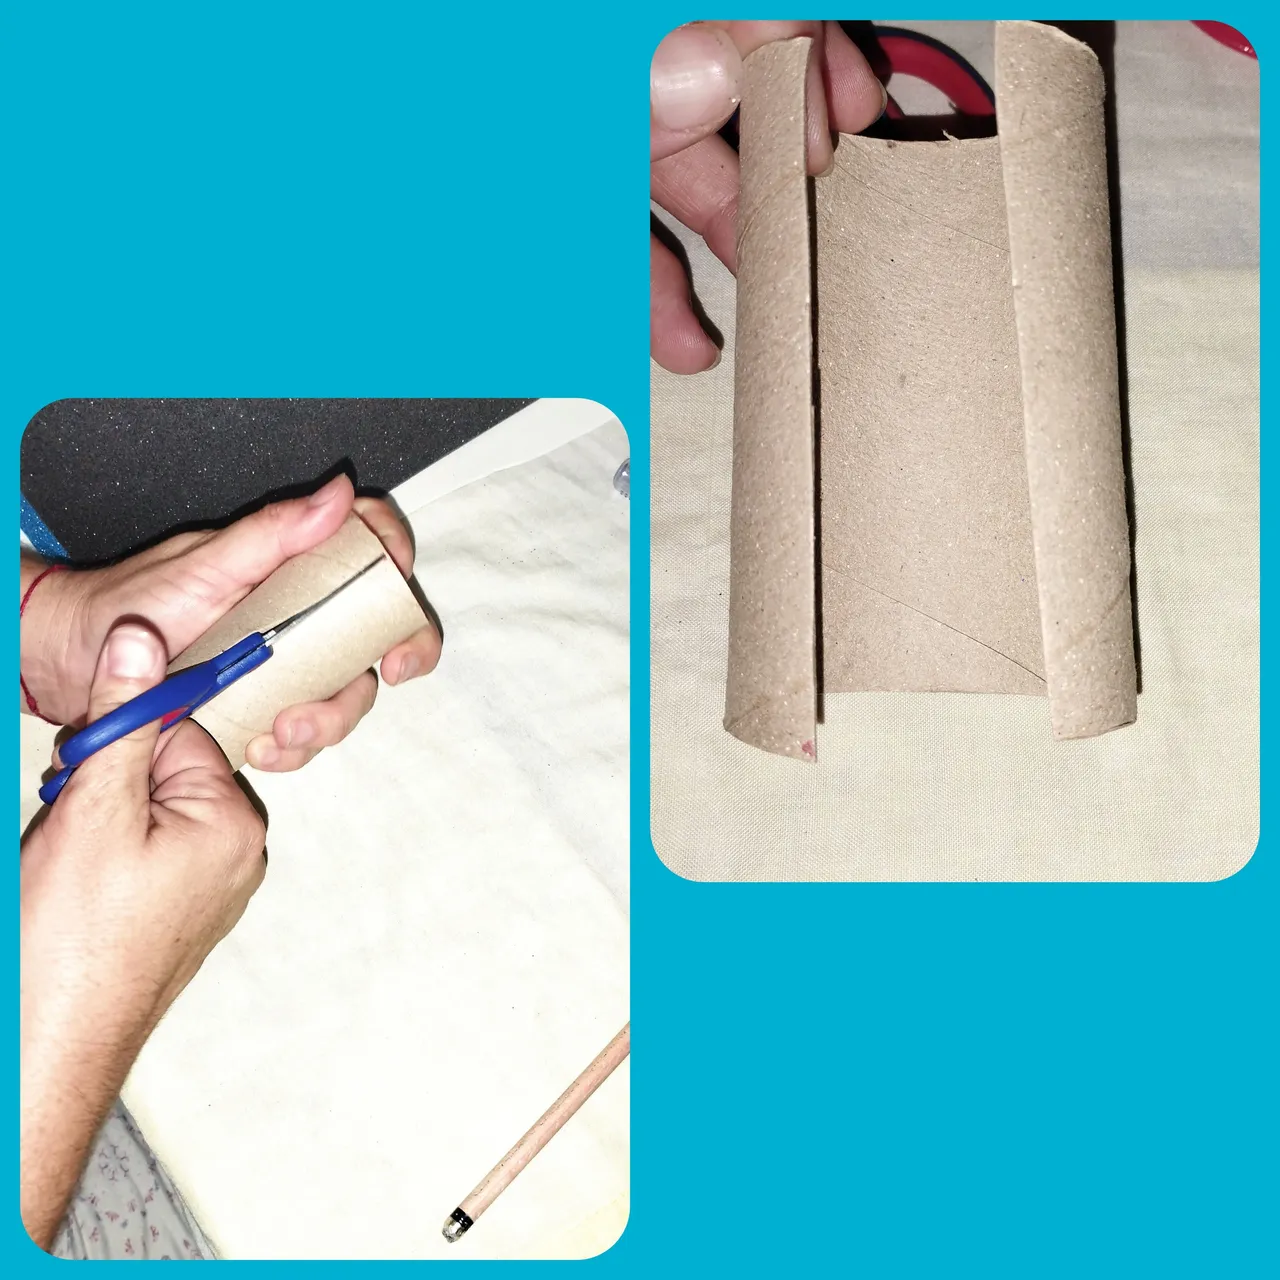
PASO 1:
En este primer paso vamos a cortar el rollo de papel por todo el medio esto para tener una apertura del mismo.
PASO 2:
Ahora vamos a medir con una regla en el foami blanco. 15 centímetros de largo y 9,5 centímetros de ancho. Para colocarlo del lado de adentro del rollito de papel higiénico.
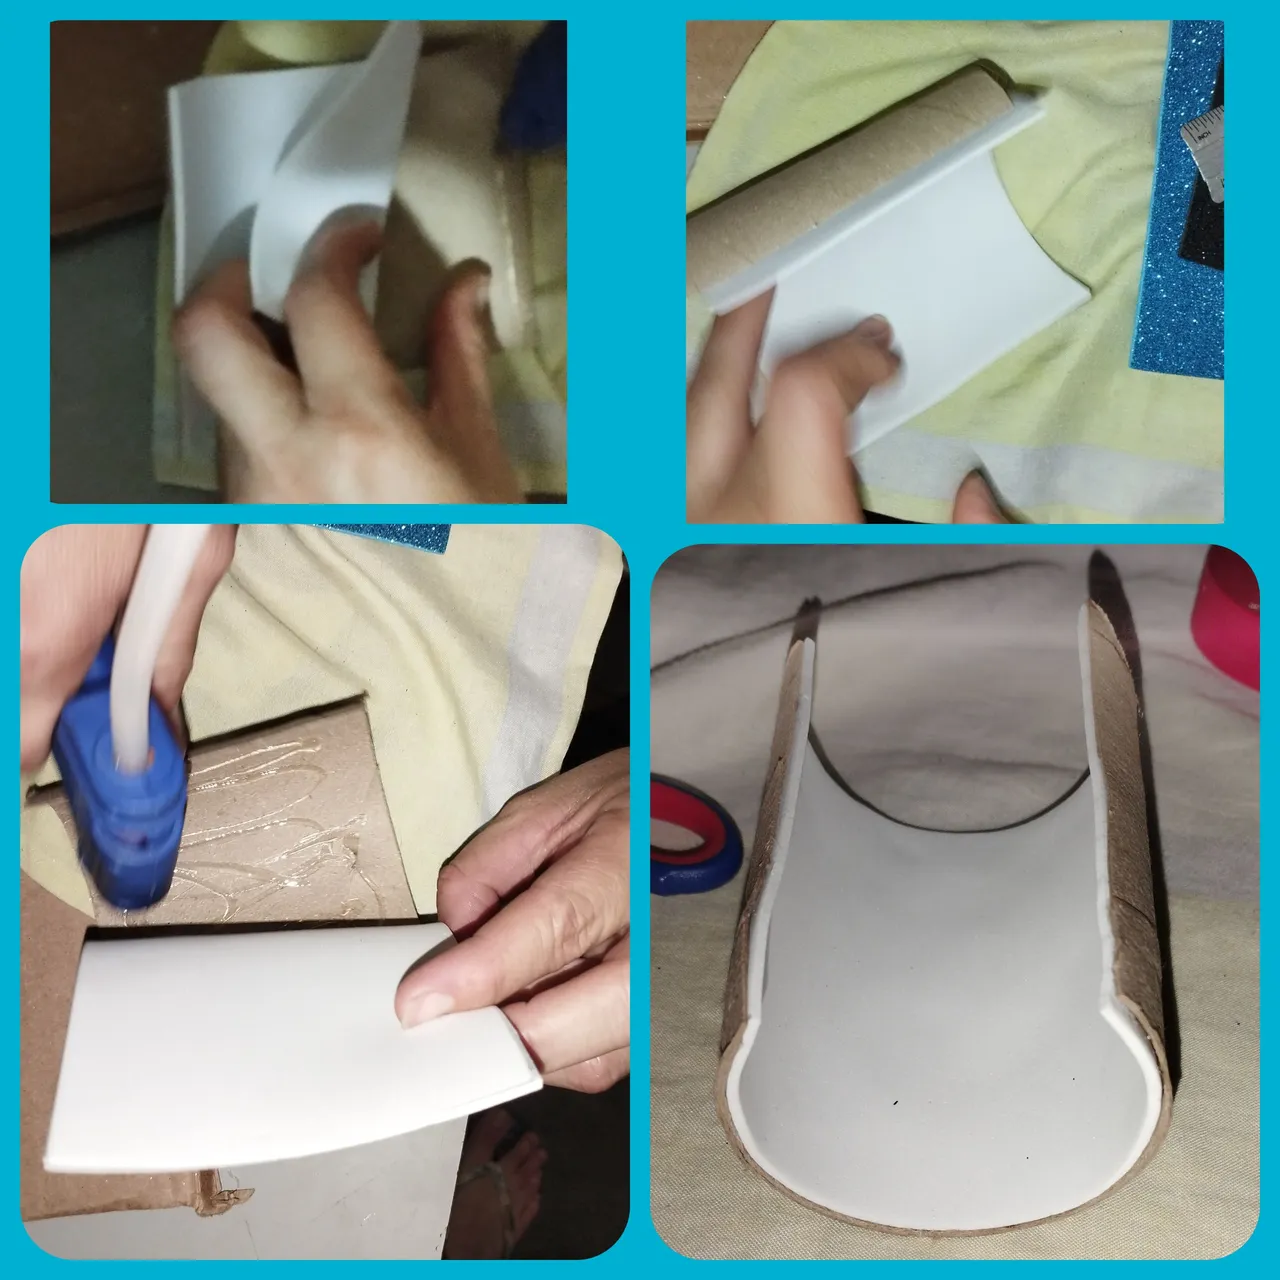
PASO 3:
Ahora vamos a recortar 20 centímetros de largo por 9.5 centímetros de ancho de foami color azul, les recuerdo que pueden usar el color del foami de su preferencia, Este lo vamos a ir pegando por la parte de afuera del rollito de papel.
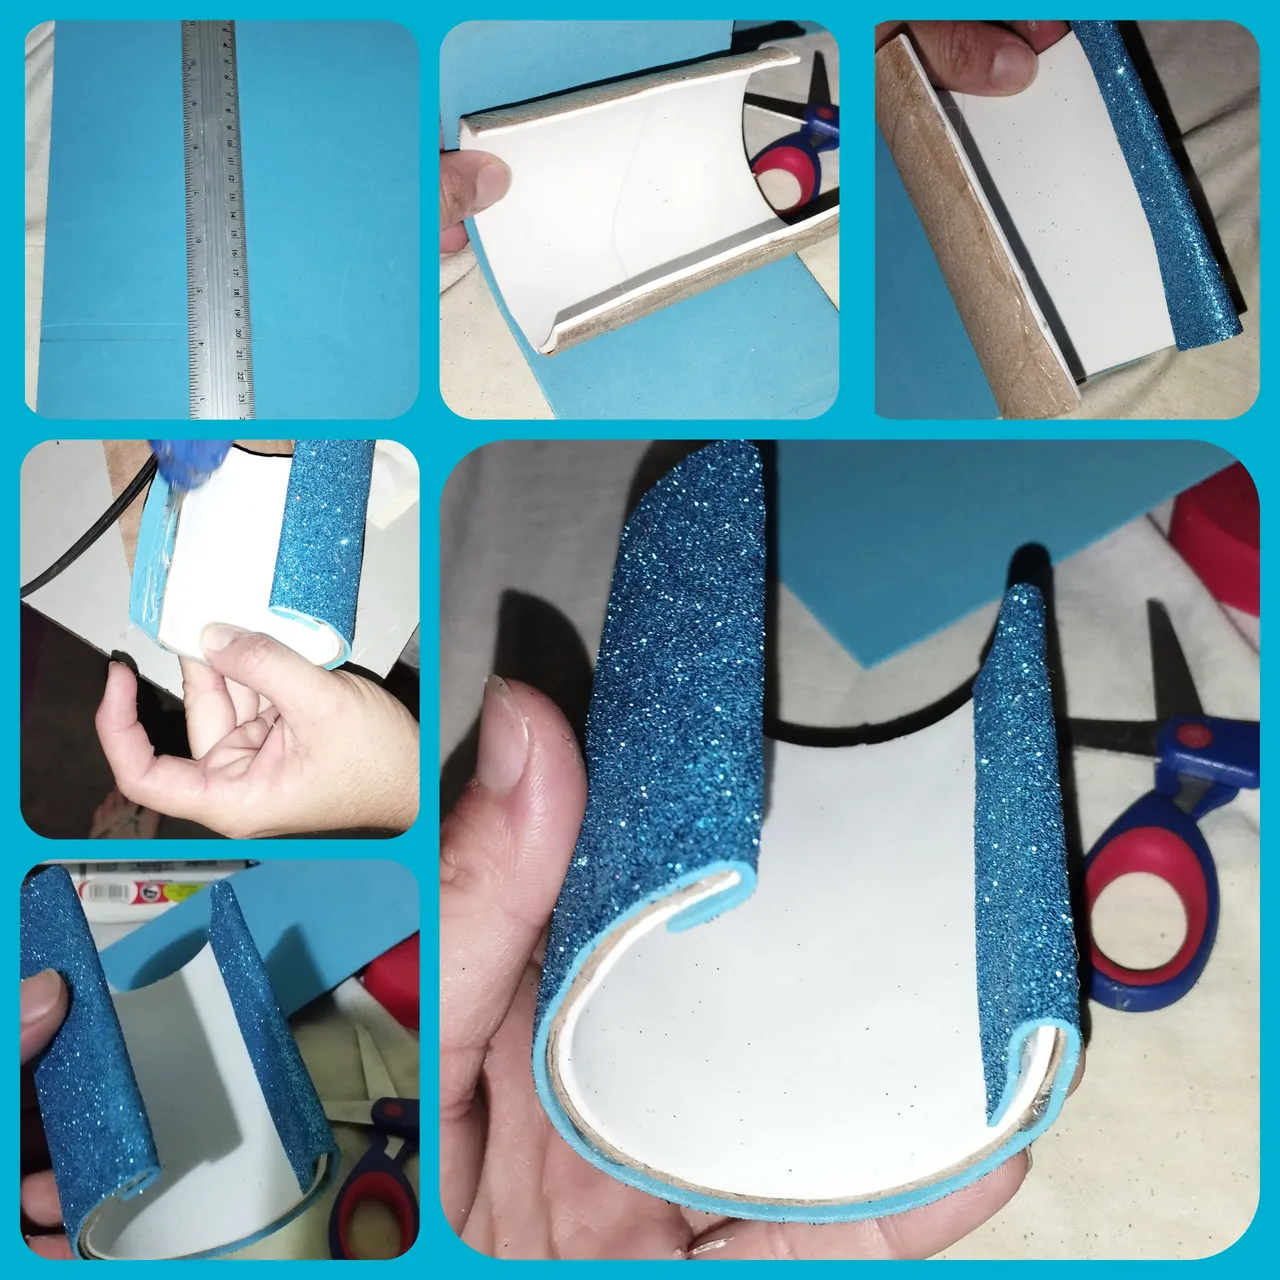
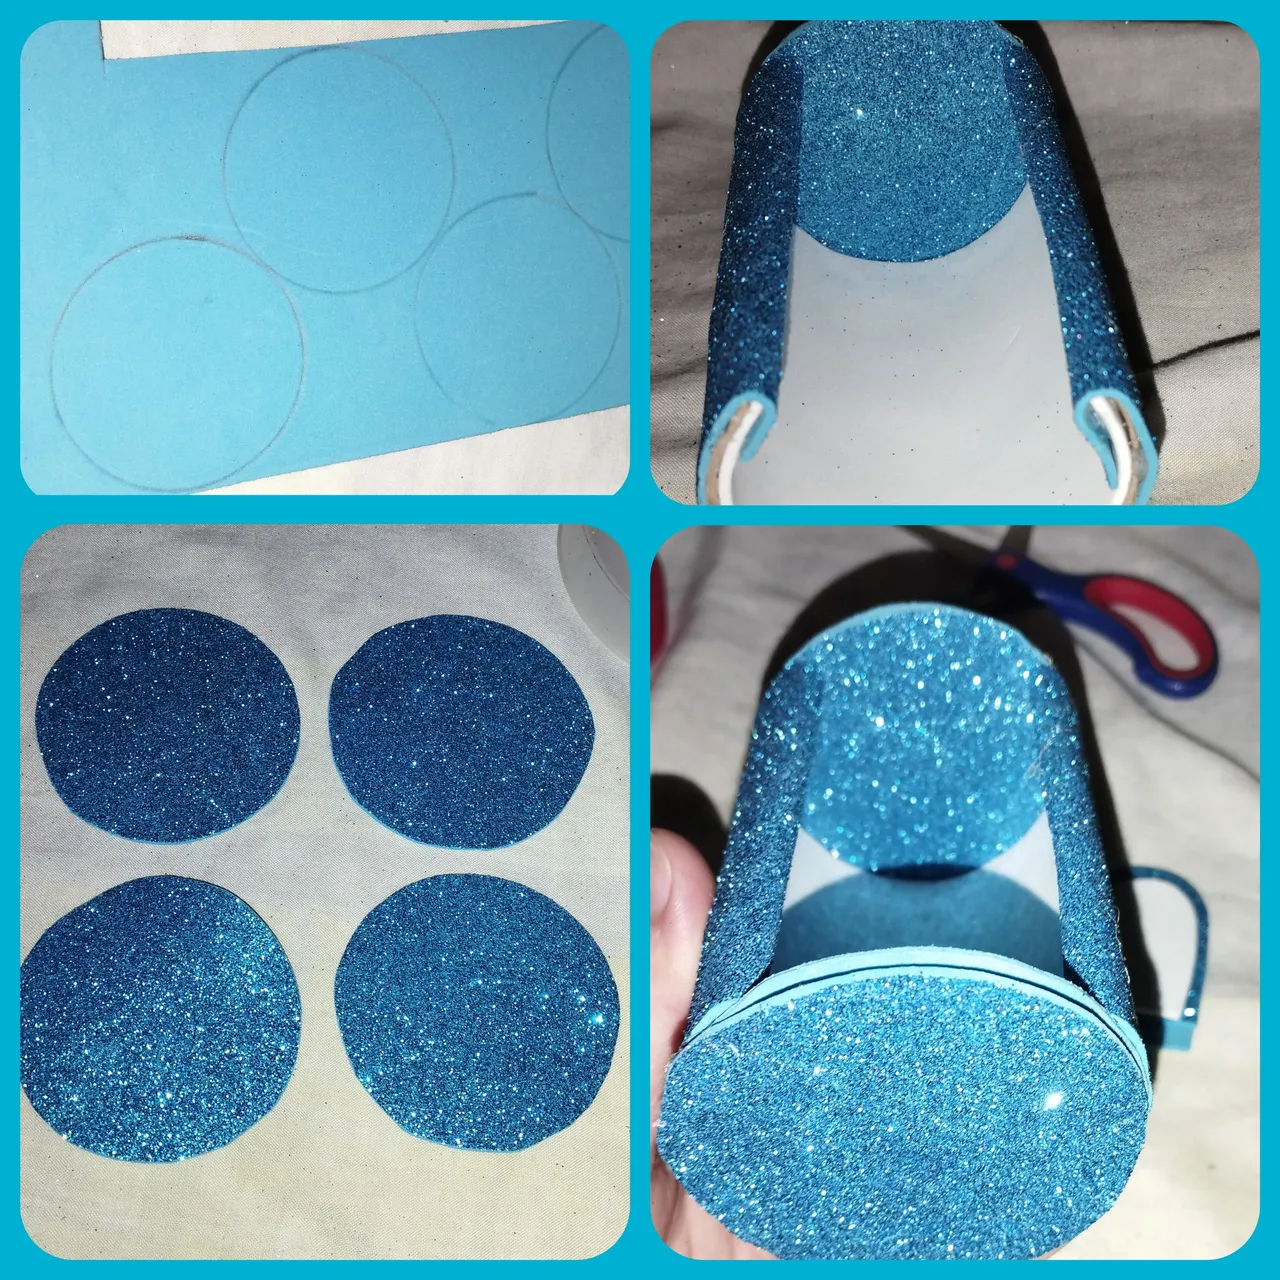
Paso 4:
Hacemos cuatro círculos de 7 centímetros cada uno y los pagamos de lado a lado formando dos lados con dos caras. Estás las vamos a pegar delante y detrás de rollito es ahí donde haremos la carita y la colita del conejito.
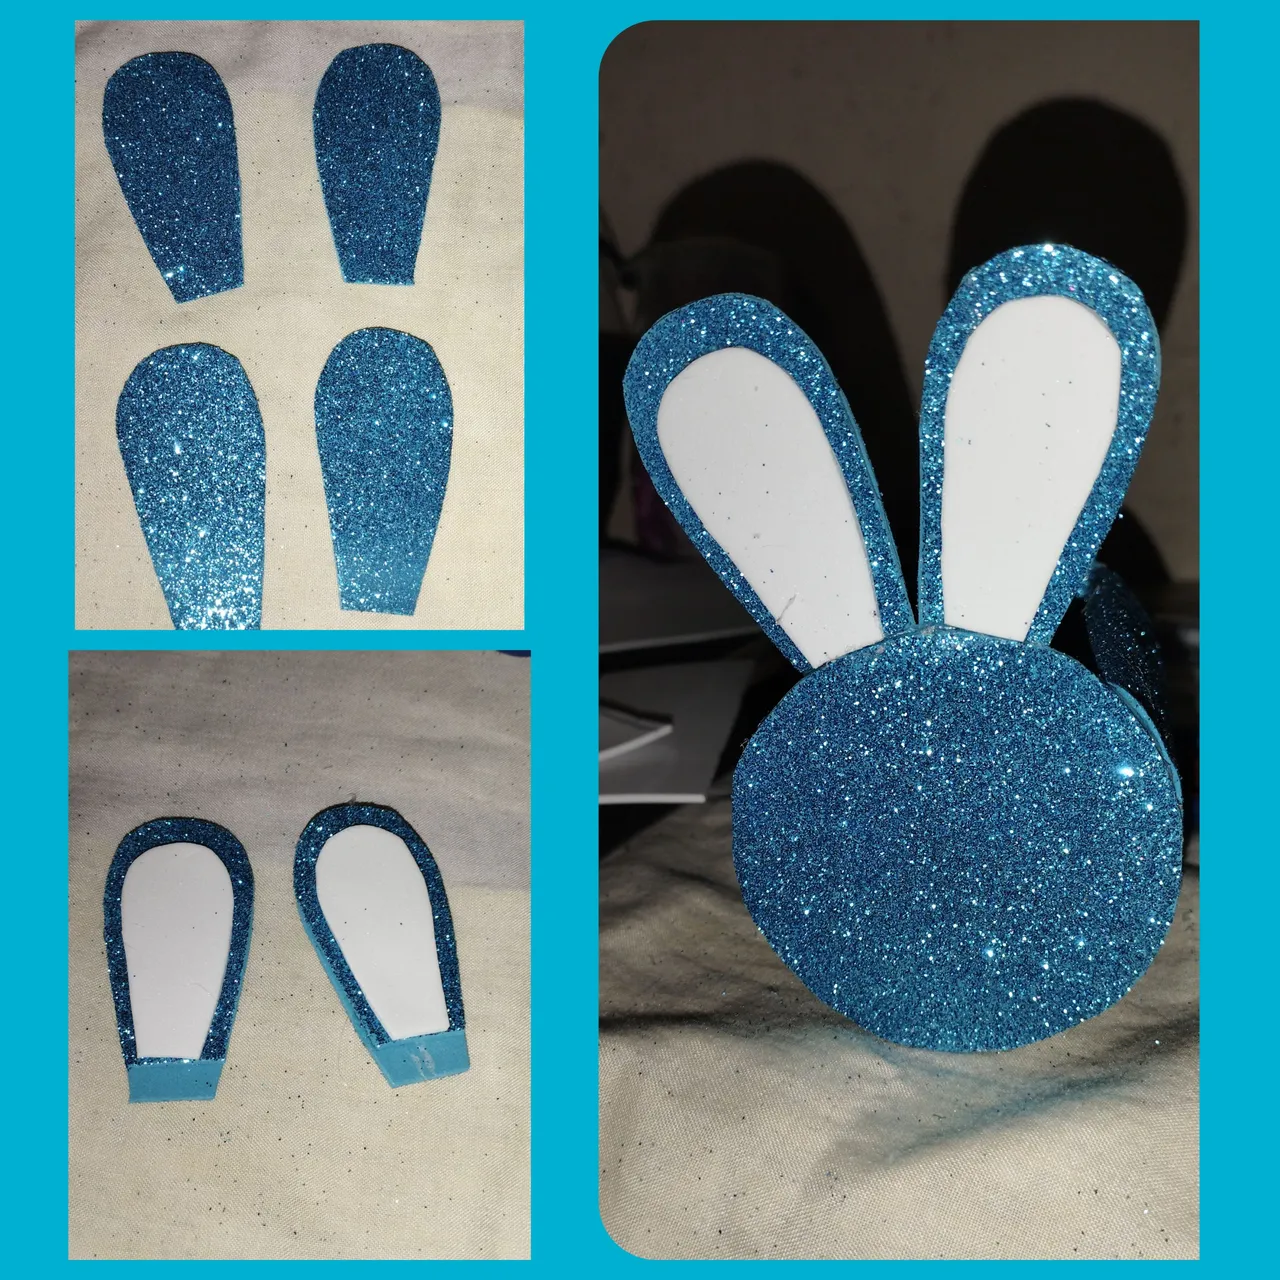
PASO 5:
Una vez que tengamos armado el rollo vamos elaborar las orejitas se van a intruducir del lado superior luego se pegará completamente para que no se caigan.las orejitas azules tendrán una medida de 5.5 centímetros por 3 centímetros. Y las orejas bancas 5 centímetros por 3 centímetros.
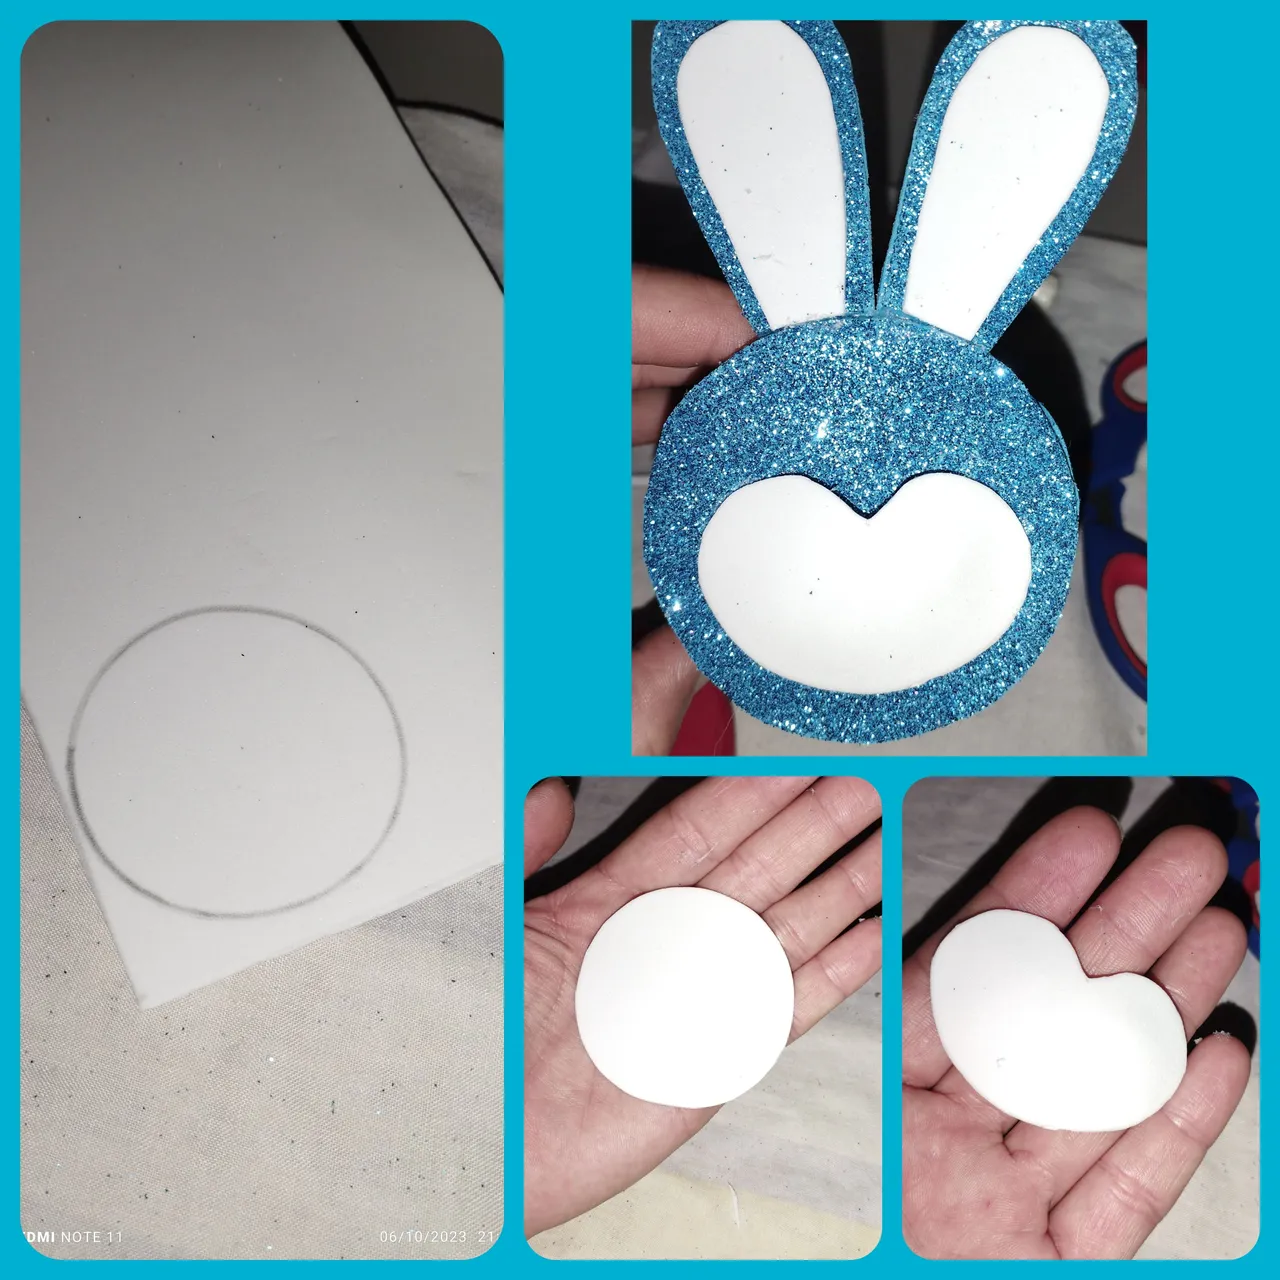
PASO 6:
Vamos a dibujar en el Foami blanco un círculo 5 de centímetros para hacer la nariz de nuestro conejito. Cortamos como si vamos a realizar un corazón medio ancho.
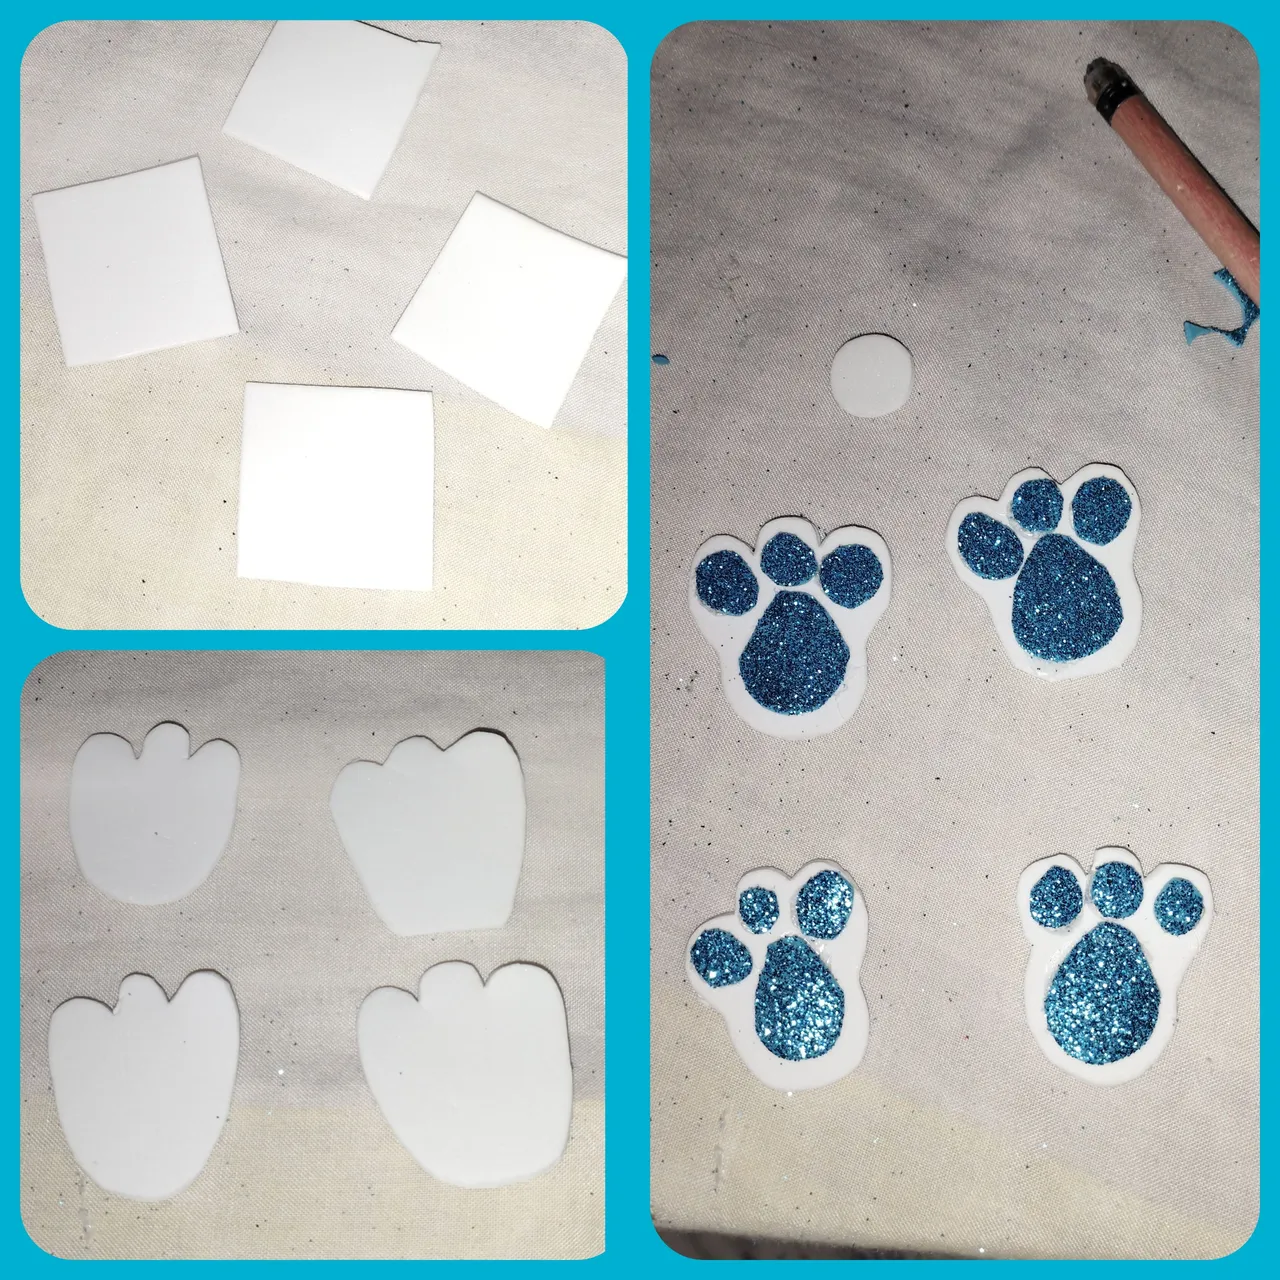
PASO 7:
Para la elaboración de las patitas tenemos 4 cuadrados de 5 centímetros de foami blanco y pintamos una patita luego la recortamos y le colocamos la huellita del foami de color azul.
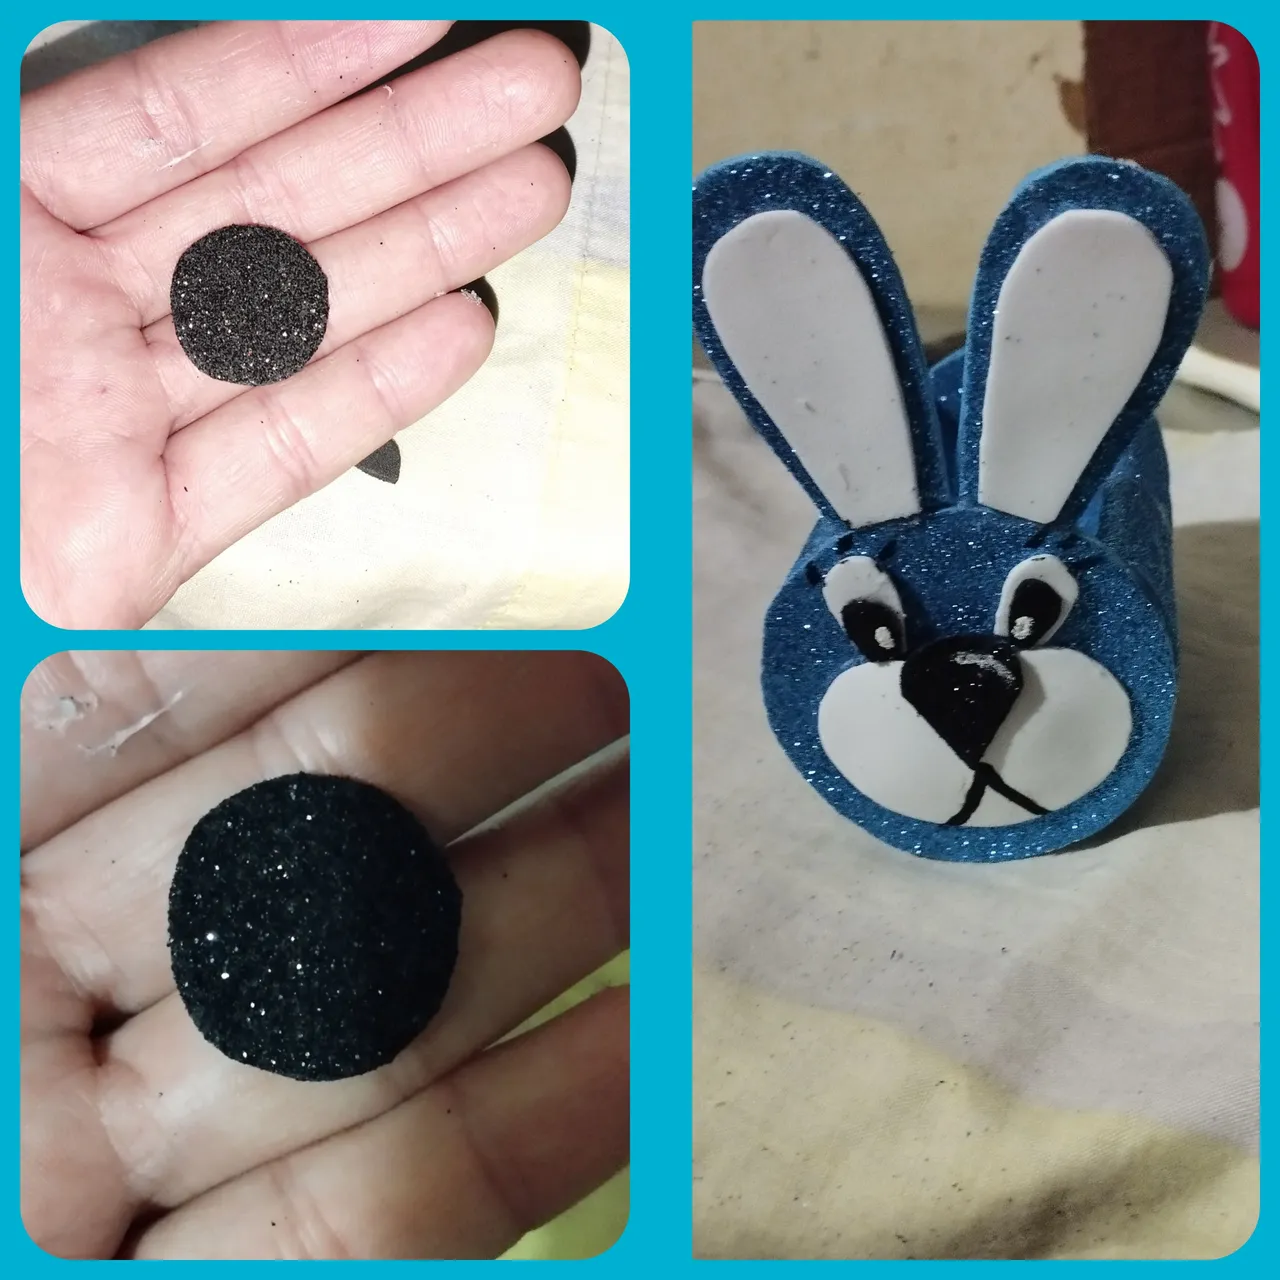
PASO 8:
Recortamos un círculo de 2 centímetro de foami de color negro para hacerle los ojitos y la parte superior de la nariz.
Y luego q tengamos eso armamos la carita de conejo.con el marcador le aremos sus pestañas para darle un toque paso delicado.
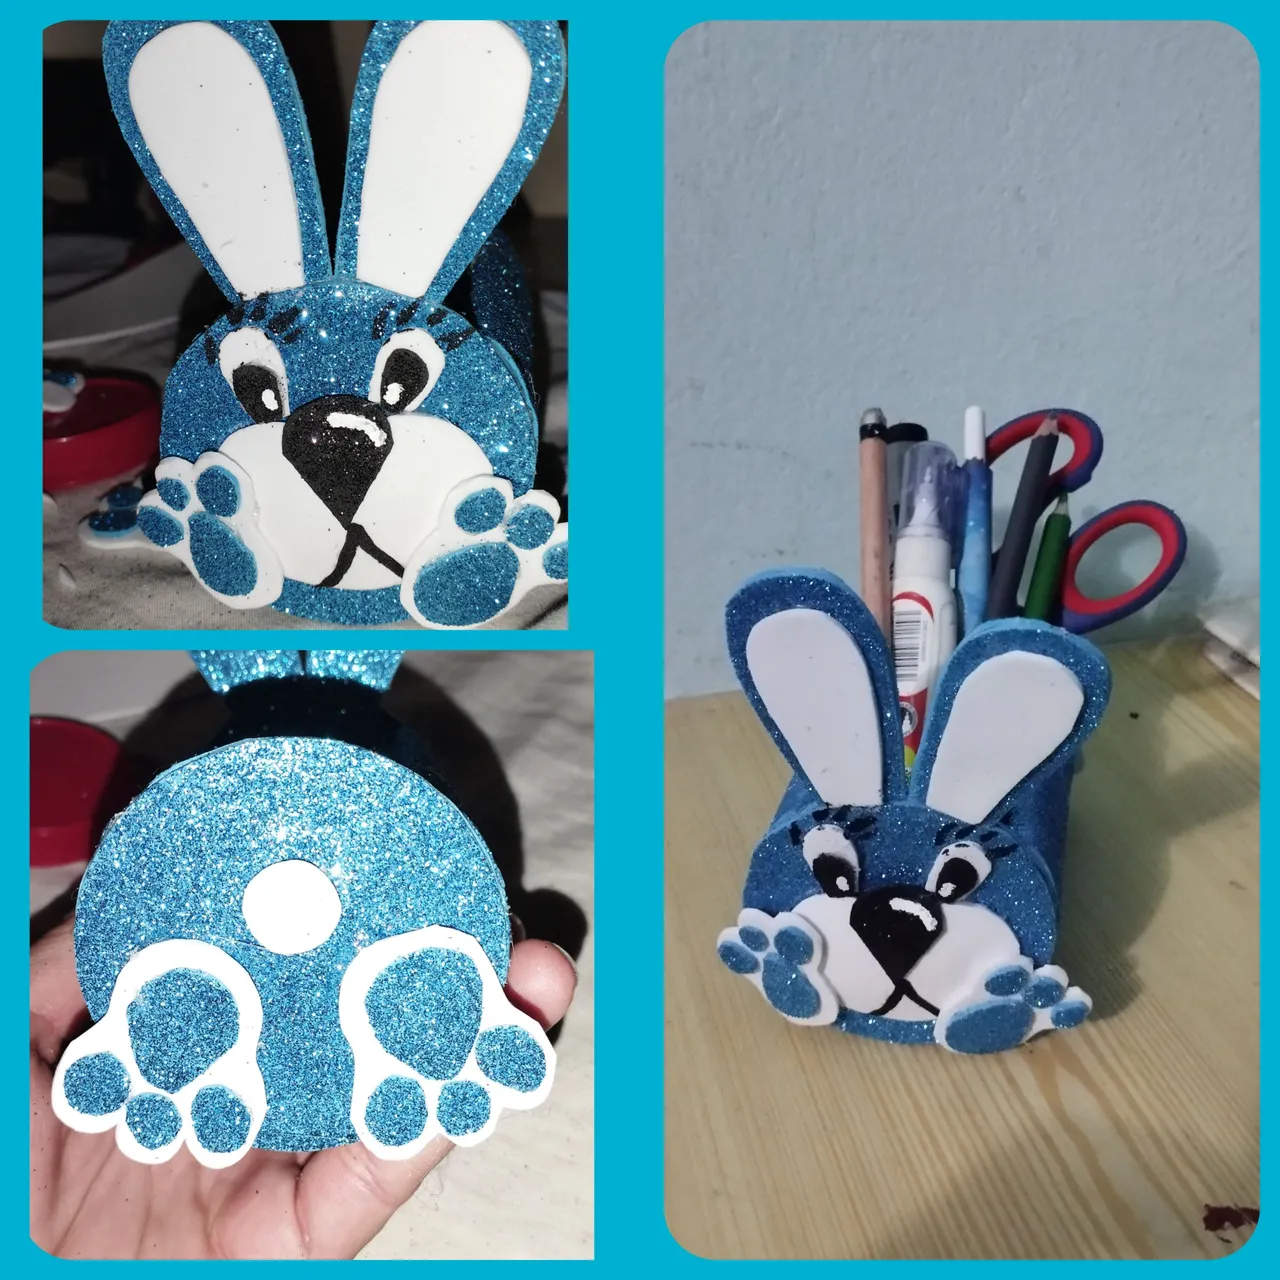
PASO 9:
Le daremos los últimos detalles que son las patitas que se colocarán el la parte de adelante y la de atrás. Y así tendremos listo nuestro hermoso porta lápices.
En esta hermosa comunidad he aprendido muchísimo, he buscado técnicas y elaborado manualidades que nunca pensé que podia realizar por eso quiero darles las gracias a todos, estoy muy agradecida por el apoyo y espero que en esta oportunidad les guste mi post y está hermosa manualidad que realice.
Gracias por leerme, bendiciones! 😊🙏🏻
¡Saludos!
Las imagenes me pertenecen, fueron tomadas de mi teléfono Redmi Note 11.
Las fotos fueron editadas en el programa Editor de Fotos Polish.
traductor: Deepl Traslator.
Warm greetings my dear friends of @HiveDiy and to all fellow members of the beautiful @Hive platform.
For me it is an honor to join the initiative with a back to school theme as I am now starting again after many years in pre-school, kindergarten or kindergarten as they call it in other places or countries of the world.
This time I made a beautiful, cute, practical and delicate bunny pencil holder.
The materials used in this creation are the following:
Materials:
✓ Foami color: blue, white and black.
✓ Hot glue.
✓ A roll of toilet paper.
✓ pencil.
✓ Scissors.
✓ Ruler.
✓ Black marker.
✓ Corrector or Tiper.
STEP BY STEP:
STEP 1:
In this first step we are going to cut the paper roll all the way down the middle to have an opening.
STEP 2:
Now let's measure with a ruler on the white foami. 15 centimeters long and 9.5 centimeters wide. To place it on the inside of the toilet paper roll.
STEP 3:
Now we are going to cut 20 centimeters long by 9.5 centimeters wide of blue foami, I remind you that you can use the color of the foami of your preference, this we are going to glue it on the outside of the paper roll.
Step 4:
We make four circles of 7 centimeters each and pay them from side to side forming two sides with two faces. These we are going to glue them in front and behind the roll is where we will make the face and tail of the bunny.
STEP 5:
Once we have assembled the roll we will elaborate the ears are going to intruducir the top side then glue completely so they do not fall.blue ears will have a measure of 5.5 centimeters by 3 centimeters. And the bank ears 5 centimeters by 3 centimeters.
STEP 6:
We are going to draw on the white Foami a circle 5 of centimeters to make the nose of our bunny. We cut as if we were going to make a half wide heart.
STEP 7:
For the elaboration of the paws we have 4 squares of 5 centimeters of white foami and we paint a paw then we cut it and we place the little hole of the foami of blue color.
STEP 8:
Cut out a circle of 2 centimeters of black foami to make the eyes and the top of the nose.
And after we have that we assemble the bunny face. With the marker we will make its eyelashes to give it a delicate touch.
STEP 9:
We will give the last details which are the little legs that will be placed on the front and the back. And so we will have our beautiful pencil holder ready.
In this beautiful community I have learned a lot, I have searched for techniques and made crafts that I never thought I could do so I want to thank you all, I am very grateful for the support and I hope that this time you like my post and this beautiful craft that I made.
Thanks for reading me, blessings! 😊🙏🏻
Greetings!
The images belong to me, they were taken from my Redmi Note 11 phone.
The photos were edited in the Polish Photo Editor program.
translator: Deepl Traslator.