

Ruleset Focus
In last week's Battle Mage Secrets challenge, the focus was on showcasing the FIRE & REGRET ruleset, which was introduced earlier in the year. As with any new changes, it initially felt unfamiliar and uncomfortable, but players quickly adapted by strategically organizing their teams to maximize their gameplay.

In the FIRE & REGRET ruleset, every unit possessed the RETURN FIRE ability from the start of the battle. This ability resulted in Ranged attackers receiving damage equivalent to half of their own damage, rounded up, as a counterattack. Consequently, in battles governed by this ruleset, the usage of Ranged monsters was significantly reduced due to the substantial disadvantage they faced 😵

FIRE & REGRET ruleset is in play.Keep an eye out for monsters possessing these abilities when constructing your team, as they can greatly enhance your chances of achieving victory ✌️


RETURN FIRE, and Thorns damage to all enemy monsters by 1RETURN FIRE damages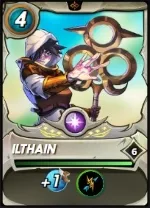
When discussing the RETURN FIRE ability, Summoners like Lir Deepswimmer and Ilthain are often associated with it, as they provide a similar buff to your lineup as seen in the FIRE & REGRET ruleset. These two Summoners are particularly valuable and frequently chosen in battles governed by the Going the Distance ruleset, where only units with Ranged attacks are permitted 😁

The Battle
In my alt account, jimbei, I had the opportunity to participate in a challenging battle that combined the Going the Distance and the FIRE & REGRET rulesets, making it a frustrating and intense experience 😓 To get right into the action, the battle link can be found here. Otherwise, do read on as I go into more detail regarding the lineup and fight.

Let's begin by reviewing the ruleset. Firstly, there is the Going the Distance ruleset, which restricts the use of units to those with Ranged attacks. Secondly, there is the Heavy Hitters ruleset, which provides all monsters with the Knock Out ability where units are able to do double damage when attacking an enemy that is stunned. Lastly, the centerpiece of this challenge is the FIRE & REGRET ruleset, which was previously mentioned. It is a high-stakes battle with a mana cap of 43, and only the Earth and Dragon Splinters are prohibited.

Summoner, Kelya Frendul
When confronted with a Going the Distance ruleset, my instinct is to choose Quix the Devious due to the valuable -1 Range debuff. This debuff is particularly effective in battles where all monsters have Ranged attacks. However, since the Dragon Splinter is prohibited in this specific battle, I have opted for Kelya Frendul. Kelya Frendul grants beneficial attribute buffs, including +1 Armor and +1 Speed, and allows the utilization of the Water Splinter, which offers a wide selection of excellent Ranged monsters 😁

First Position, Venari Marksrat
Venari Marksrat is not typically considered a frontline tank in most cases. However, in this particular setup, it serves as a sacrificial unit primarily for its Martyr ability, which grants adjacent monsters a +1 boost to all their Stats upon its demise. This is a strategy that I frequently employ and find great satisfaction in 😜

Second Position, Drybone Raider
Having the Drybone Raider in this battle provides a significant advantage, particularly when positioned in the first spot. It allows the monster to focus on utilizing its Melee attacks and abstain from using Ranged attacks, especially under the influence of the FIRE & REGRET ruleset. By capitalizing on the Martyr boost activated upon Venari Marksrat's demise, the Drybone Raider undergoes a remarkable transformation, becoming an exceptionally formidable entity. With the utilization of its Double Strike and Shatter abilities, the monster achieves an astonishing output of 6 Melee damage per round after factoring the Martyr boost! 😍

Third Position, Wave Brood
Positioned in the third spot, Wave Brood assumes the role of a backline tank, utilizing its Taunt ability to draw all enemy attacks towards itself, effectively safeguarding the remainder of the lineup. Additionally, its Close Range ability enables it to attack as a frontline tank when necessary, even from the first position. Placing Wave Brood in the backline also allows it to benefit from the healing capabilities of Angelic Mandarin's Triage ability, further enhancing its durability in battle 🤝

Fourth Position, Angelic Mandarin
As previously stated, the primary purpose of including Angelic Mandarin in this setup is to offer healing support to Wave Brood using its Triage ability. The role played by Angelic Mandarin is pivotal in ensuring the survival of Wave Brood, as Wave Brood attracts all enemy attacks through its Taunt ability. This arrangement allows the Drybone Raider to solely focus and unleash its Melee onslaught from the first position without any concern for the FIRE & REGRET ruleset 🤝

Fifth Position, Merhampir
Merhampir is a monster that I absolutely adore when playing with the Water Splinter. Its Life Leech ability allows the monster to continuously increase its health based on the damage dealt to the enemy's units. This ability becomes even more significant in battles featuring the FIRE & REGRET ruleset, as Merhampir can offset the damage received from RETURN FIRE by effectively healing itself through Life Leech 😤
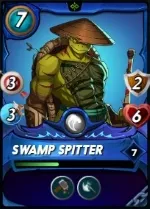
Last Position, Swamp Spitter
Loving this Soulbound card for its Repair ability. It is extremely useful in this battle as it is an all Ranged monster only battle and having that armor repaired could easily make the difference in the outcome. Ultimately, it is only useful if you have monsters with armors for which my monsters are fully equipped with after getting the +1 Armor buff from Kelya Frendul 😉
The Analysis
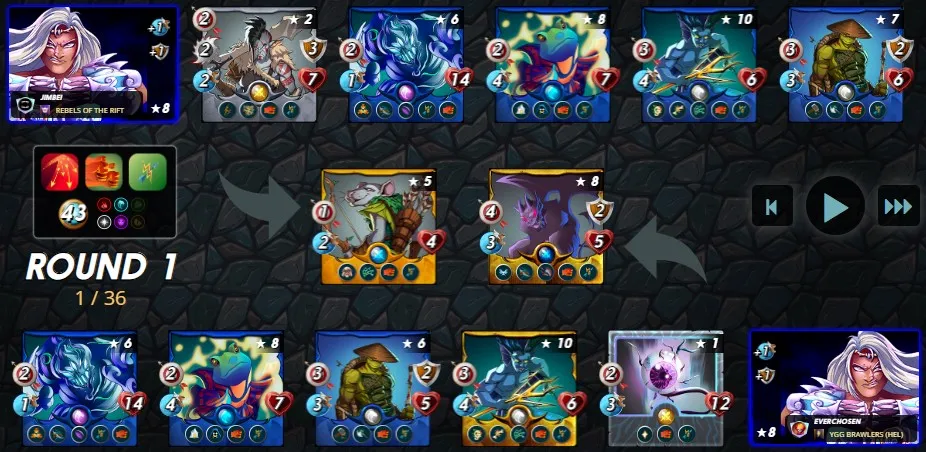
Unsurprisingly, my opponent also opted for the Water Splinter for this battle. With Going the Distance and FIRE & REGRET rulesets present, there are limited plays that one could use and the Water Splinter is definitely stand out amongst the rest of the Splinters for this battle 👍
My opponent and I basically have the same strategy in having the Wave Brood in the backline in order for it to be supported by Angelic Mandarin's Triage ability. However, my strategy of sacrificing the Venari Marksrat to provide the Martyr boost for Drybone Raider prove to be the difference in this battle as the Drybone Raider is able to freely dealt Melee damages without any concern for the FIRE & REGRET ruleset, proving too much for the opponent to handle 👊

To be honest, when I saw the battle lineup of my opponent, I thought that this game would be a goner especially when I saw the Cornealus. Cornealus possesses a high health and Heal ability that makes it pretty undestroyable. Furthermore, when maxed out, Cornealus basically have all the countermeasure for any form of attack. Thankfully my opponent's Cornealus was only at Level 1, hence only posses the Heal ability, otherwise my strategy of having the Drybone Raider going on rampage in the first position with its Melee attack would backfire since even a Level 2 Cornealus would gain the Thorns ability to sufficiently hurt my Drybone Raider 😅

If you made it this far, I sincerely appreciate your time and value your encouragement. Please feel free to leave any comments or suggestions so that we can discuss about other strategies. Thinking about giving Splinterlands a try but haven't signed up yet? Feel free to use my referral link: https://splinterlands.com?ref=ak08, and be sure to reach out to me if you have any questions!
Are you interested in reading some of my future writings? Don't forget to follow me! In the meantime, here are some of my most recent blogs if you'd like to view them:
Social Media Challenge - A battle analysis
UNLEASHING THE POWER OF THORNSBattle Mage Challenge - A battle analysis featuring the
EXPLOSIVE WEAPONRY: BLAST OF RANDOMNESSSocial Media Challenge - A battle analysis showing a battle full of
OPPORTUNITIESBattle Mage Secrets - A battle analysis showcasing incredible synergy between
DOCTOR BLIGHT AND BORN AGAIN RULESET (CONT'D)
All banners, dividers card and battle images used in this article are open source and obtained from the Splinterlands team or made by flauwy. Do check out his link for other amazing designs!