
This week's Share Your Battle challenge features Dax Paragon! Alas, I had difficulty finding an interesting battle with Dax this week and will instead be sharing a battle with an alternative Life strategy. But before we get into the battle, a few words about Dax.
Dax is a budget monster for the Life splinter, costing just 2 mana to bring into battle. You don't get a whole lot of monster, but at that price you really shouldn't be expecting much. At level 1 Dax packs a single point of magic attack, paired with 2 speed and 3 health. Upon closer examination this is actually a great deal - magic attackers tent to cost a bit more than melee or ranged on account of being able to attack from anywhere and bypass shields, so Dax is quite the bargain.
If you wanted to jump right to the action, the Battle Link is right here. Want to hear some more about the lineup? Read on further!
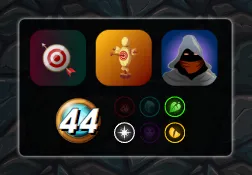
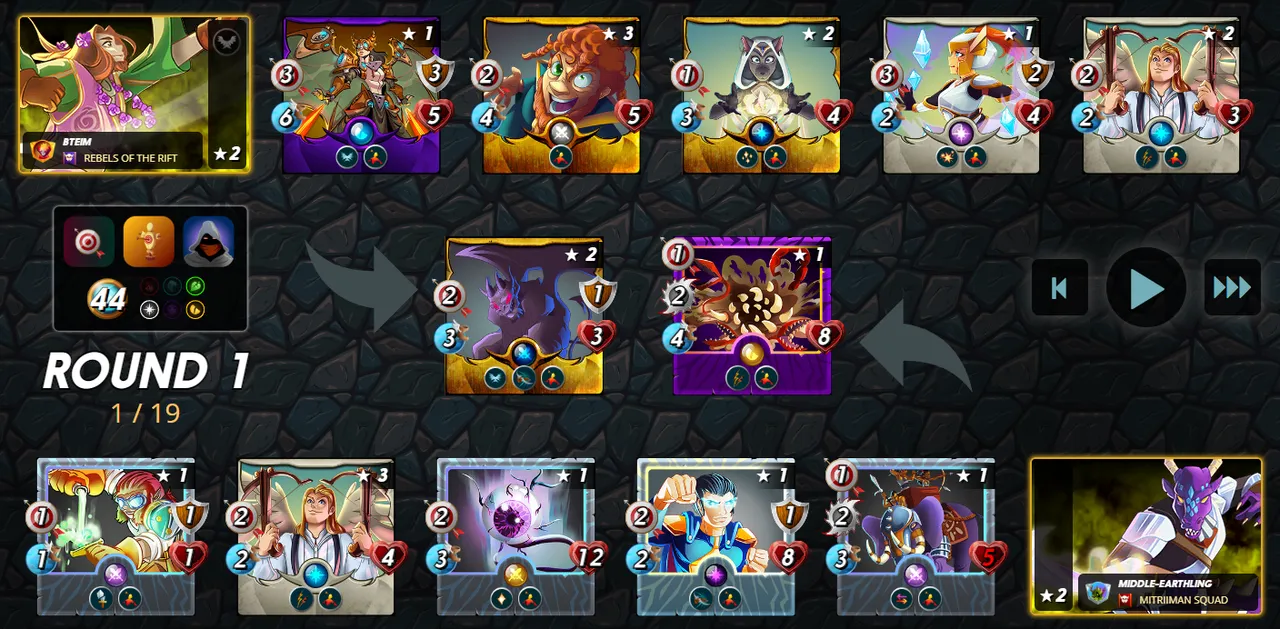
This was the ruleset for out battle. We got a somewhat strange combination here, with Going the Distance only allowing us to bring ranged monsters, and Target Practice giving ranged (and magic, though those are banned) monsters Snipe. Finally, Silenced Summoners will remove any summoner buffs from the battle. We are also working with a medium-highish mana cap of 44, with the Earth, Life, and Dragon splinters to choose from.
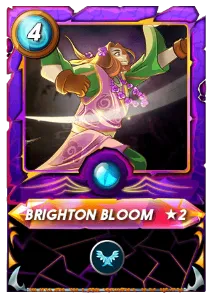
With Silenced Summoners in play, our summoner choice doesn't matter as much as it would in some other battles. I opted for a Dragon splinter summoner in order to get access to as many cards as possible for my lineup. Brighton Bloom's Flying buff won't do anything in this fight, but having a summoner which lets me pick out Dragon cards gives me some additional options to play with. Brighton costs just 4 mana, which is one of the cheaper summoner options and preserves as much mana as possible to spend on monsters.
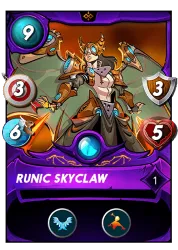
Figuring out frontline monsters is tricky in Going the Distance battles, and even more so when everything has Snipe from Target Practice. For the first position I went with Gargoya Devil, which will be able to attack from that spot with its Close Range. Next up, and first in the line of fire for and Snipe-ers was Runic Skyclaw. My plan was for these two to be able to survive for as long as possible with some dodges - both of them have Flying, and Runic Skyclaw is super speedy with 6 speed. Runic Skyclaw can even afford to take a few hits, as 3 armor and 5 health is a lot more bulk than most ranged attackers have.
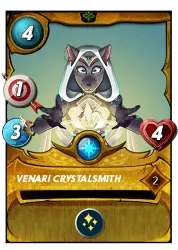
The middle of my lineup had a bit of support and a bit of backup tanks. My hope was that Supply Runner wouldn't have to spend any time in the front at all, but if it did then at least it would have 5 health to work with. Venari Crystalsmith would contribute a small amount of additional damage, and also help my front monster with Tank Heal. Unfortunately Tank Heal would be of limited usefulness in this battle since all of the monsters would be receiving Snipe, but I figured a little healing was better than none at all.
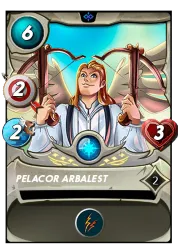
I rounded out my team with the heavy hitters. Prismologist attacks for 3 per turn, plus Blast. And finally, Pelacor Arbalest goes in for just 2, but does so twice per round. My plan was for these backline monsters to attack for some heavy damage, while my frontline would stall for time with a combination of evasion and tankiness.

With the lineup set, it's off into battle! When I see the selected teams I am a little concerned - my opponent has brought some monsters with considerable bulk. Their front 4 all have a whole lot of health, and my ranged attackers will have to do some serious work in order to take all of them down. A couple of things working for me are that my Runic Skyclaw has a significant speed advantage, and that the opposing team is lacking any healing outside of Cornealus - we'll have to see how it goes!
In the first round of battle my monsters are able to put their heavy firepower to work.
The opposing War Chaang goes down, and the enemy Hero of Beyond takes heavy damage.
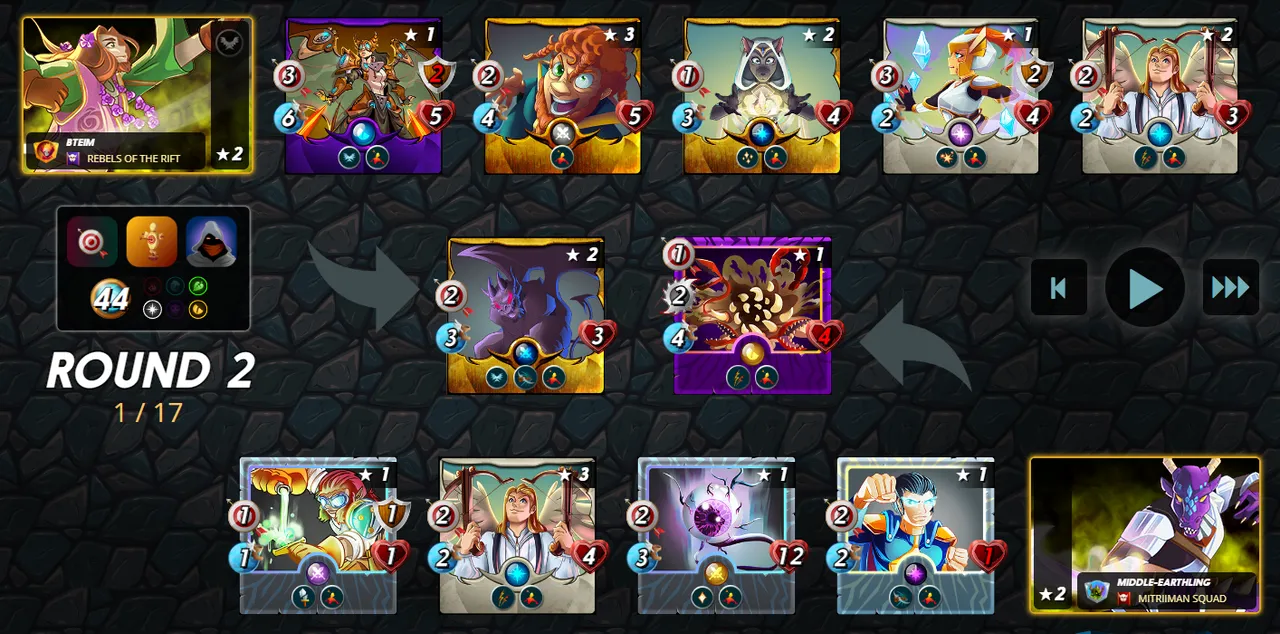
One more round and the battlefield is beginning to clear out quite a bit. Hero of Beyond indeed gets taken off the field, along with my Gargoya Devil and Supply Runner. At this point the numbers do not look like they are on my side, but my team has an ace in the hole - if Prismologist can manage to land a hit, the Blast damage will be able to take out multiple enemy monsters.
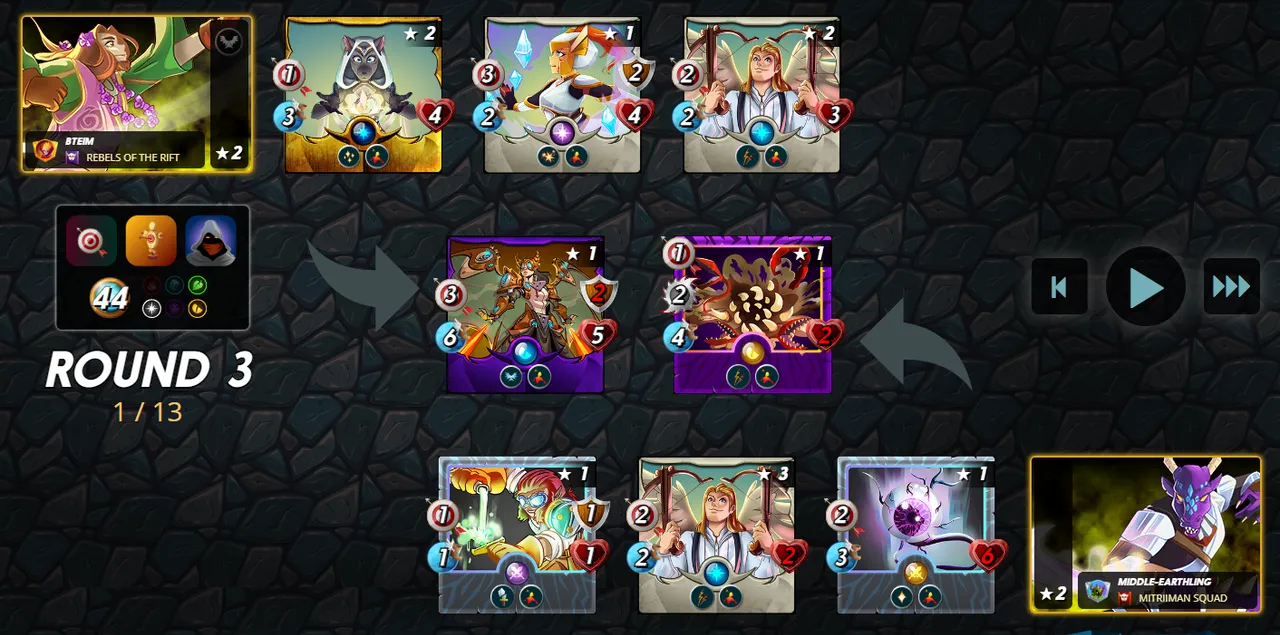
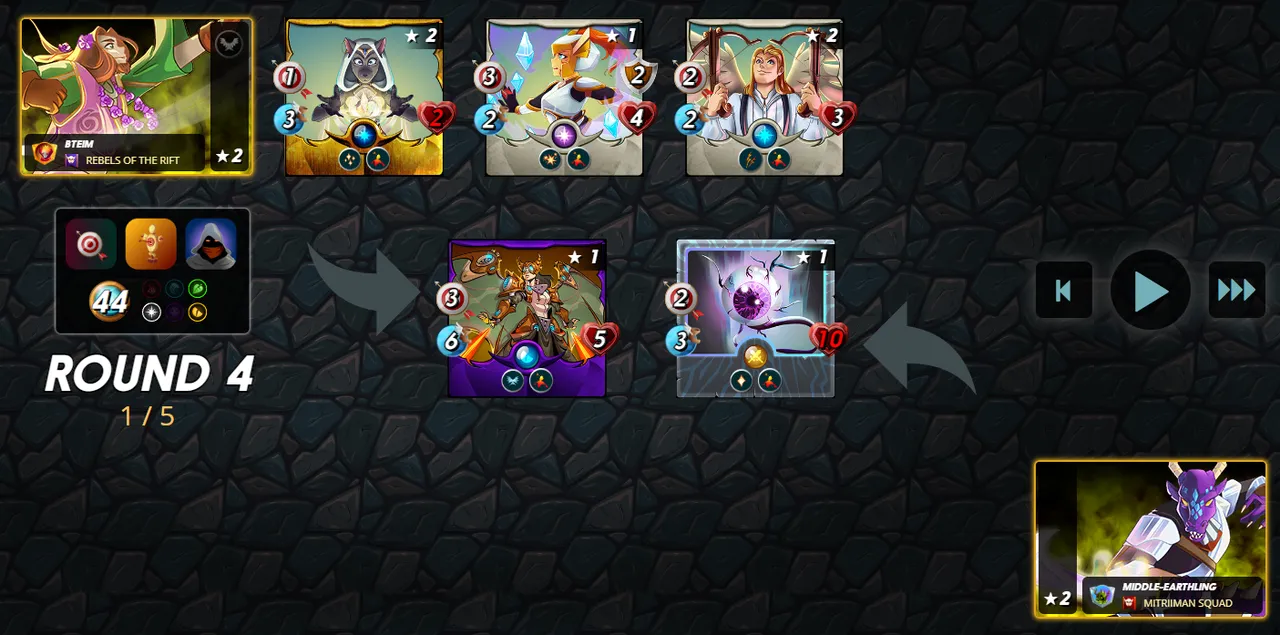
With a big Round 3, my team is able to put itself into a winning position. Prismologist is indeed able to land a hit, and by the start of Round 4 the only opposing monster is Cornealus. That floating eye may be able to stick around thanks to its self heal, but stuck in the front position and unable to attack, it was just a matter of time until my surviving monsters were able to wear it down for the victory! And again, if you wanted to see the whole battle for yourself, you can see it right here.
It was a bit of a close battle, but my lineup of ranged attackers led by some hard hitting Life monsters were able to win in the end. My strategy of loading up the back of my team with as much damage as possible worked out perfectly. As I mentioned at the start of this article, I was not able to find a spot for Dax in this battle - this was a relatively high mana fight, and Dax excels in low mana battles. Despite this, Dax certainly has a place in any Life deck - any deck can use some solid low mana monsters, and Dax is one of the best!

Thank you so much for reading all the way to the end. Interested in seeing some more of my writing in the future? Be sure to give me a follow! In the meantime, if you'd like to see some of my recent posts:
Splinterlands Economics: Causation - A look at causation, and how we can apply it to Splinterlands!
So Nice to Strike Twice - Using Grund in Battle! - Last week's battle challenge, featuring Grund!
Splinterlands Economics: Bonds - An overview of bonds, and how we can apply it to Splinterlands!
Thinking about giving Splinterlands a try but haven't signed up yet? Feel free to use my referral link: https://splinterlands.com?ref=bteim, and be sure to reach out to me if you have any questions!
All images used in this article are open source and obtained from Pixabay or Unsplash. Thumbnails borrowed with permission from the Splinterlands team or made in Canva.