
This week's Share Your Battle challenge features Molten Ash Golem! I was excited to see Molten Ash Golem getting picked for this week, because it happens to be one of the cards that I use relatively often in my battles. While its damage output is nothing to write home about, Molten Ash Golem offers solid stats for its price and fits in very well with ranged attacking Fire lineups given its combination of tankiness and abilities. In fact, I use Molten Ash Golem often enough that I thought it was worth the investment to get a gold foil copy of it!
As I alluded to at the start, Molten Ash Golem is a tanky ranged attacker - something that isn't particularly common to see. At level 2 (the version I will be working with today), for 6 mana you get the bare minimum 1 ranged attack and 1 speed. But wait, there's more! Molten Ash Golem also comes with a very respectable 10 health, as well as Close Range. This makes is suitable to be used as a hybrid ranged attacker and tank - which is how we will be highlighting it today.
If you wanted to jump right to the action, the Battle Link is right here. Want to hear some more about the lineup? Read on further!

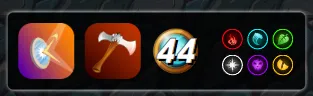
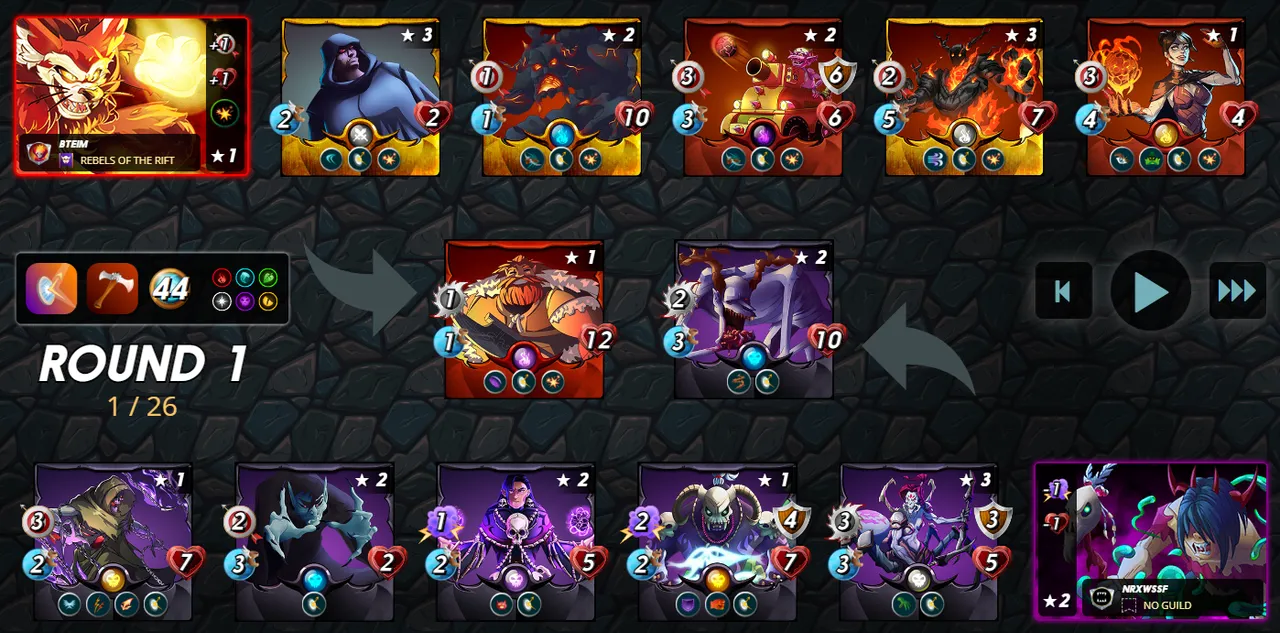
First up: the ruleset. This was a good ruleset to use Molten Ash Golem because I was looking to show it off in a Yodin lineup. The relatively high mana cap of 44 gives us plenty of mana to pay for Yodin, as well as some hard hitting monsters for the back line. The Counterspell ruleset also means that magic attackers are a little less of an issue - any magic attackers will also be hurting themself every time they attack!

Yodin is a natural summoner to pair up with Molten Ash Golem. Yodin's ranged attack boost, as well as blast, are both very welcome on Molten Ash Golem - it will be able to hit harder each turn, as well as gin a tiny bit of additional survivability thanks to Yodin's health buff. One large worry with Yodin is often running into a lineup heavy on magic attackers, but that seems like a little bit less of a risk in this battle thanks to the Counterspell ruleset.
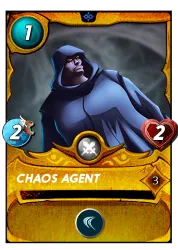
As usual, I started my lineup off with some tanks. Or more accurately, a tank and some evasion. Tusk the Wide is a great frontline tank - he would be great in case my opponent decided to bring some magic attackers in spite of the rulesets, and has a crazy high 12 heath. Chaos Agent was there for a bit of evasion and to buy more time for my ranged attackers at the back of my lineup.
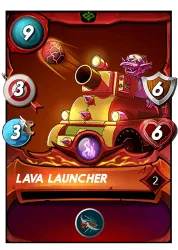
The middle of my team was filled with some tanky ranged attackers. Our guest star of the week, Molten Ash Golem has a ton of health and gets some boosted damage thanks to Yodin. Lava Launcher (if you look at its picture, literally a tank!) has a great combination of health and shields, and hits hard with a whooping 3 ranged damage per turn.
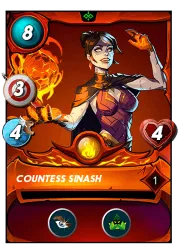
I closed out my team with some more ranged damage. Ash Mirage is a solid attacker with 2 damage and 5 speed, and its Headwinds ability would tilt the tide in my favor if my opponent happened to bring some ranged attackers into the fight. I finished with Countess Sinash, who could safely hide in the back with Camouflage, and would be able to take out my opponent's weaker monsters whenever the Opportunity strikes.

With the lineup set, it's off into battle! When I see the selected teams I am hopeful - My opponent has gone with a mixed lineup with a combination of melee, magic, and ranged damage. Tusk is a little magic resistant and my Ash Mirage's Headwinds will reduce enemy ranged attacks, so my team should have quite a bit of extra survivability in this fight. It is just a matter of whether my ranged damage will be able to outrace the other team!
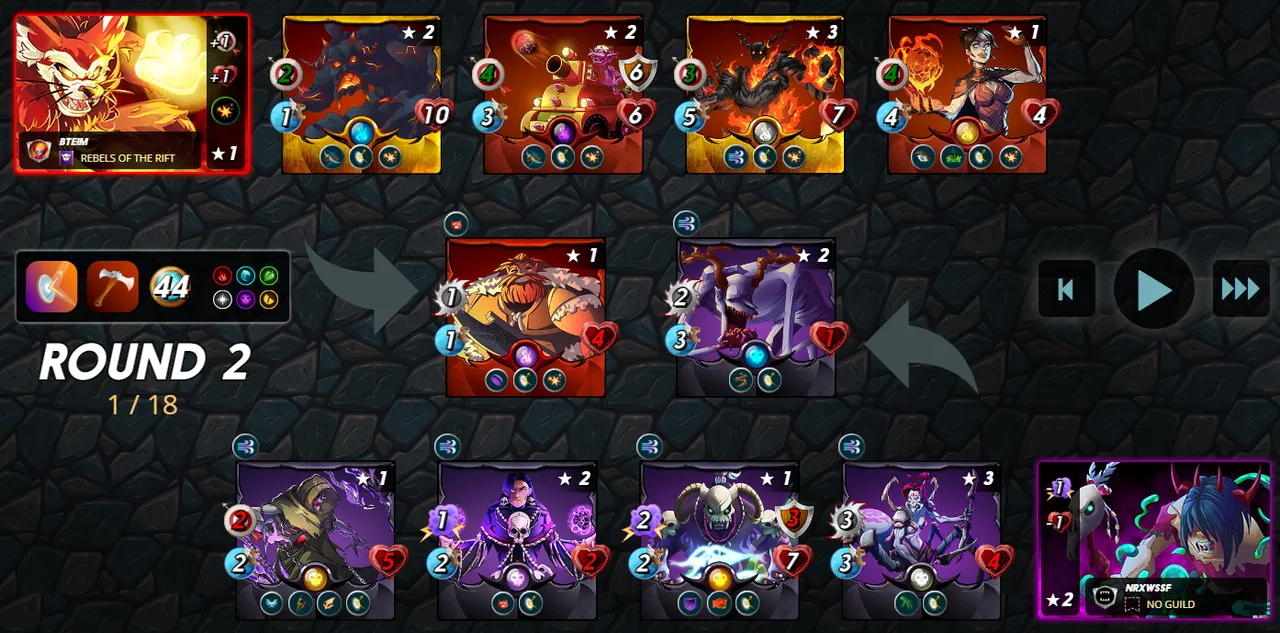
In the first round of battle everything goes as expected. Countess Sinash is able to quickly take out half of the other team's ranged component, and the rest of my team deals heavy damage to the enemy tank. Thanks to Yodin's Blast, the opposing secondary tank is significantly weakened as well!
One more round and the field has cleared out significantly. My Chaos Agent went down to a random Scattershot attack, but by the beginning of the third round the rest of my team is still standing while my opponent only has two heavily damage monsters left. Two more quick attacks and it was all over! And again, if you wanted to see the whole battle for yourself, you can see it right here.
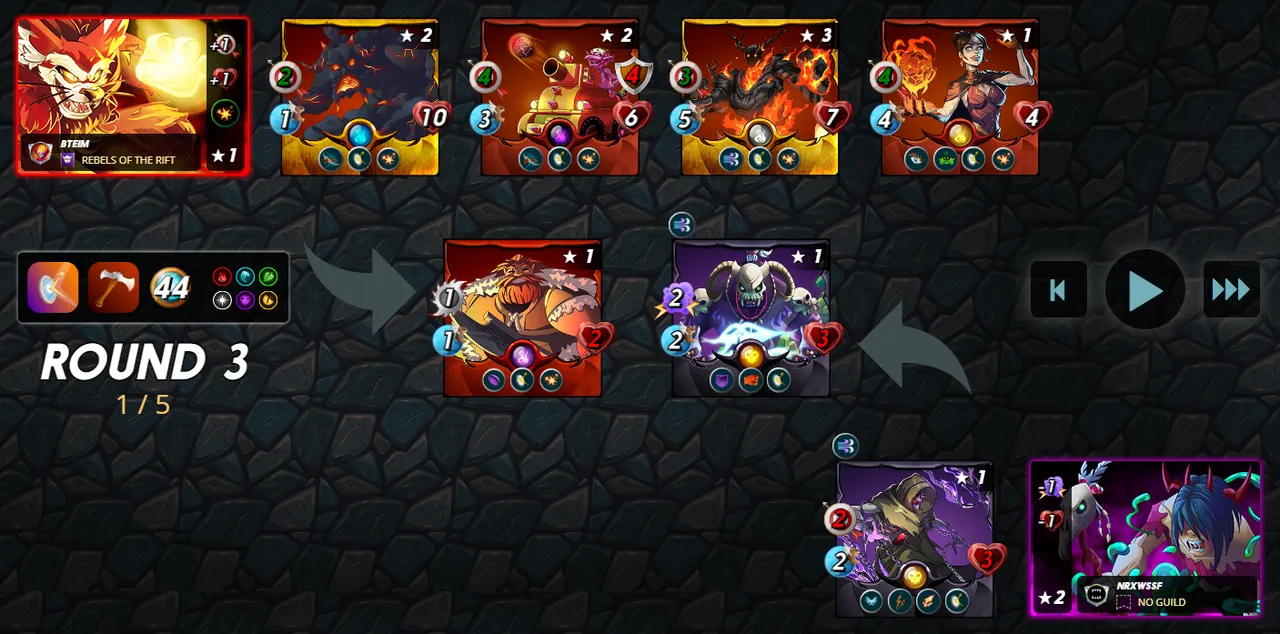
My strategy worked perfectly in this battle. Tusk was able to hold off my opponent's attacks, which were weakened by Headwinds and Void. Molten Ash Golem did a solid job of pitching in additional ranged damage, and while its tanking services were not required in this fight it was there as a secondary tank waiting to jump in if Tusk fell.
I am a big fan of Molten Ash Golem - it is not a flashy attacker that can take down the opposing team singlehandedly, but it is a super solid "glue" monster that can hold your team together by contributing some ranged damage while also being able to stand in as a tank when necessary. Molten Ash Golem has been a staple of my ranged Fire teams in the past, and will continue to make frequent appearances going forward.

Thank you so much for reading all the way to the end. Interested in seeing some more of my writing in the future? Be sure to give me a follow! In the meantime, if you'd like to see some of my recent posts:
Splinterlands Economics: First Mover Advantage - An introduction to the concept of first mover advantage, and how we can apply it to Splinterlands!
A Monster in the Rough - Using Gem Meteor in Battle! - Last week's battle challenge, featuring Gem Meteor!
Splinterlands Economics: Equity - An overview of the concept of equity, and how we can apply it to Splinterlands!
Thinking about giving Splinterlands a try but haven't signed up yet? Feel free to use my referral link: https://splinterlands.com?ref=bteim, and be sure to reach out to me if you have any questions!
All images used in this article are open source and obtained from Pixabay or Unsplash. Thumbnails borrowed with permission from the Splinterlands team or made in Canva.