
This is my first time joining a DIY contest showing off my DIY content that I specially did for this contest and I would like to talk about a ship made of Cardboard that I did following a YouTube video although I changed the main idea somewhere.

DIYHUB CONTEST - SEA LIFE (In Collaboration With @ECENCY.) has only 3/4 days left towards the deadline so if you wanna join then you better hurry.

Lemme show you how I did the entire thing.
- Essentials
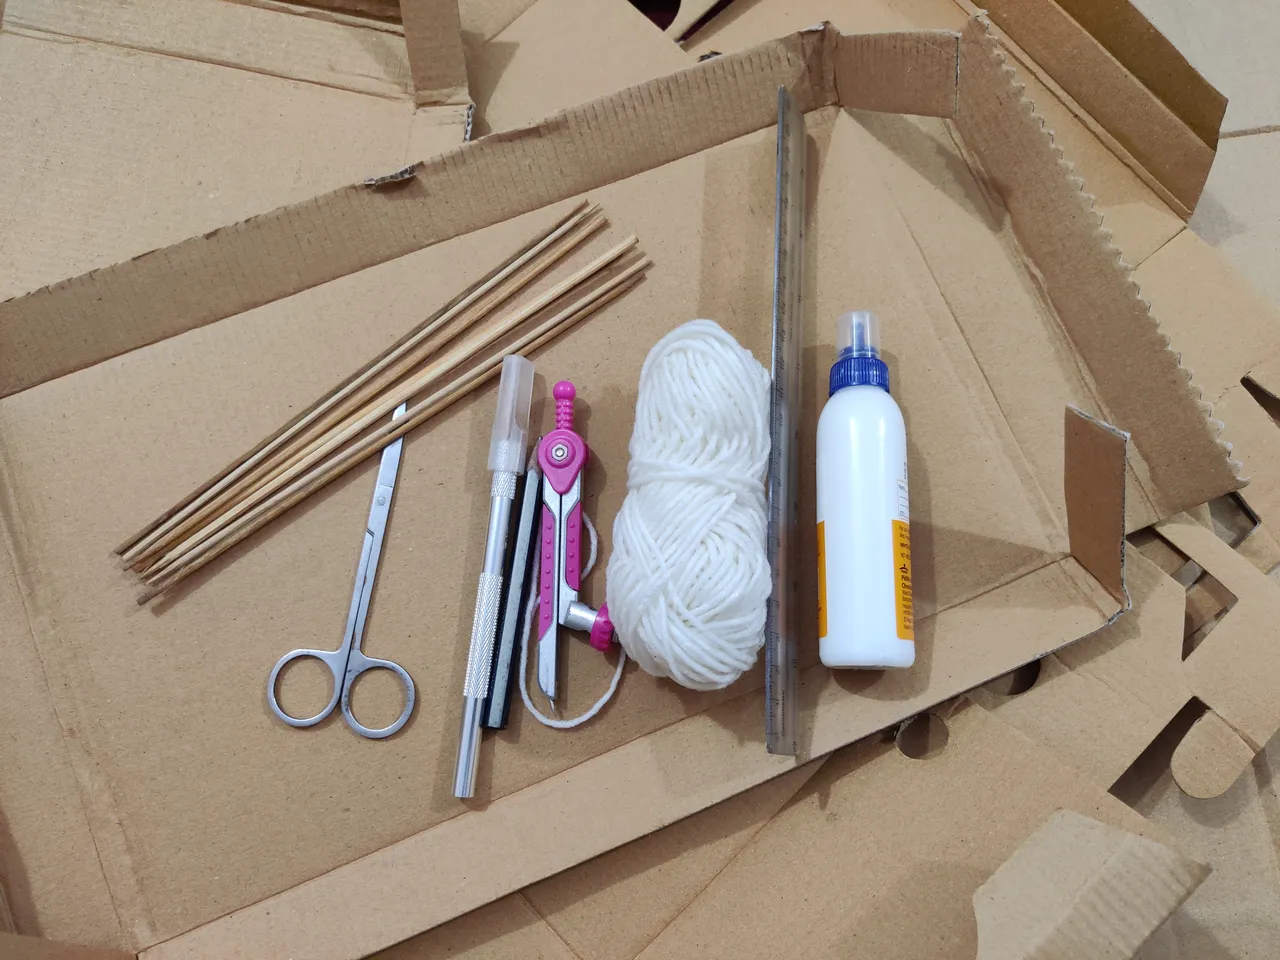
I used some recycled cardboards that were the main essentials for this diy work, white thread, glue, a scissor, a plastic scale, a cutter, some bamboo sticks and some color papers.
Except the cardboards that I got with some products, I had to buy all other things although they were previously bought.

- How I did it myself?
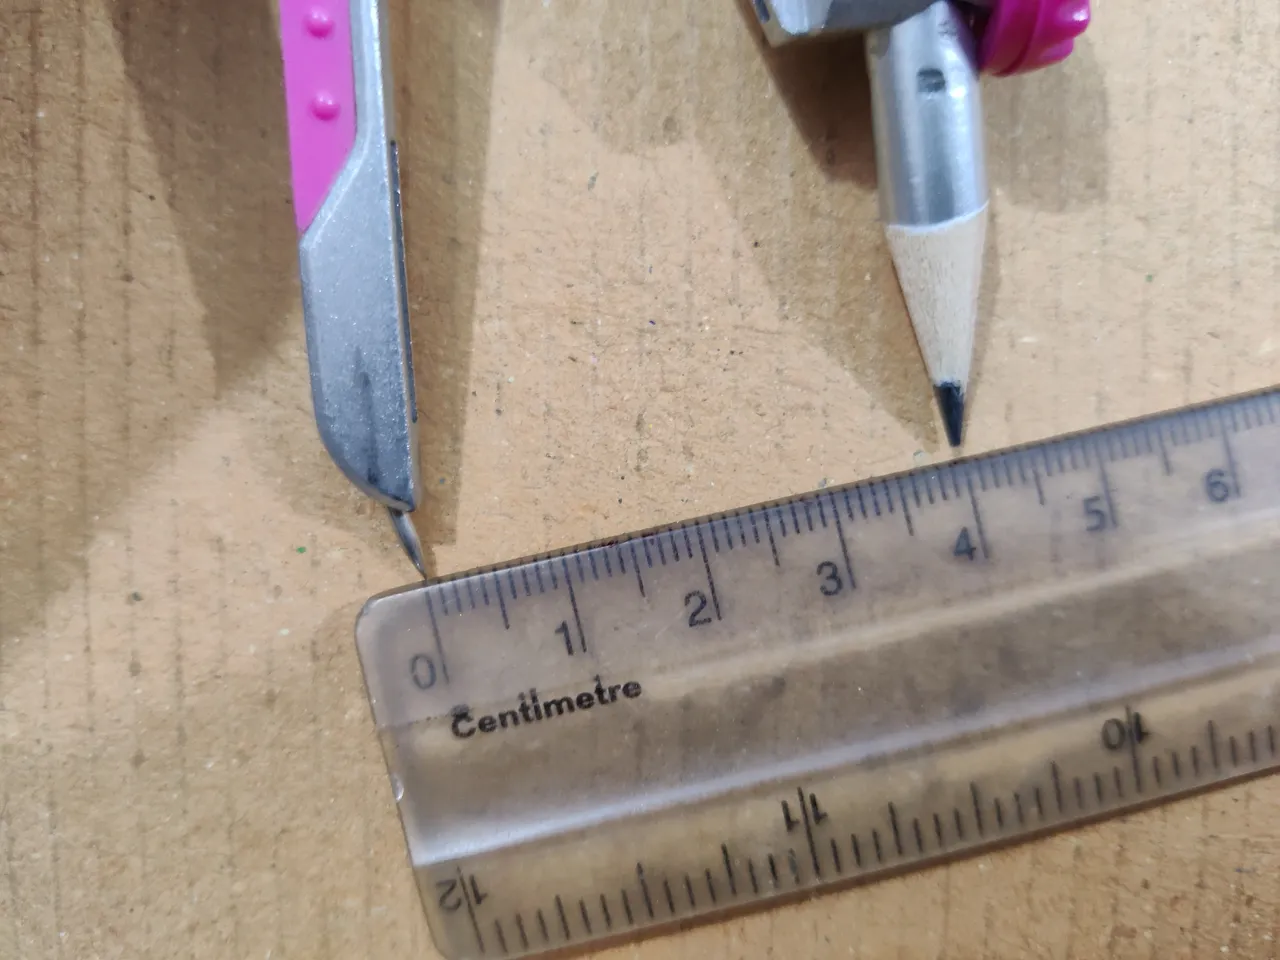
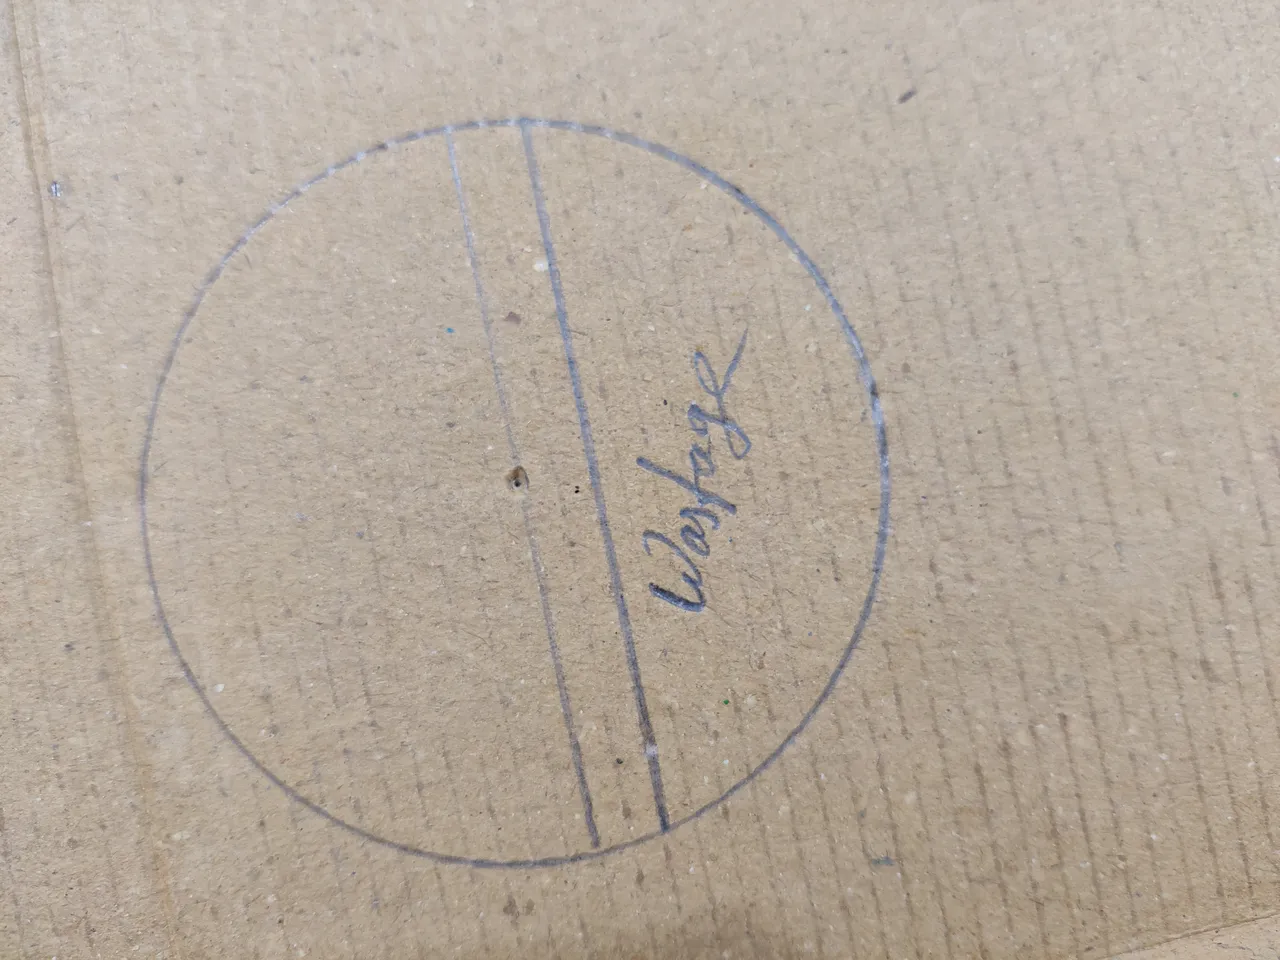
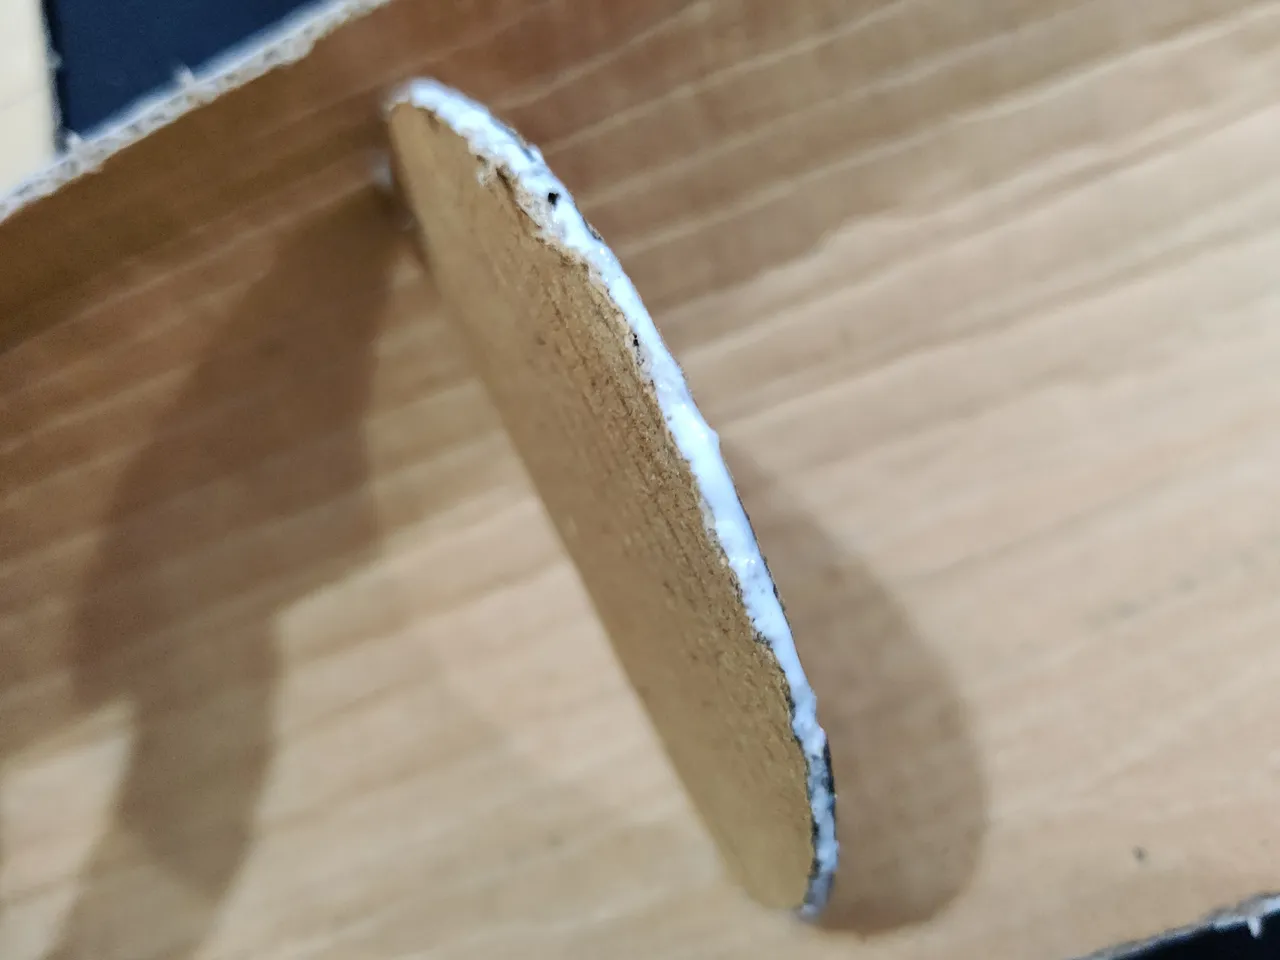
At first I used the compass and used the scale to get a dimension of 4 cm and then I drew a circle with that 4 cm dimension. Then I had to remove that part that I indicated as wastage.
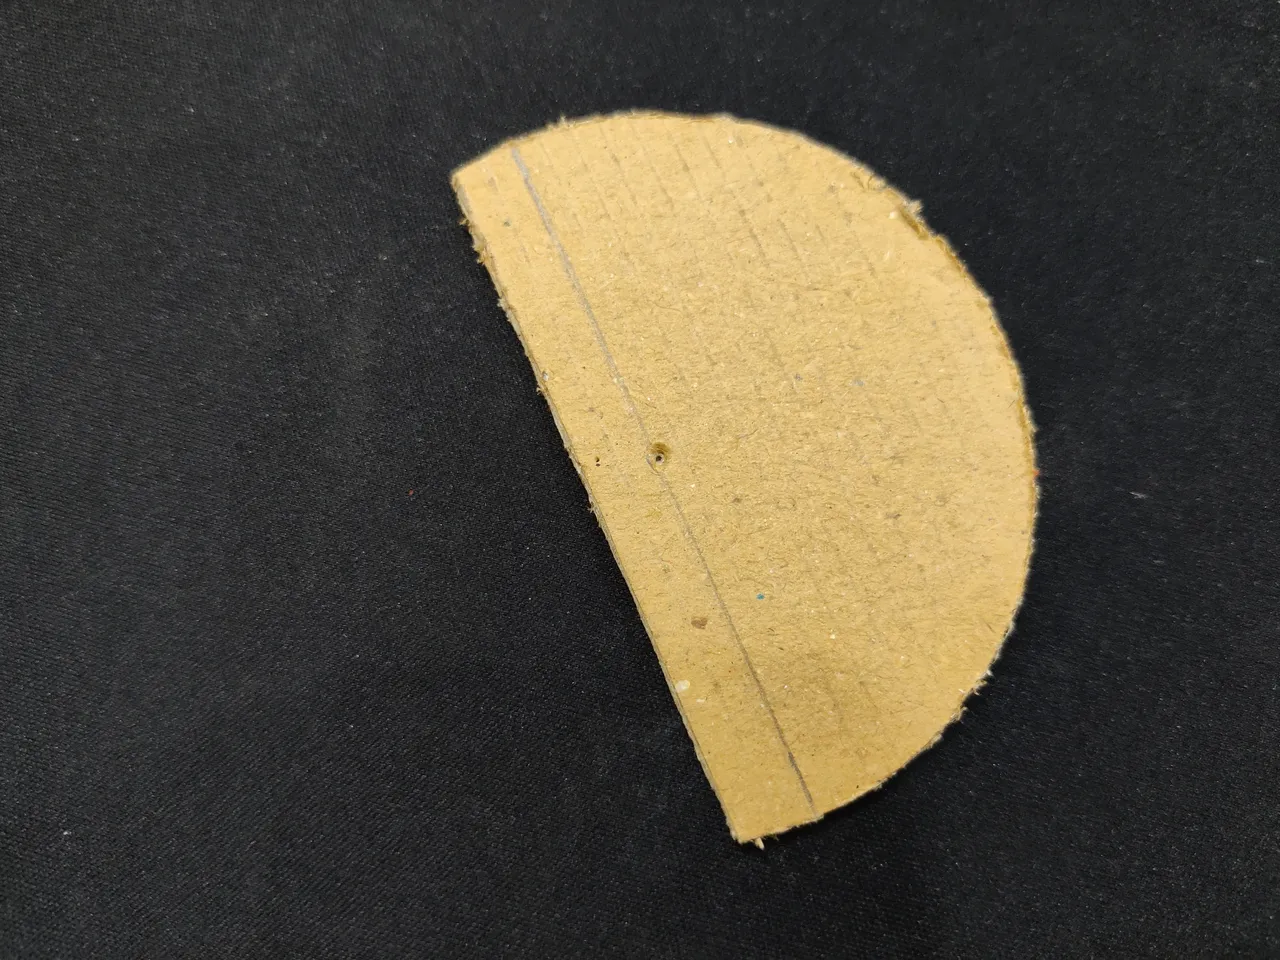
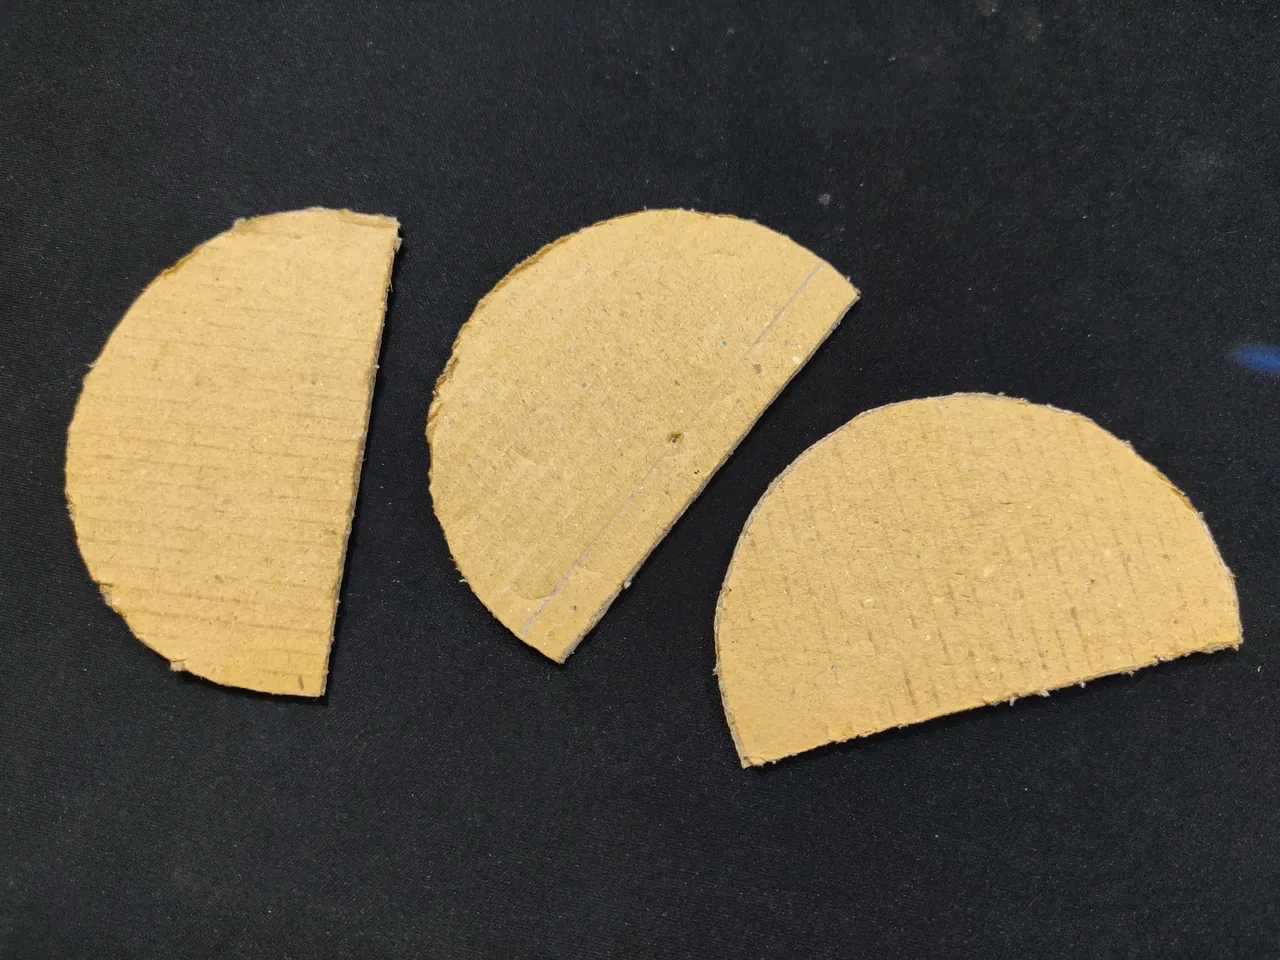
There I did the same thing three times and got 3 pieces of that shape.
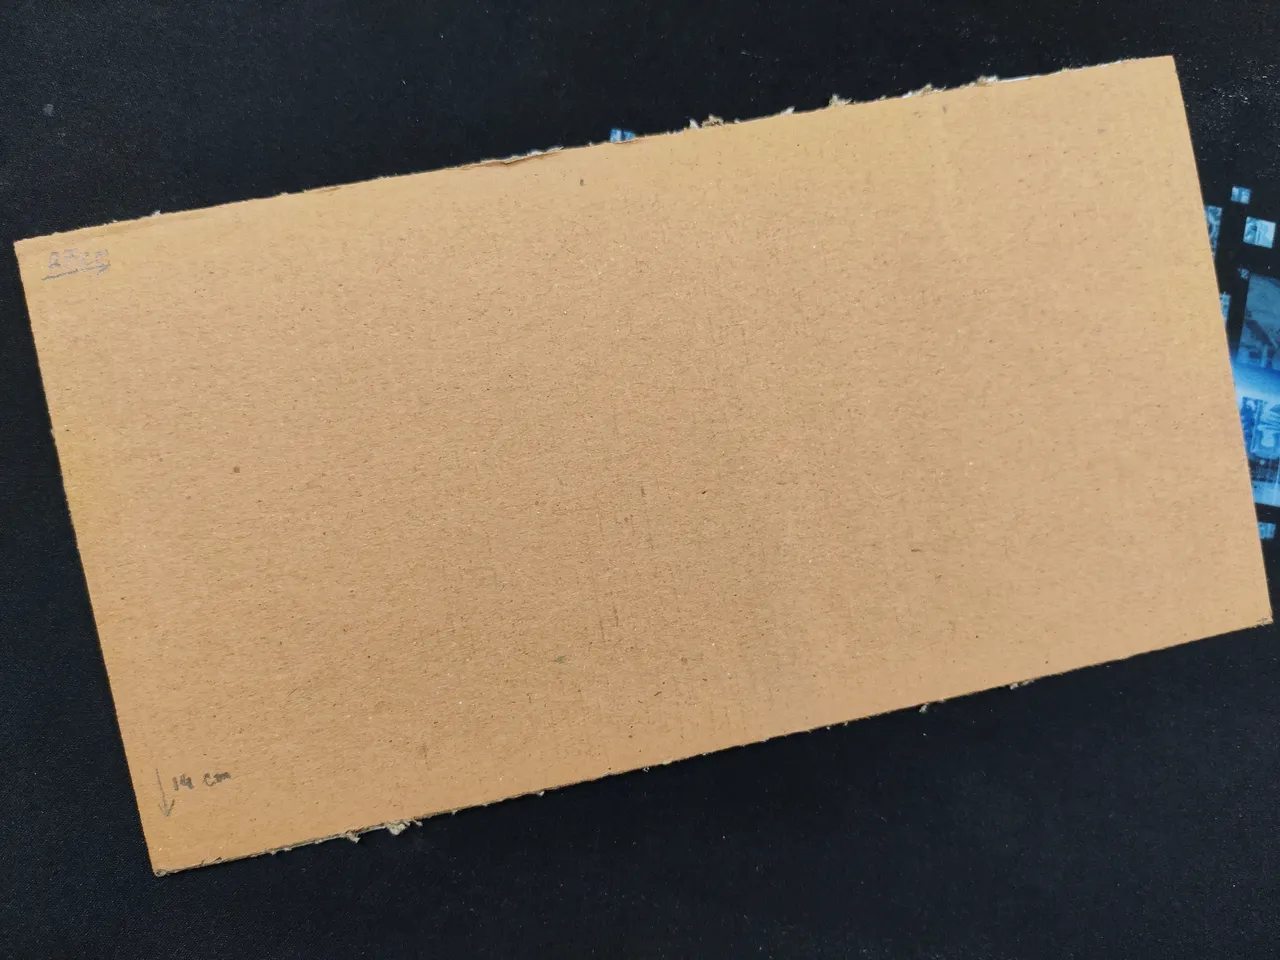
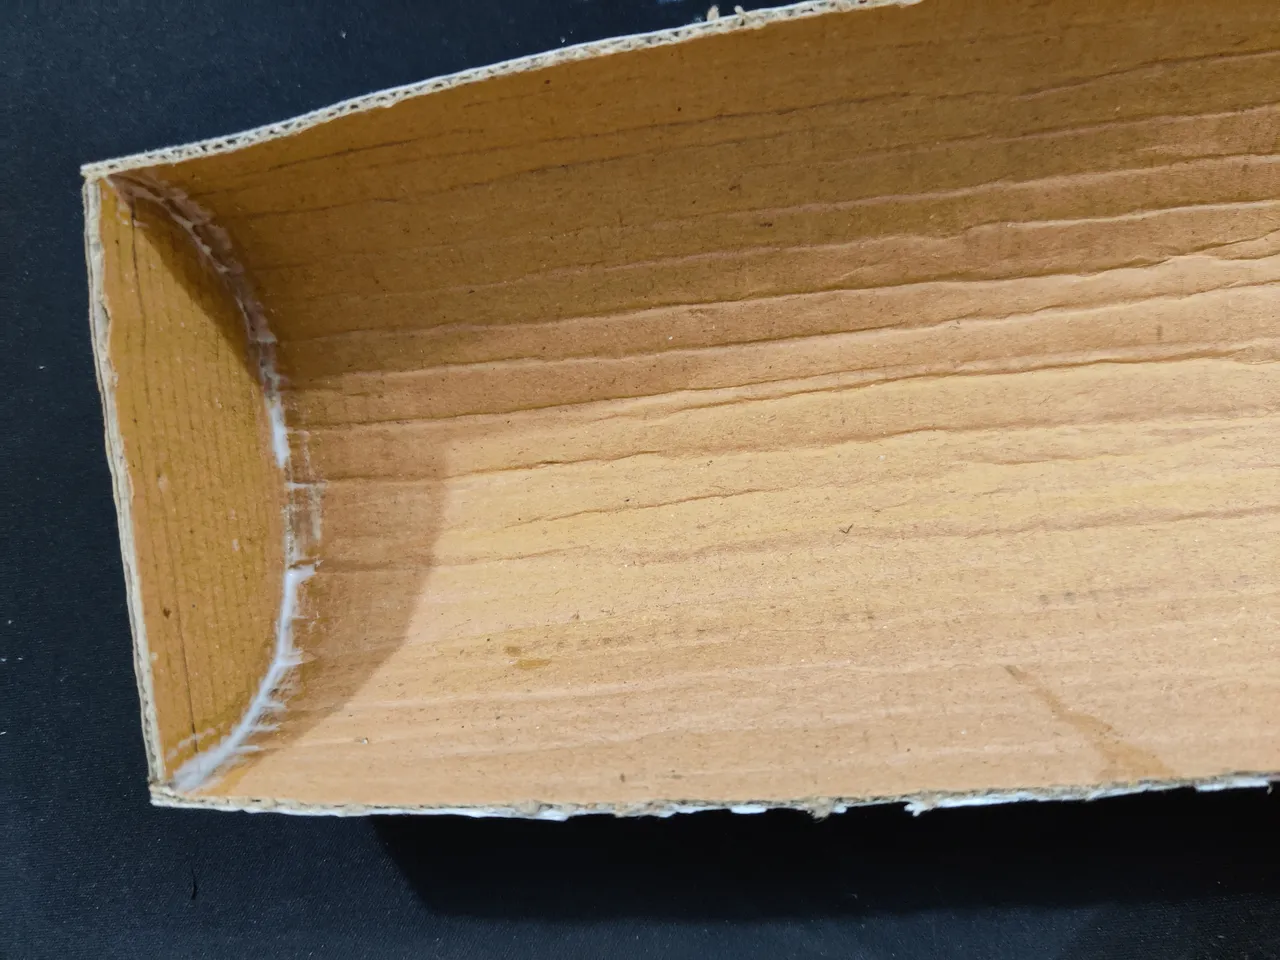
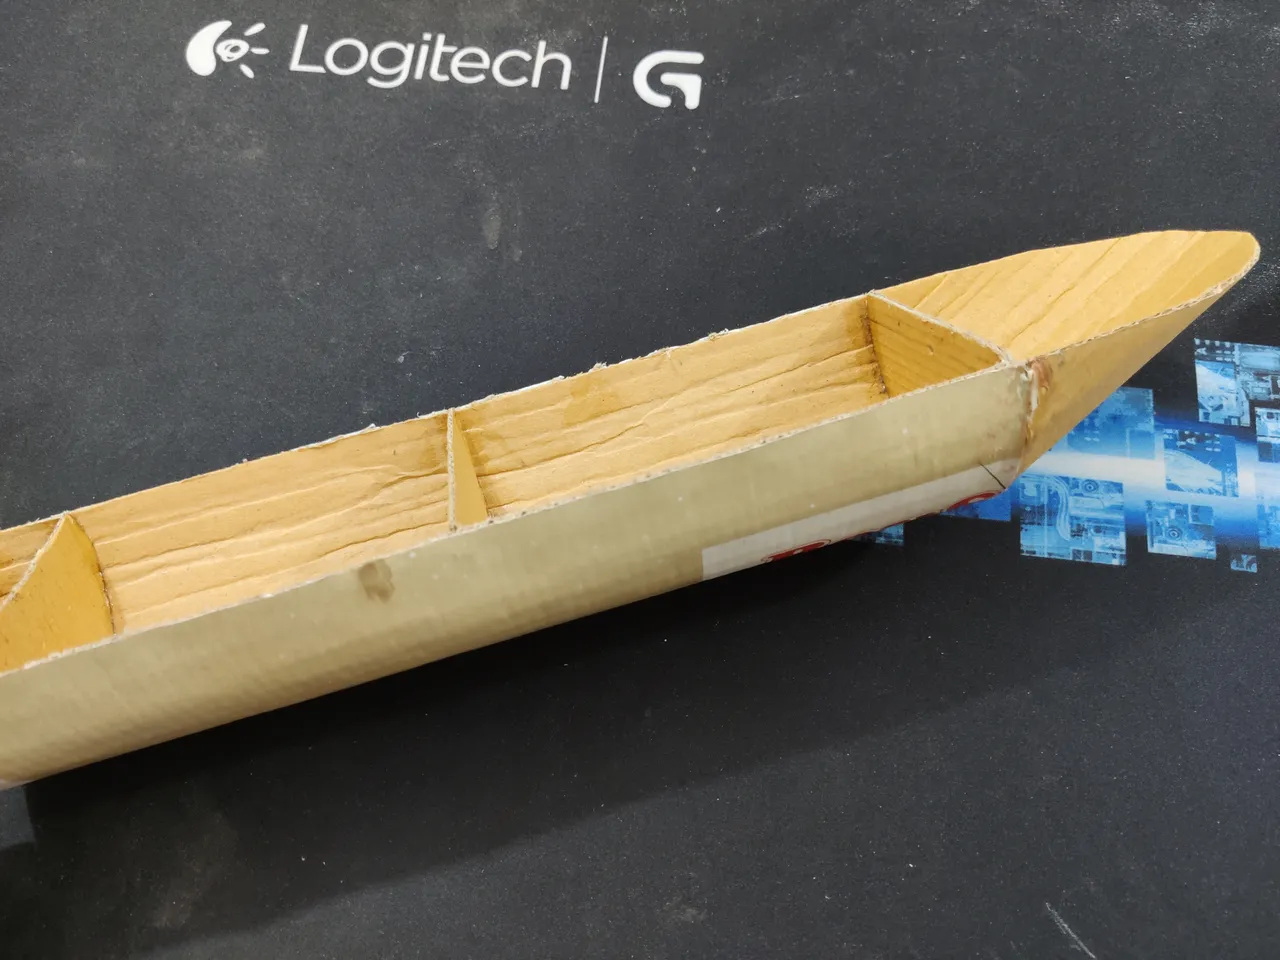
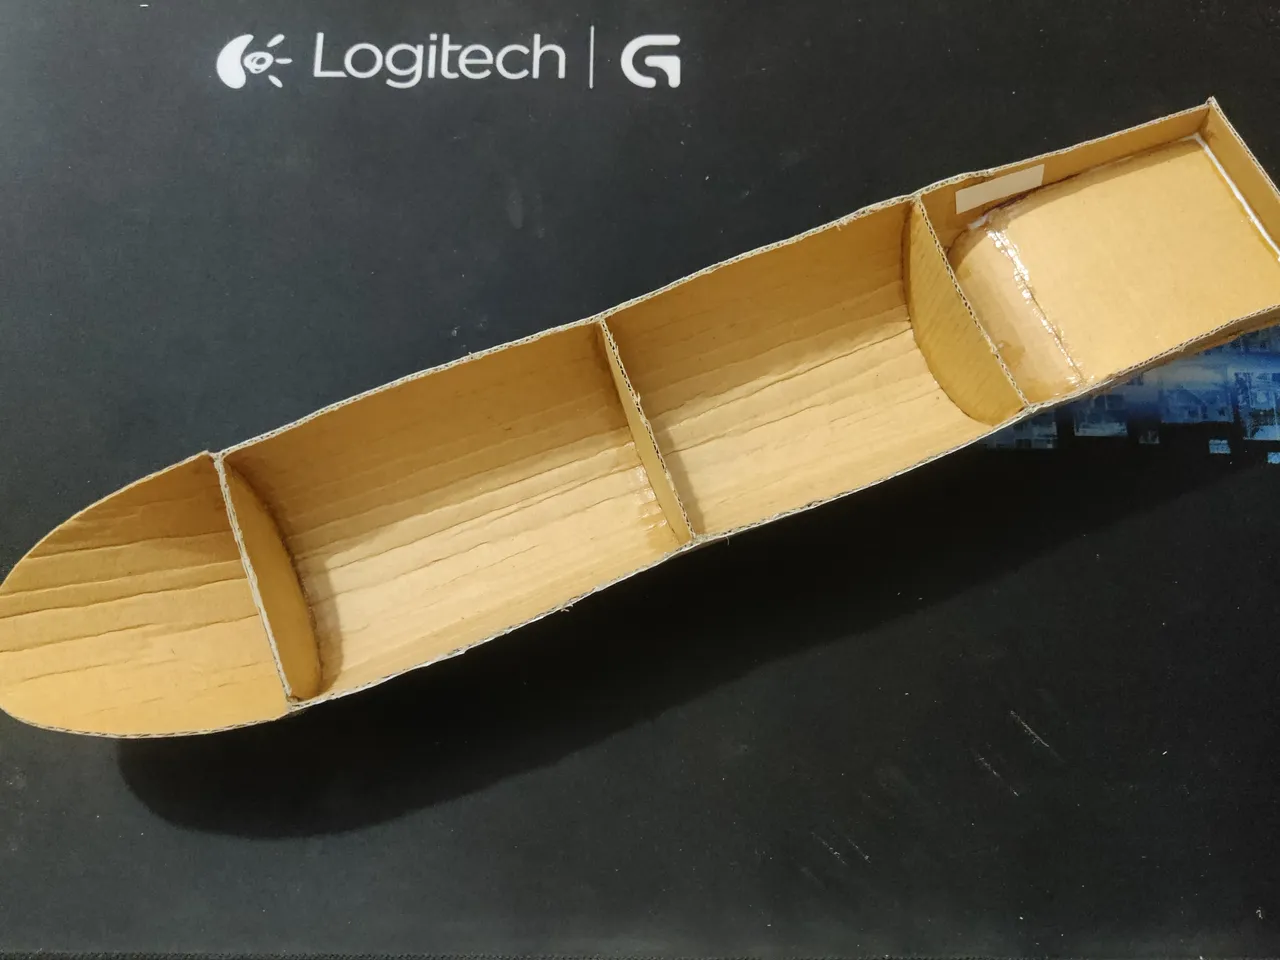
Now I got to get a big piece of cardboard which I'll use as the lower body of the ship. I took this flat piece of cardboard of 27cm X 14 cm.
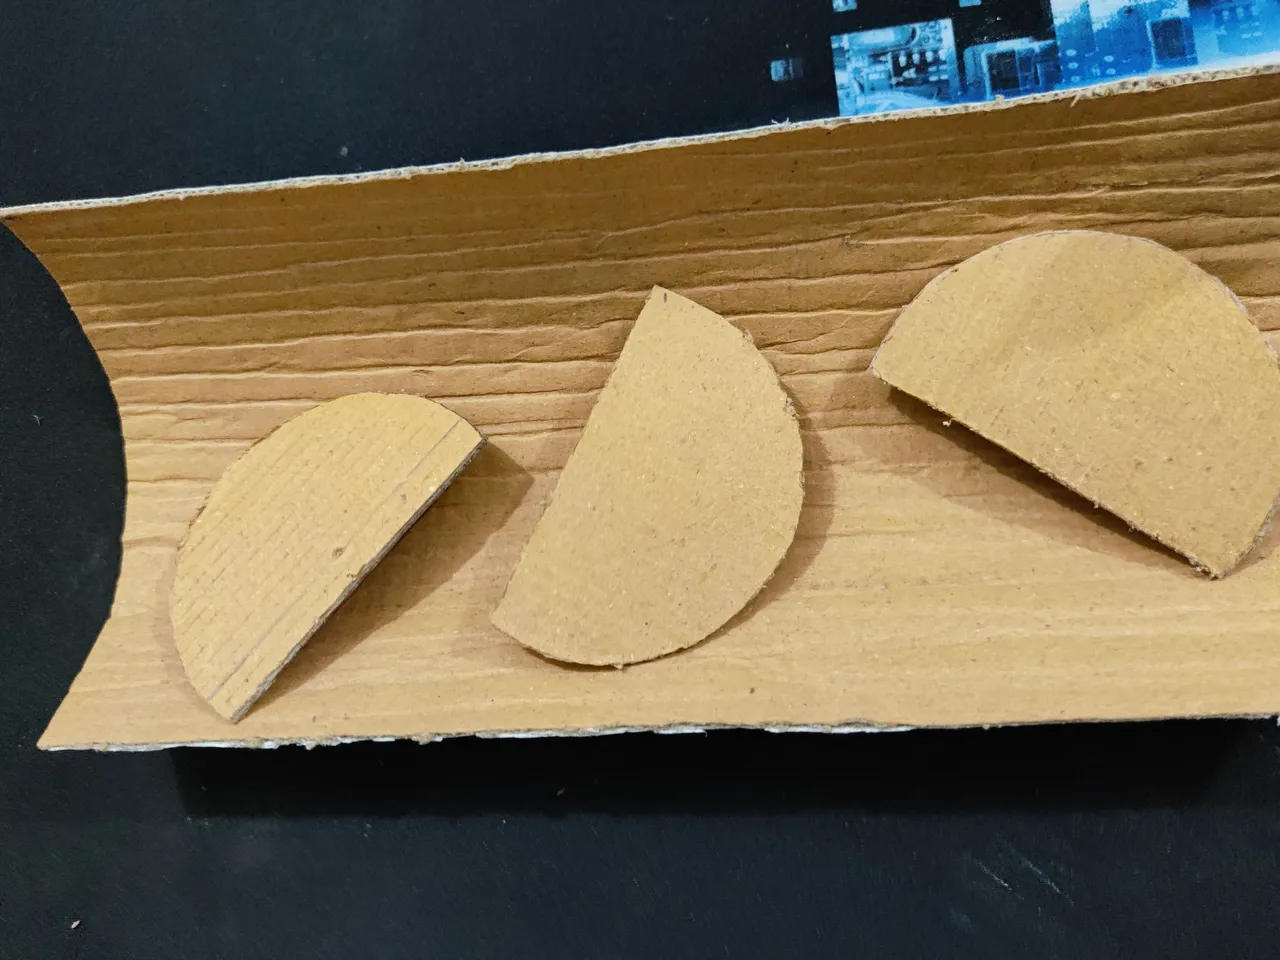
Then I bended the big piece and gave it a curve shape. The lower part of this shape is going to be the lower part of the ship.
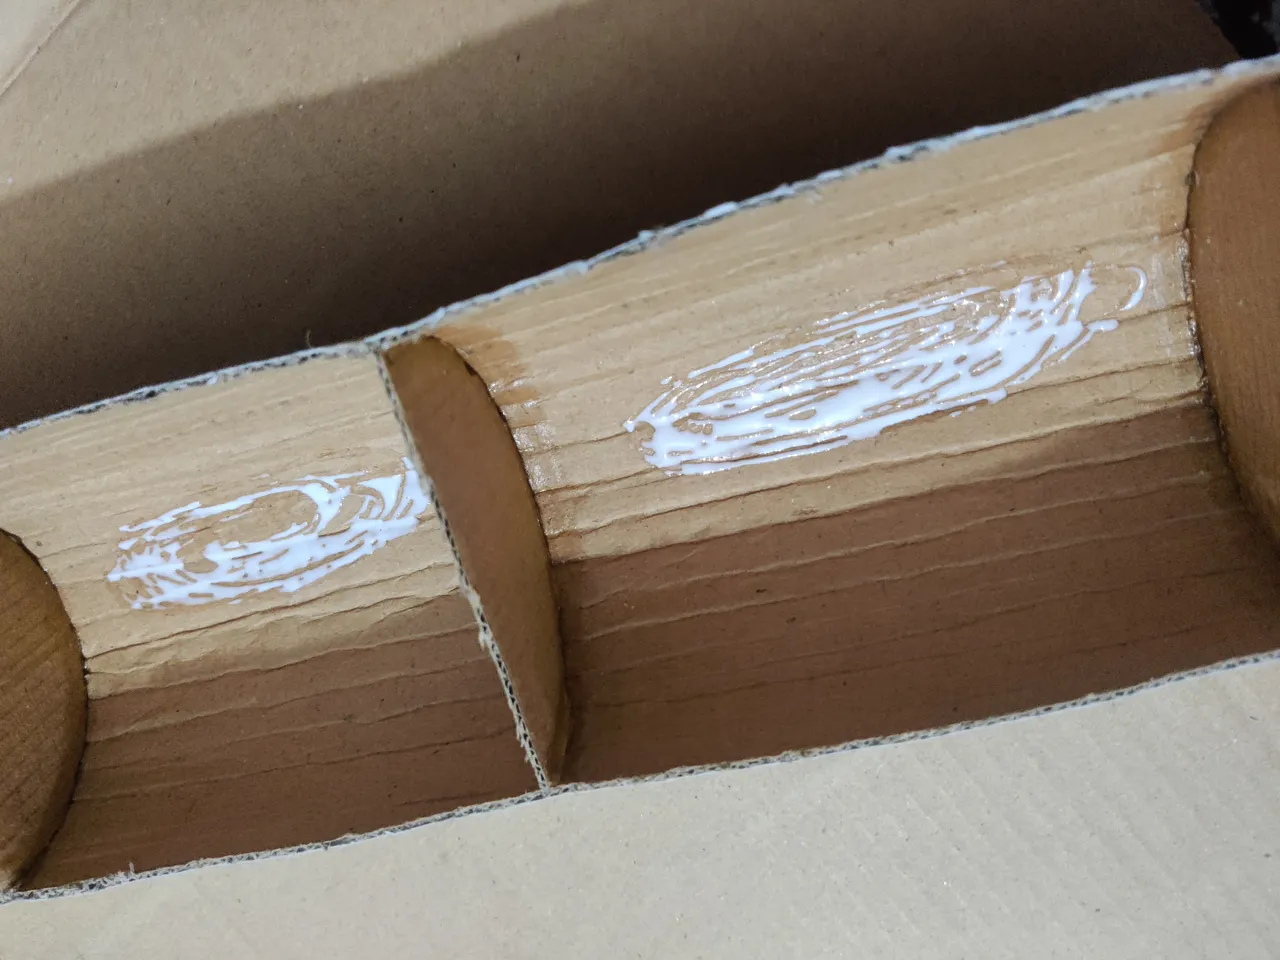
Now, its time I glue the half circled pieces (all three pieces) in the curved big piece. I glued one at the end side of the curved piece, another one at the middle and another one leaving a little space at the end part of the curved piece. The part where I left a little space at the end part is going to be the back part of the ship.
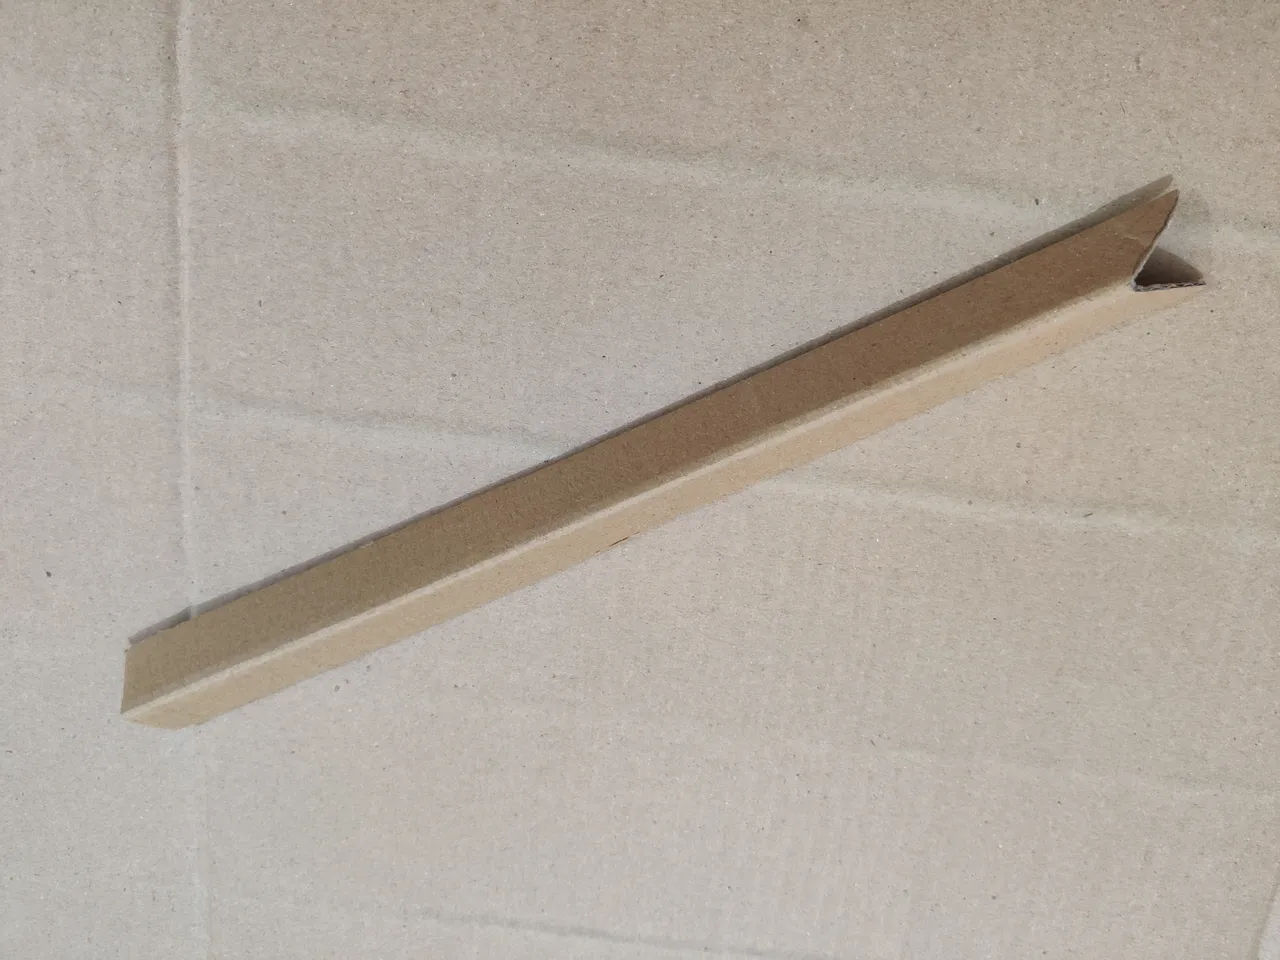
And now I added this piece of cardboard at the front side and its going to be the front of the ship. Then I drew it like that so I can cut it perfectly.

And now it gets this look at the front part. I needed to make the whole surface at the same level so I can add a piece on top of it to make a floor.
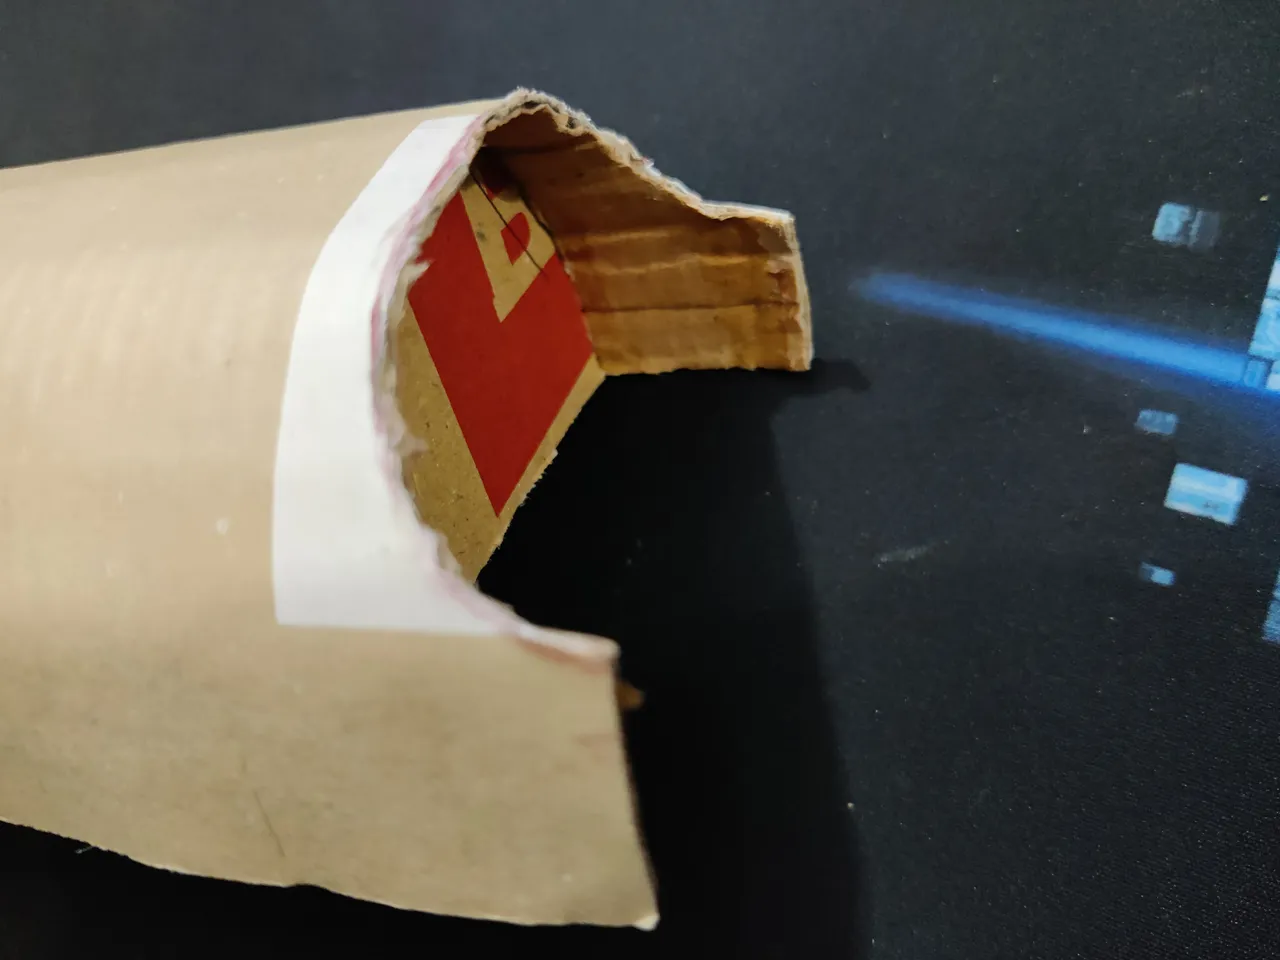
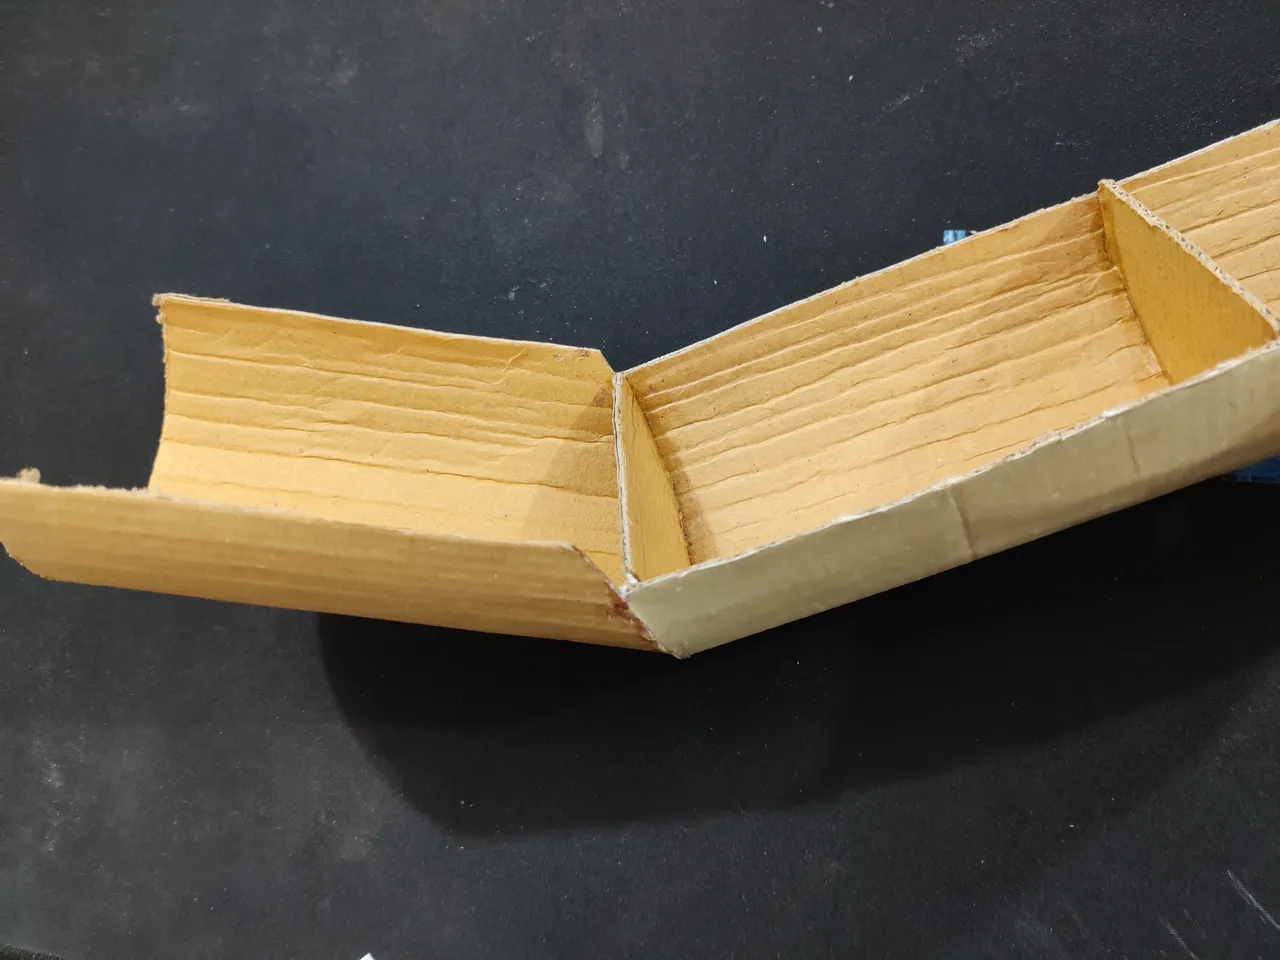
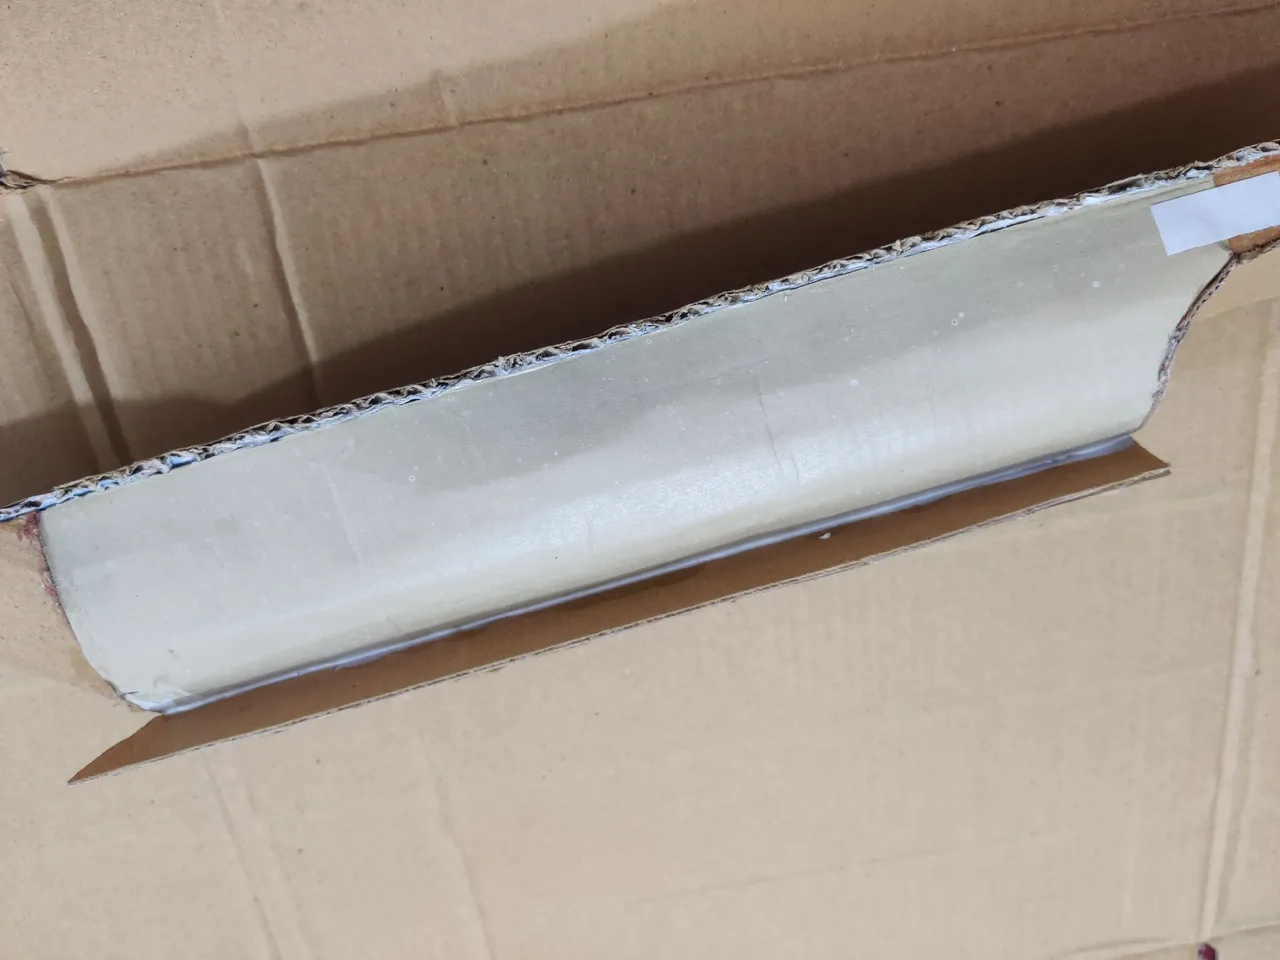
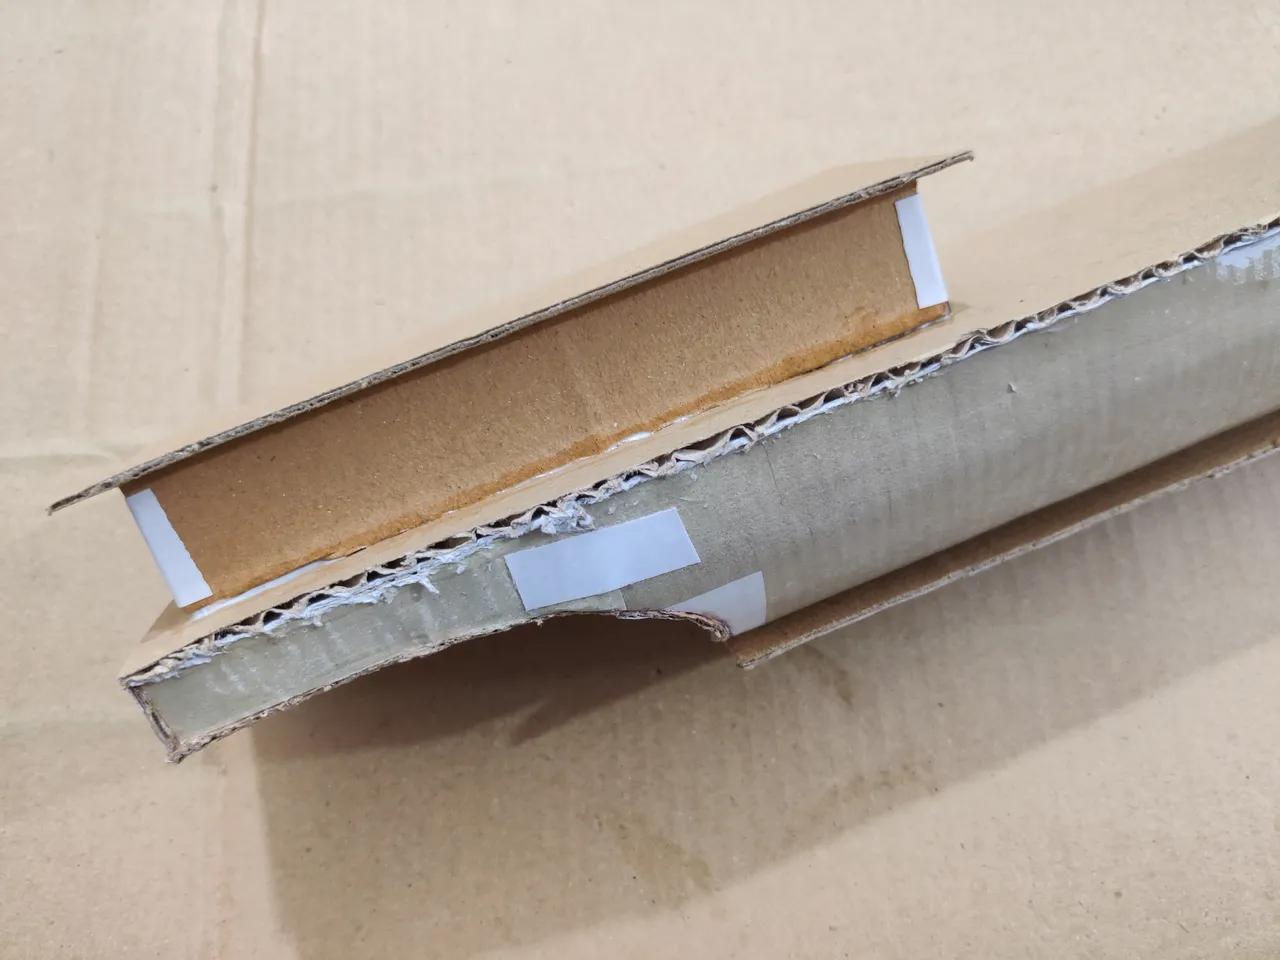
Now its time I work on the back. At first, I removed that part like you can see above and then I added a piece of cardboard (any size just needs to fill the gap) after bending it and made it curve and I removed the additional parts.
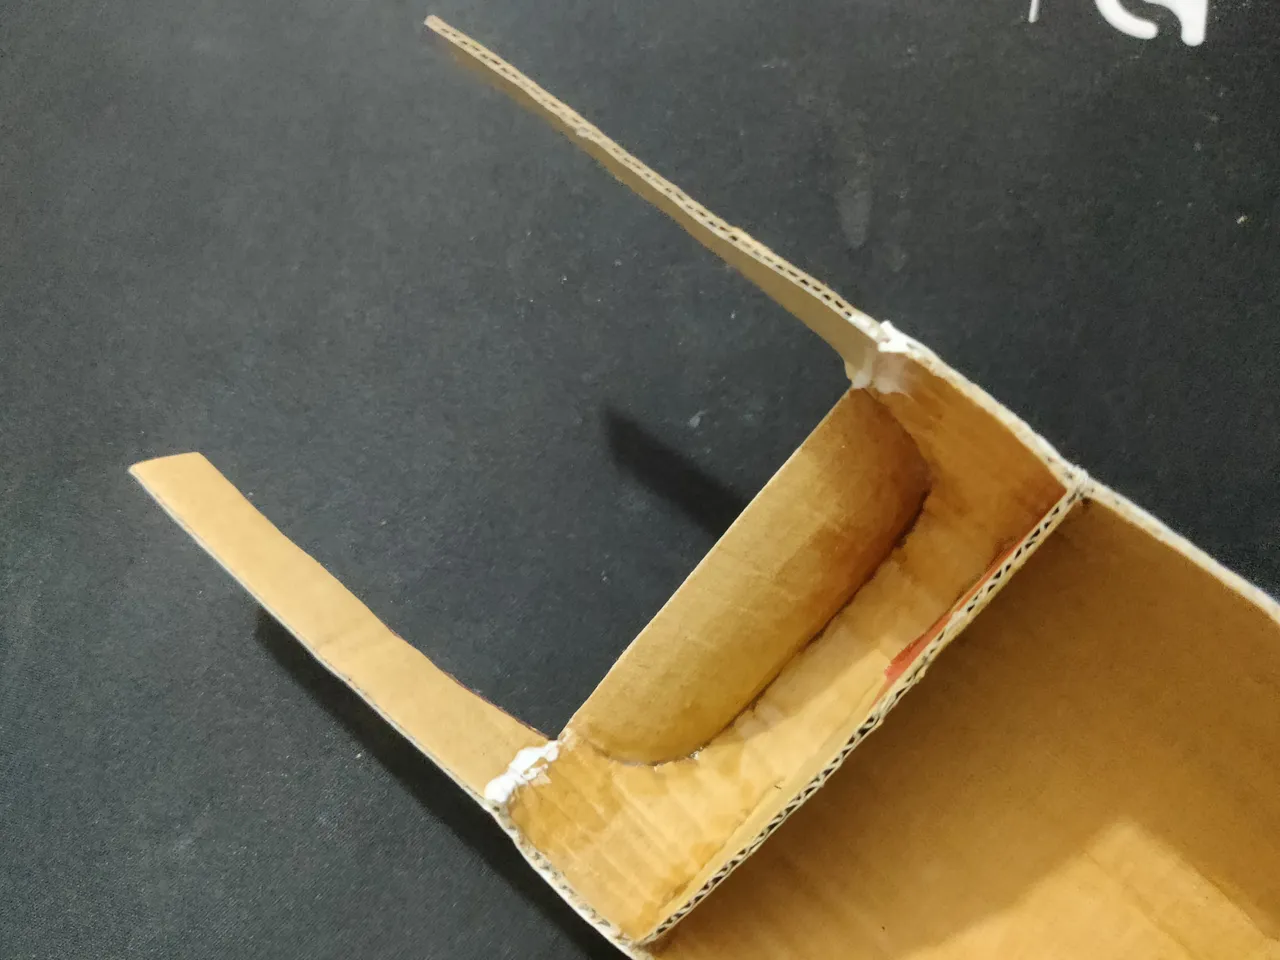
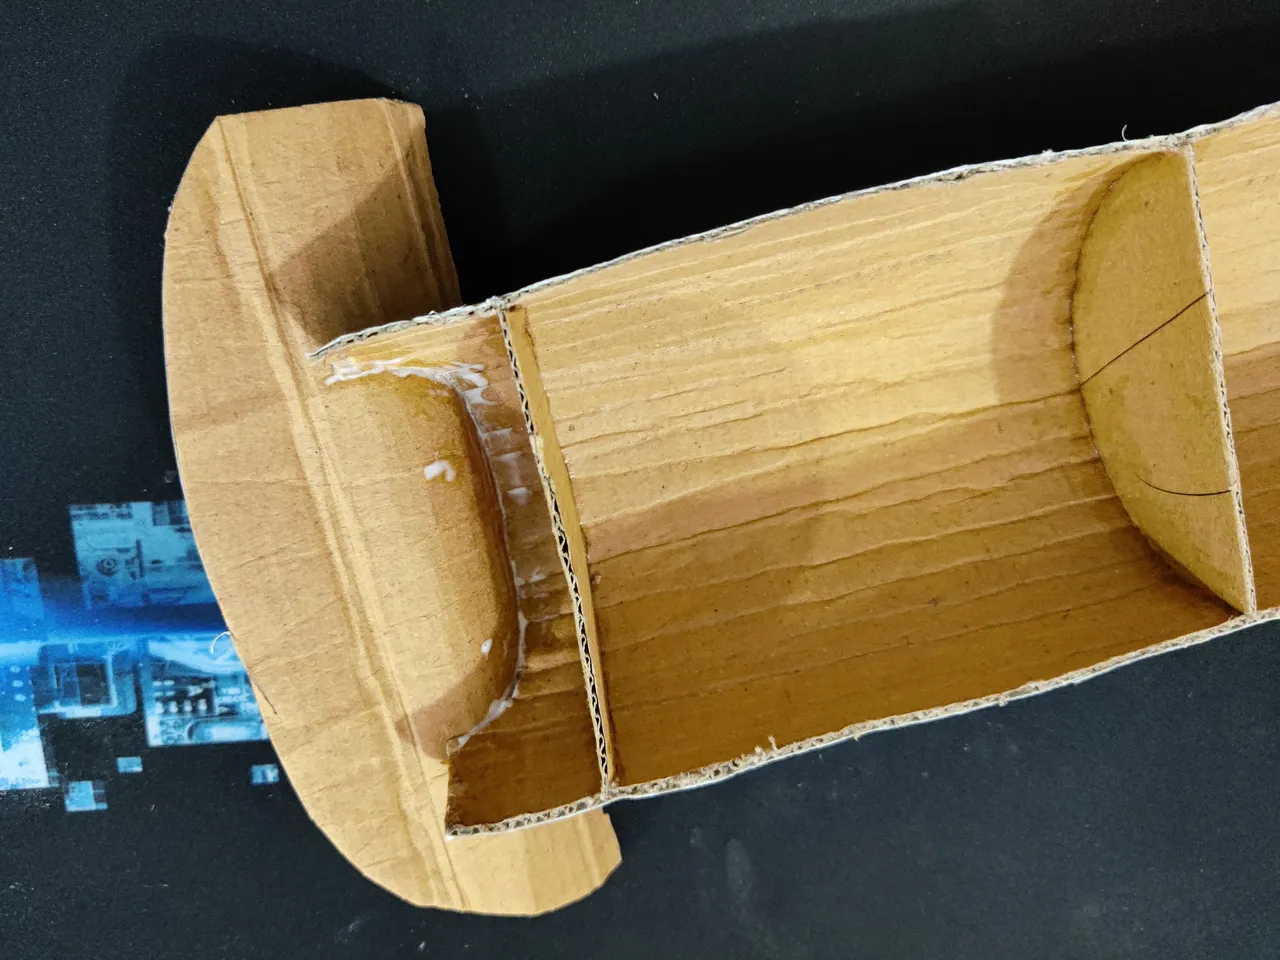
Then I just cut these small parts according to the back part and I followed the back part for the size of those parts and I glued them. Then I attached another piece to attach them as you can see below.
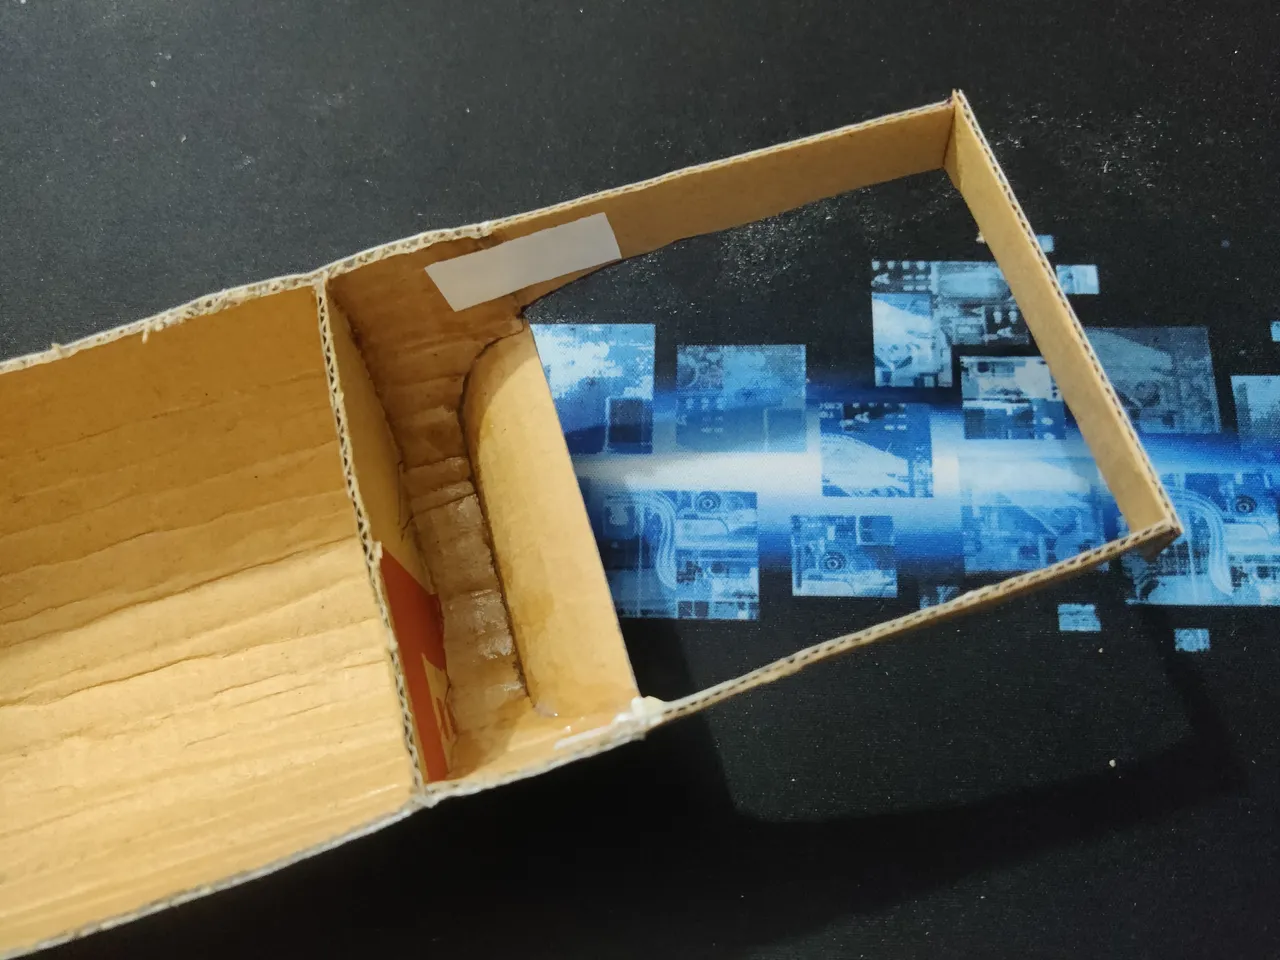
Now I needed to fill that empty spot with another piece of cardboard after I bended it a little,
And then after I glued some weight inside the body, I filled the surface adding a floor. I forgot to take a picture after I glued the floor.
Then I used this piece of cardboard and glued it underneath the ship body as a stand.
Now I needed to start working on the chambers.
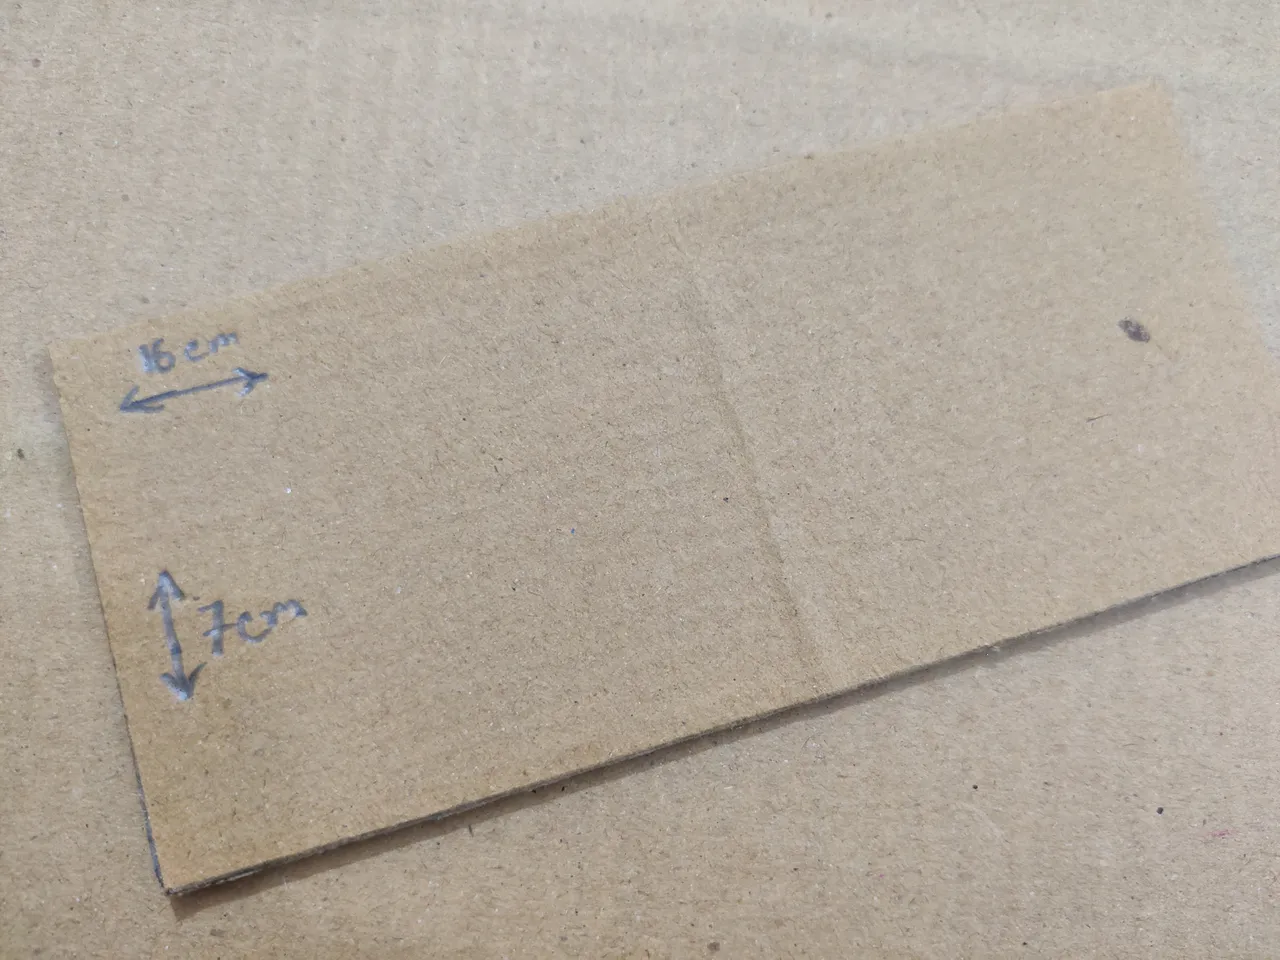
This is a 16cm X 7cm cardboard piece that I needed for a chamber and its going to be the roof of the chamber.

Then I needed two 14cm X 2.5cm pieces and they'll be the left and right side walls of the chamber.
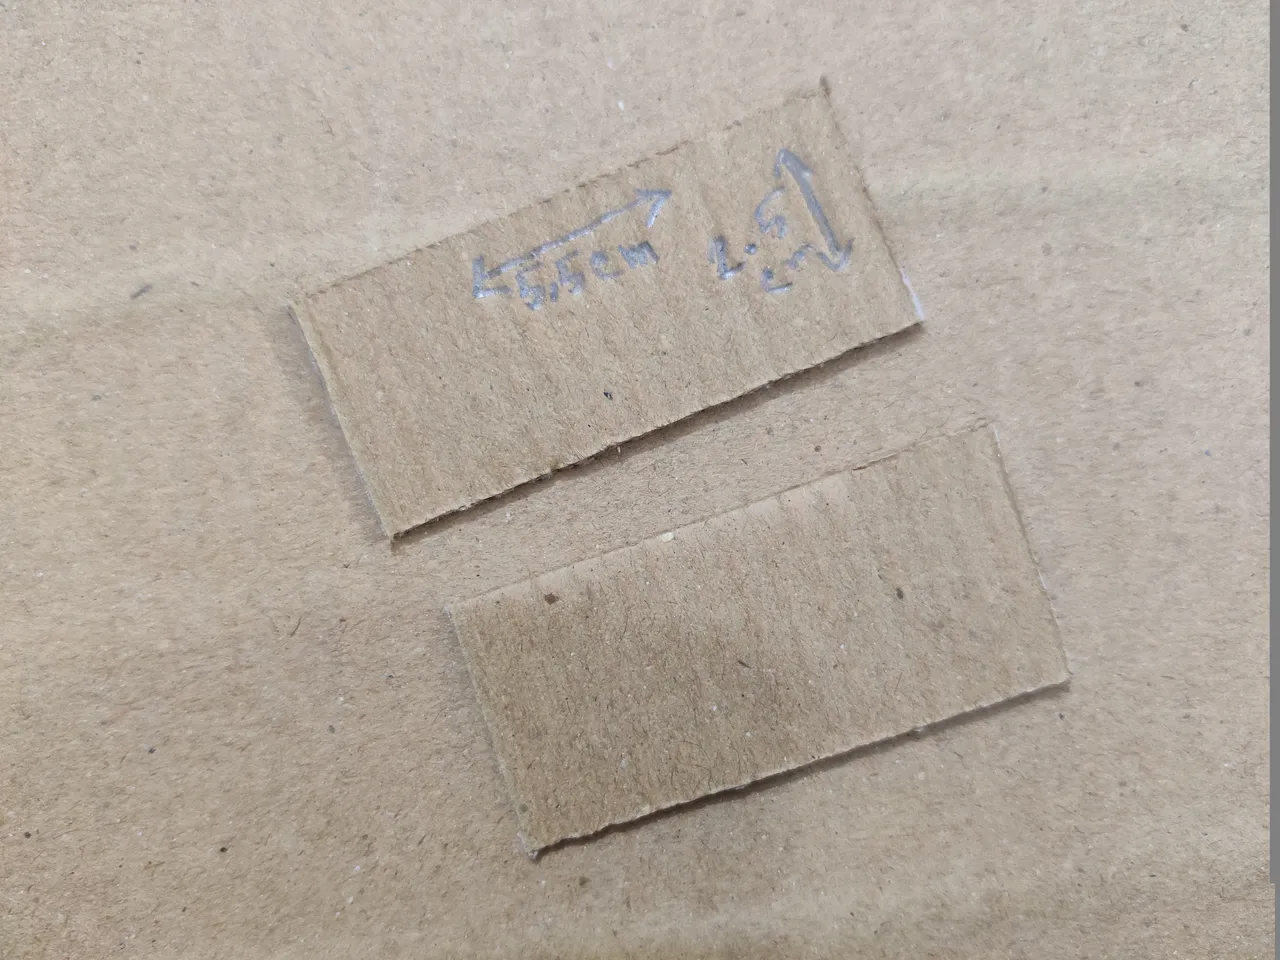
And then I needed two 5.5cm X 2.5cm pieces and they'll be the front and the back walls of the chamber.
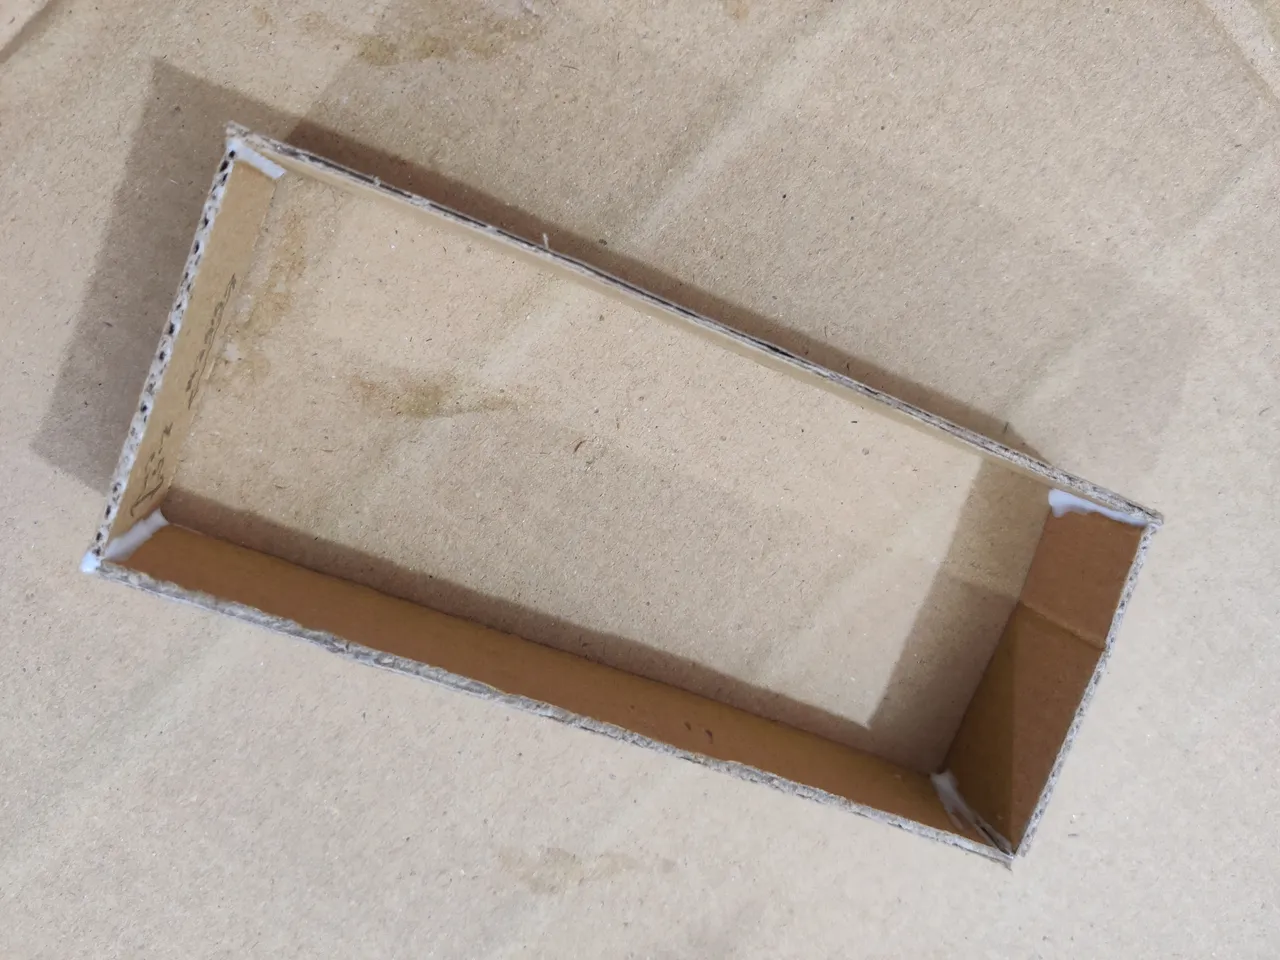
And after gluing all walls together, I attached the roof as well.
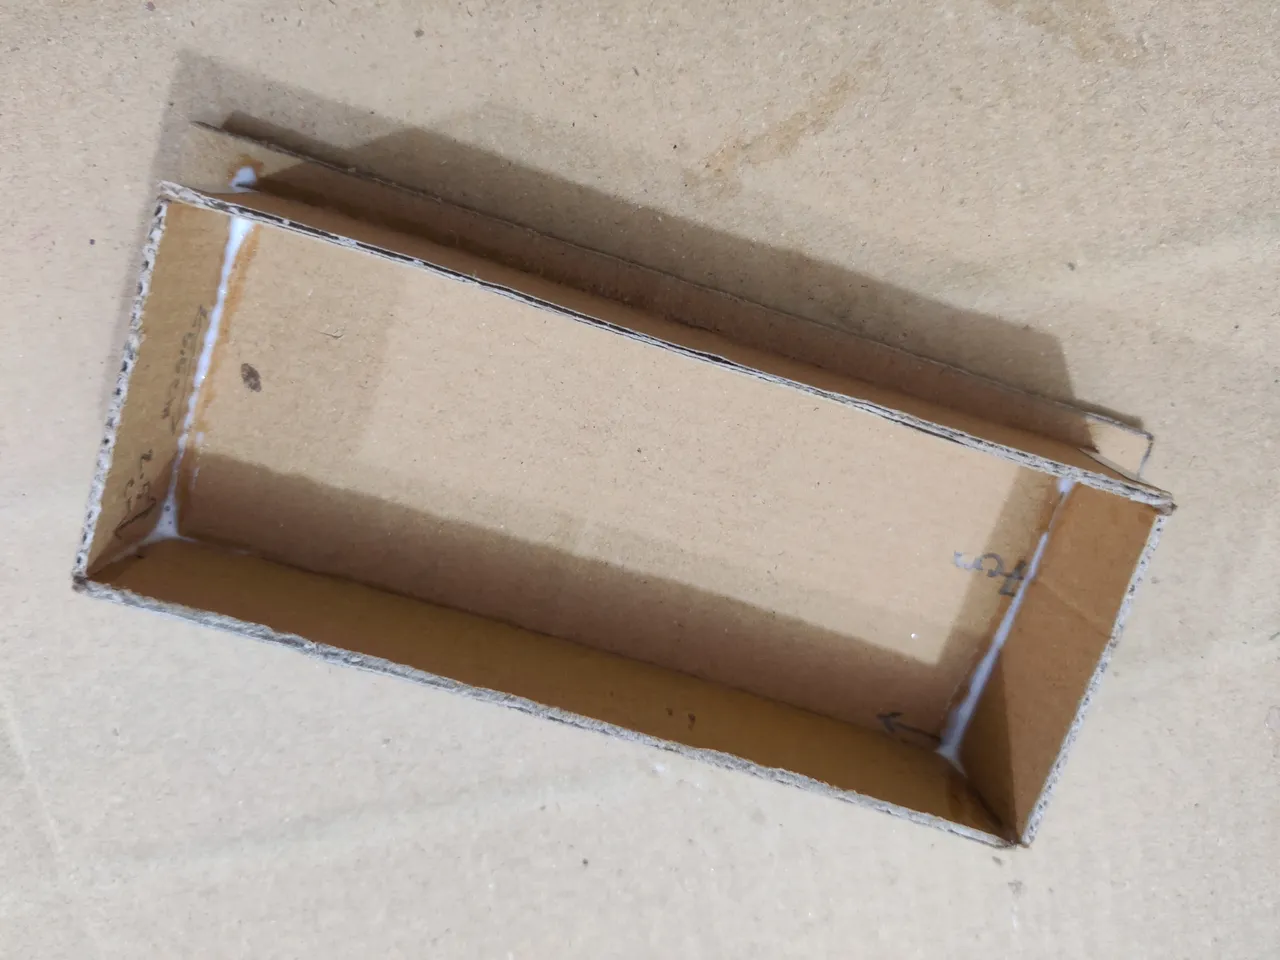
Then I glued the chamber on the ship at the back part. This is just one chamber out of three so more are on the way.
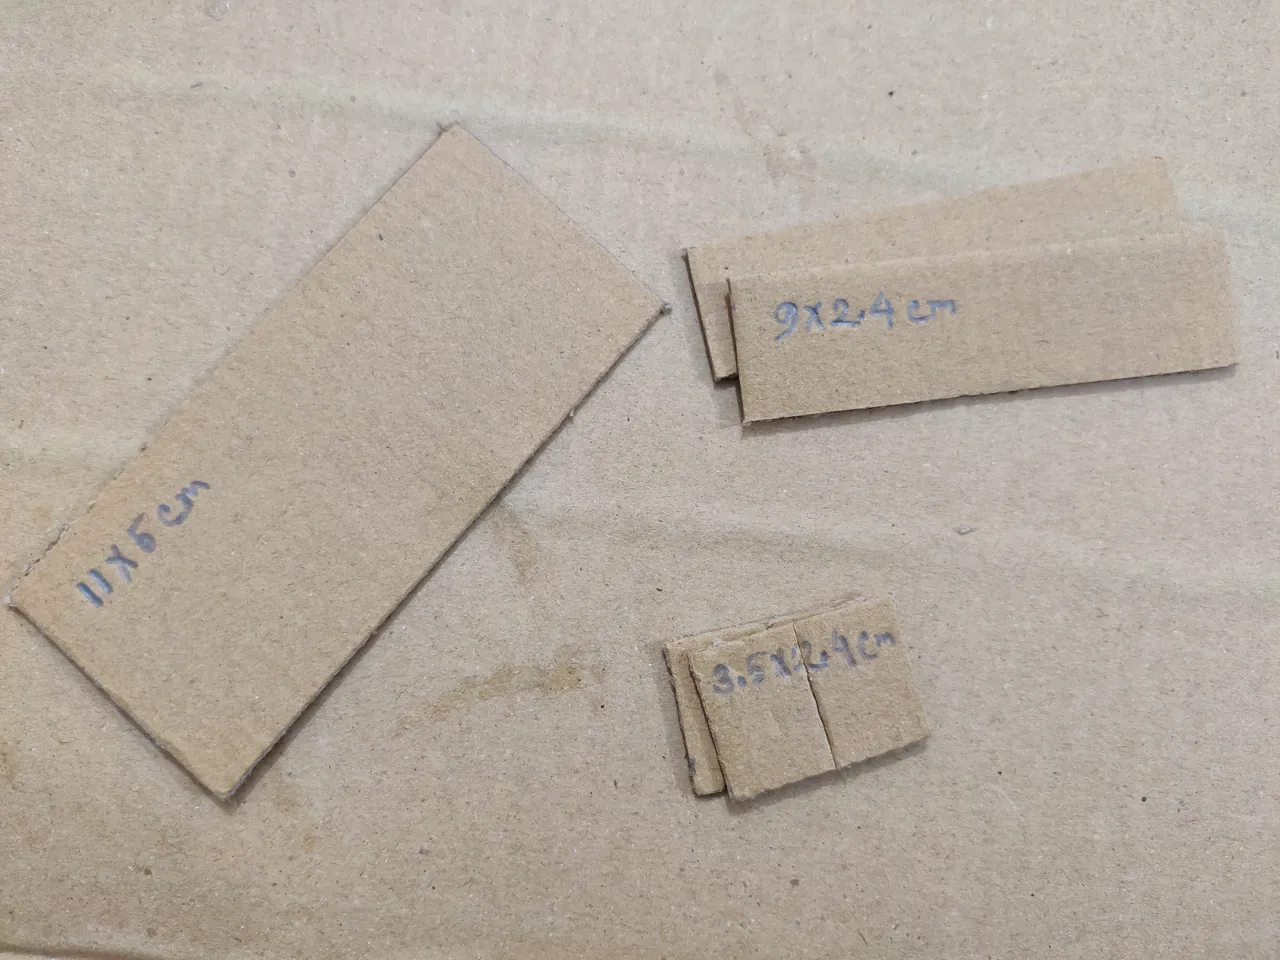
I used smaller pieces to make a smaller chamber that I can attach on the roof of the previous chamber. And I used one 11cm X 5cm for roof, two 9cm X 2.4cm for side walls, two 3.5cm X 2.4 cm for front and back walls.
Then I glued them together and attached it on above the previous chamber and now they looks like a two storied building above the ship.
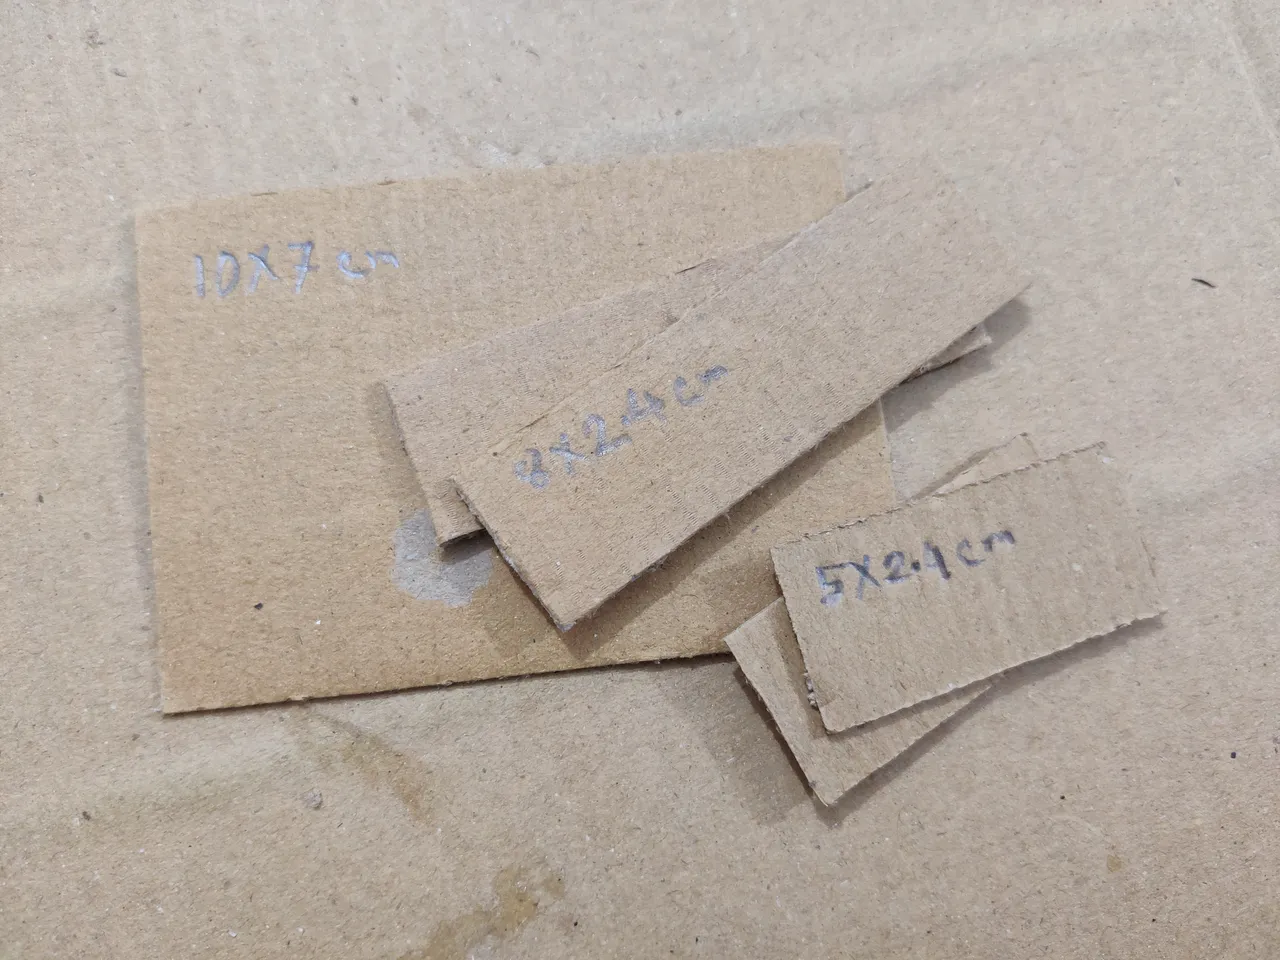
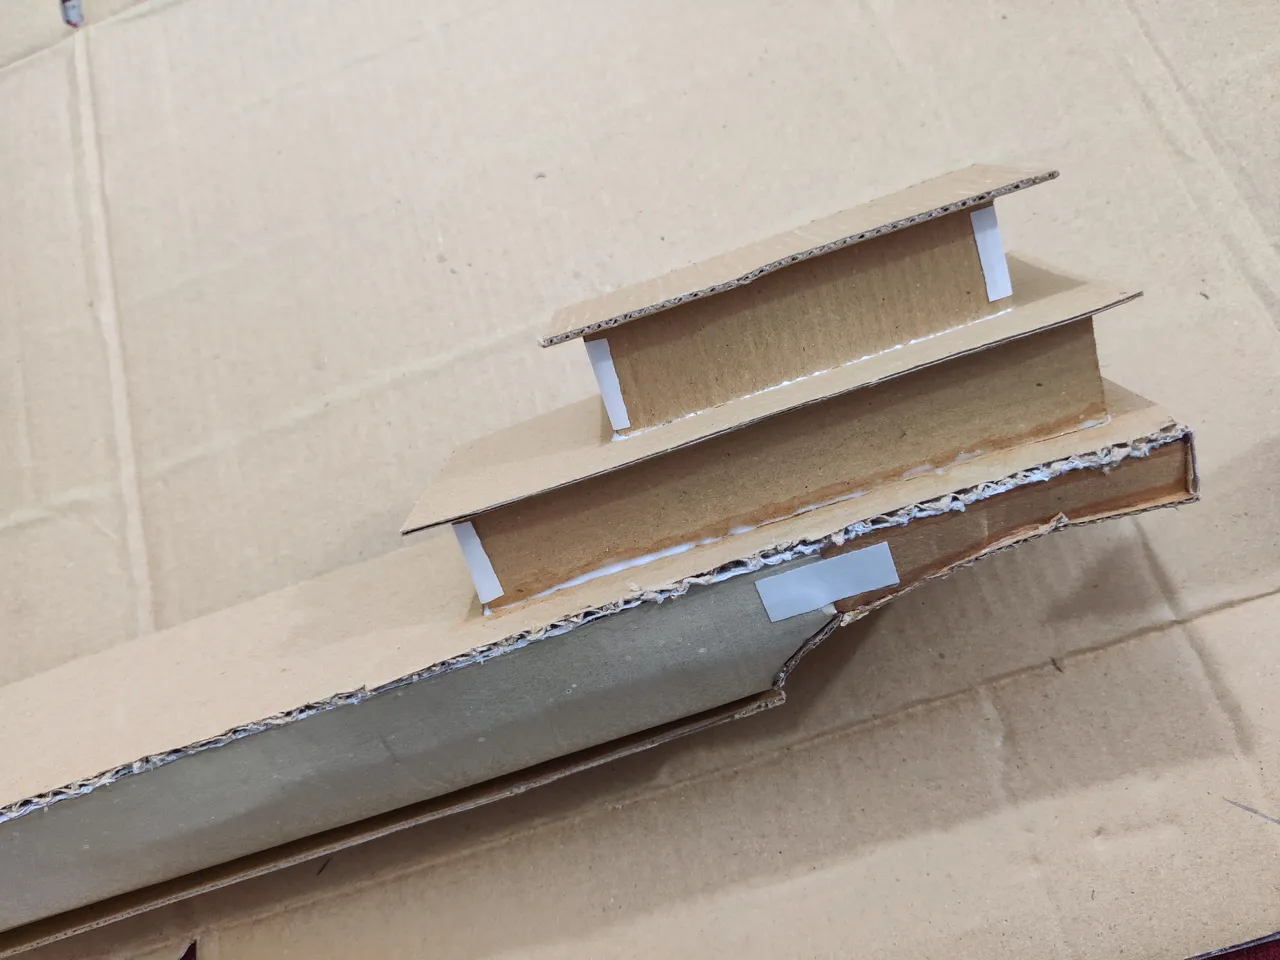
Now I needed the third chamber and I used one 10cm X 7cm for roof, two 8cm X 2.4cm for side walls, two 5cm X 2.4 cm for front and back walls.
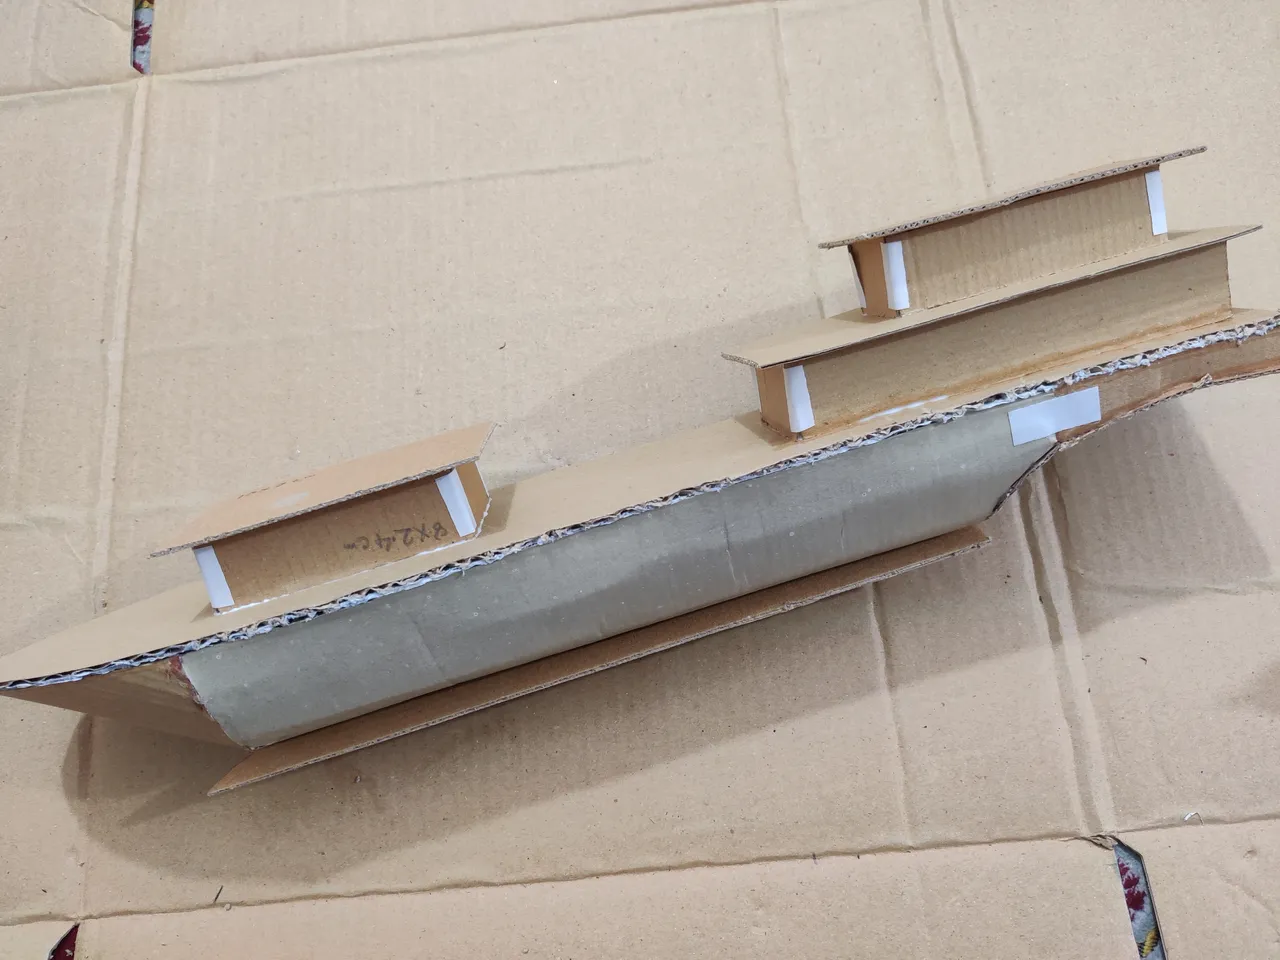
Then I attached the third chamber on the front side of the ship. If I could find same color cardboards which I had actually but I failed to use them on time then I'd leave them like this but as they're a mess in color now so I had to add some color papers on them.
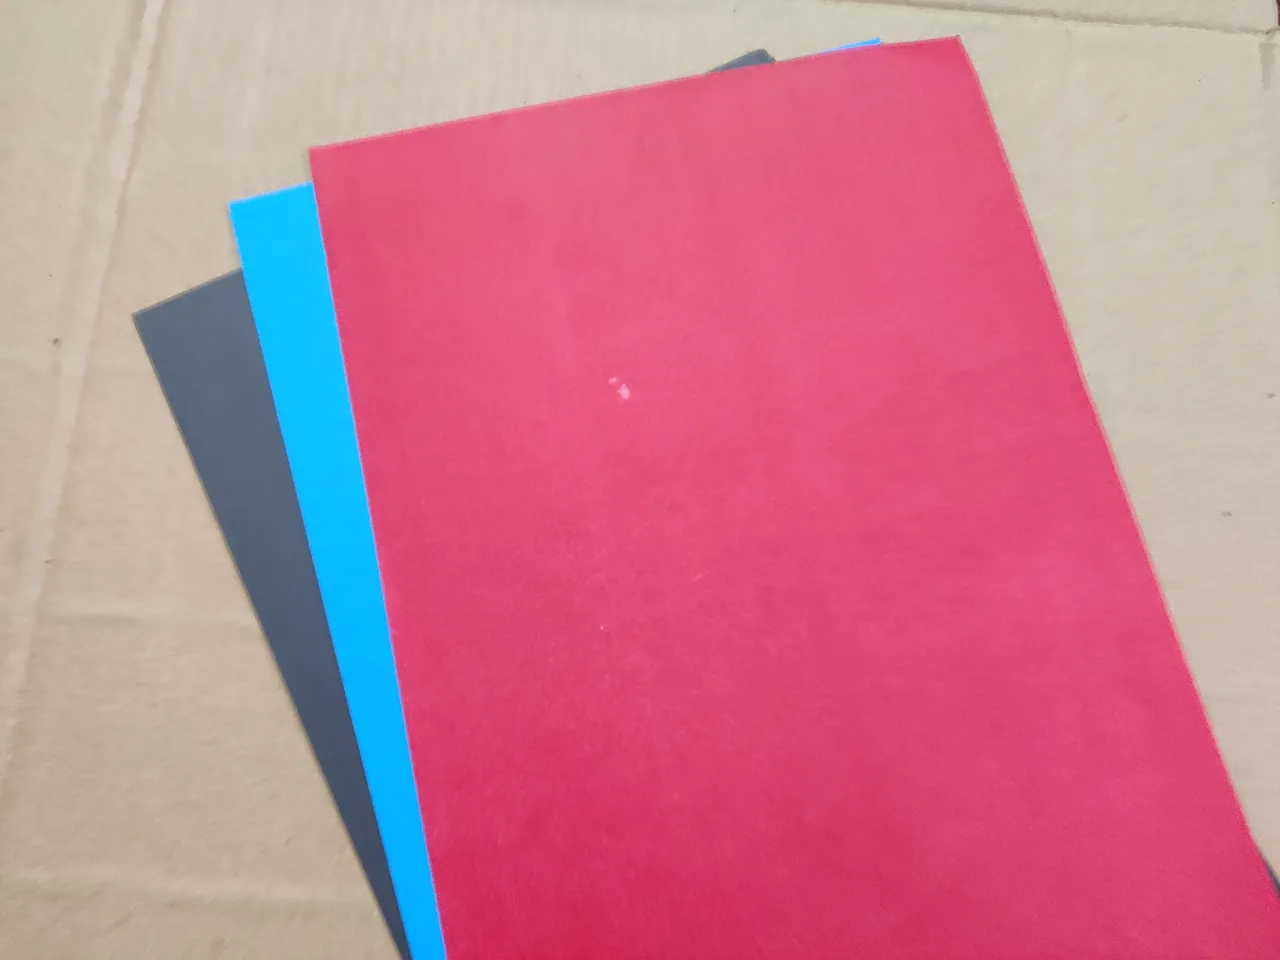
I searched for a ship image on google to see how they're colored and I've seen a big ship colored as red at the below part and black on the lower body.
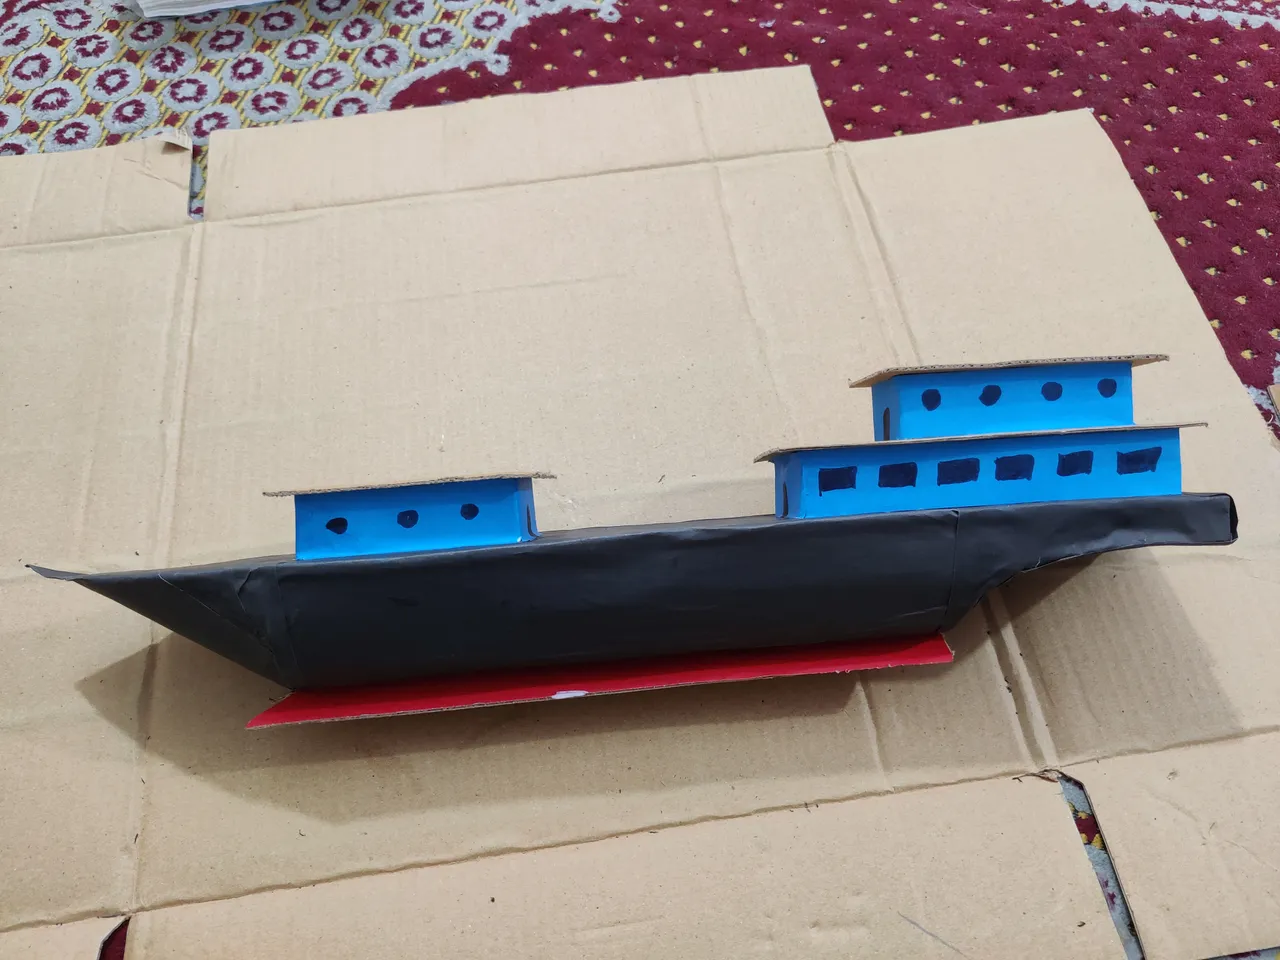
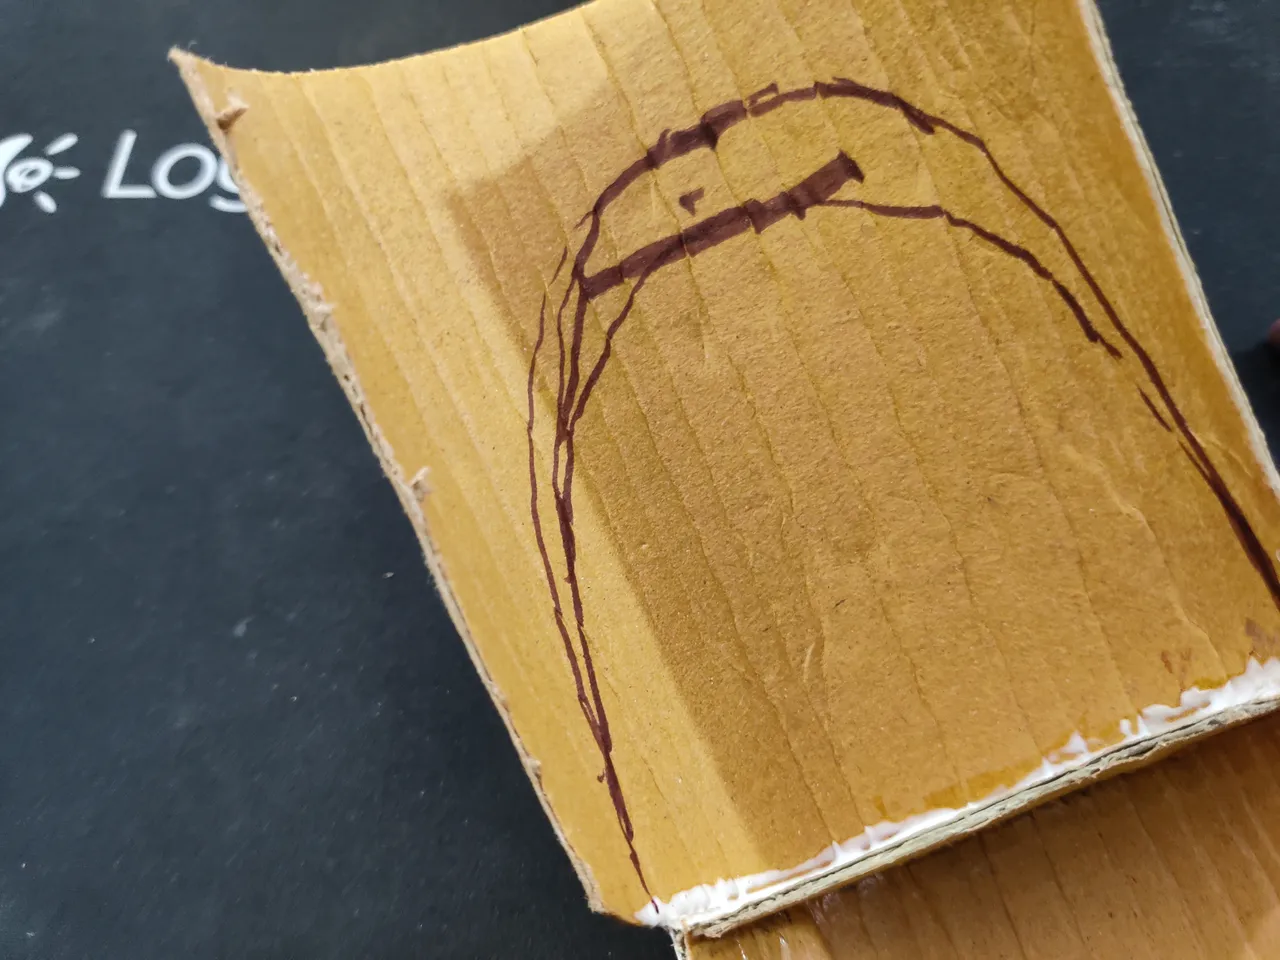
I used red no the lower stand part, black on the body part and blue on the chambers and then I drew window and door on the chambers with a black colored pen.
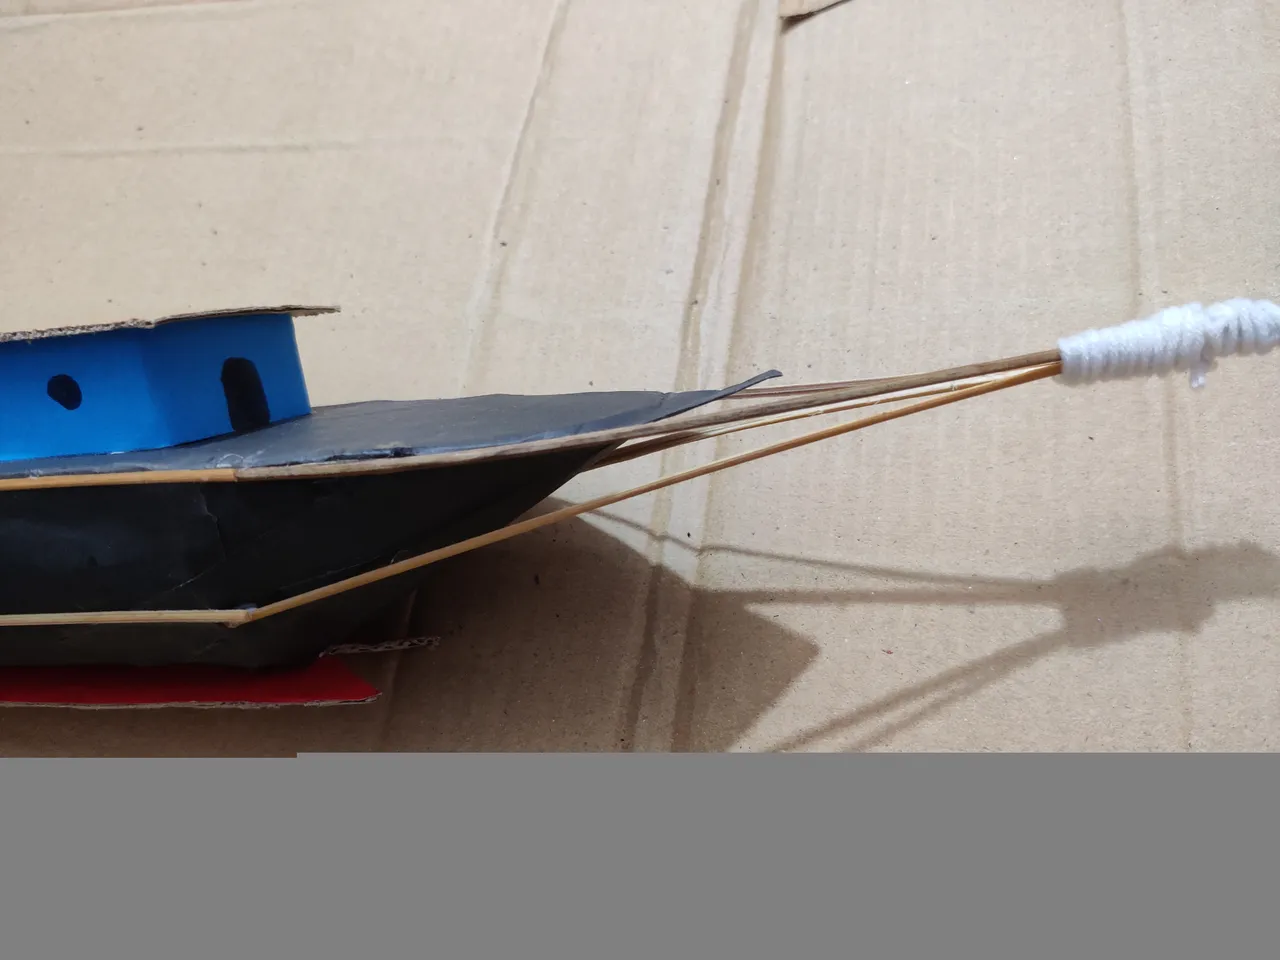
Now its time I attach some bamboo sticks at the side of the ship and I did it as above. There are a lot of more works on the original idea like using more and more bamboo sticks but attaching the bamboo sticks was a tough job and besides I've already spend a lot of time in this single work so I ignored that extra part.
Now its time to make some sails.
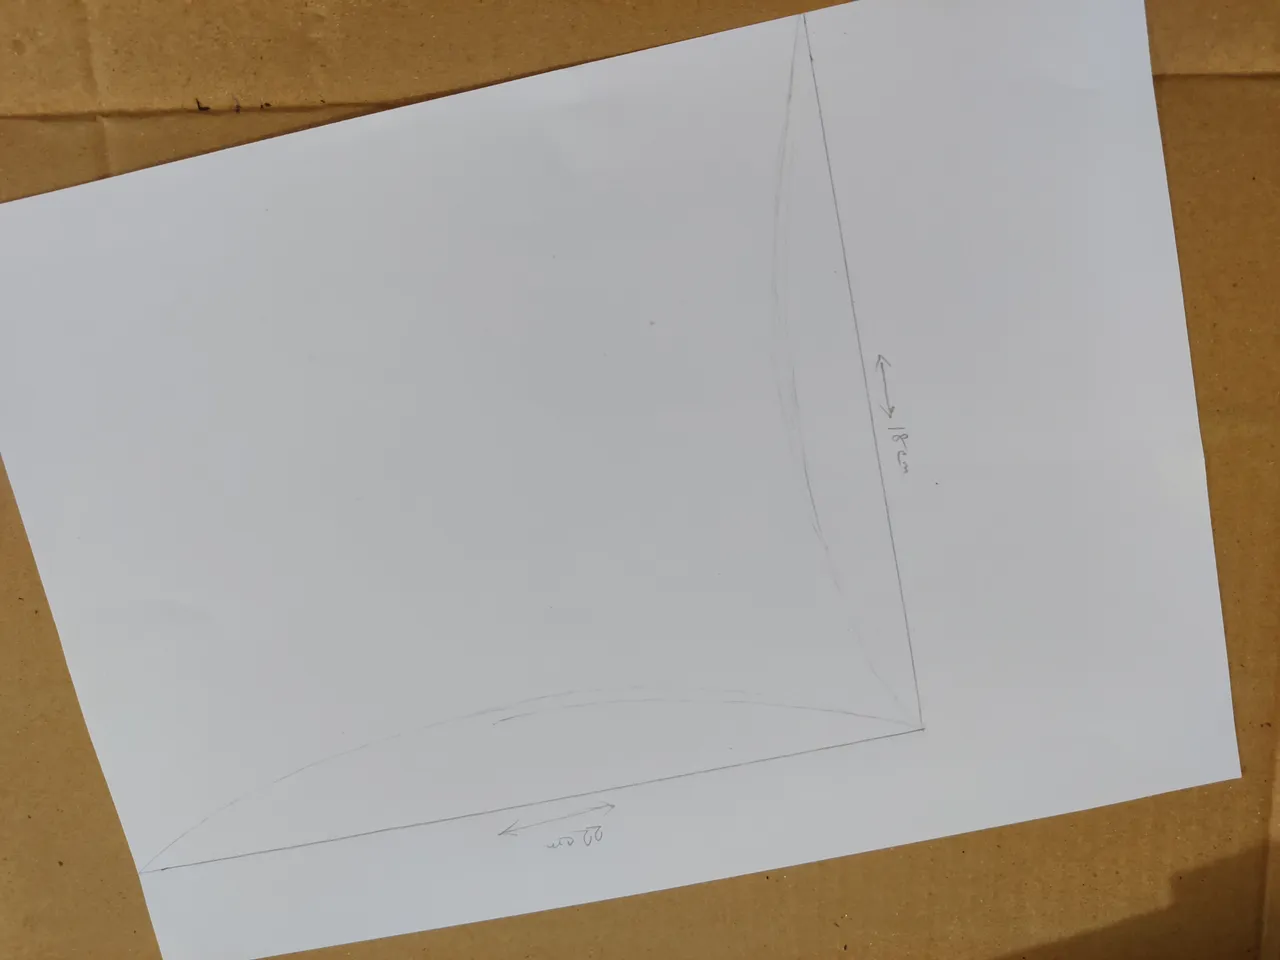
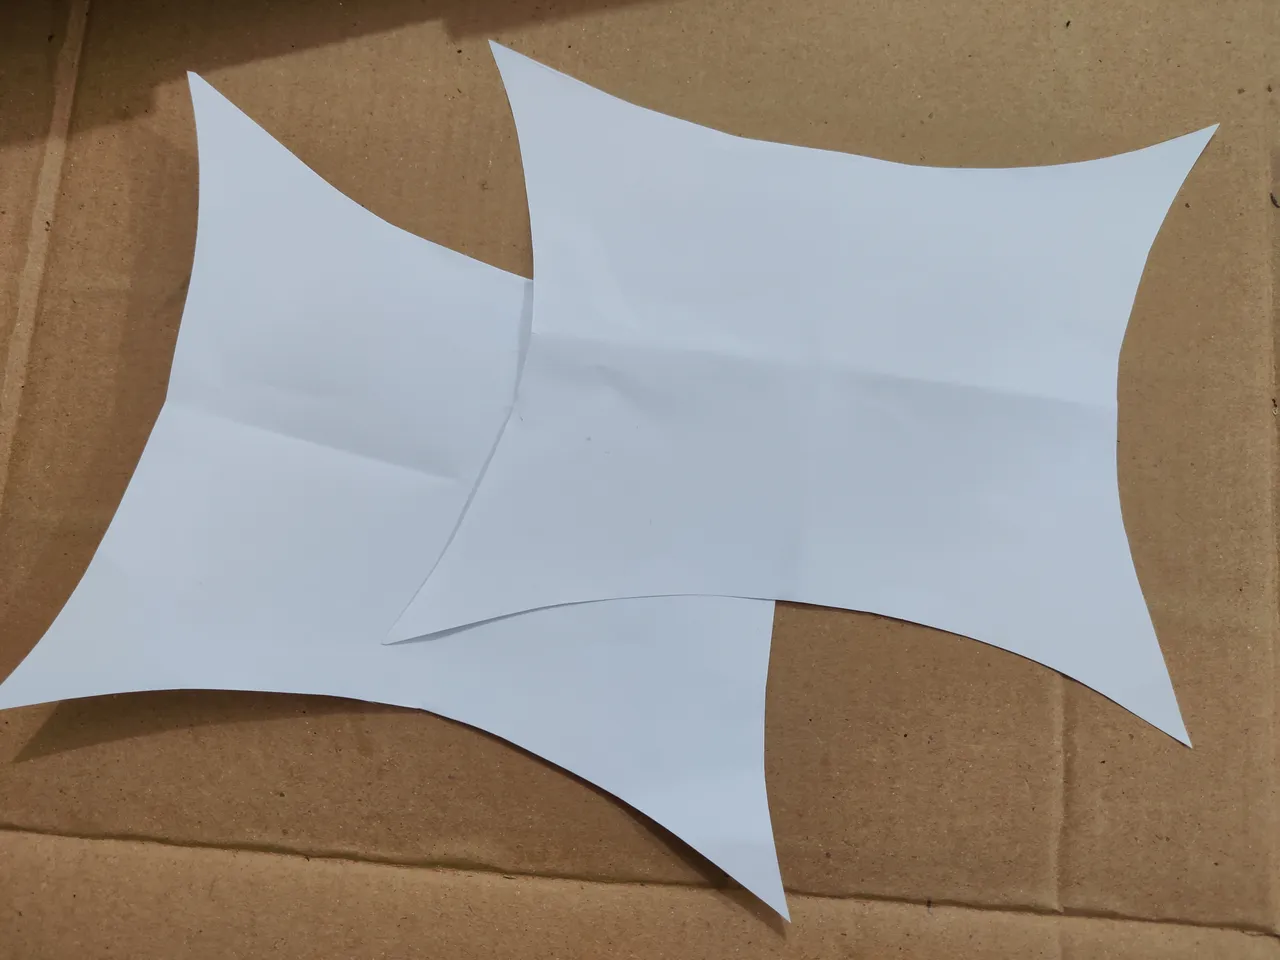
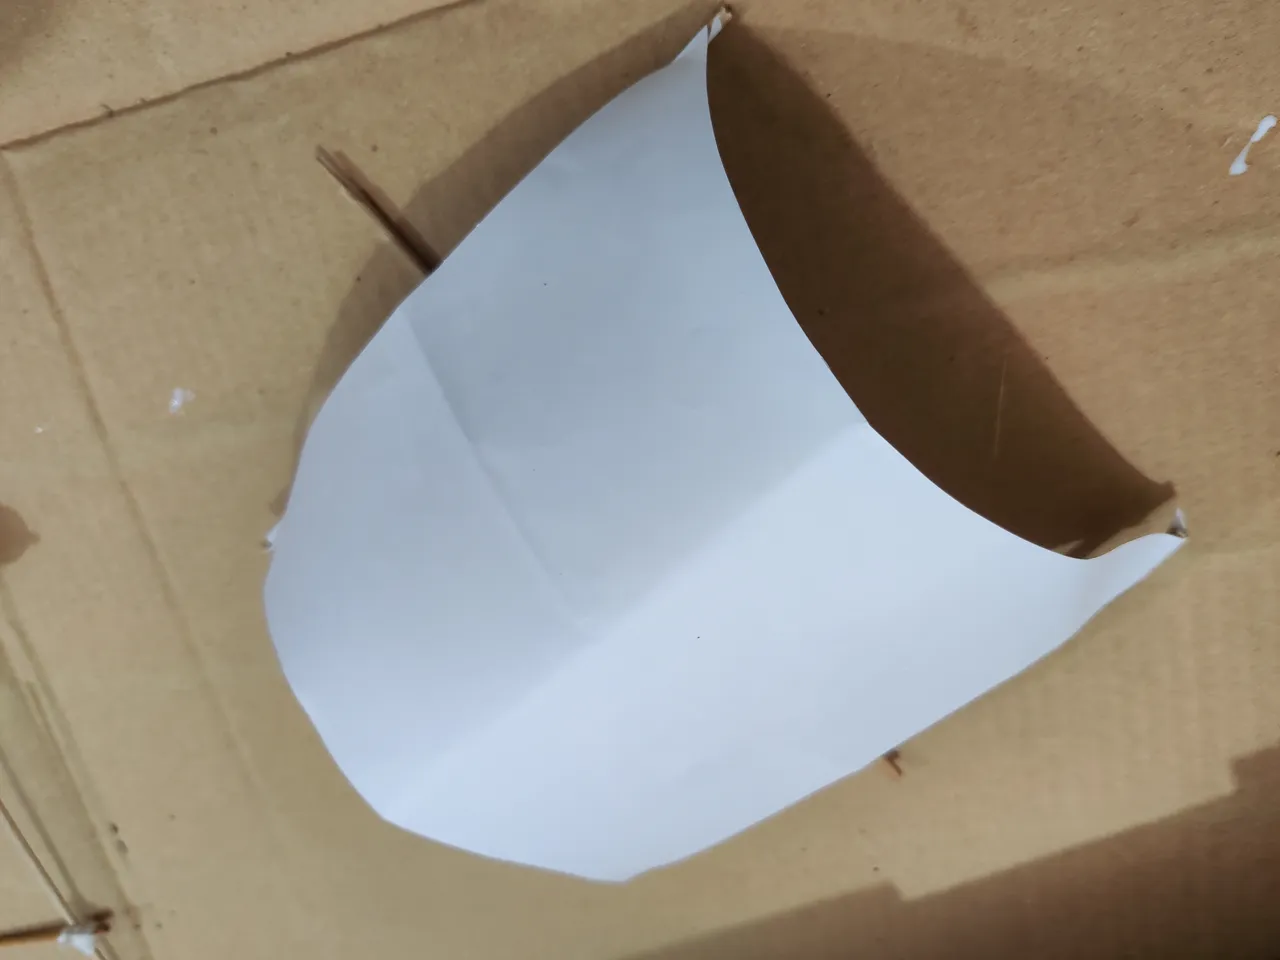
After taking a 22cm X 18cm white paper, I cut it like above and I did that with two papers.

Then I used some bamboo sticks and I attached them using white thread and made them the structure for the sails.
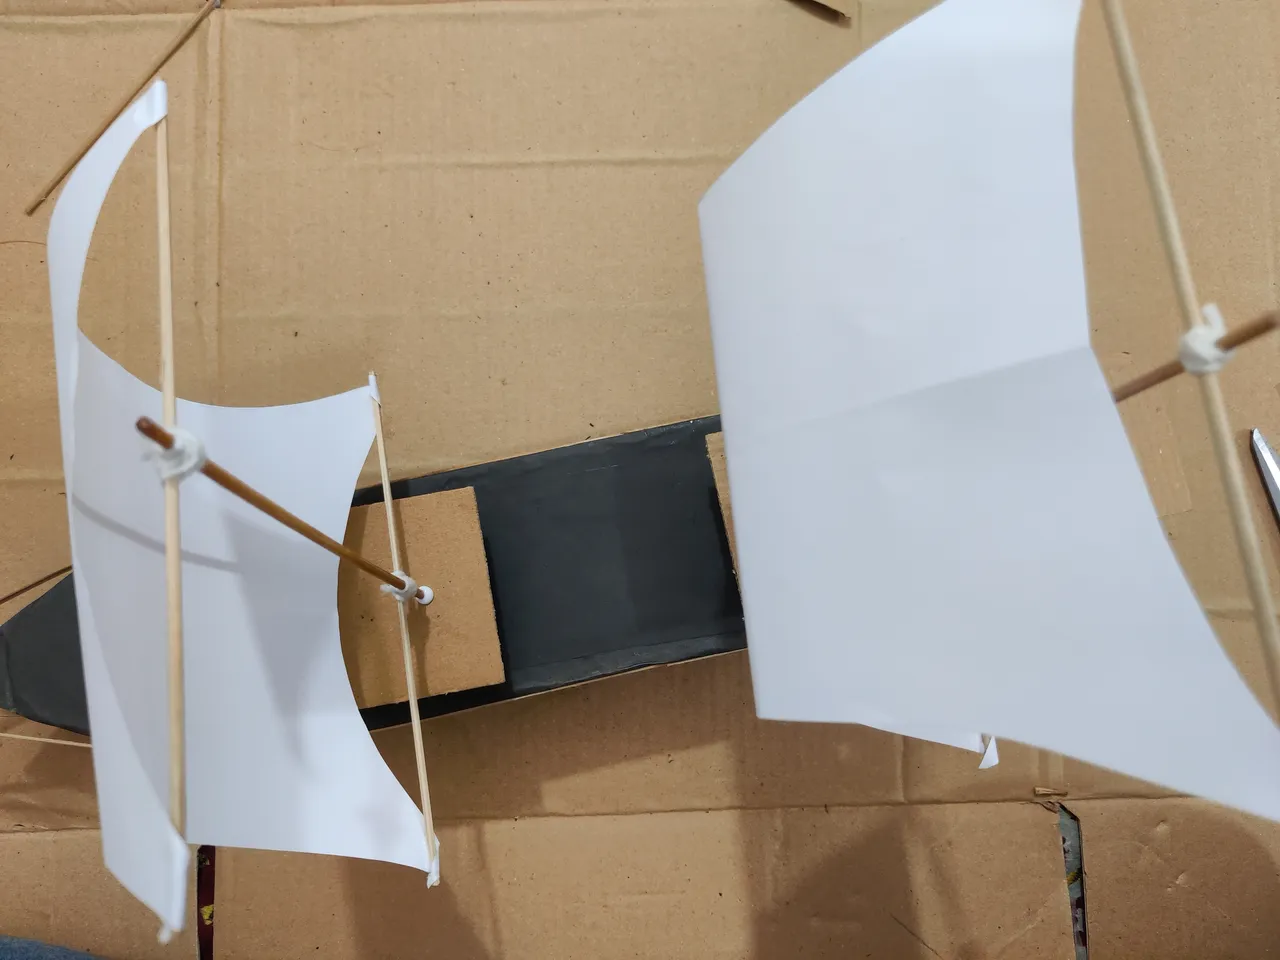
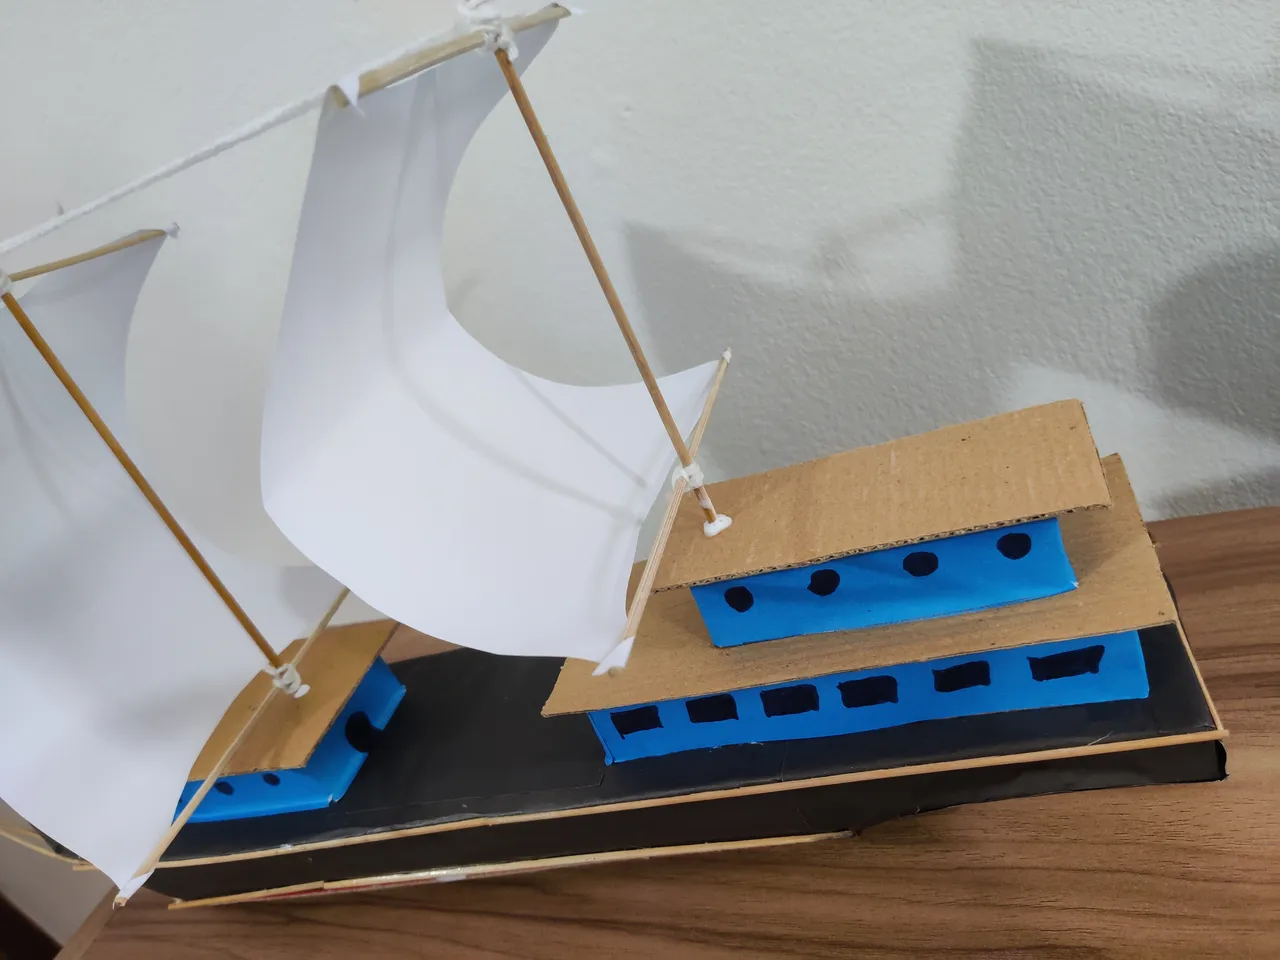
Then I glued the papers on the bamboo stick structures and made them good sails and I attached on sail on the back upper chamber and another one on the front chamber.
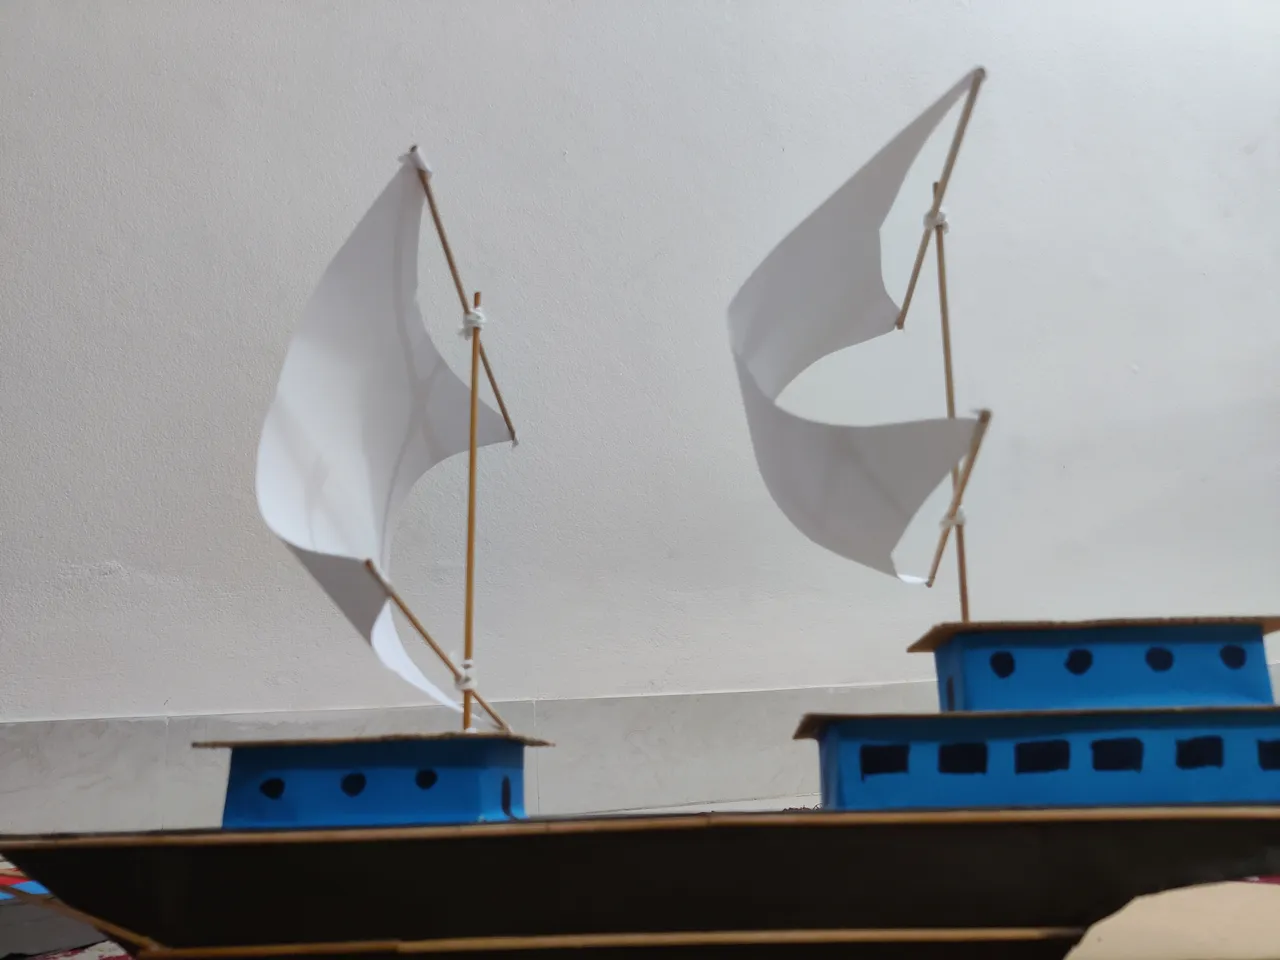
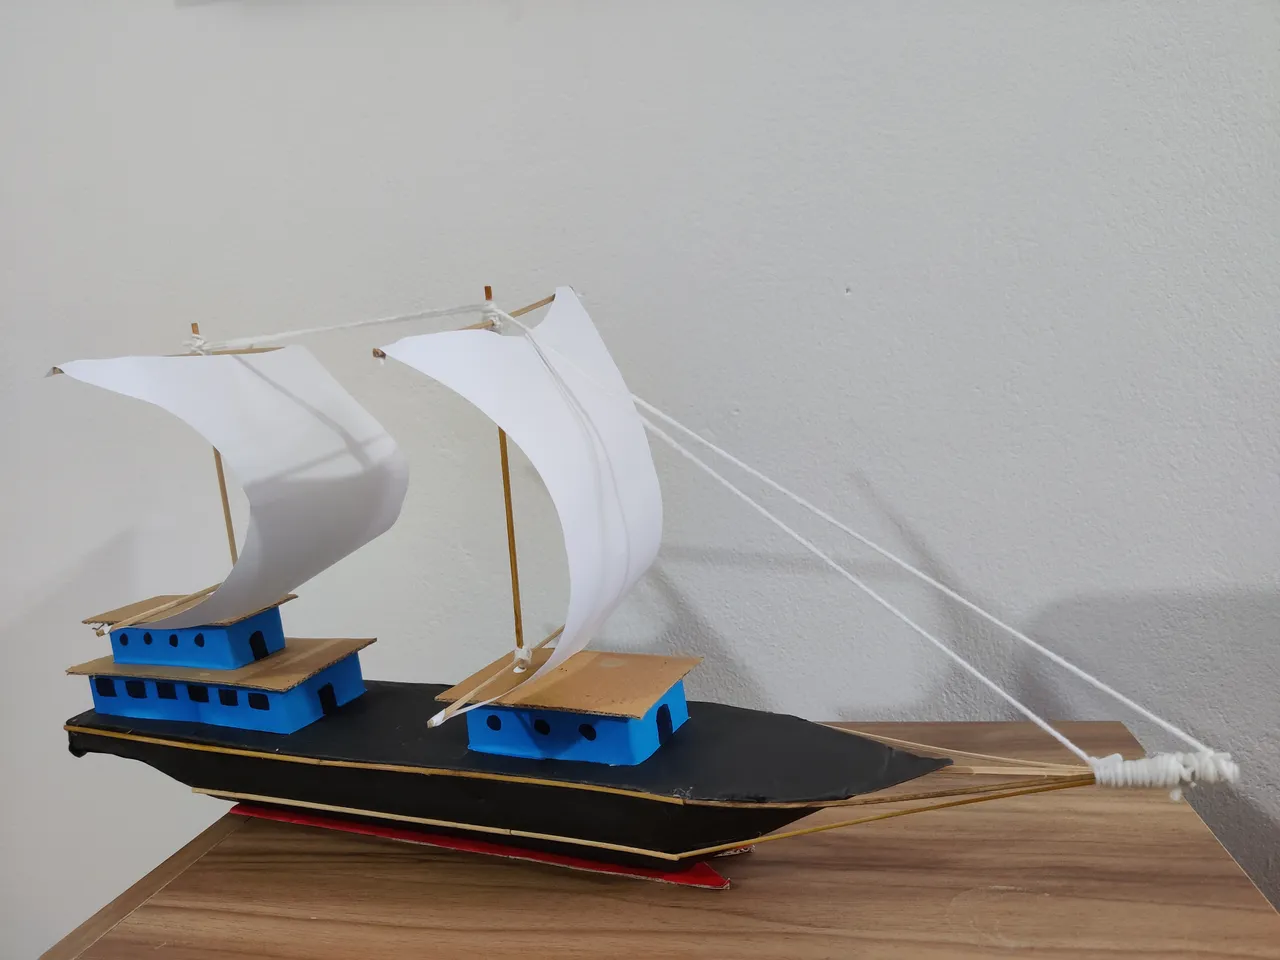
And they looks like this now.
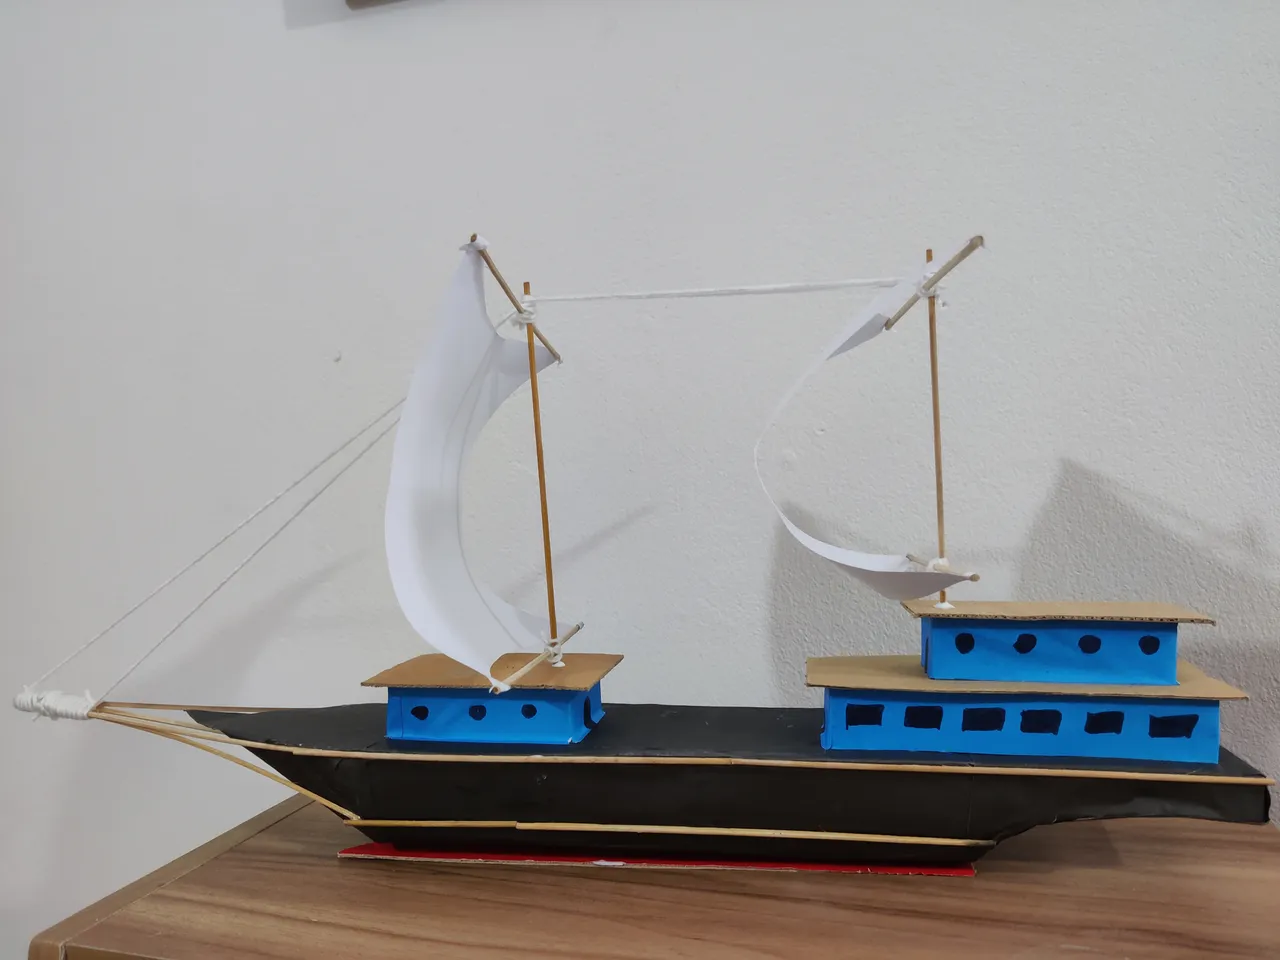
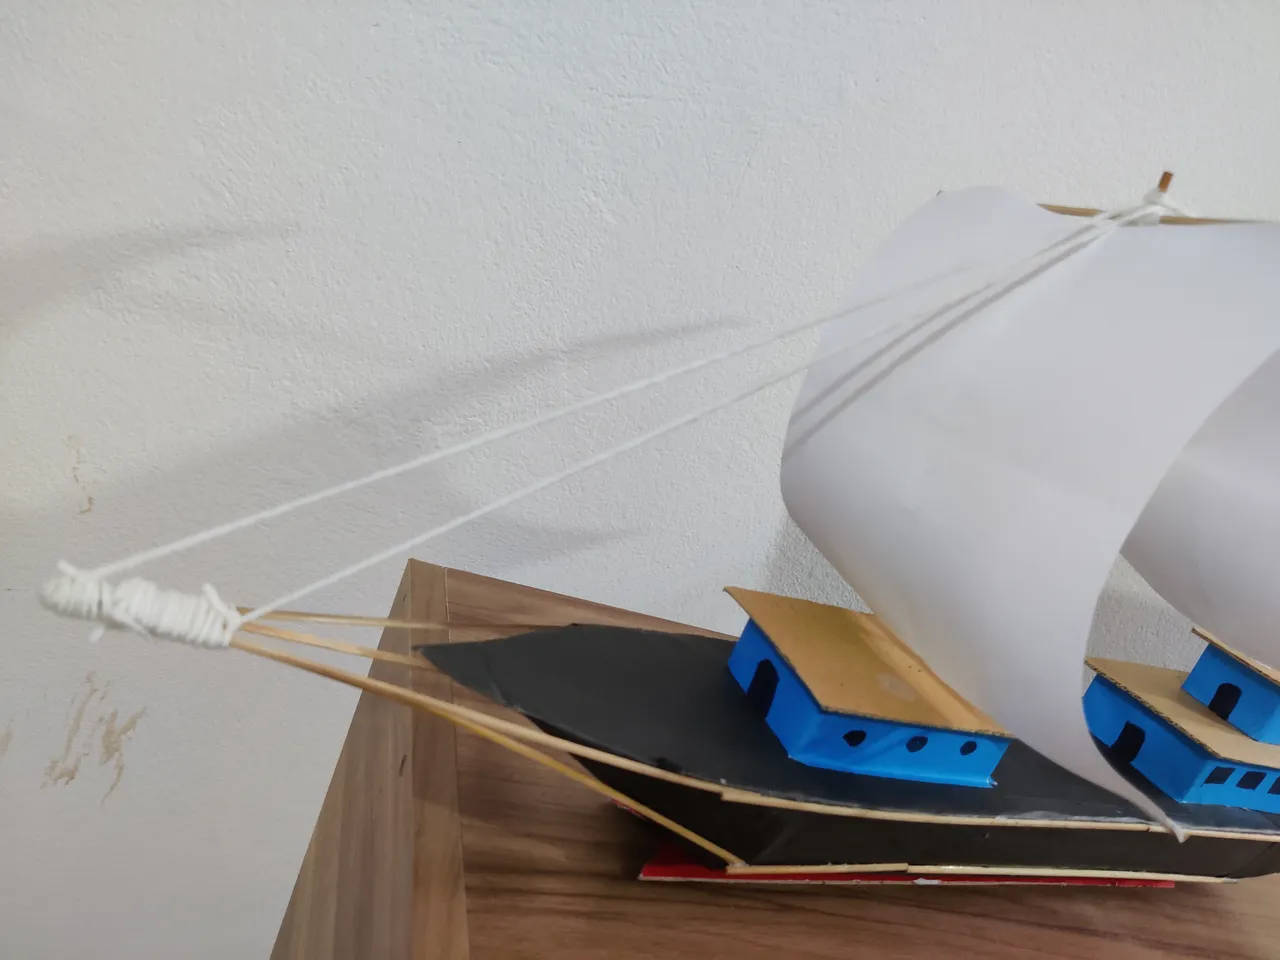
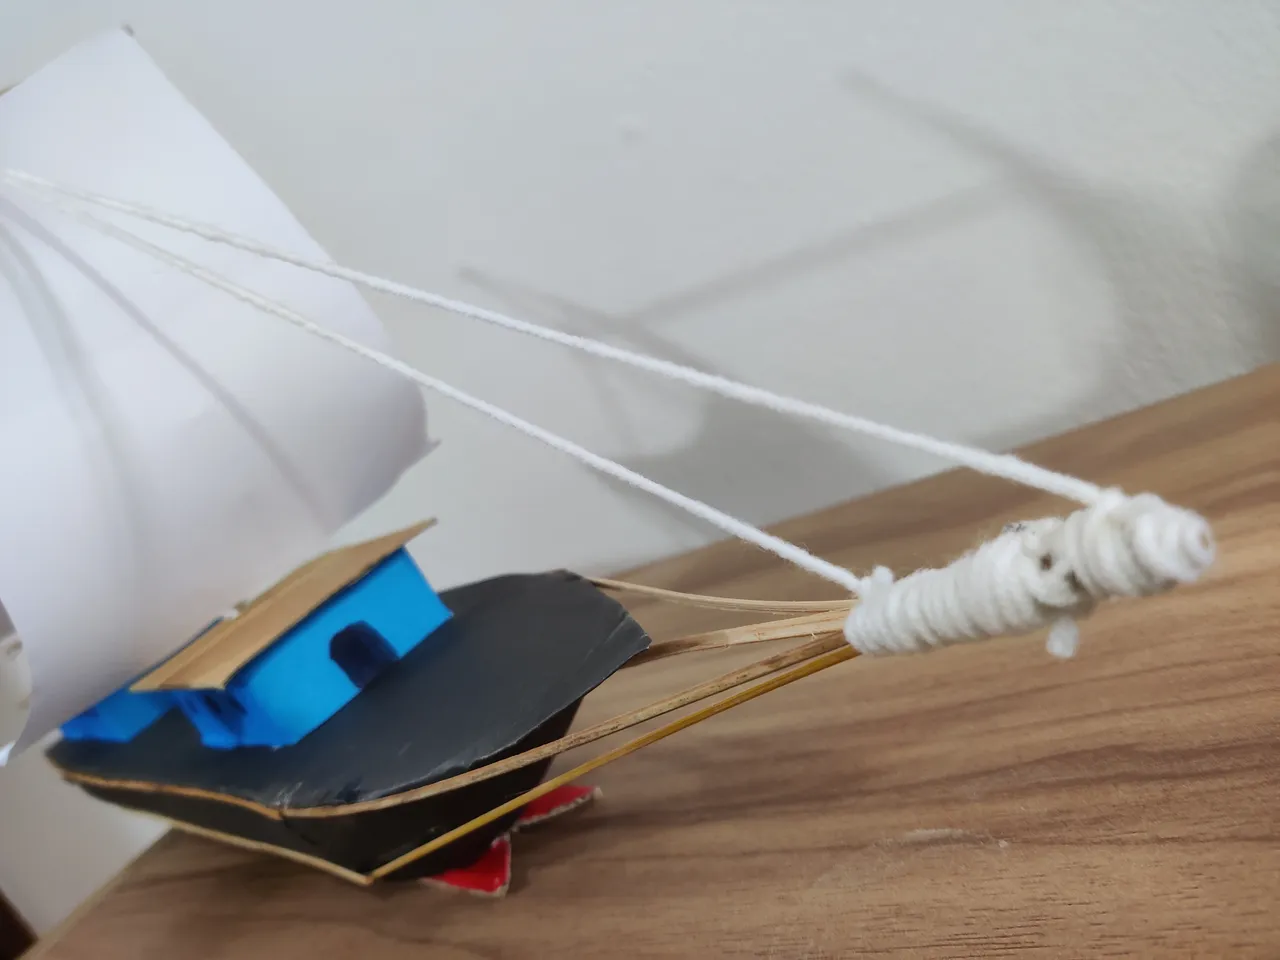
And now I used the white thread to decorate the ship a little better and I didn't use glue on this, I just used knots and attached the threads on the ship.
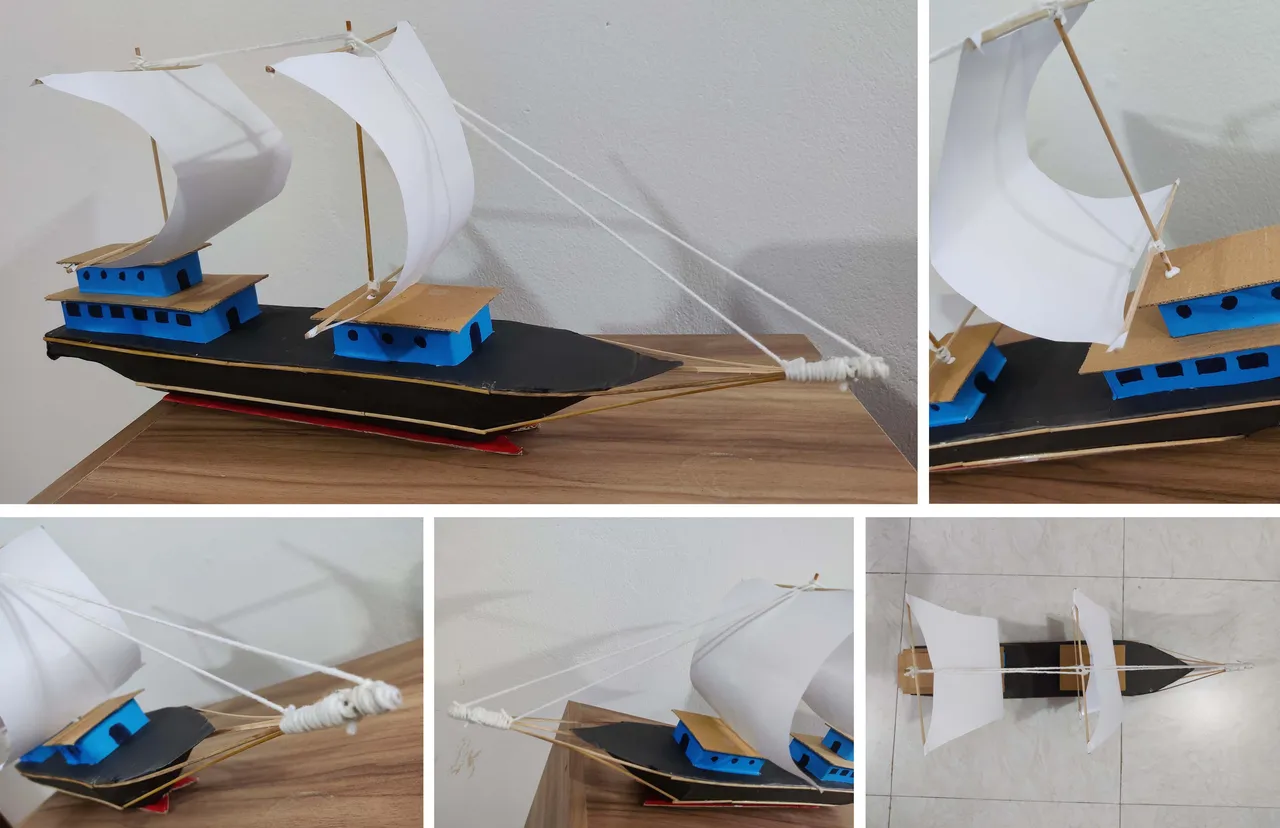
And its actually done from my side although I could do more but I feel bored now after working on a single project for so long. Let's check out the ship now.
Back view.
Front view.
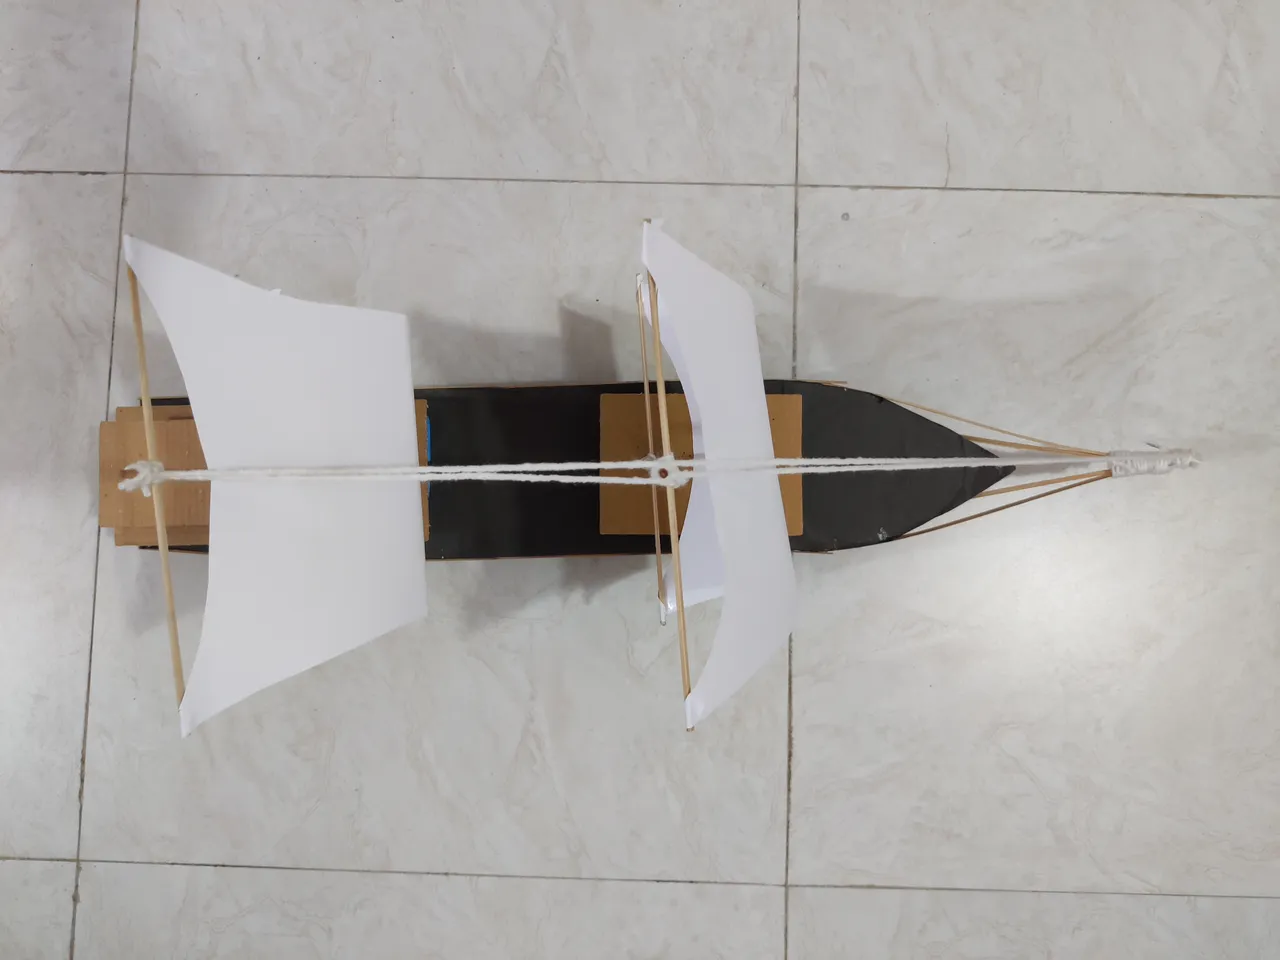
Aerial view.
We came to the finishing line of this DIY post. I didn't check on time but I think the whole process killed around or more than 7 hours of my life. Yes, freaking 7 hours and I did that taking more than 10 days.
I may show more of my DIY practice later if I find something interesting to try on. Don't forget to pray for me for the result of the contest.
All photos are my own except for the line breakers that I borrowed from the contest post page and I hope that's okay with the DIYHub team.
SEE YOU.