The sun has always been a symbol of power, strength and even beauty. For many it has been an object of worship and for others inspiration for art and even technology.
Precisely, the sun is the theme of DIYHub's monthly contest, where we are invited to make something inspired by the sun.
You can read more about the contest by following this link:
@diyhub/diyhub-contest-sun-in-collaboration-with-needleworkmonday
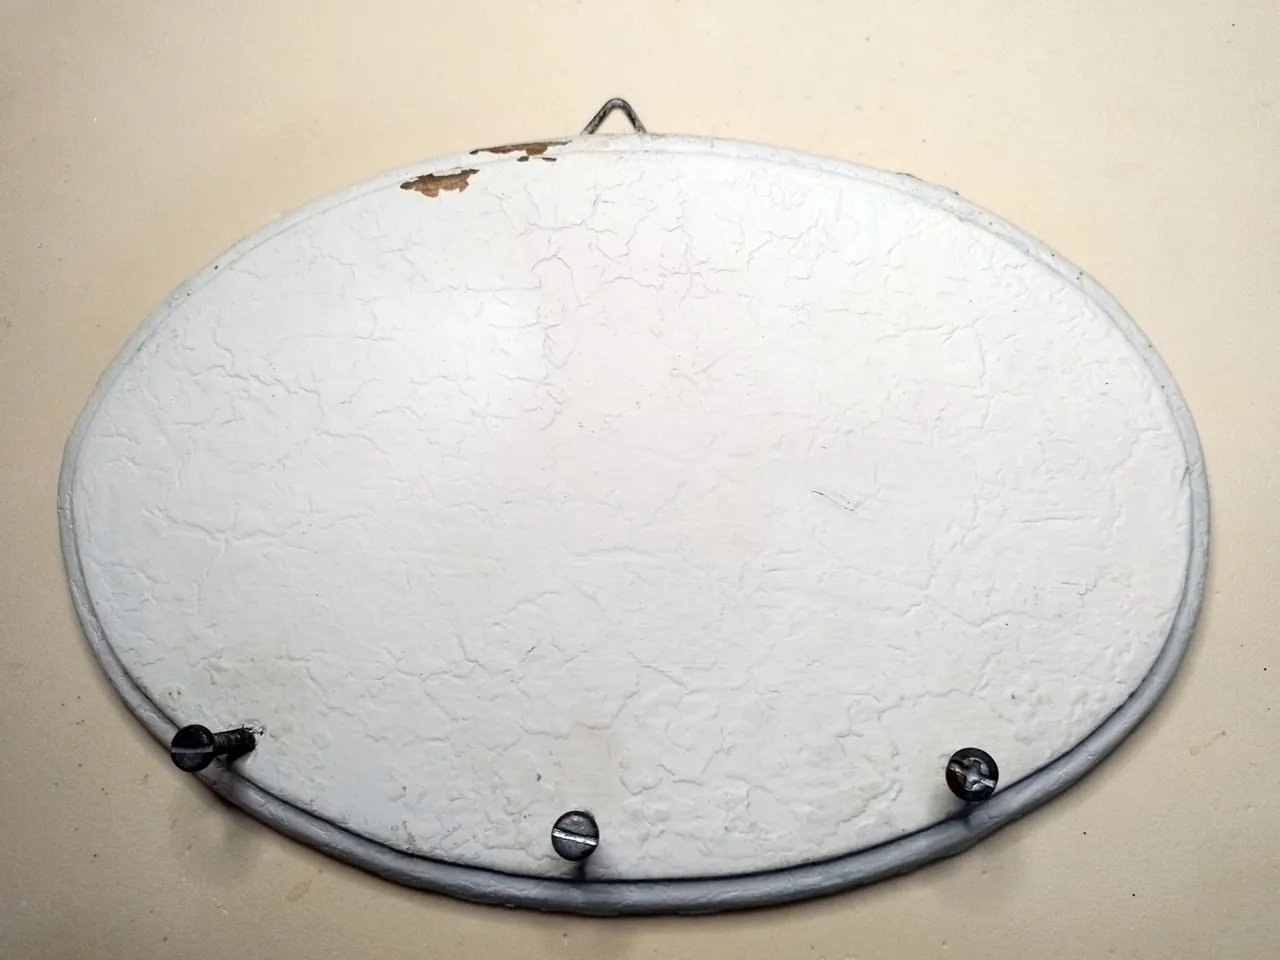
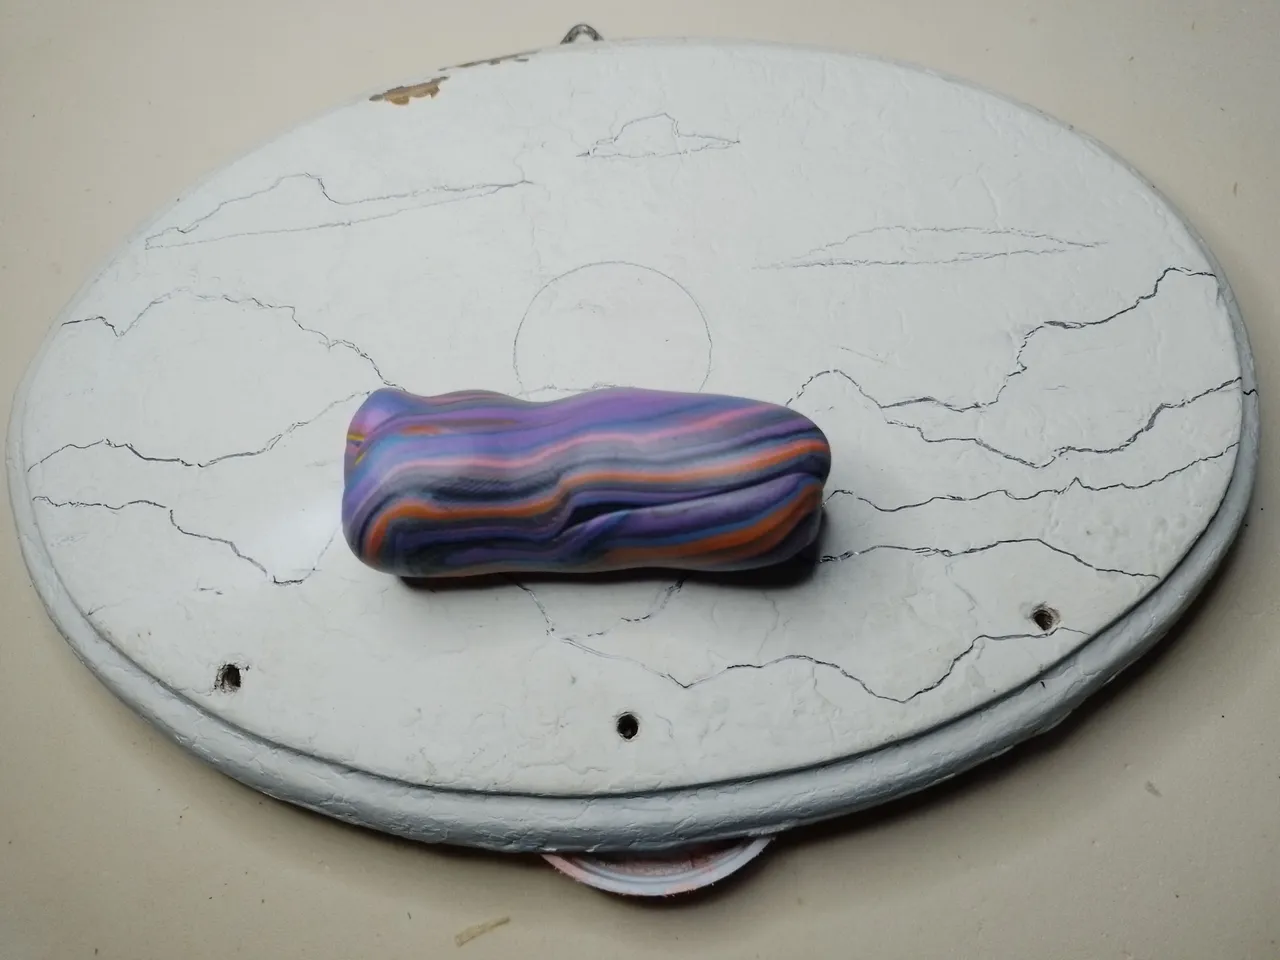
I decided to personalize and restore an object known as a key holder, one that had been in my house for months, as it was a gift, and I had not restored it. Below you can see it completely blank, worn and full of dust.
El sol siempre ha sido un símbolo de poder, fuerza e incluso belleza. Para muchos ha sido objeto de adoración y para otros inspiración para el arte e incluso la tecnología.
Precisamente, el sol es el tema del concurso mensual de DIYHub, donde se nos invita a hacer algo inspirado en el astro rey.
Puedes leer más del concurso siguiendo este enlace:
@diyhub/diyhub-contest-sun-in-collaboration-with-needleworkmonday
Yo decidí personalizar y restaurar un objeto conocido como porta llaves, uno que tenía meses en mi casa, pues fue un regalo, y no había restaurado. Abajo pueden verlo completamente en blanco, gastado y lleno de polvo.
Step by step
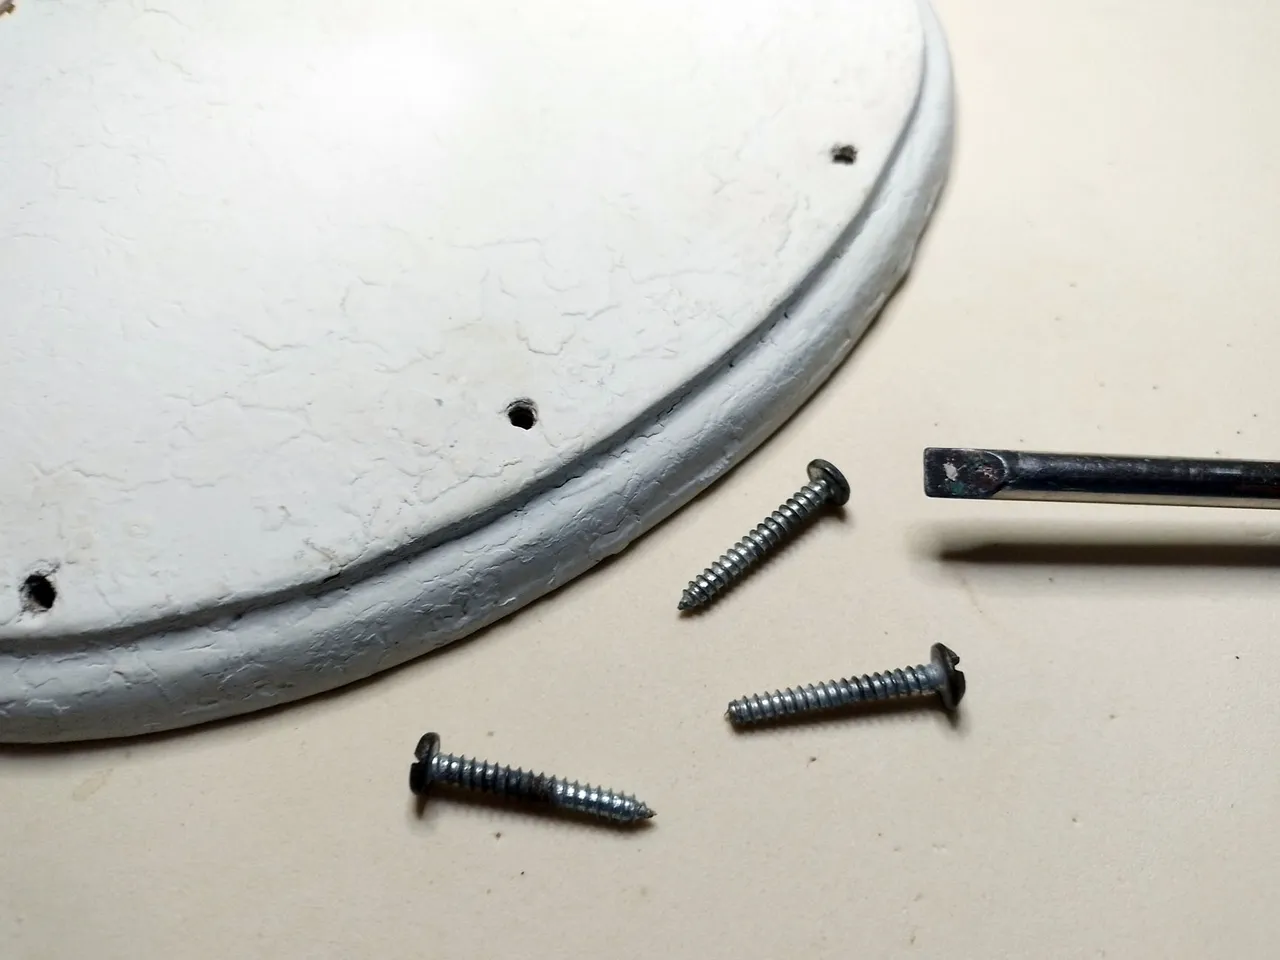
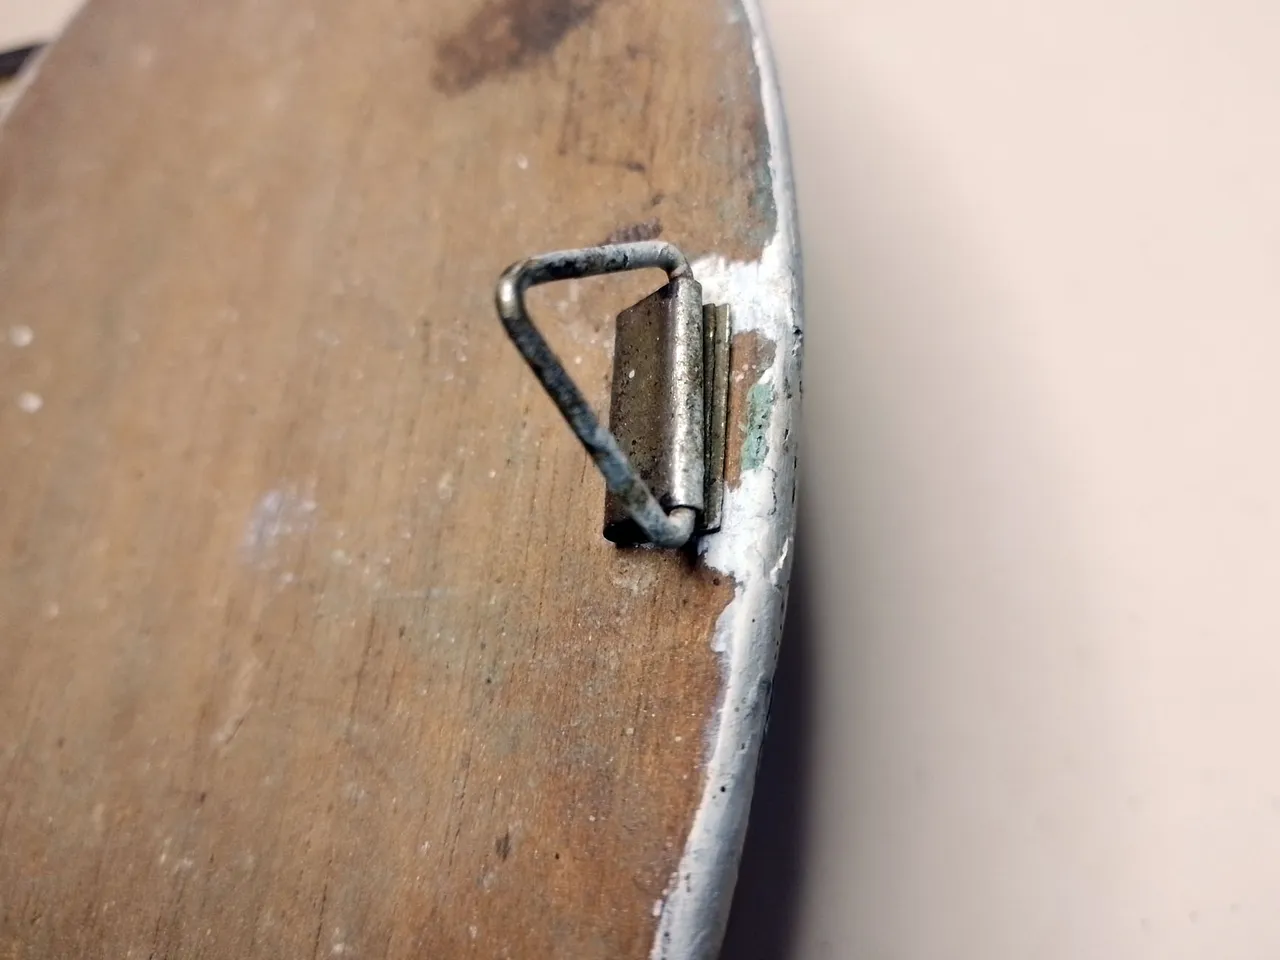
The first thing I did to start with this restoration was to remove the elements that "hinder" the restoration work, which in this case are the 3 screws that are at the front. I also lifted the clasp on the back to clean it.
Paso a paso
Lo primero que hice para comenzar con esta restauración fue sacar los elementos que "entorpecen" la labor de restauración, que en este caso son los 3 tornillos que están al frente. También levanté el broche que tiene en la parte trasera para limpiarlo.
 |  |
|---|
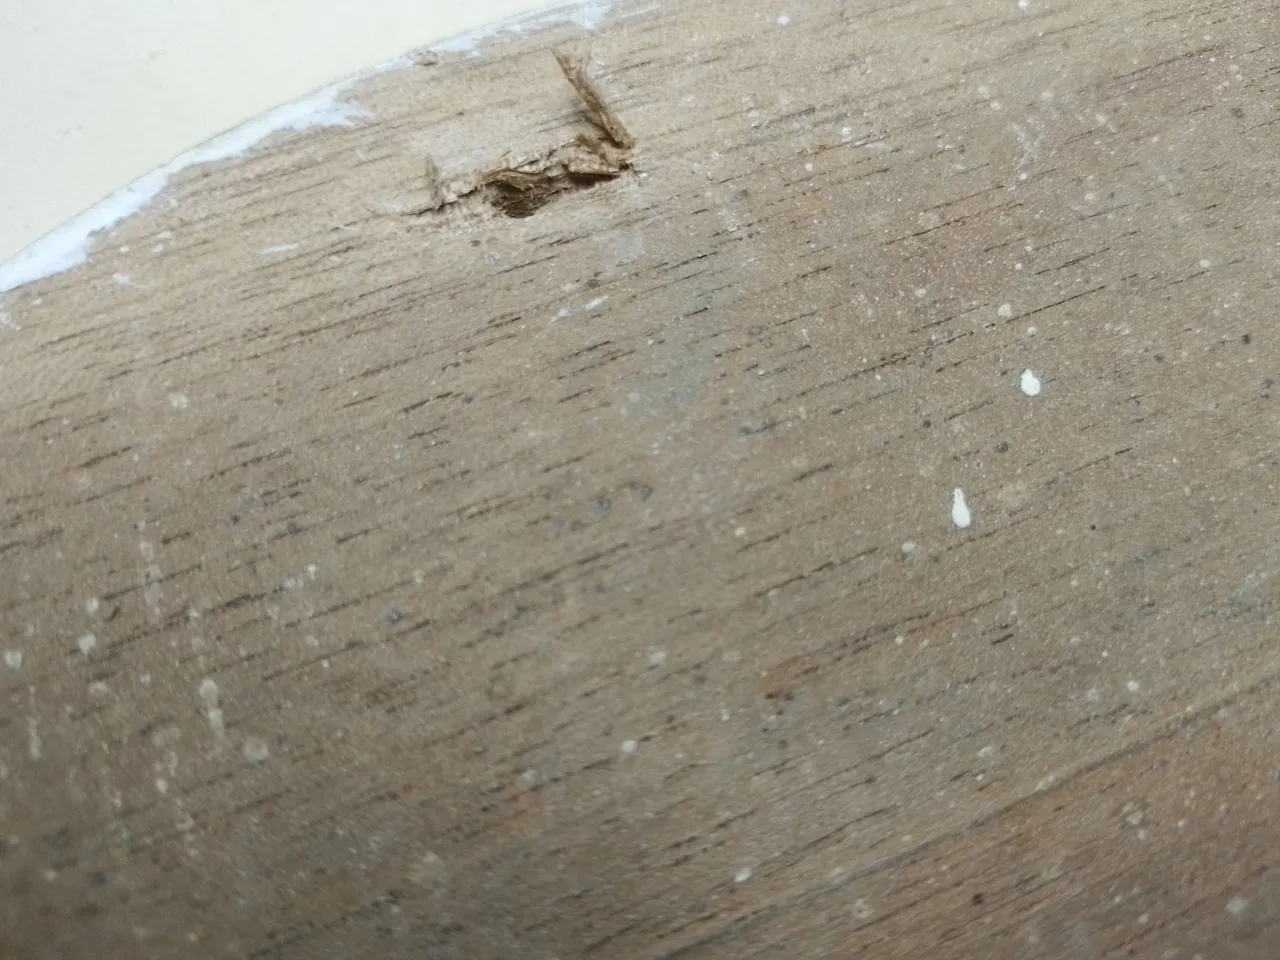
While overall the wood was in good condition, it did have a hole in the back. It wasn't major damage, but I wanted to fix it while I was at it.
Aunque en general la madera estaba en buenas condiciones, tenía un agujero en la parte trasera. No era un gran daño, pero quería arreglarlo, ya que estaba en esto.
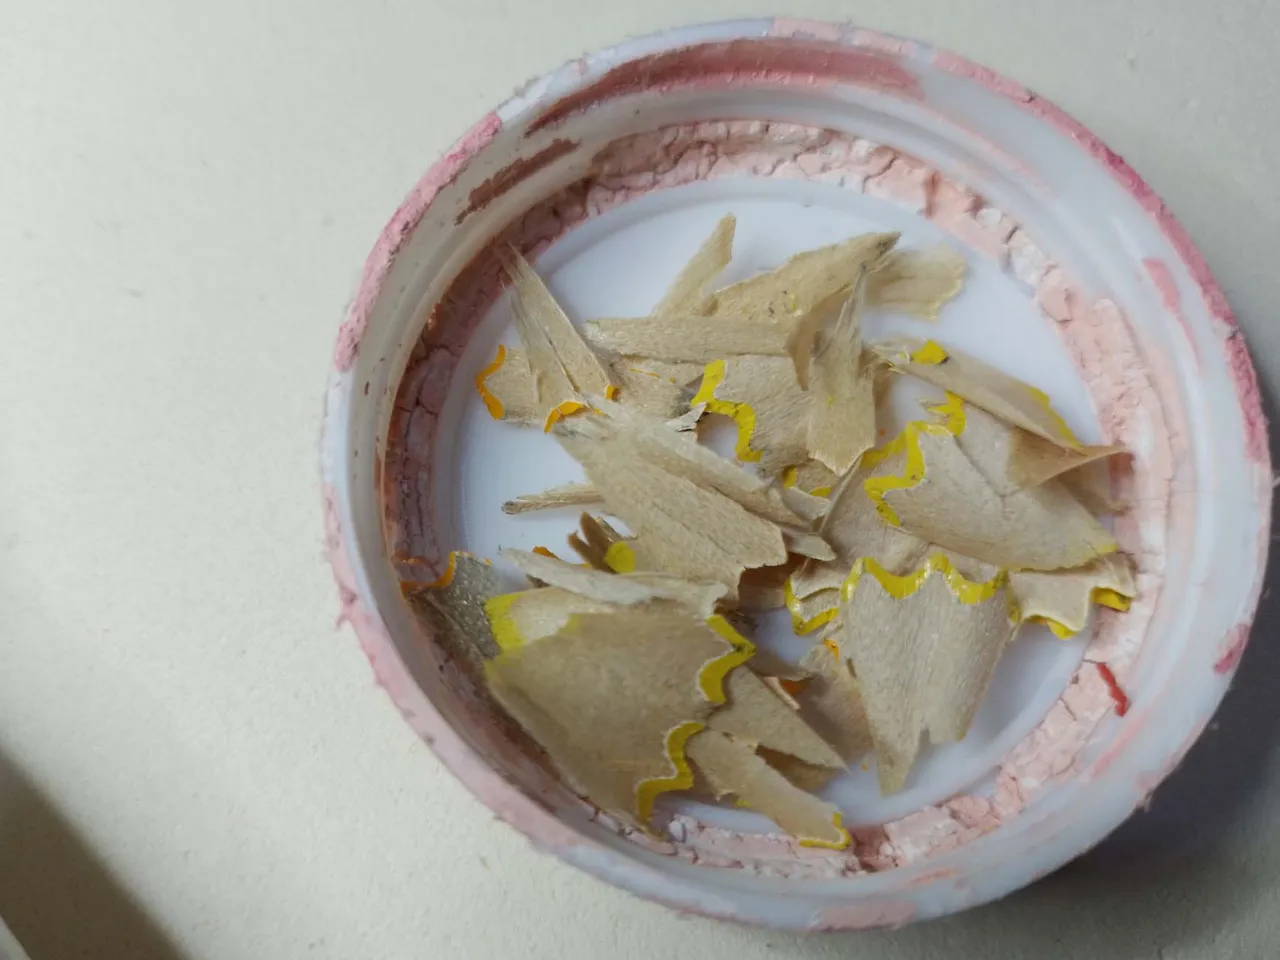
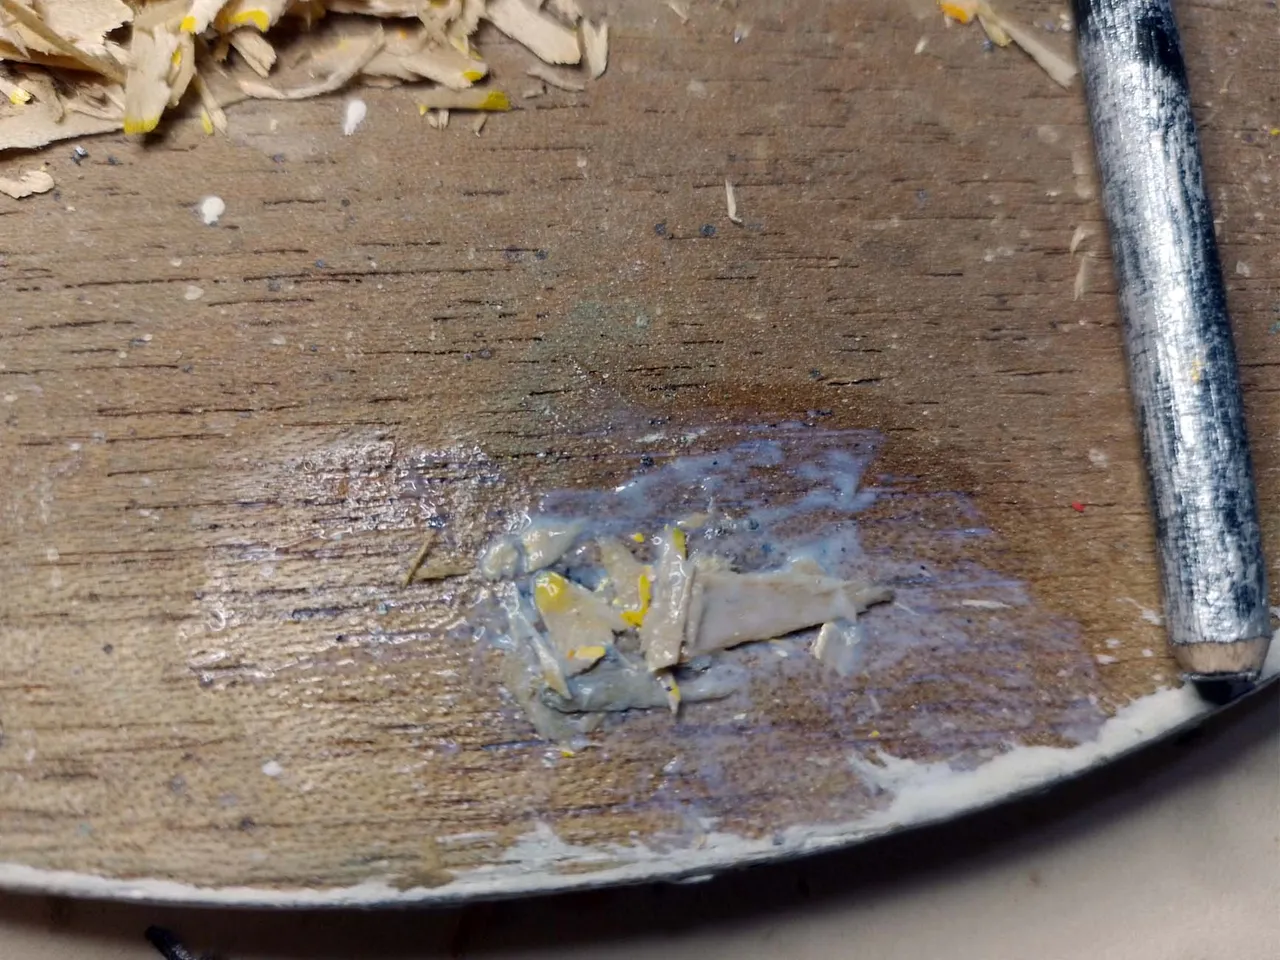
Although the correct way to repair it is with sawdust, the idea is to give tricks to repair objects with things we have at home. In this case I used the wood fiber that remains when we sharpen the colors, for example.
It is wood and serves for this purpose. All I did was to add glue in the hole in the wood, then place in a dense way all the pencil shavings on top of the glue, then add more glue to make it look good.
Aunque la manera correcta de repararlo es con aserrín, la idea es dar trucos para reparar los objetos con cosas que tenemos en casa. En este caso usé la fibra de madera que queda cuando sacamos punta a los colores, por ejemplo.
Es madera y sirve para este propósito. Todo lo que hice fue agregar pegamento en el agujero en la madera, luego colocar de manera tupida toda la viruta de lápiz encima del pegamento, después agregan más pegamento para que quede bien.
 |  |
|---|
Finally, to leave a smooth surface on the wood, you can place several layers of paper with glue. I clarify, it is a strong glue, similar, not equal, to wood glue.
Por último, para dejar una superficie lisa en la madera, se pueden colocar varias capas de papel con pegamento. Aclaro, es un pegamento fuerte, similar, no igual, al pegamento de madera.
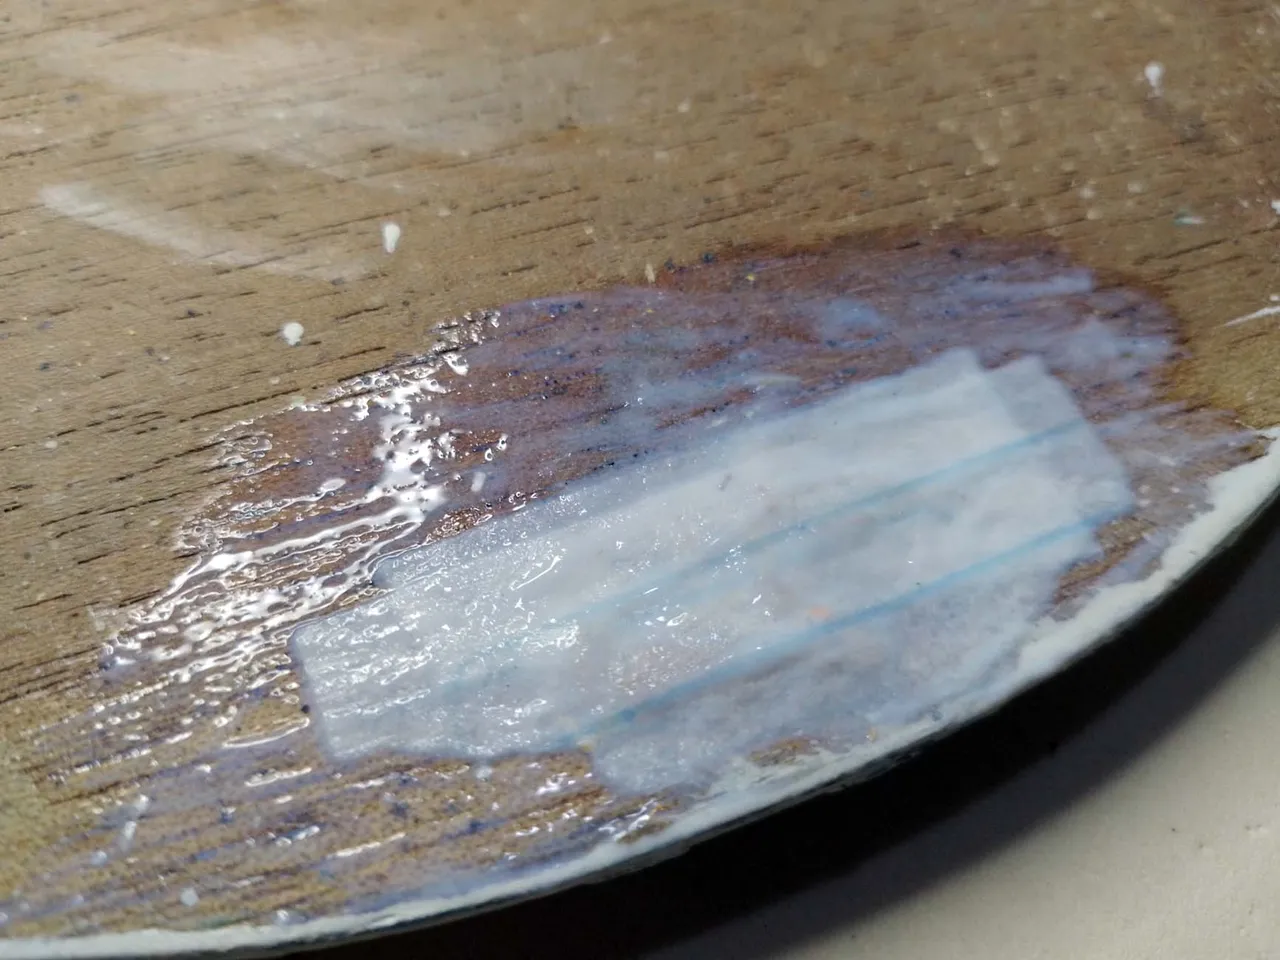
This way the wood is ready to start making the art I wanted to create on it.
As you can see in the picture below, before doing anything, the first thing to do is to draw with graphite what you want to do, this allows us to have an idea of how it could look like.
De esta manera está lista la madera para comenzar a hacer el arte que quería crear en esta.
Como pueden ver en la fotografía de abajo, antes de hacer cualquier cosa, lo primero es dibujar con grafito lo que se quiere hacer, esto nos permite tener una idea de cómo podría quedar.
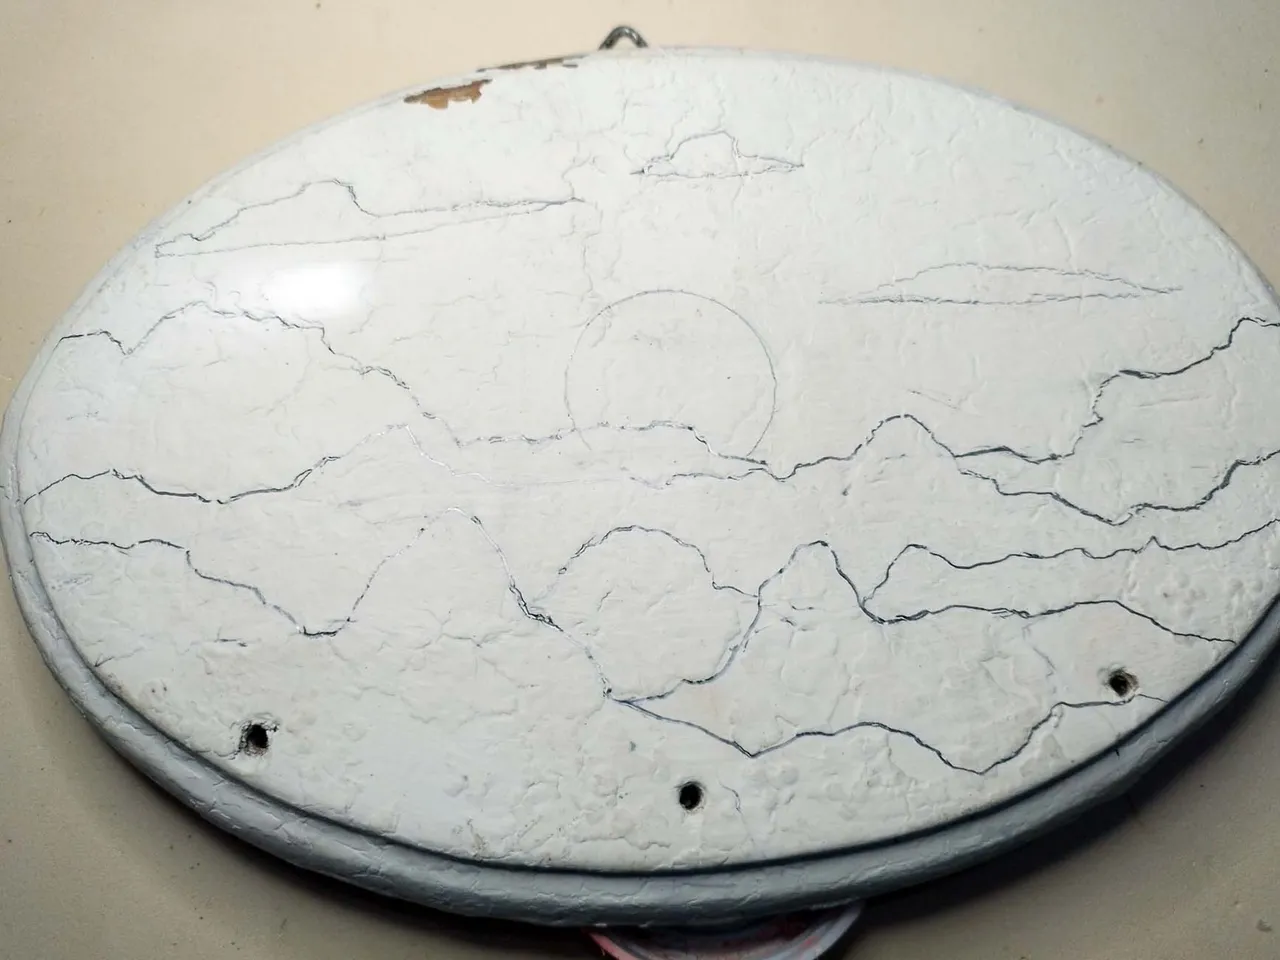
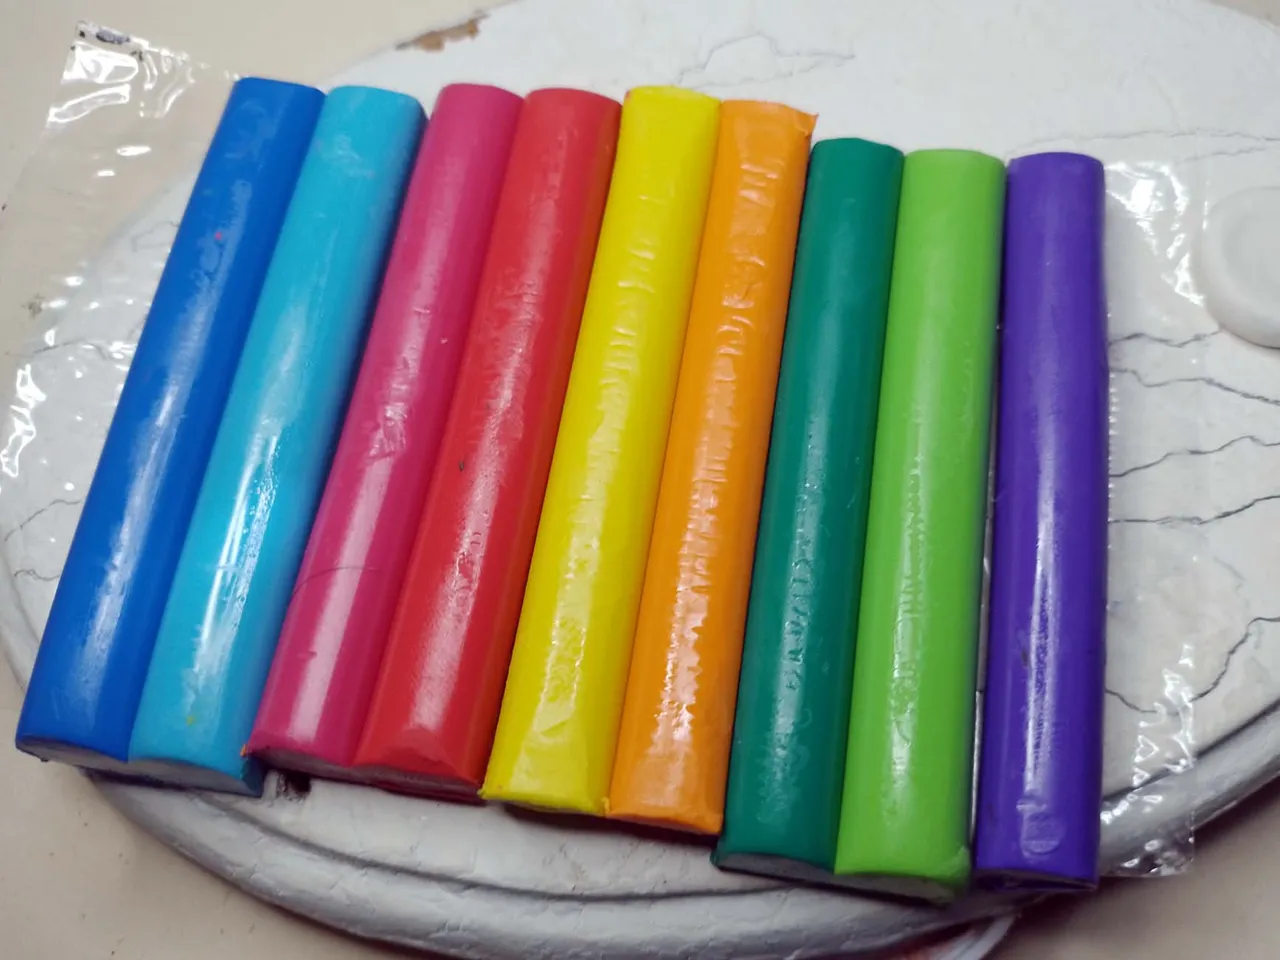
I didn't just want to make a drawing on the wood, but a drawing with relief. The idea was to create some mountains with some clouds in the background and at the end a sun, with more clouds in the sky.
I made the relief with plasticine, but since I planned to paint it I didn't mind mixing some of the colorful sticks I had, because when mixed they give a color similar to brown.
Of course, you should not mix all but the one you are going to use, because each color can be used for other figurines.
No solo quería hacer un dibujo en la madera, sino un dibujo con relieve. La idea era crear unas montañas con unas nubes de fondo y al final un sol, con más nubes en el cielo.
El relieve lo hice con plastilina, pero como planeaba pintarlo no me importó mezclar una parte de las coloridas barras que tenía, pues cuando se mezclan dan un color parecido al marrón.
Desde luego, no se debe mezclar toda sino la que van a utilizar, pues cada color nos puede servir para otras figuritas.
 |  |
|---|
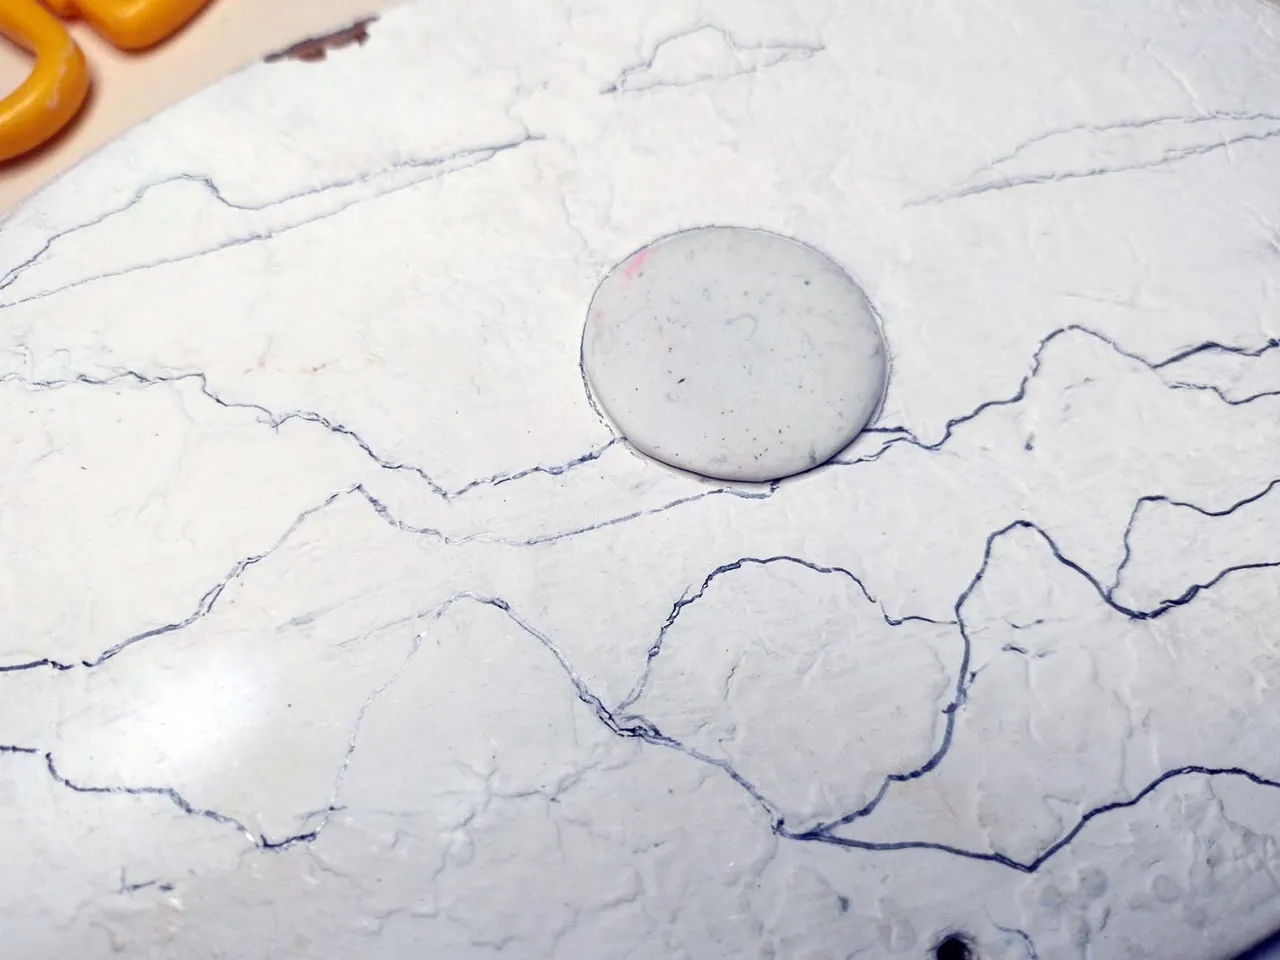
Precisely, I made the sun with white plasticine. I made a plasticine tortilla and cut it in a circular shape, the same size as the circle I had drawn on the wood.
Precisamente, el sol lo hice con plastilina blanca. Hice una tortilla de plastilina y la corté de forma circular, del mismo tamaño del círculo que había dibujado en la madera.
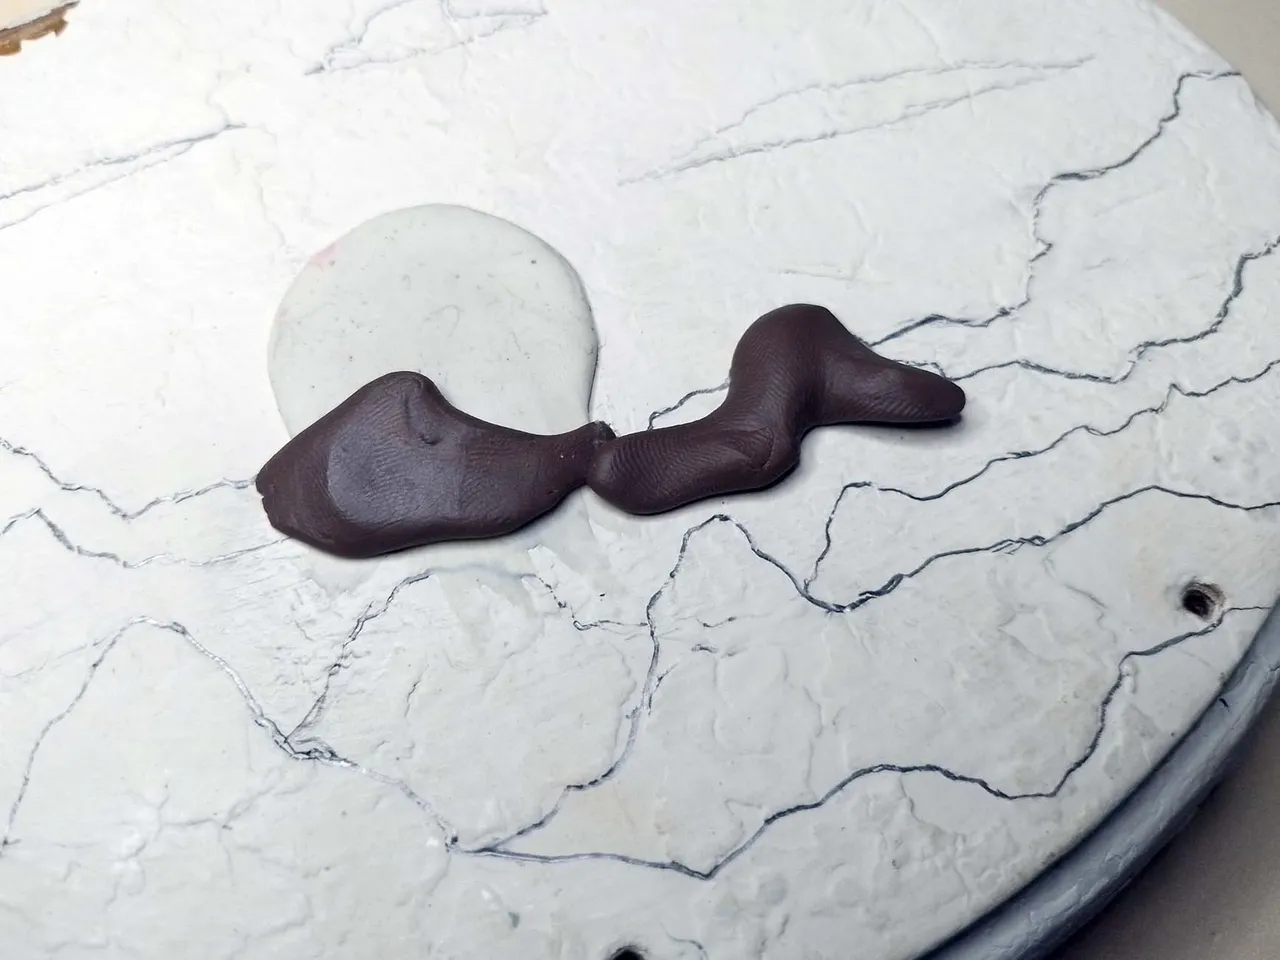
On the other hand, I made the relief with the brown plasticine, the mixture I got from joining all the other bars.
It is important to place the plasticine layer on top of the previous ones, being the sun the one at the end, therefore, the first plasticine layer goes on top of the sun, covering the bottom.
Por otra parte, el relieve lo hice con la plastilina marrón, la mezcla que obtuve de unir todas las otras barras.
Es importante colocar capa de plastilina sobre las anteriores, siendo el sol la que está al final, por lo tanto, la primera capa de plastilina va encima del sol, cubriendo la parte de abajo.
 |  |
|---|
The entire surface of the wood is covered with this first layer and then, on top of this first layer of plasticine, the other layers are placed.
Se termina de cubrir con esta primera capa toda la superficie de la madera y luego, encima de esta primera capa de plastilina, se comienzan a colocar las otras capas.
 |  |
|---|
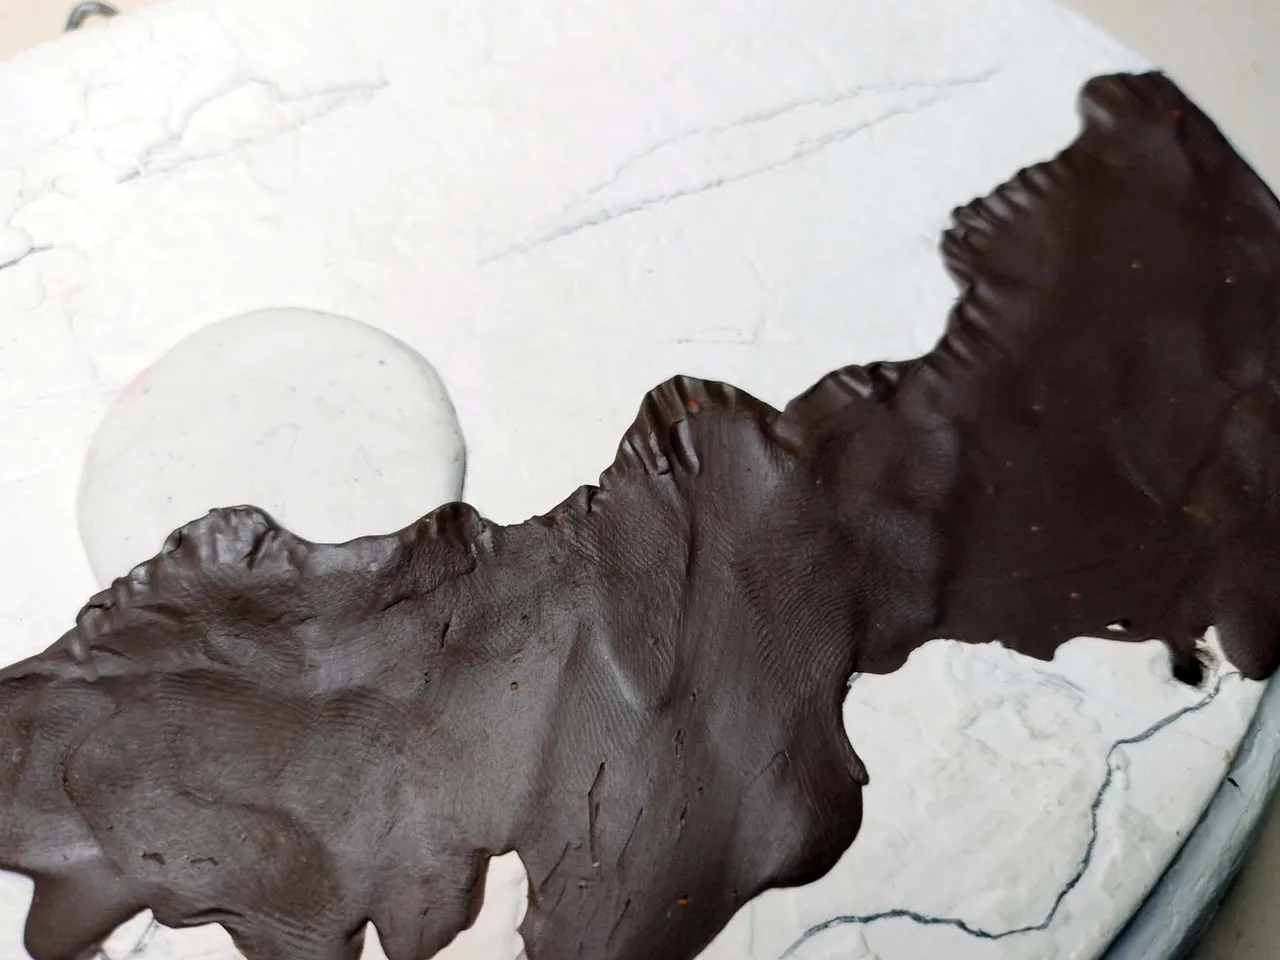
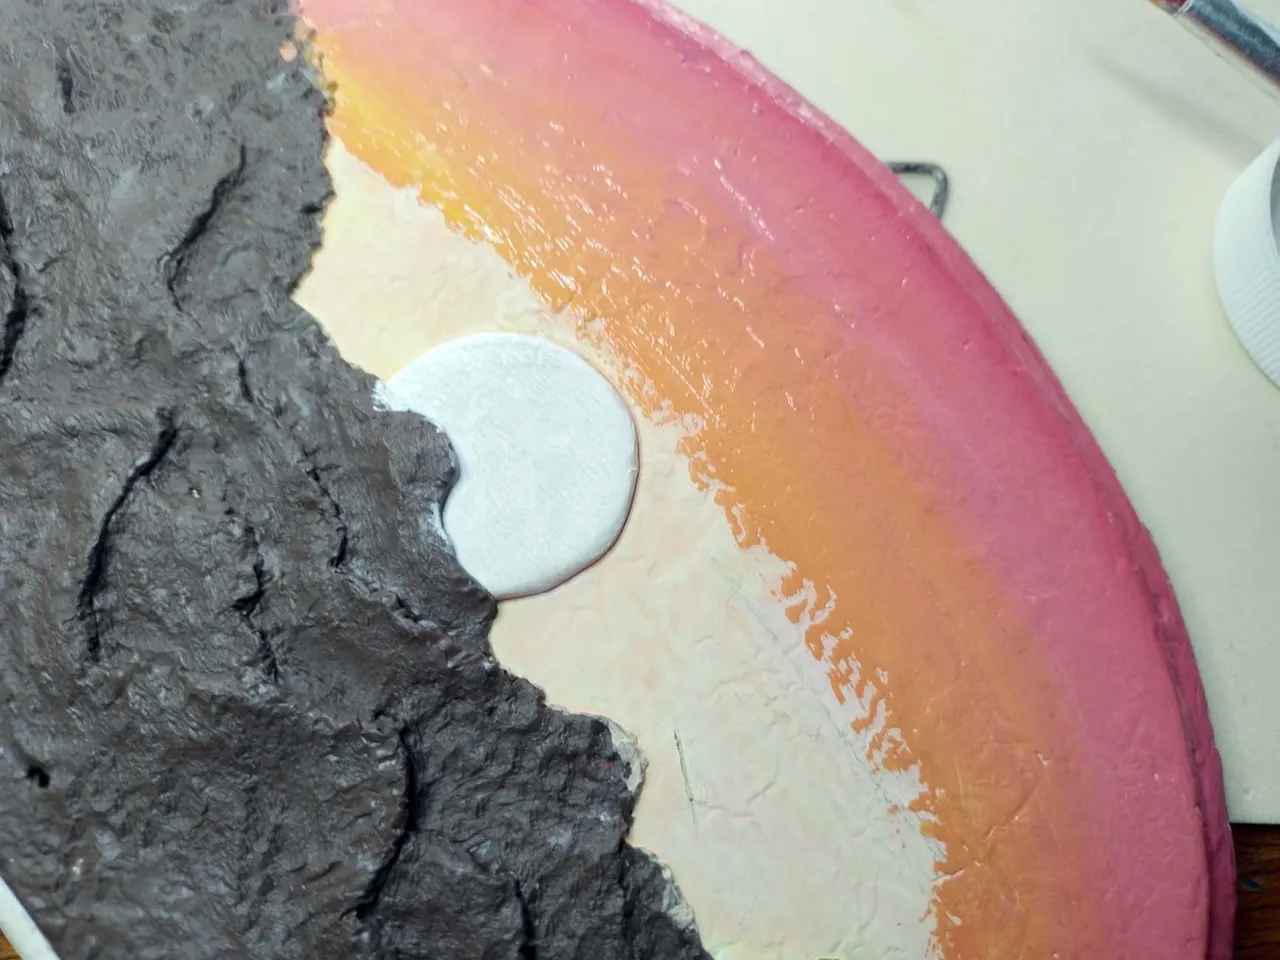
Looking at the picture below it doesn't look pretty at all; in fact, it even looks like a bunch of scars, but little by little it is taking shape.
The idea is, as I told you, to place first the background layer, which are the clouds, then the secondary layer, which are the background mountains and then the closest mountains, which are the last layer of plasticine.
Al ver la foto de abajo no parece nada bonito; de hecho, parece hasta un montón de cicatrices, pero poco a poco va tomando forma.
La idea es, como les dije, colocar primero la capa del fondo, que son las nubes, luego la capa secundaria, que son las montañas de fondo y luego las montañas más cercanas, que son las última capa de plastilina.
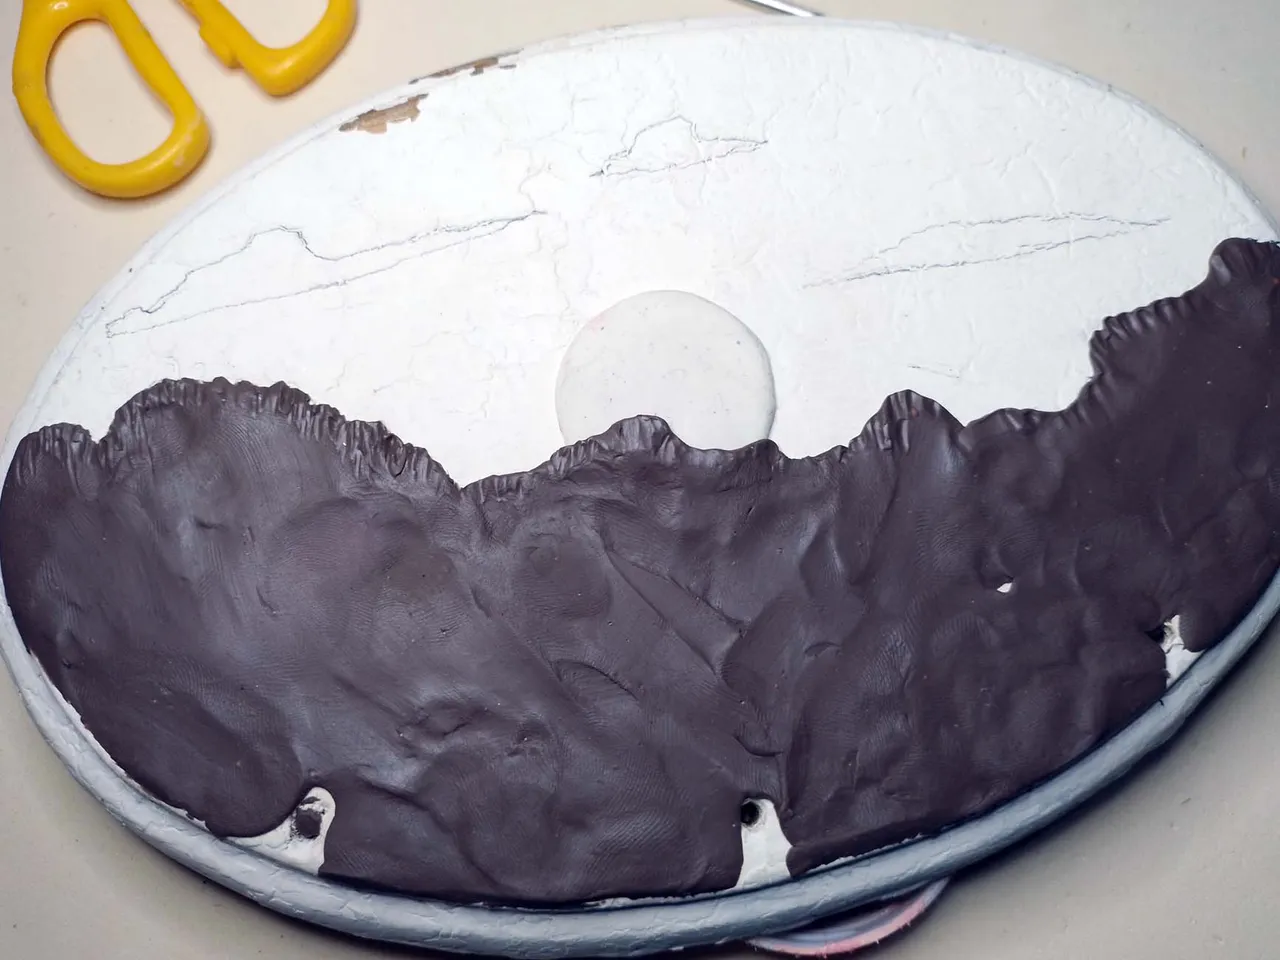
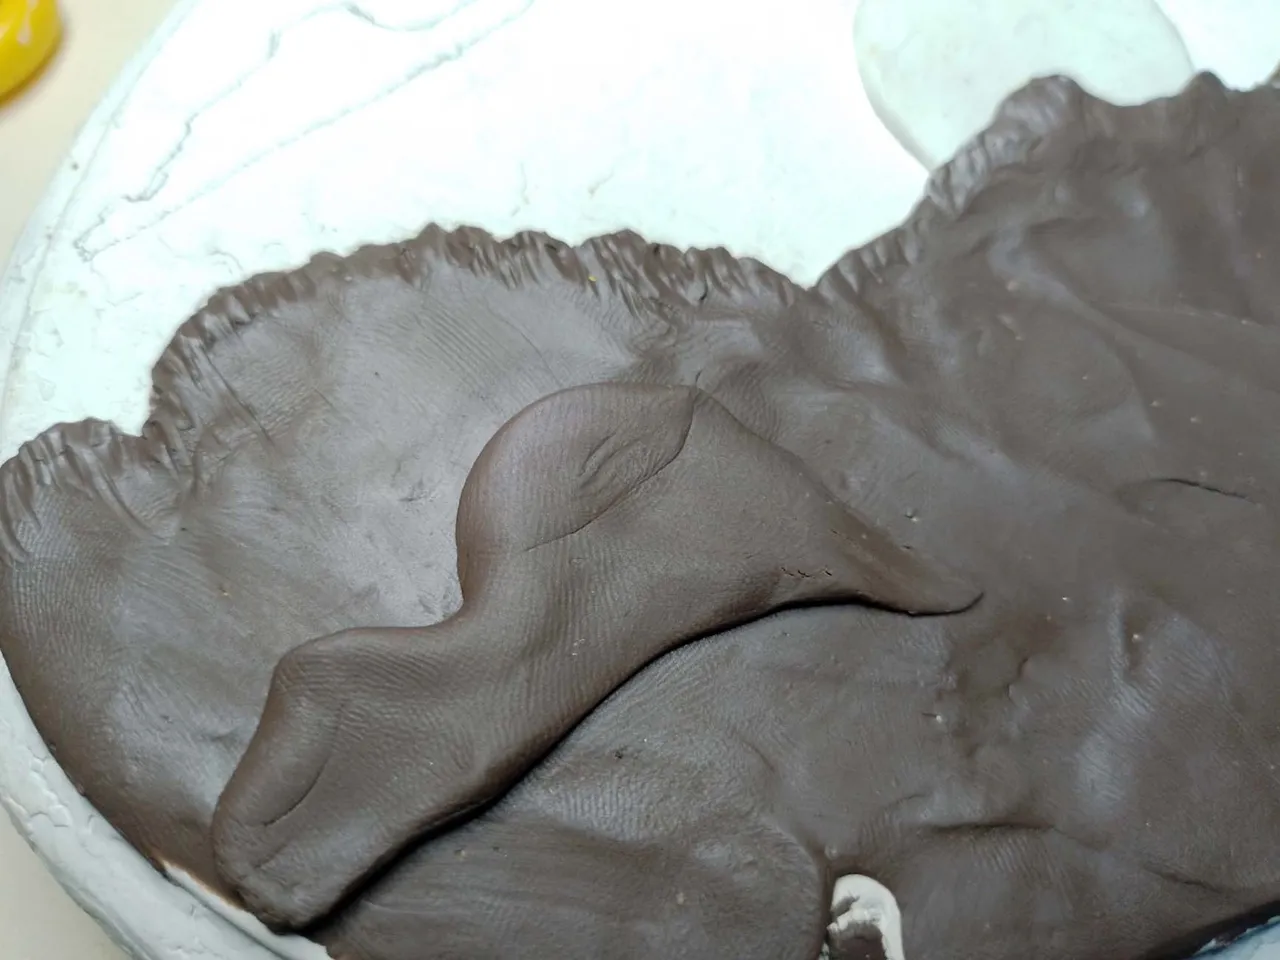
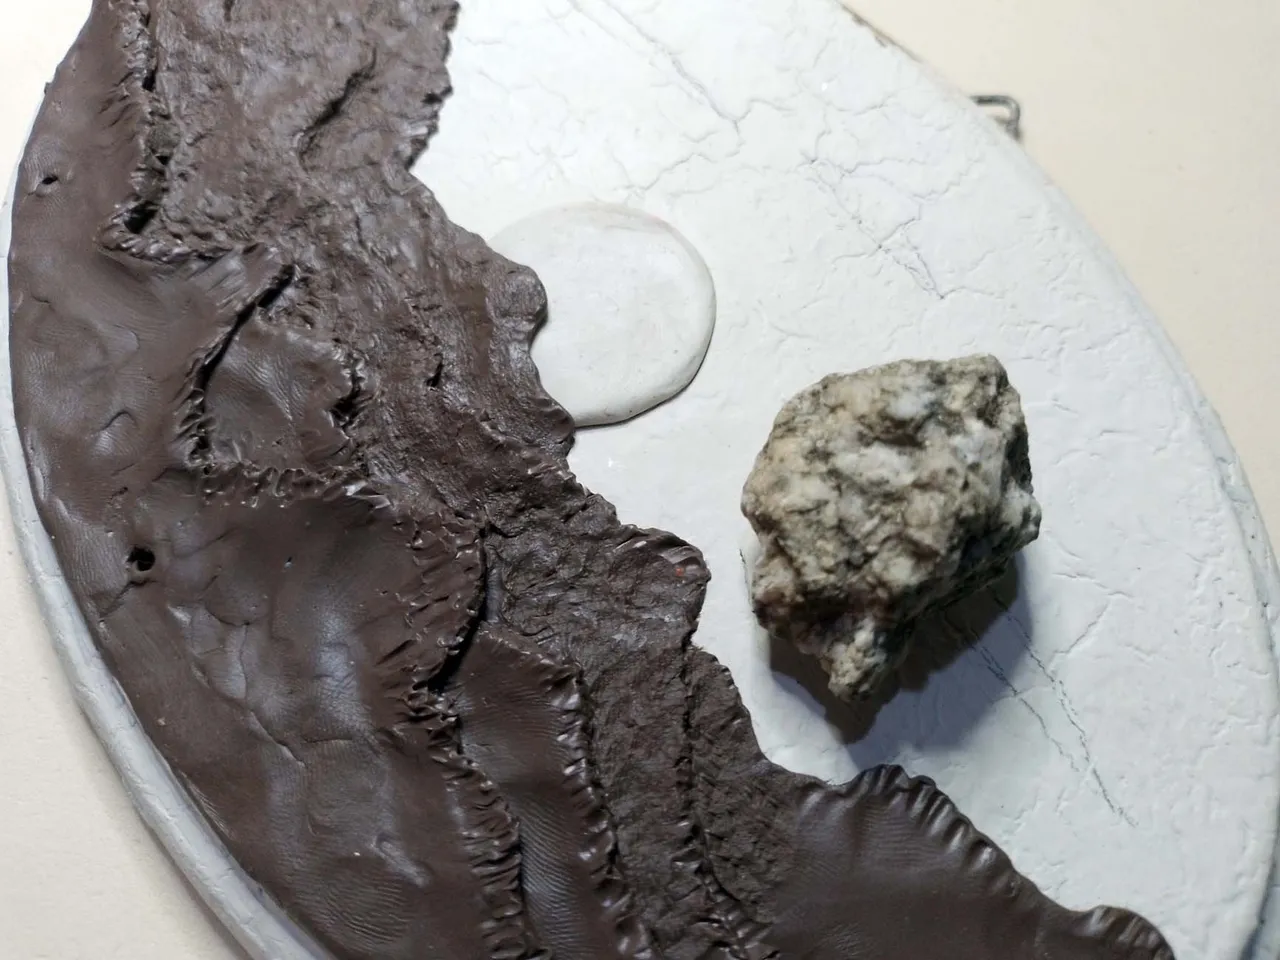
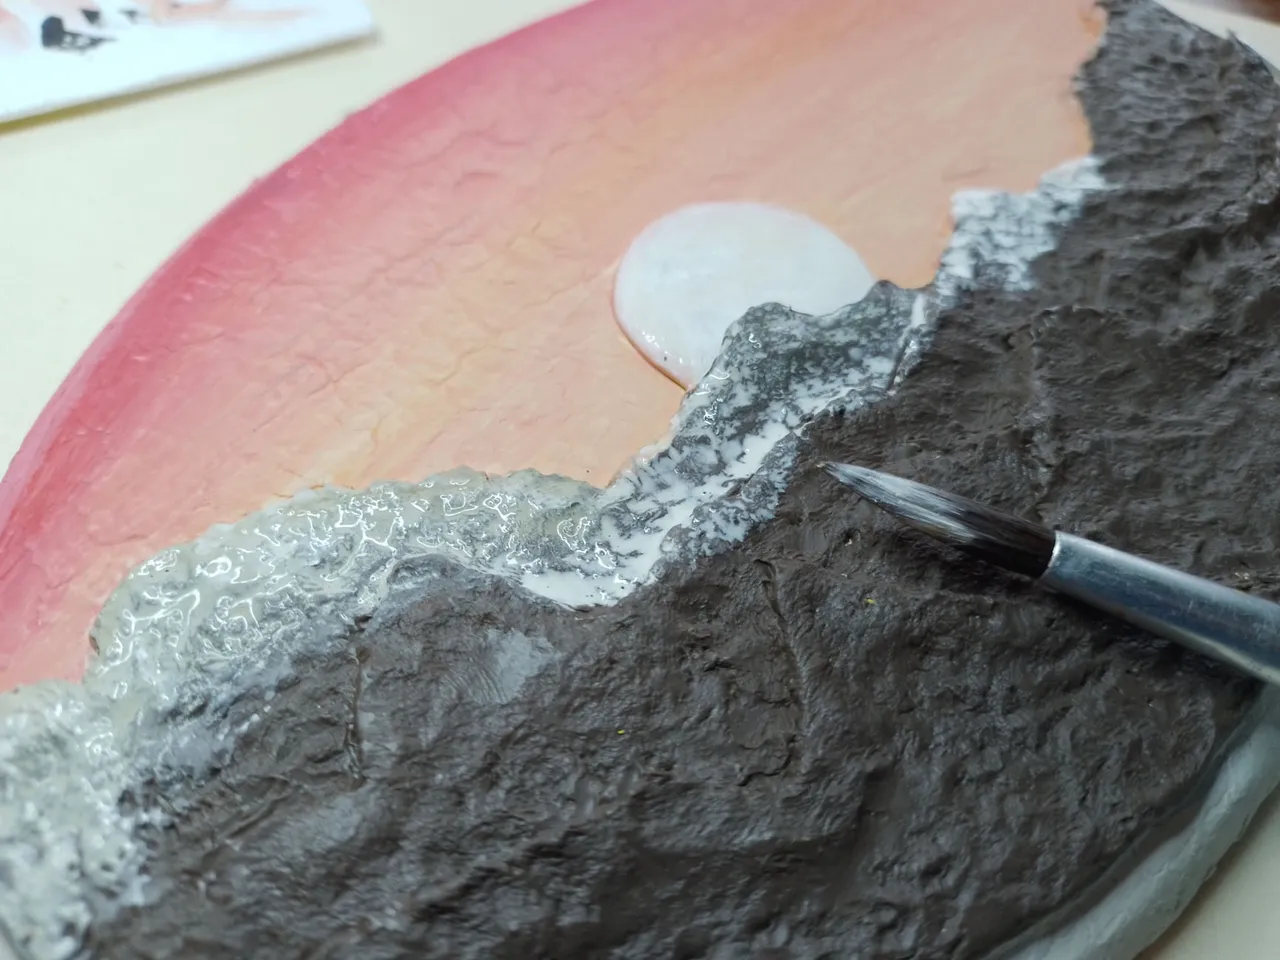
To give it that relief similar to that of a rock, a rock with many protuberances and imperfections is used.
The plasticine should be gently tapped until the texture of the rock is imprinted on the material.
Para darle ese relieve similar al de una roca, se utiliza precisamente una roca con bastantes protuberancias e imperfecciones.
Se debe golpear suavemente la plastilina hasta que se logre imprimir en el material la textura de la roca.
 |  |
|---|
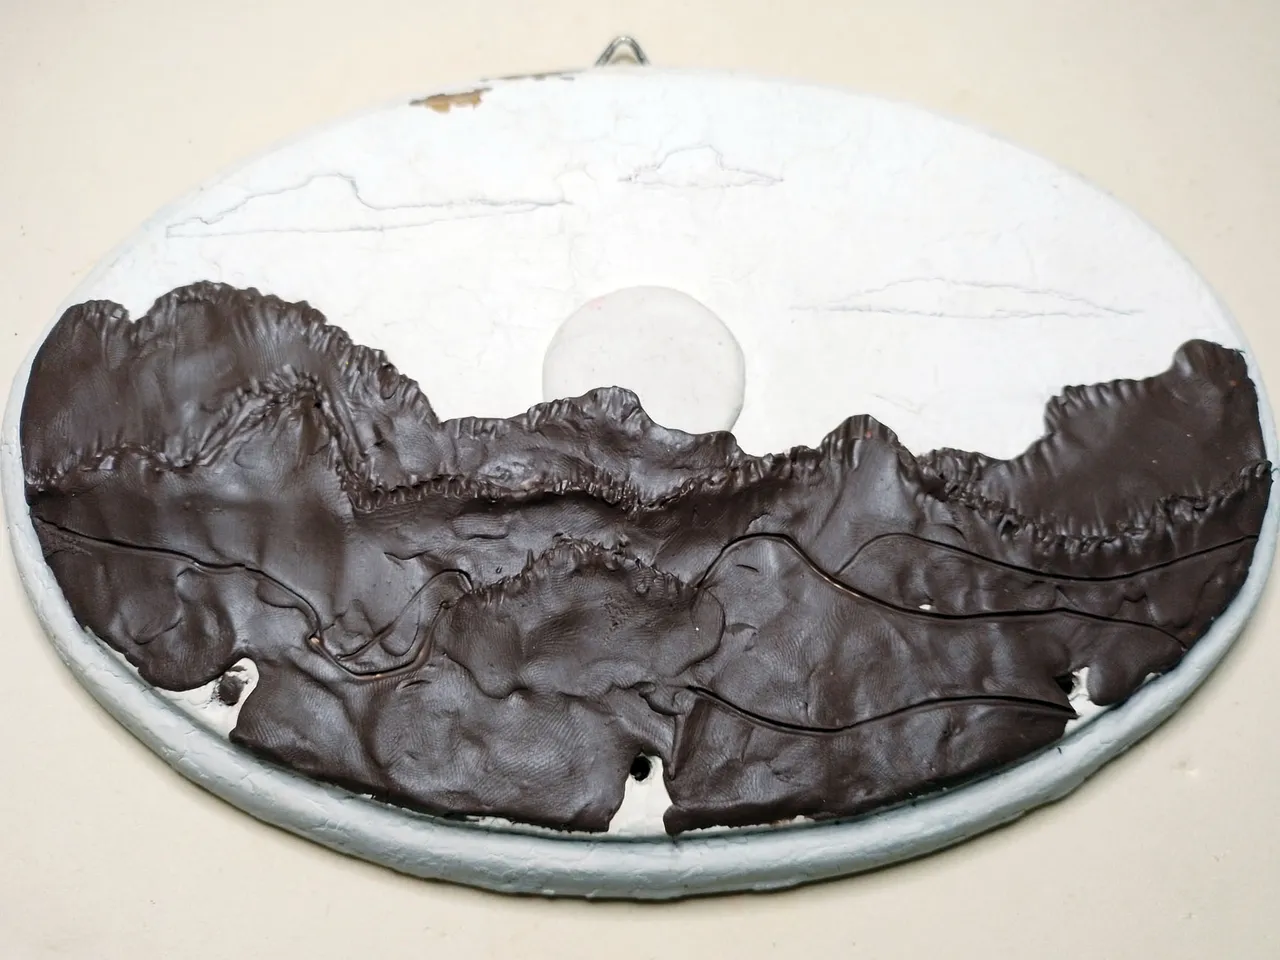
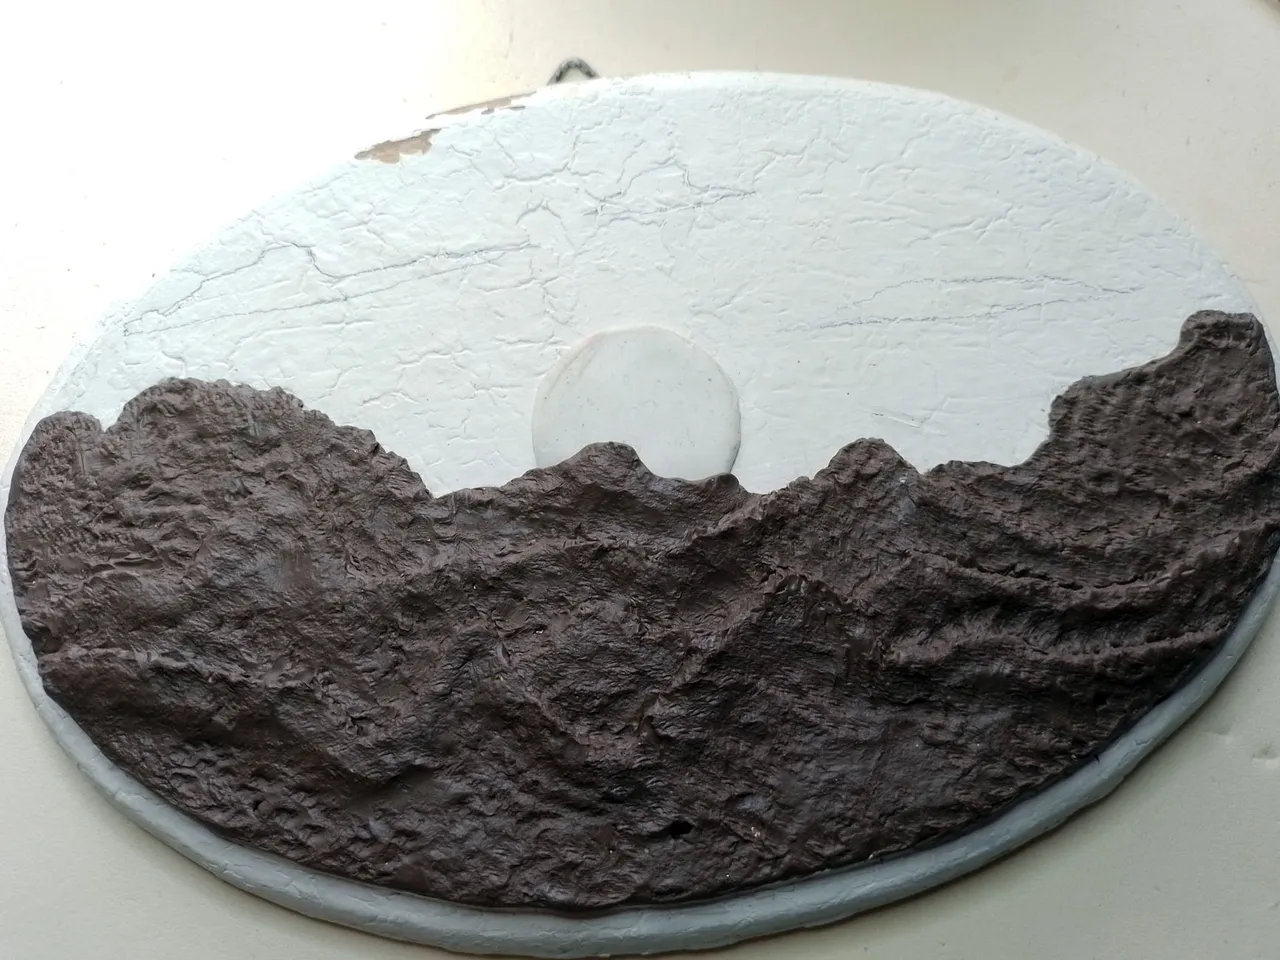
The base of the key holder is ready to start painting this relief we made. The idea is that it is not like a flat drawing, that's why the relief, which will look better when painted.
Así está listo la base del porta llaves, para comenzar a pintar este relieve que le hicimos. La idea es que no quede como un dibujo plano, por eso el relieve, el cual quedará mejor cuando se pinte.
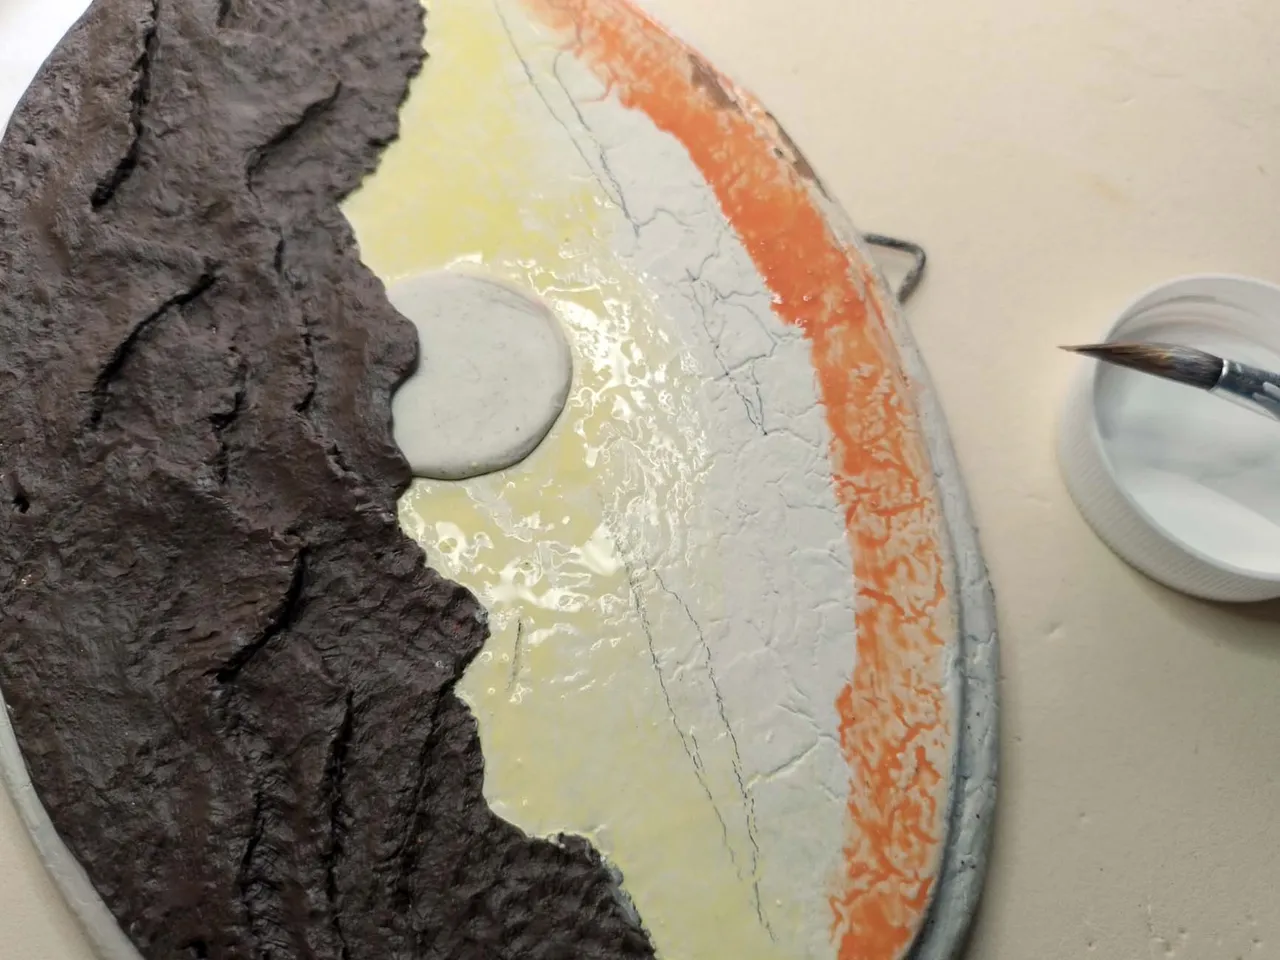
The first thing to paint is the gradient of the sky. Start with a soft layer of yellow and orange paint, making a gradient from the softest to the strongest color.
Once it dries, apply another layer, this time more intense at the top, to make a gradient at the bottom, near the sun, where it should be lighter.
Lo primero a pintar es el degradado del cielo. Se comienza con una capa suave de pintura amarilla y naranja, haciendo un degradado del color mas suave al más fuerte.
Una vez que se seque, se aplica otra capa esta vez más intensa en la parte superior, para hacer un degradado en la parte de abajo, cerca del sol, donde debe ser más claro.
 |  |
|---|
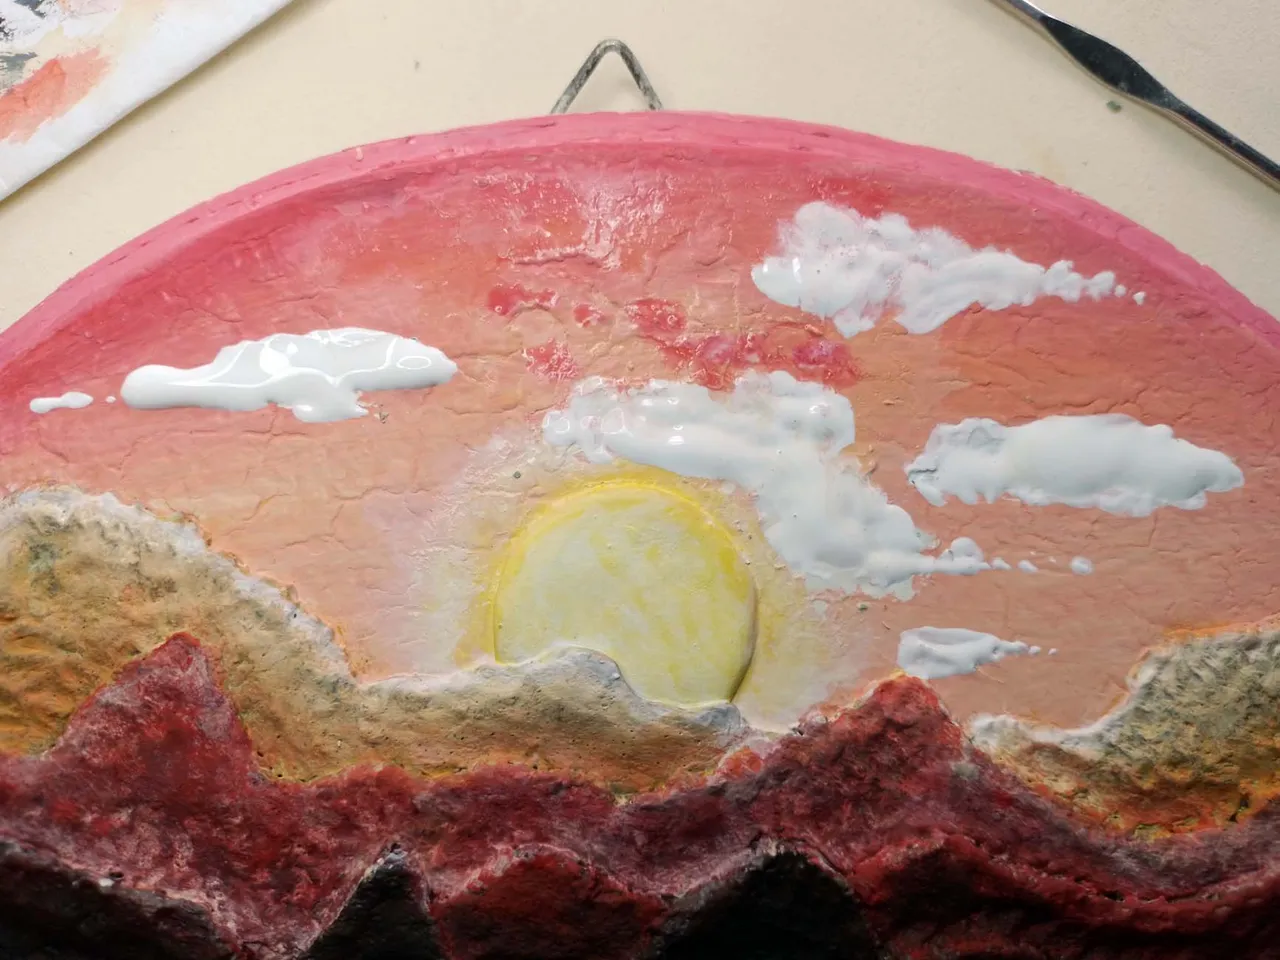
Below you can see how this gradient turned out. But not only that, you also have to paint the clouds. In this case I started by making a white base, so that the paint to be added later dries better.
A continuación pueden ver cómo quedó este degradado. Pero no solo eso, también hay que pintar las nubes. En este caso comencé haciendo una base blanca, para que la pintura que se agregue posteriormente seque mejor.
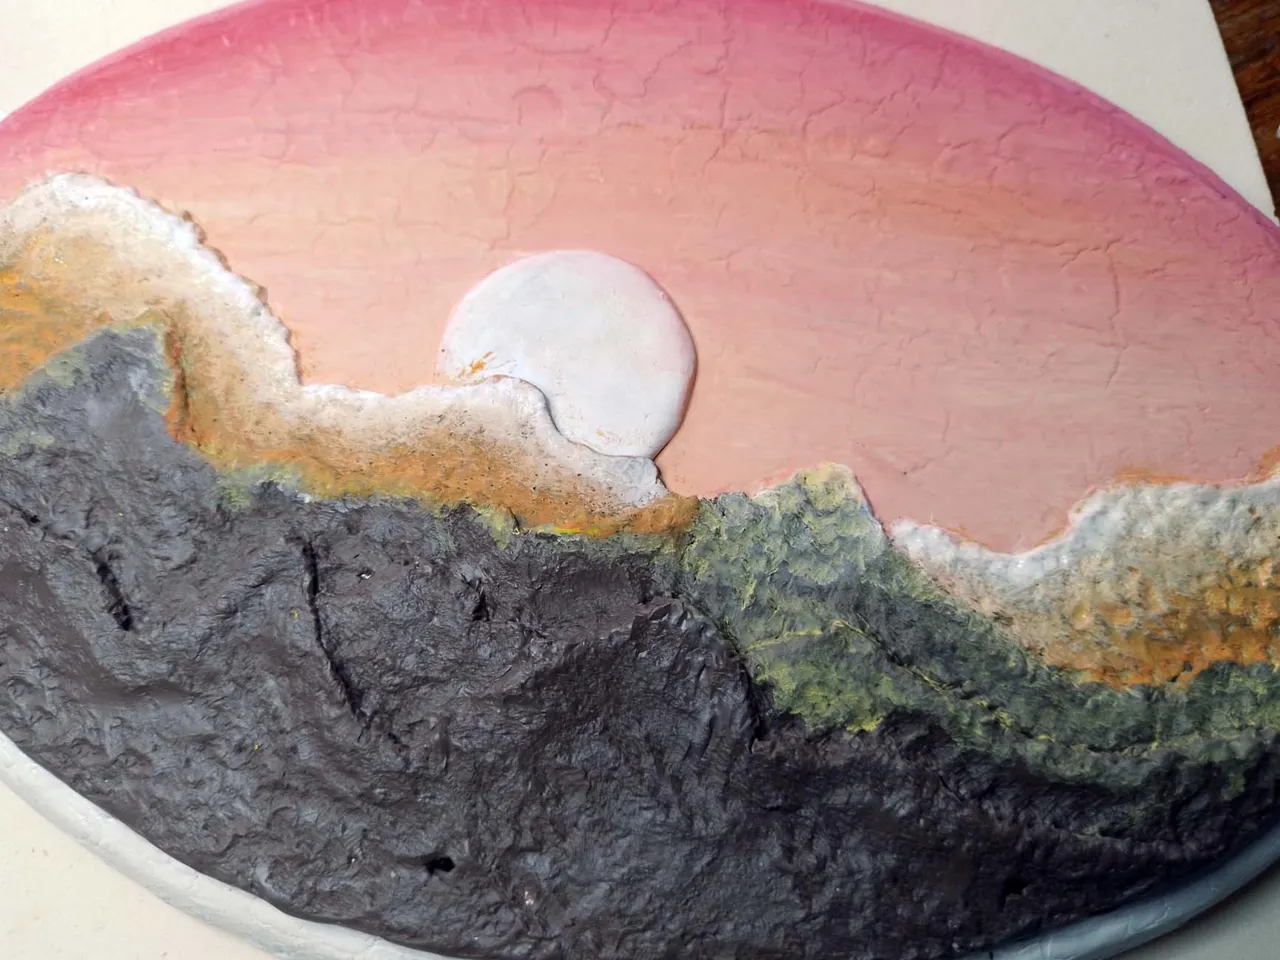
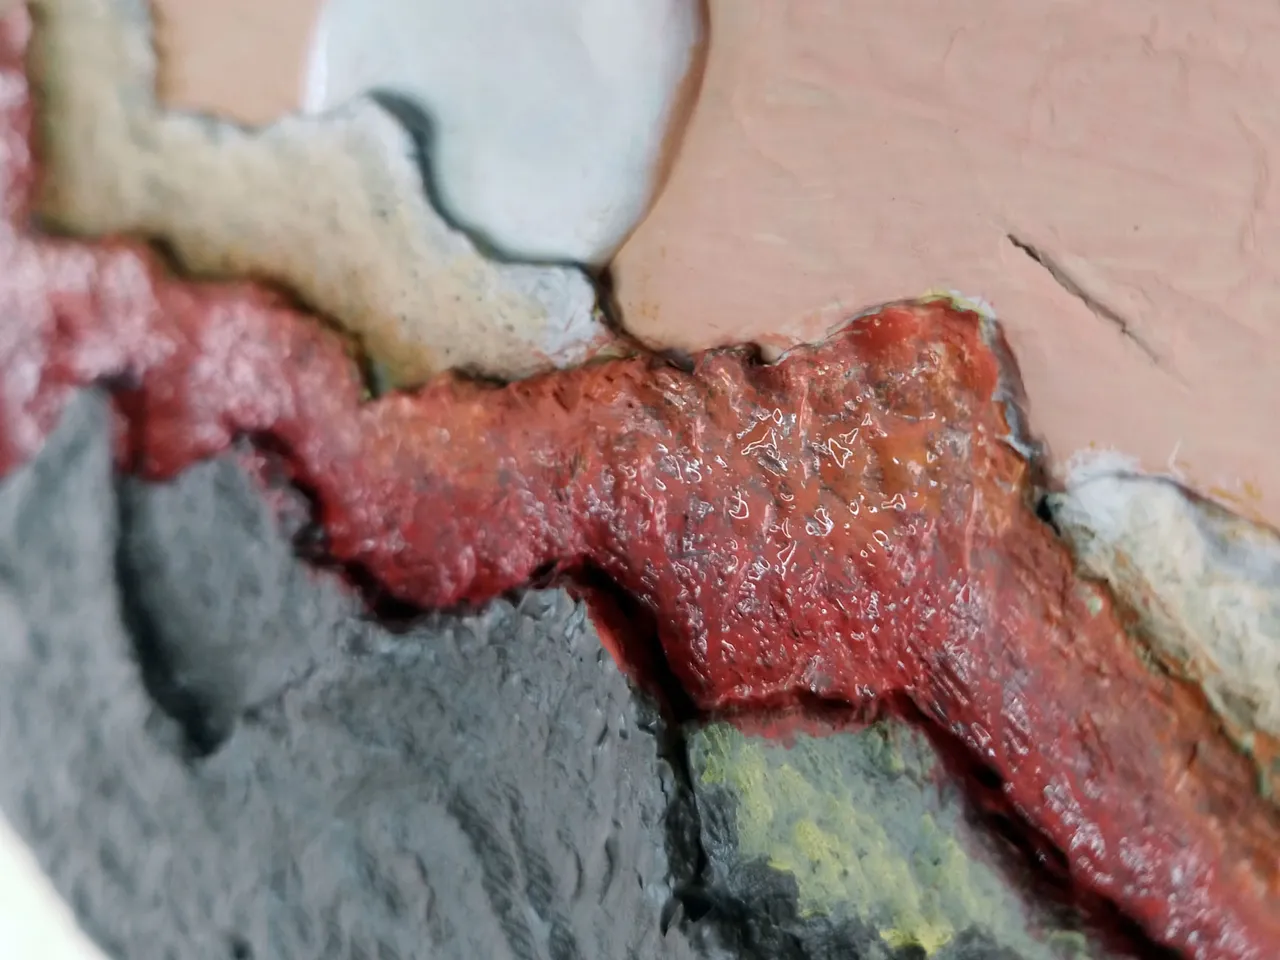
The idea with the clouds is to give them an orange tint like the sunset, with white borders on top.
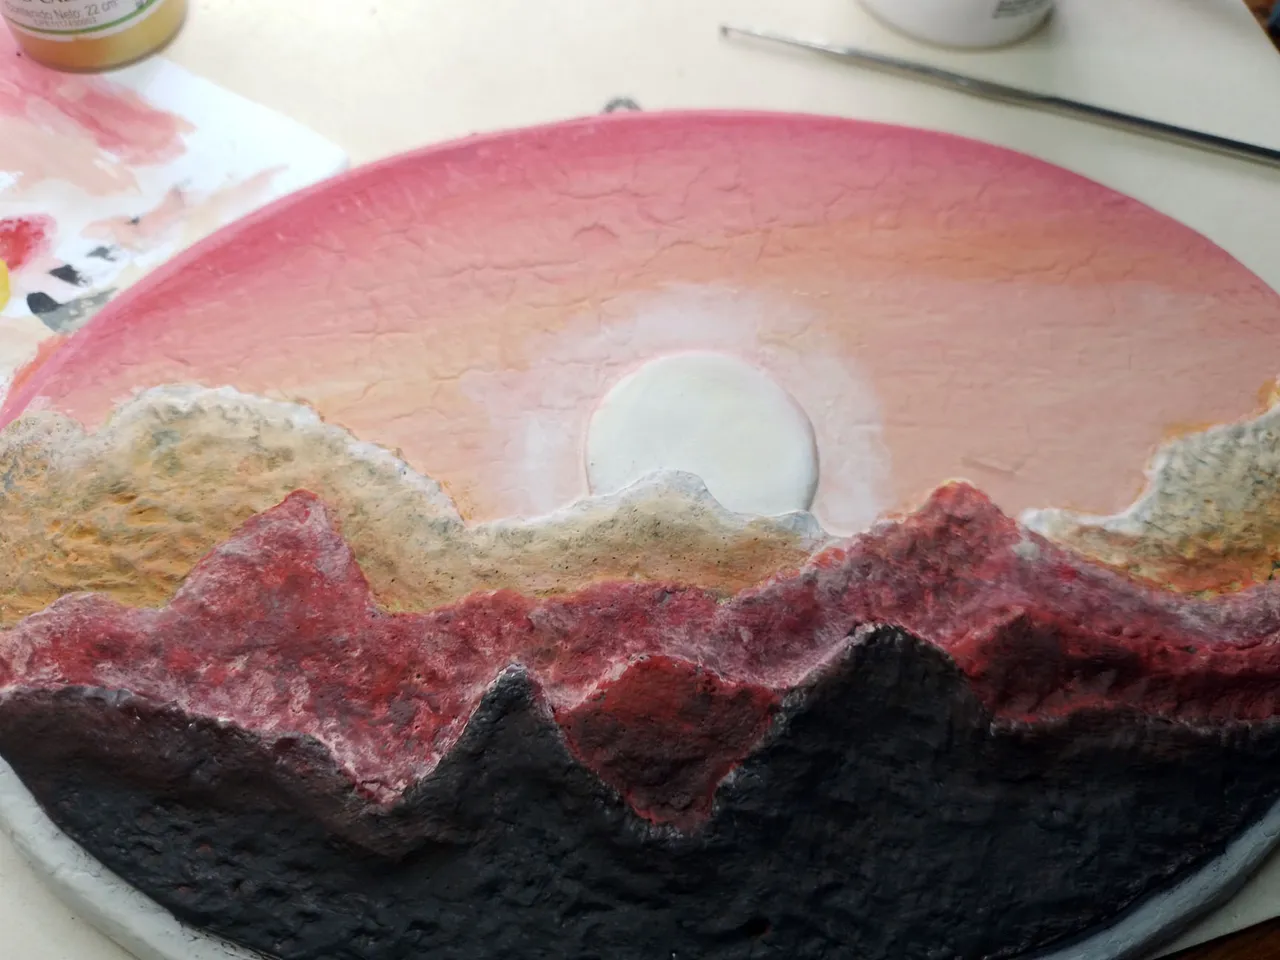
The mountains should be painted in a darker color, specifically I used red to show the difference between one thing and the other.
La idea con las nubes es darle unos tintes naranjas como el atardecer, con bordes blancos en la parte superior.
Las montañas sí se deben pintar de un color más oscuro, específicamente usé rojo para que se notara la diferencia entre unas cosa y la otra.
 |  |
|---|
As you can see in the image below, you can clearly see the difference in colors in each layer, with the back layers being the lightest and the front layers the darkest.
Como pueden ver en la imagen de abajo, se ve claramente la diferencia de colores en cada capa, siendo las capas traseras las más claras y las capas delanteras las más oscuras.
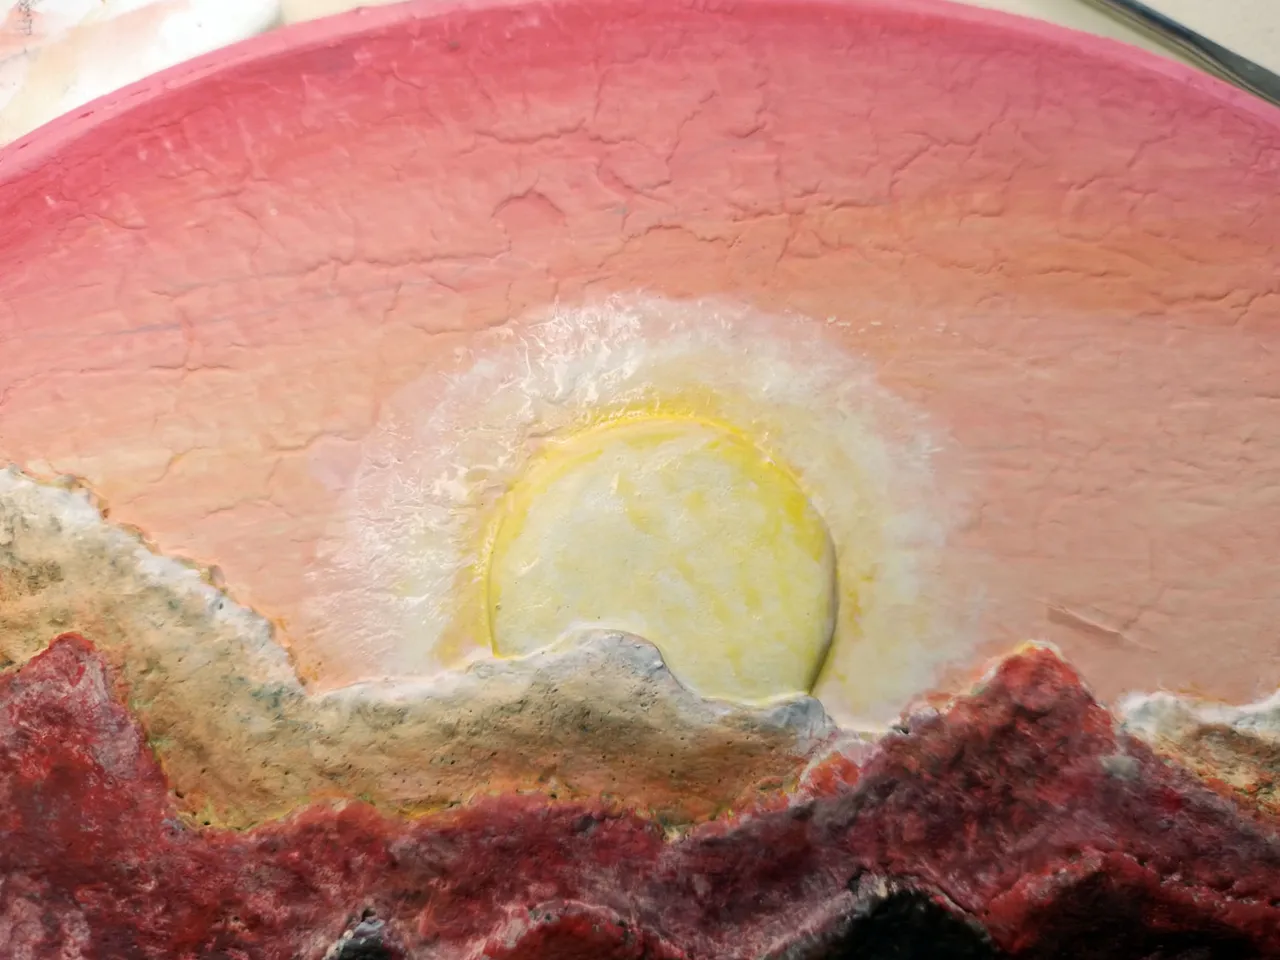
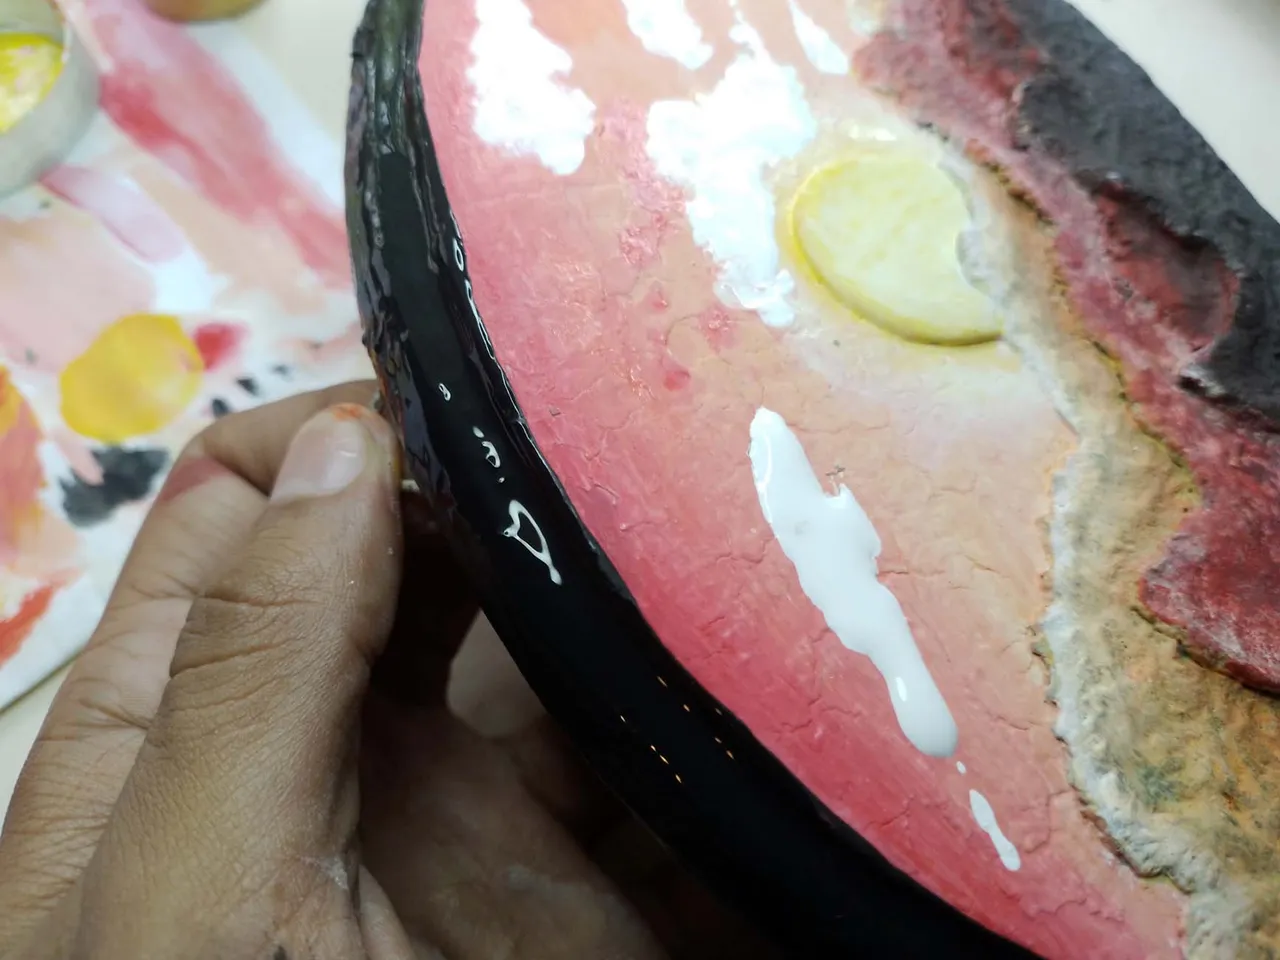
The last thing to do is to decorate the sun. White paint is added with a wet brush, trying to create an effect similar to that of a watercolor, for example.
Then, with a brush loaded with a lot of paint, the clouds of the sky around the sun are made.
Lo último que se hace es decorar el sol. Se le agrega pintura blanca con un pincel húmedo, tratando de crear un efecto parecido al que se haría con una acuarela, por ejemplo.
Ya después, con un pincel cargado de bastante pintura, se hacen las nubes del cielo, alrededor del sol.
 |  |
|---|
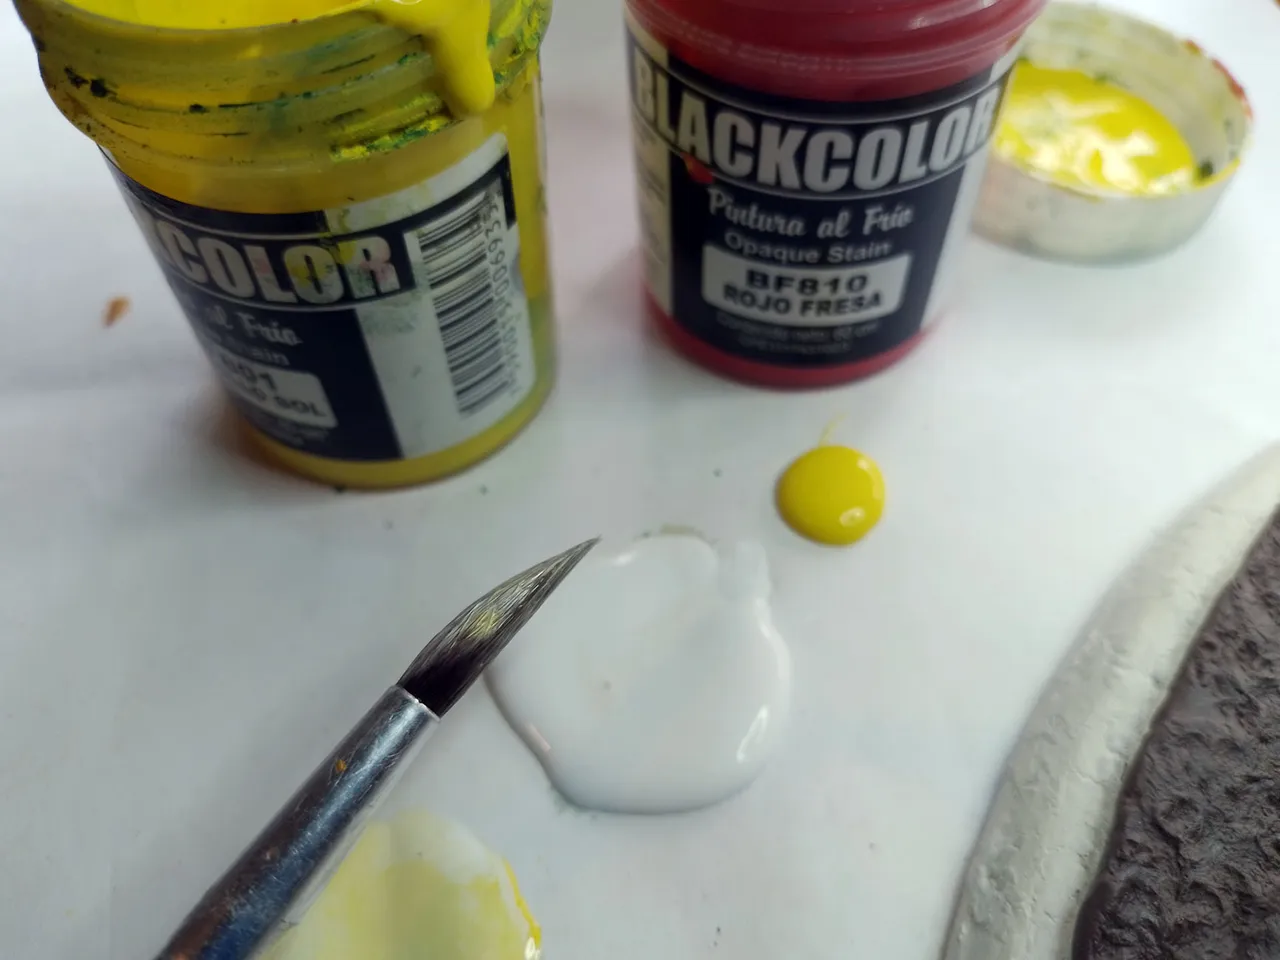
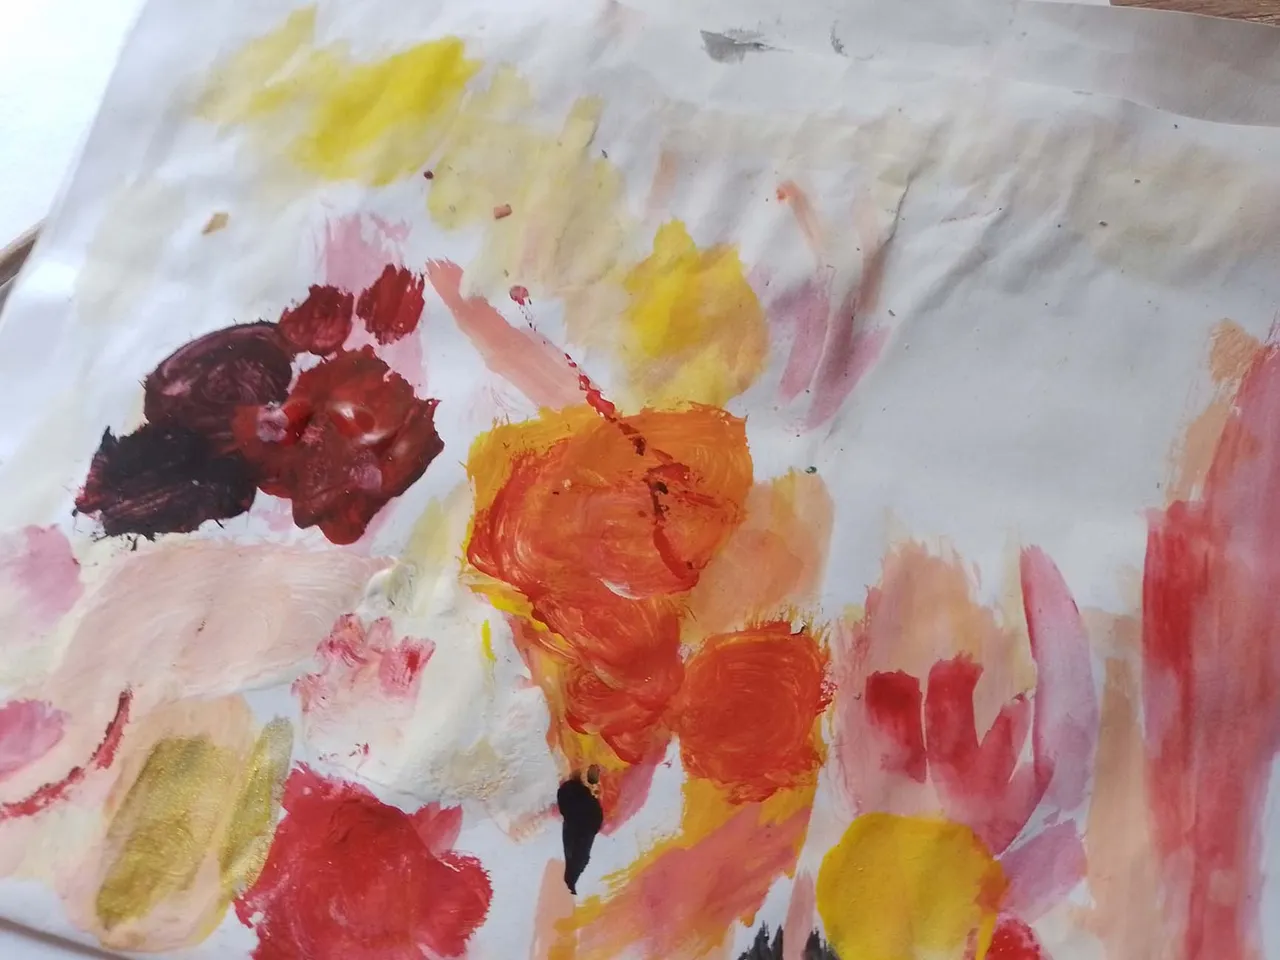
To give you an idea of how the sheet where I make the color mixtures looks like, here you can see the photo, because when you paint these things you make a lot of mess:
Para que se hagan una idea de cómo queda la hoja donde hago las mezclas de colores, aquí pueden ver la foto, porque cuando uno pinta estas cosas ensucia mucho:
The work is almost finished, we only have to finish the final decoration, which consists of a few steps.
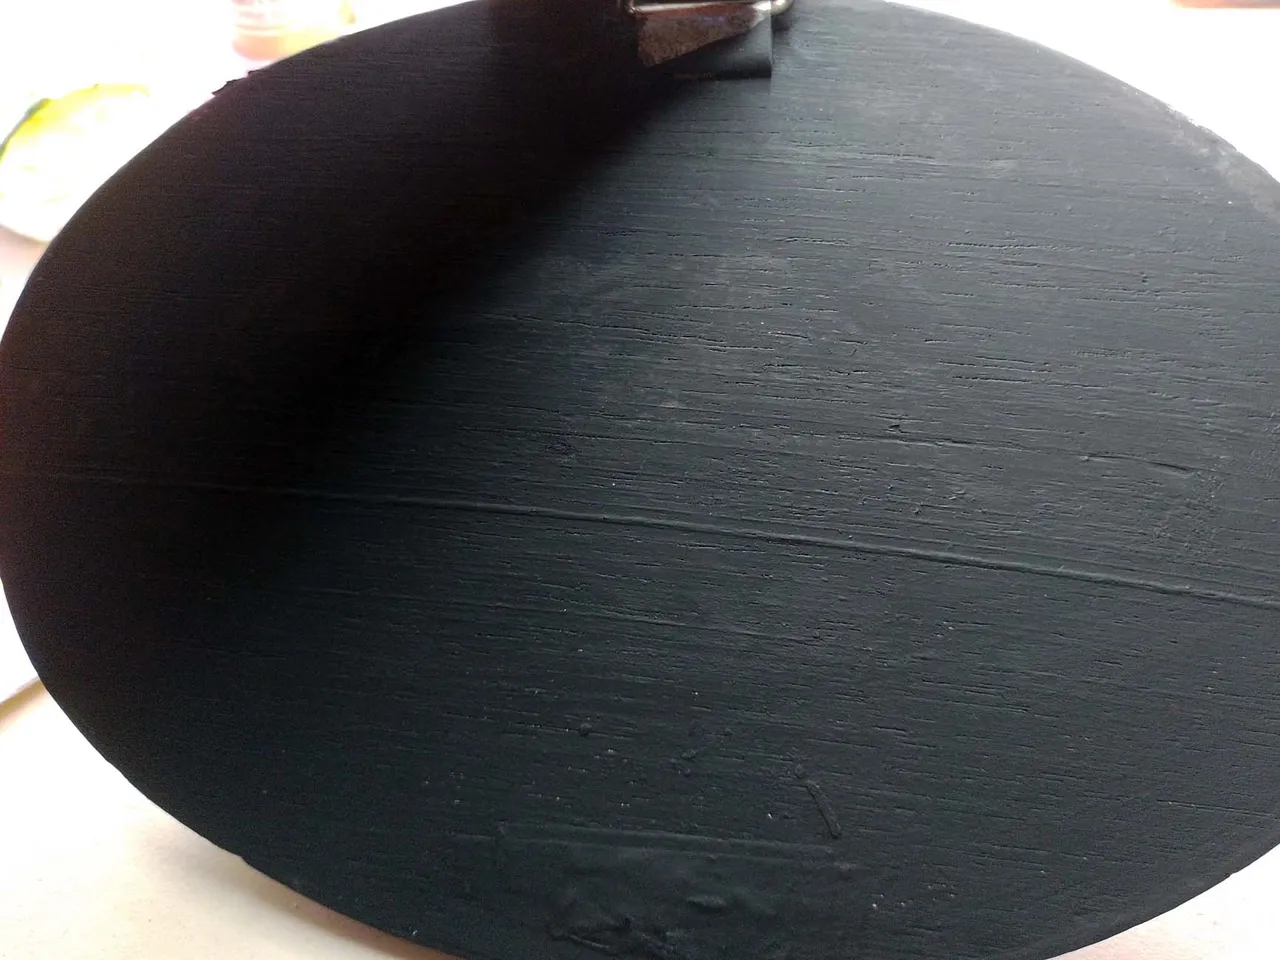
First we have to paint the edge of the key holder black, to give it an elegant touch and to differentiate it from the colors in the drawing.
El trabajo quedó prácticamente terminado, solo hay que terminar el decorado final que consiste en unos pocos pasos.
Primero hay que pintar de color negro el borde del porta llaves, para darle un toque elegante y que se diferencie de los colores que hay en el dibujo.
The back should also be painted, because although it is not visible, the idea is that they look good.
También hay que pintar la parte trasera, porque aunque no se ve, la idea es que queden bien.
 |  |
|---|
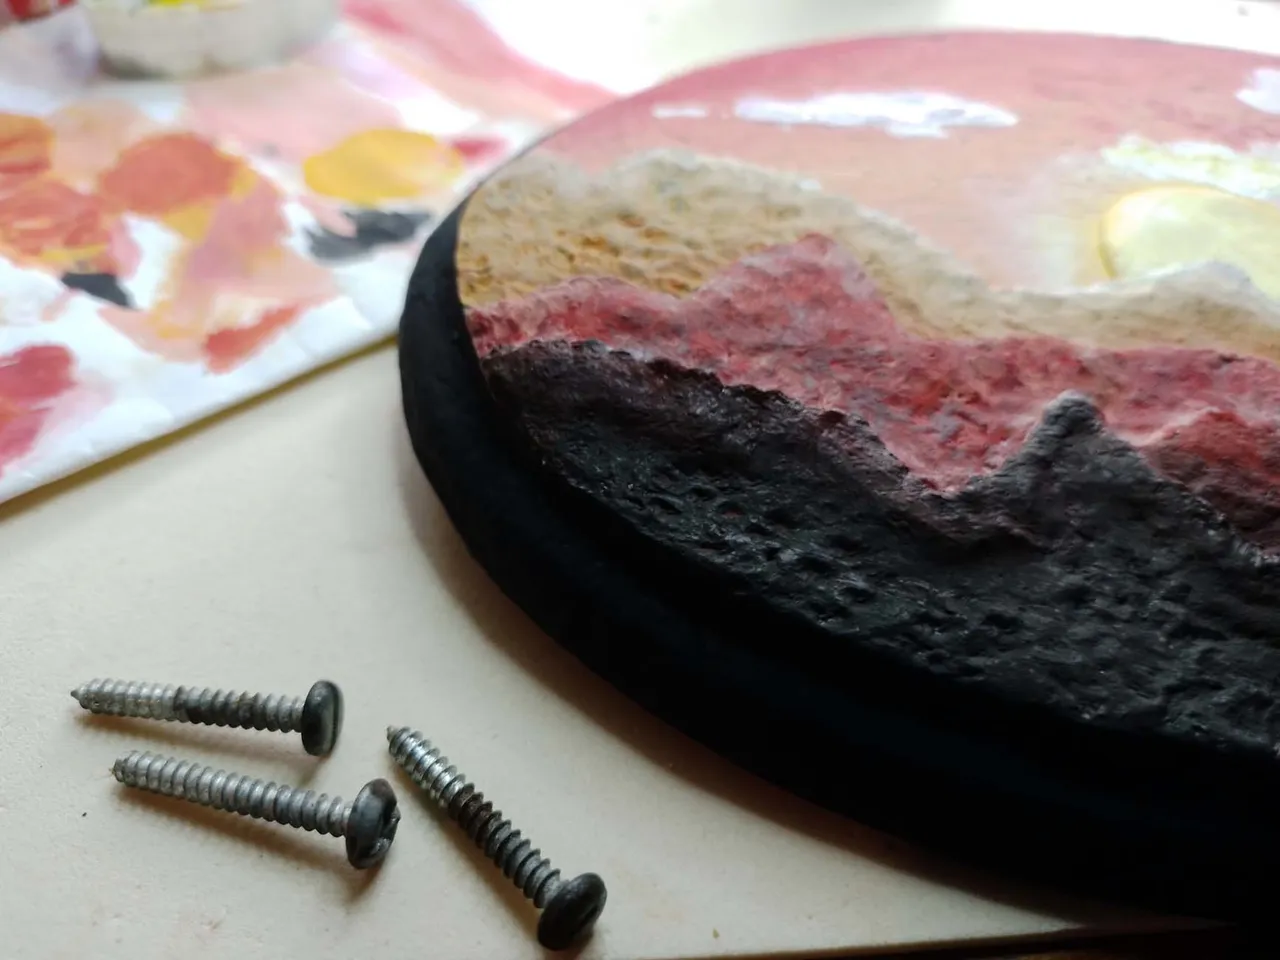
Another thing to do is to place the screws that hold the keys. Although they are normal screws, I painted them gold, to give a touch of elegance to this work.
Otra cosa que hay que hacer es colocar los tornillos que sostienen las llaves. Aunque son tornillos normales, yo los pinté de dorado, para darle un toque de mayor elegancia a este trabajo.
 |  |
|---|
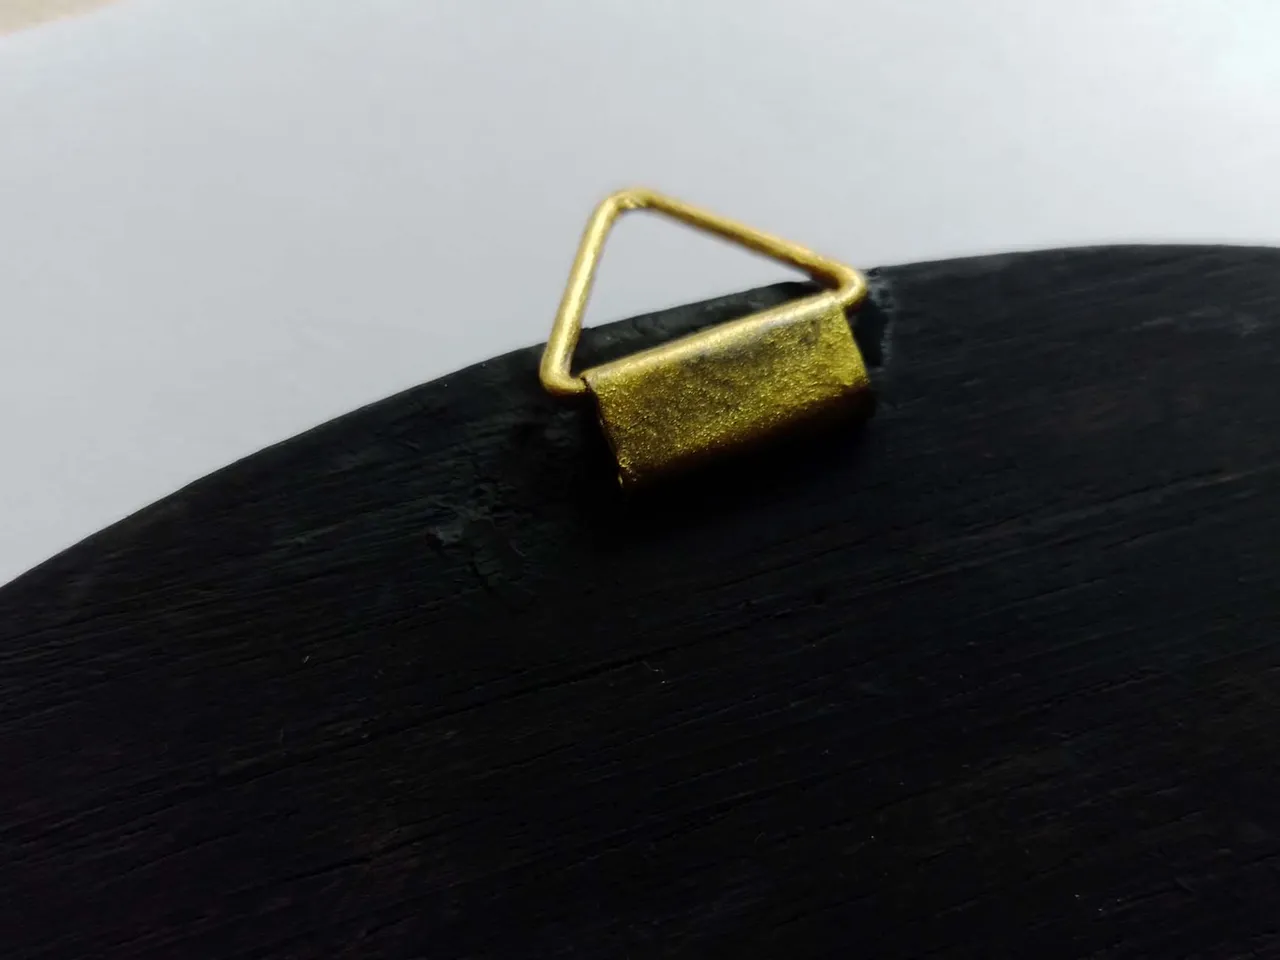
In the same way, I painted the little brooch on the back with this nice golden color. I repeat, although you can't see it, the idea is to make things look good.
De igual manera pinté de este bonito color dorado el brochecito que tiene en la parte trasera. Repito, aunque no se ve, la idea es que queden bien las cosas.
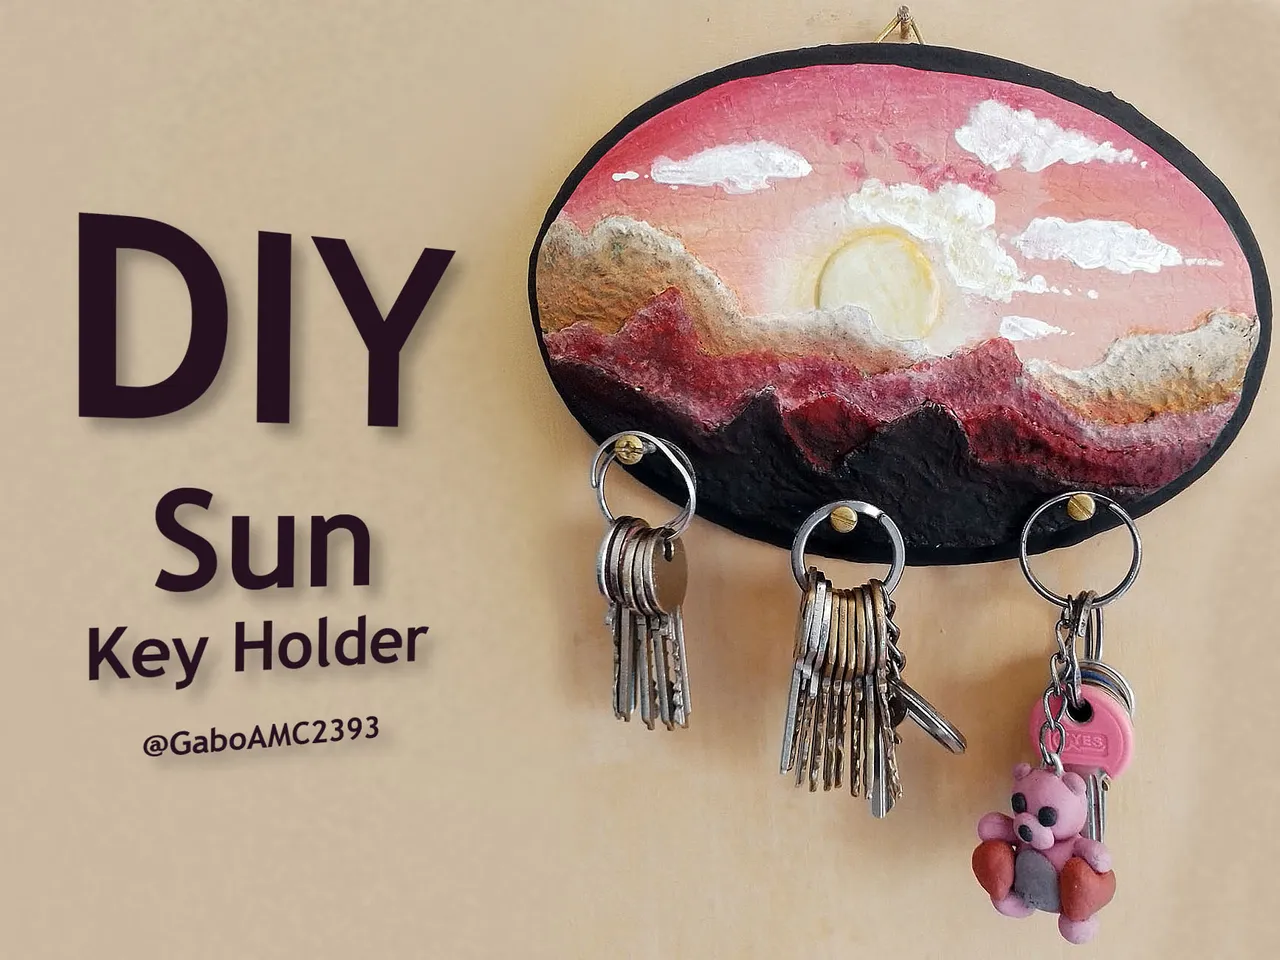
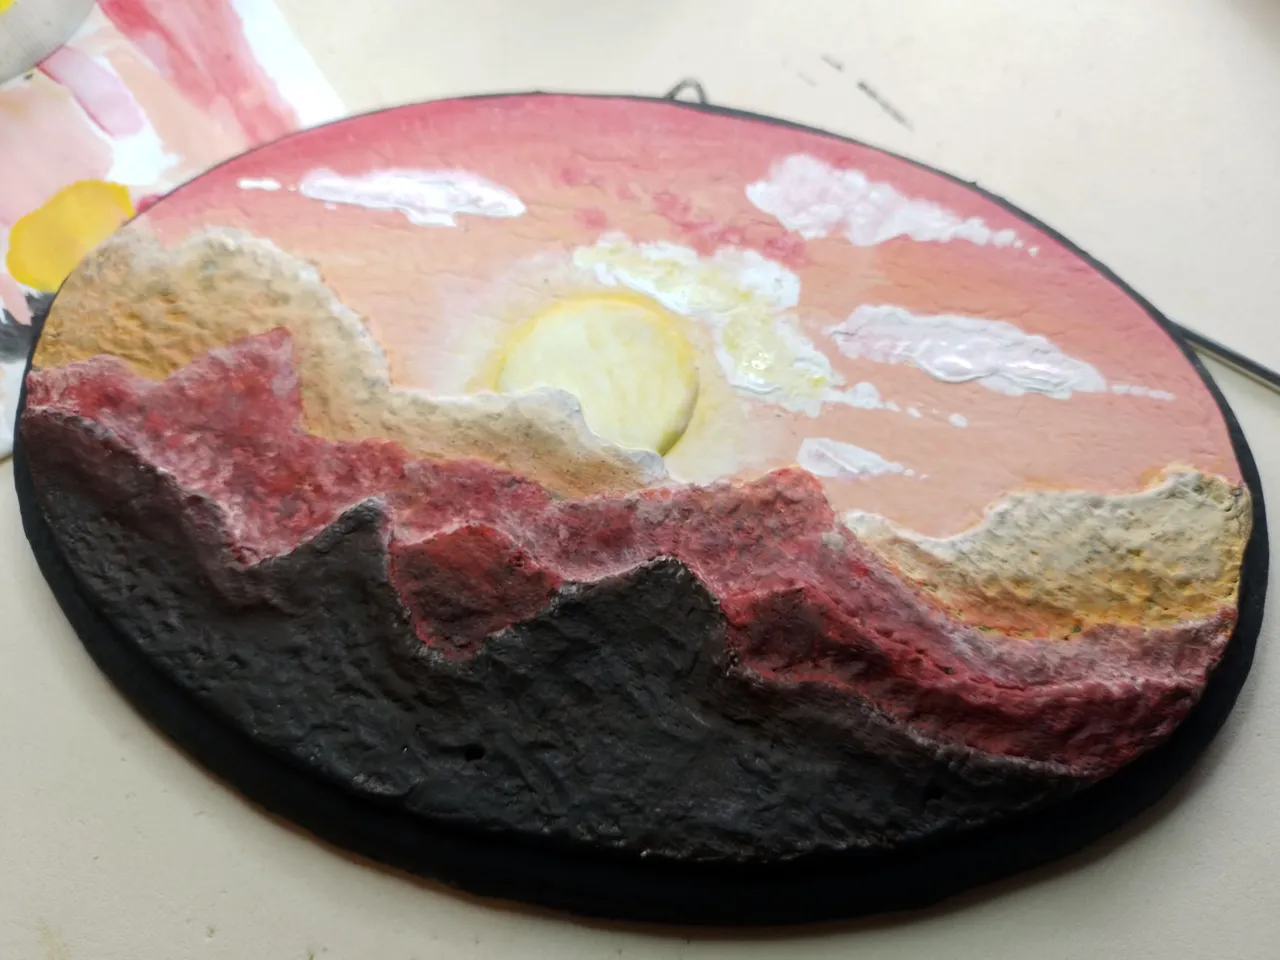
With these last details, the key holder was finished and with a great style.
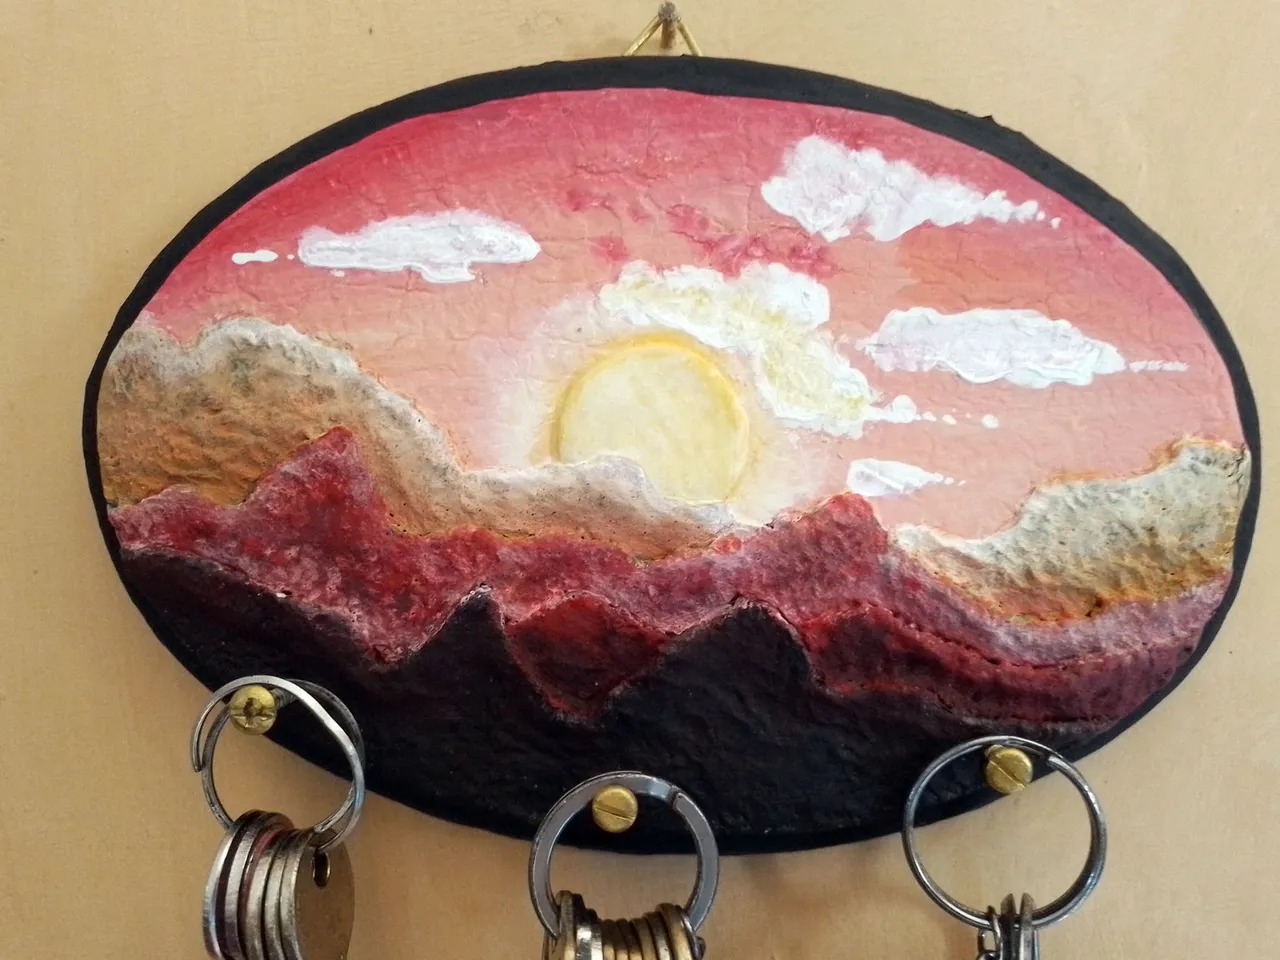
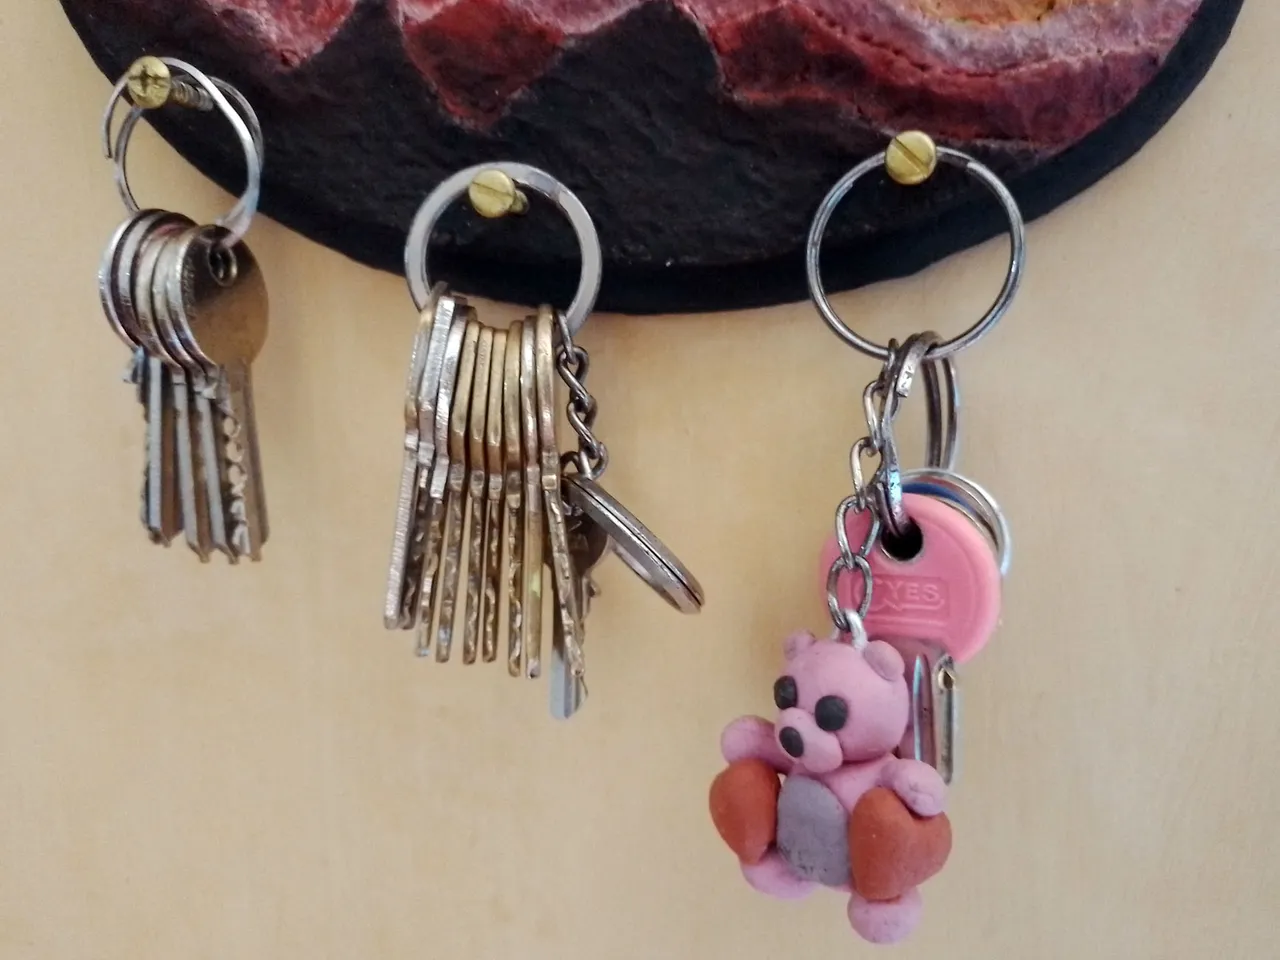
For the final photos, I had to borrow some keys from some friends, since I only have a bunch of keys from home, so I could use all the screws of the piece.
I invite you to see the pictures of the final result, which I leave below:
Con estos últimos detalles, el porta llaves quedó terminado y con un estilo genial.
Para las fotos finales, tuve que pedir unas llaves prestadas a unos amigos, pues solo tengo un mazo de llaves de la casa, para así ocupar todos los tornillos de la pieza.
Los invito a ver las fotografías del resultado final, las cuales dejo a continuación:
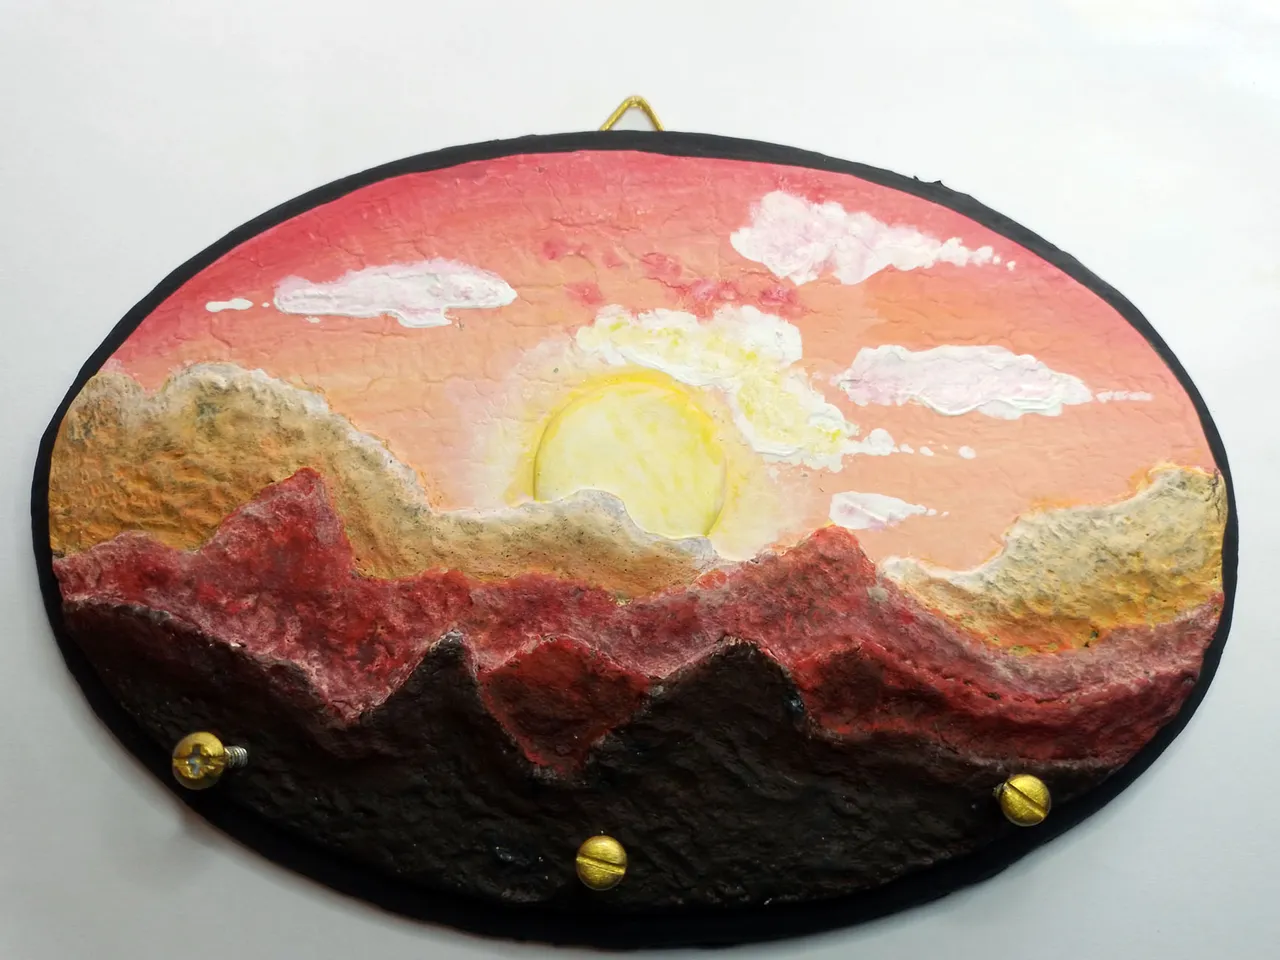


Well friends, that's all for now. I would like to know your opinion of this work, which you can leave below in the comments. As you know, I'm always happy to read them.
I appreciate very much that you took the time to read my publication, as it was quite the time I spent in making it and your visits are always appreciated.
With nothing more to add, I'll say goodbye then...
See you next time!
Bien amigos, esto ha sido todo por ahora. Me gustaría saber su opinión de este trabajo, la cual pueden dejar abajo en los comentarios. Como saben, siempre estoy encantado de leerlos.
Agradezco mucho que se tomaran el tiempo de leer mi publicación, pues fue bastante el tiempo que dediqué en hacerla y siempre se agradecen sus visitas.
Sin más que agregar, me despido entonces...
¡Hasta la próxima!