
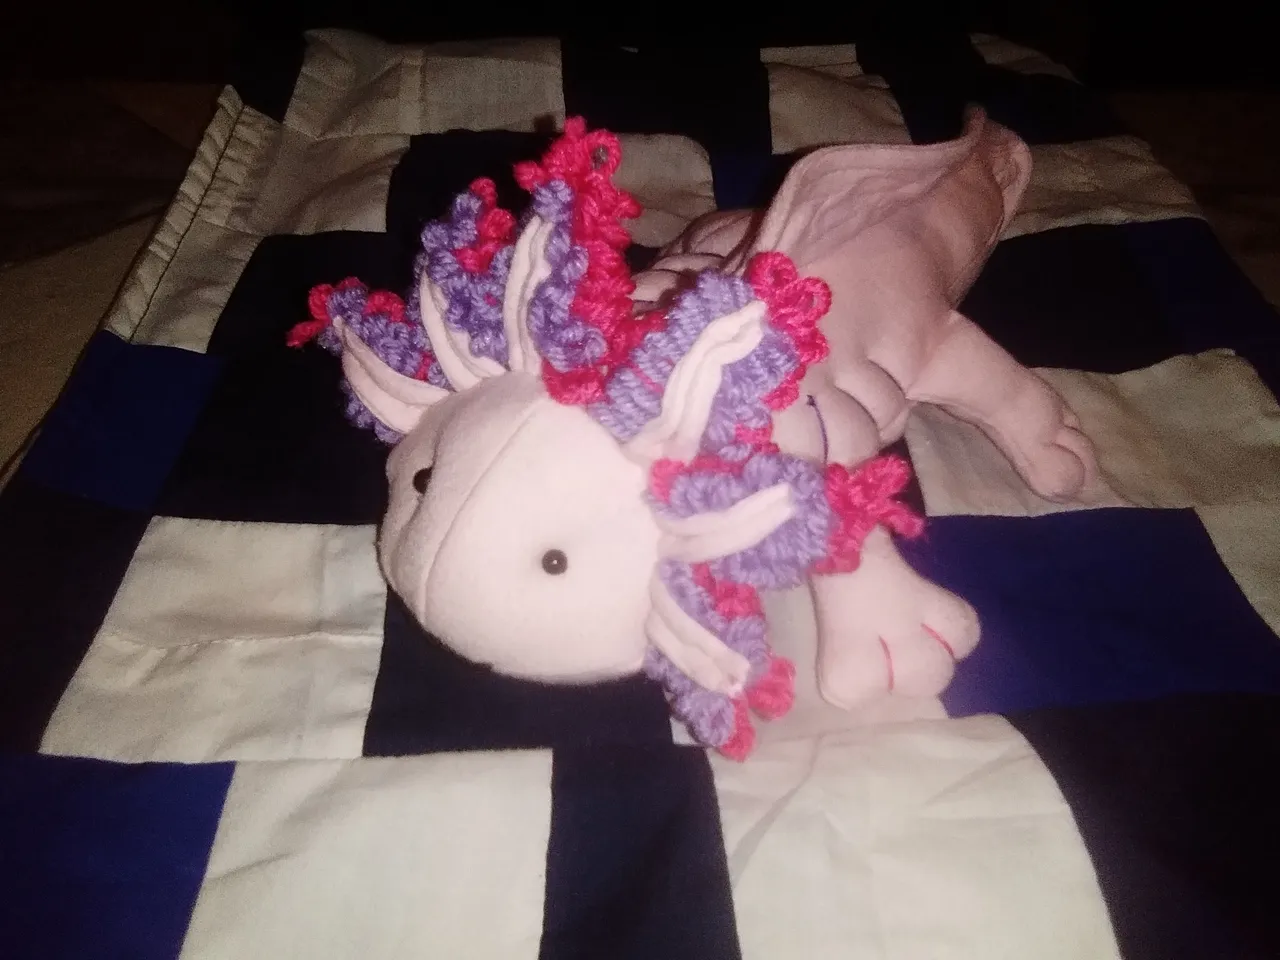
Hello, #DIYHub community. I hope you are having a nice start of the week. Today I want to tell you how I made a cute aquatic salamander.
As part of the Sea Life initiative, I did some research on sea creatures, and to get out of my comfort zone and comply with the outlines of it, I wanted to do something different for the first time.
Among these creatures I saw a marine salamander that I found interesting. I don't like this kind of animal but when I looked at its colors I found it beautiful. My idea was to make it as a stuffed animal for my baby, since she is not old enough to play with other toys.
Hola, comunidad #DIYHub. Espero estén teniendo un bonito inicio de semana. Hoy quiero contarles como hice una bonita salamandra acuática o ajolote.
Cómo parte de la iniciativa Sea Life, investigué un poco sobre las criaturas del mar, y para salir de mi zona de confort y cumplir con los esquemas de la misma, quise hacer algo diferente por primera vez.
Entre estas criaturas vi una salamandra marina que me pareció interesante. A mí no me gusta este tipo de animal pero al mirar sus colores me resultó hermosa. Mi idea fue plasmarla como un peluche para mí bebé, ya que ella no está en edad para jugar con otros juguetes.
Materials:
- Wadding.
- Fabric.
- Stamens.
- Thread.
- Needles.
- Sewing machine.
- Pencil.
- Scissors.
- Black beads.
Materiales:
- Guata.
- Tela.
- Estambres.
- Hilo.
- Agujas.
- Máquina de coser.
- Lápiz.
- Tijeras.
- Cuentas negras.

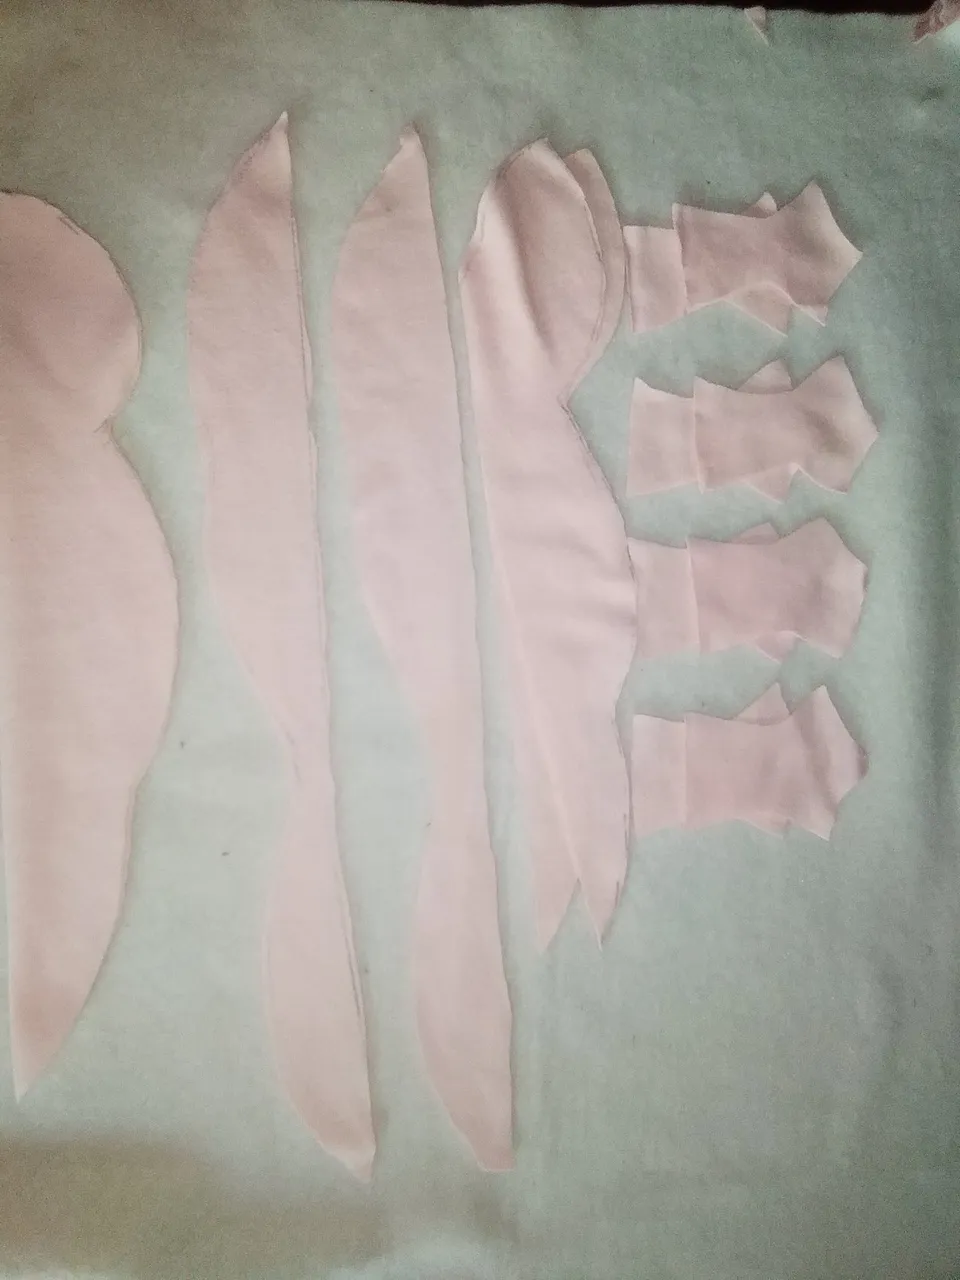
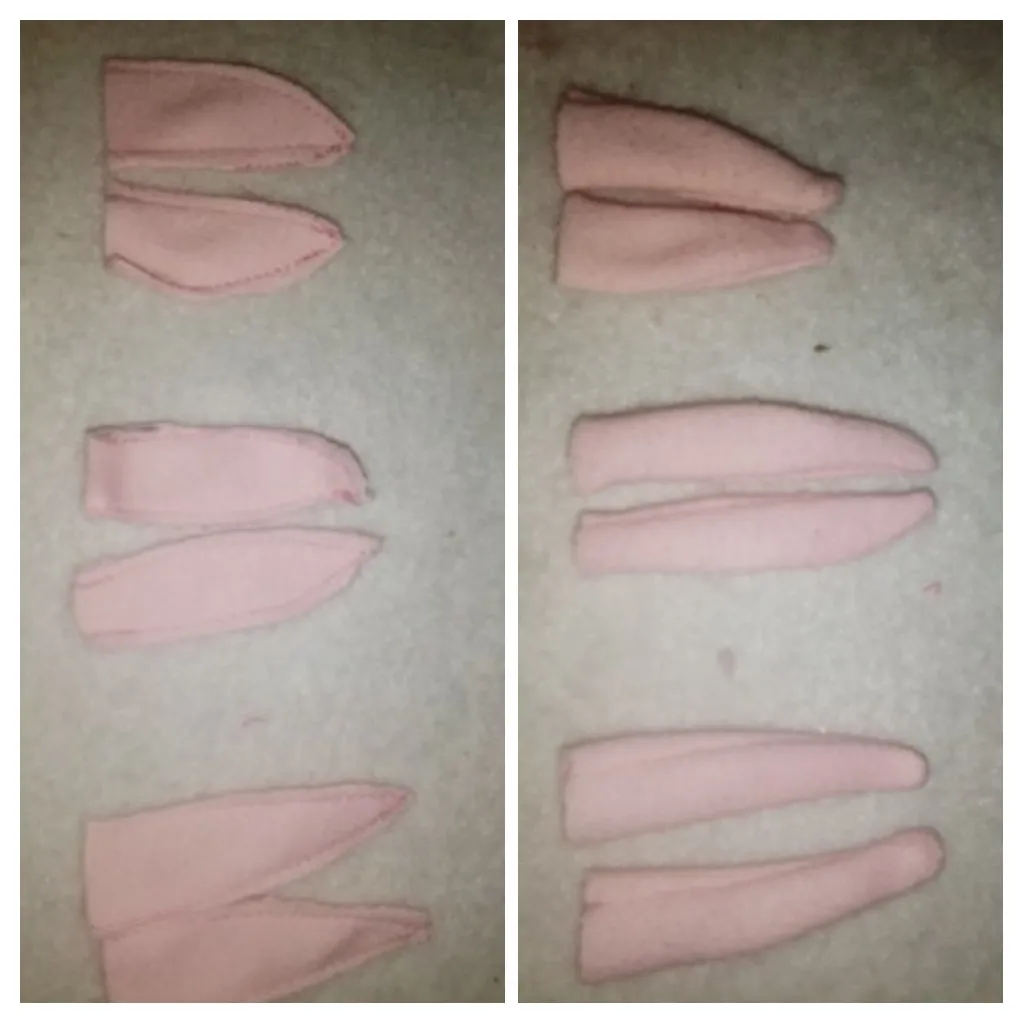
Step 1:
We cut out all the pieces. For this we will already have a image of what the salamander looks like.
Paso 1:
Recortamos todas las piezas. Para esto tendremos ya una imagen de cómo es la salamandra.
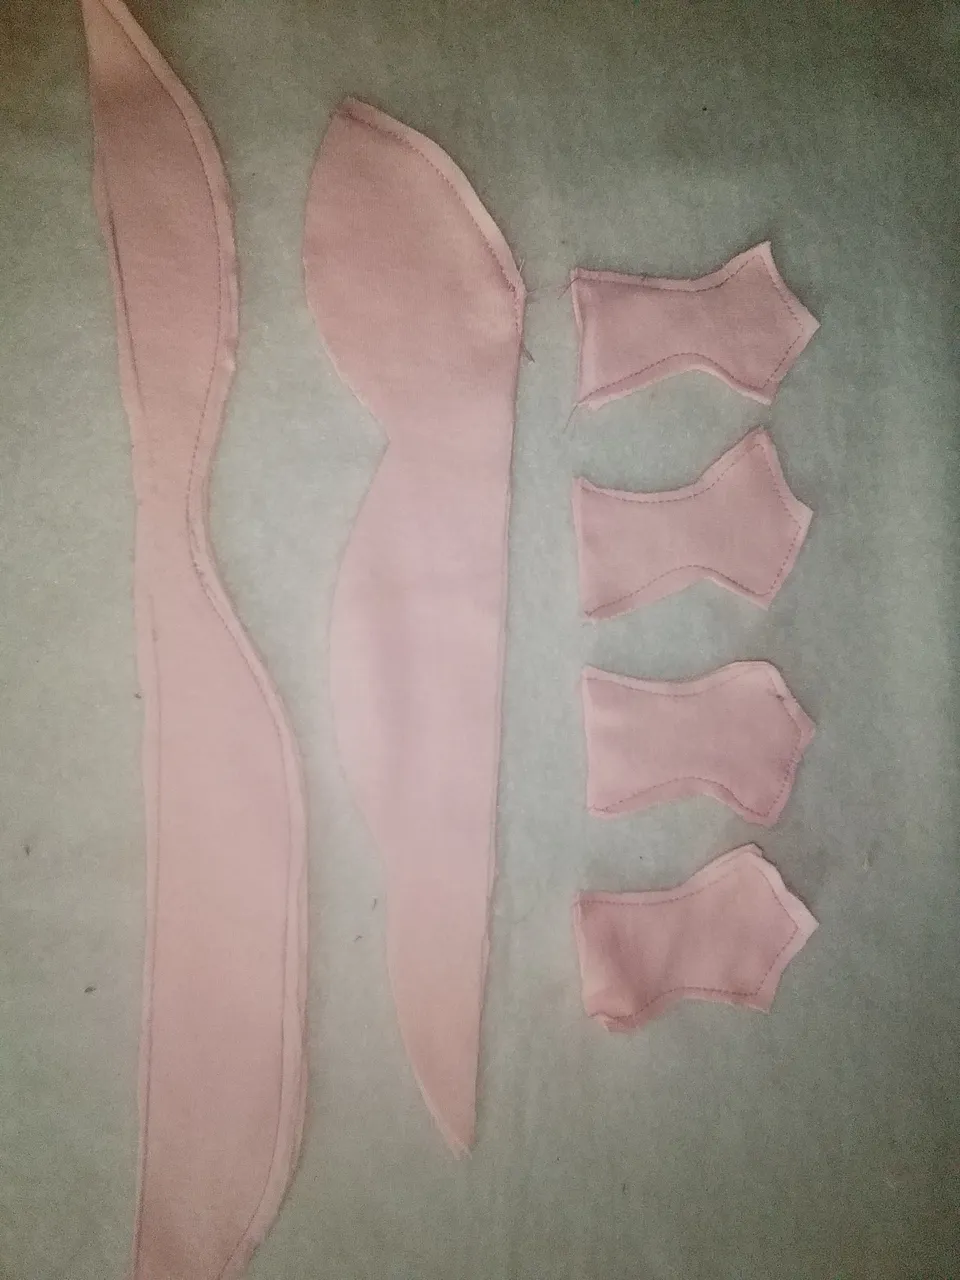
Step 2:
We sew along the edge the legs, the dorsal fin and the top of the head.
Paso 2:
Cosemos por la orilla las patitas, la aleta dorsal y la parte de arriba de la cabeza.
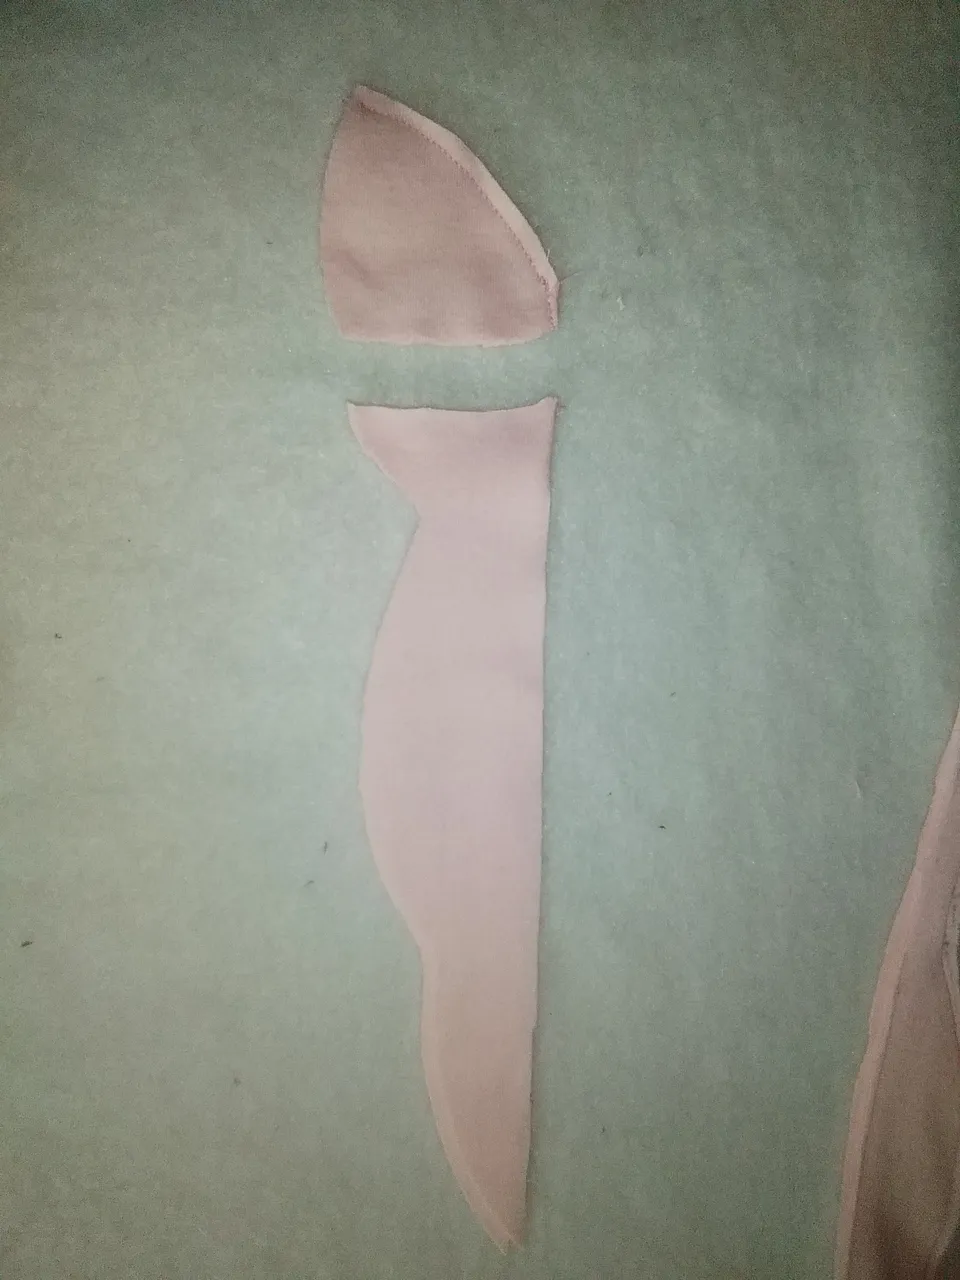
Step 3:
We will cut the head piece making a division where the feather-like gills will go. We will also make a cut in half from the tip of the tail upwards, leaving 2cm uncut.
Paso 3:
Cortaremos la pieza de la cabeza haciendo una división donde iran las branquias con forma de plumas. Tambien haremos un corte a la mitad desde la punta de la cola hacia arriba, dejando 2cm sin cortar.
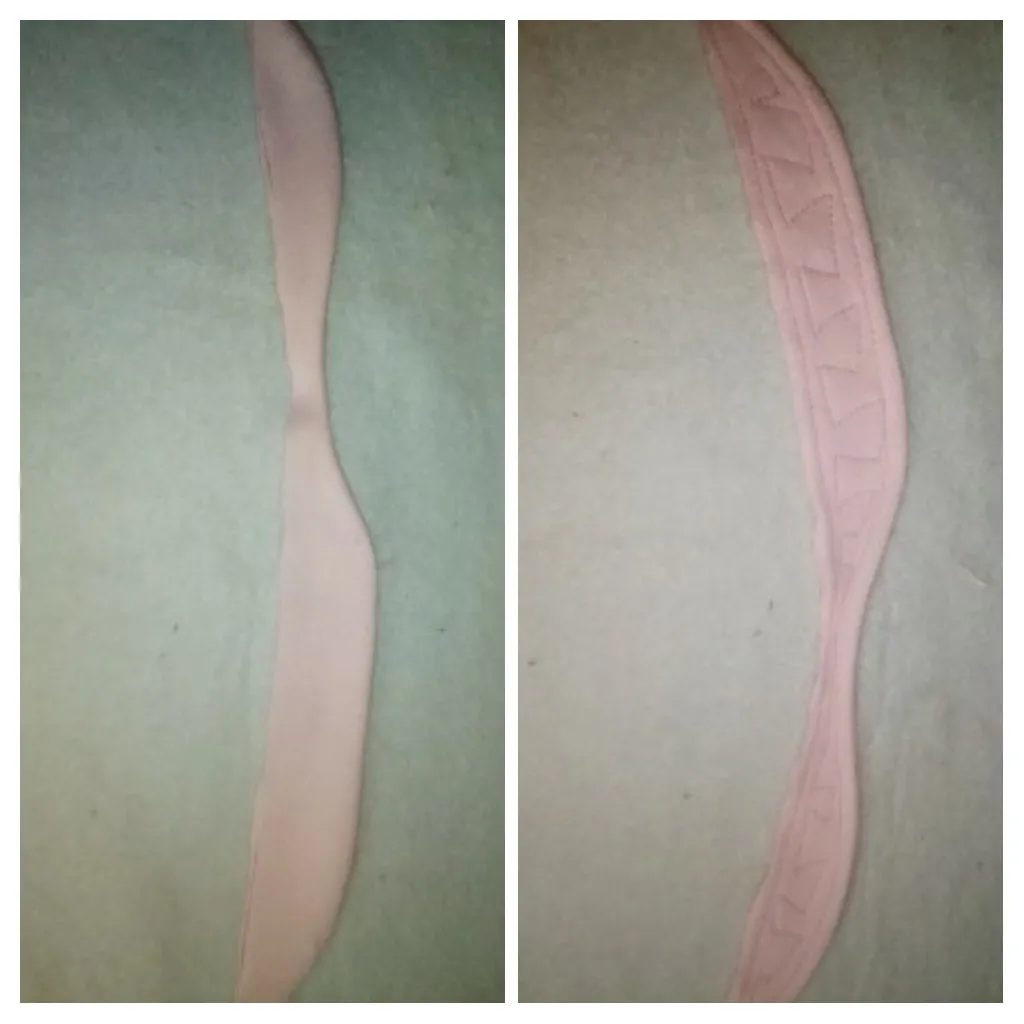
Step 4:
We will turn the piece that will be the dorsal fin and make a random design.
Paso 4:
Daremos vuelta a la pieza que será la aleta dorsal y haremos un diseño al azar.
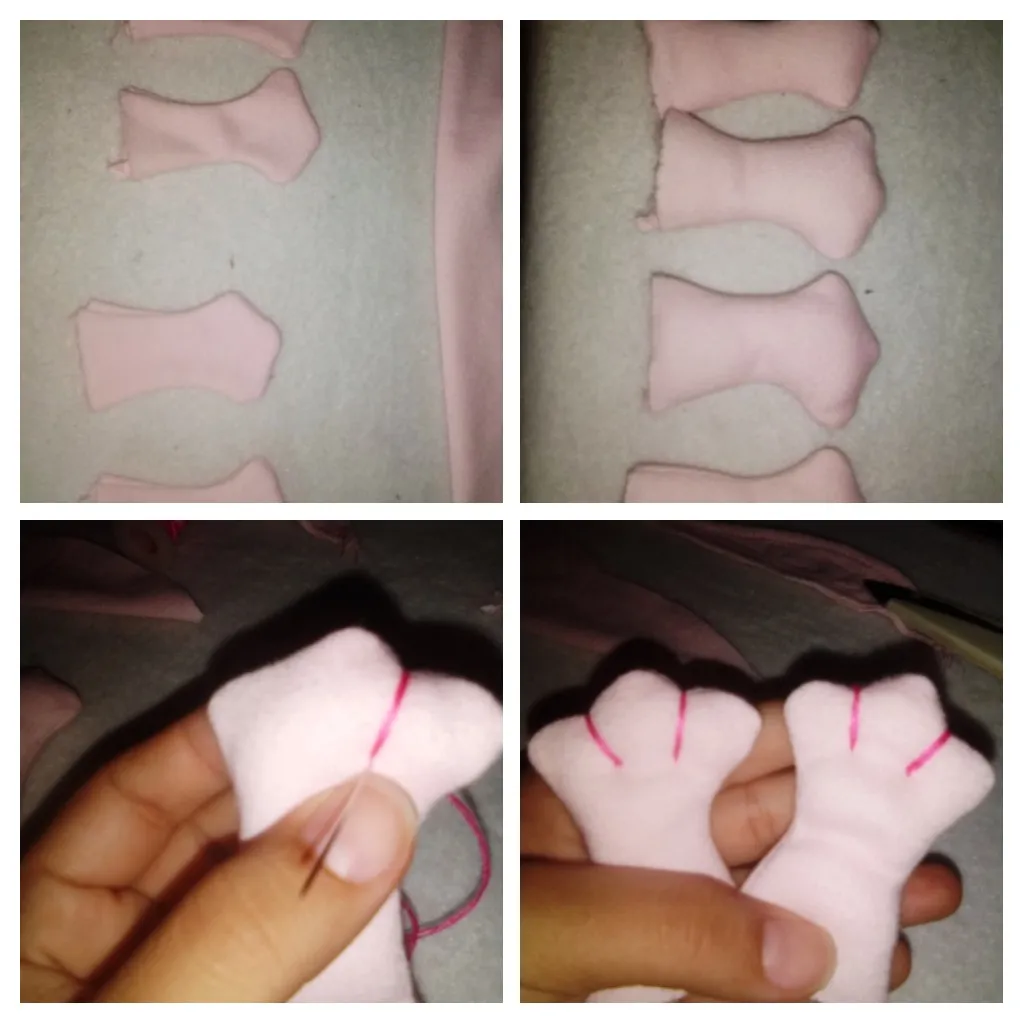
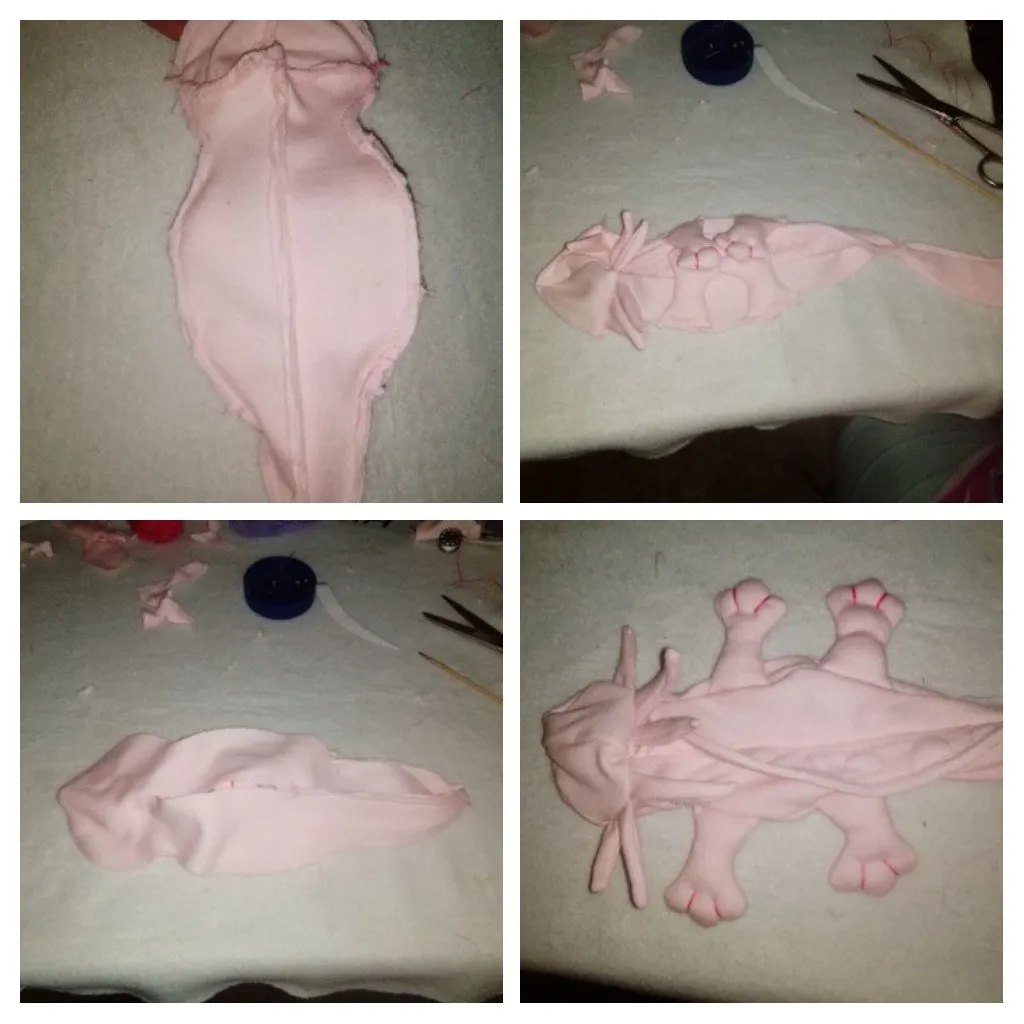
Step 5:
We flip the little legs and fill with the wadding and with a needle and thread we will make the division of the toes.
Paso 5:
Volteamos las patitas y rellenamos con la guata y con una aguja e hilo haremos la división de los dedos.
Step 6:
We will cut the piece that will be the belly of the salamander from the tip of the tail to the neck, we will place the dorsal fin leaving 10cm of opening to be able to introduce the stuffing.
Paso 6:
Cortaremos la pieza que será la barriga de la salamandra desde la punta de la cola hasta el cuello, colocaremos la aleta dorsal dejando 10cm de abertura para poder introducir el relleno.
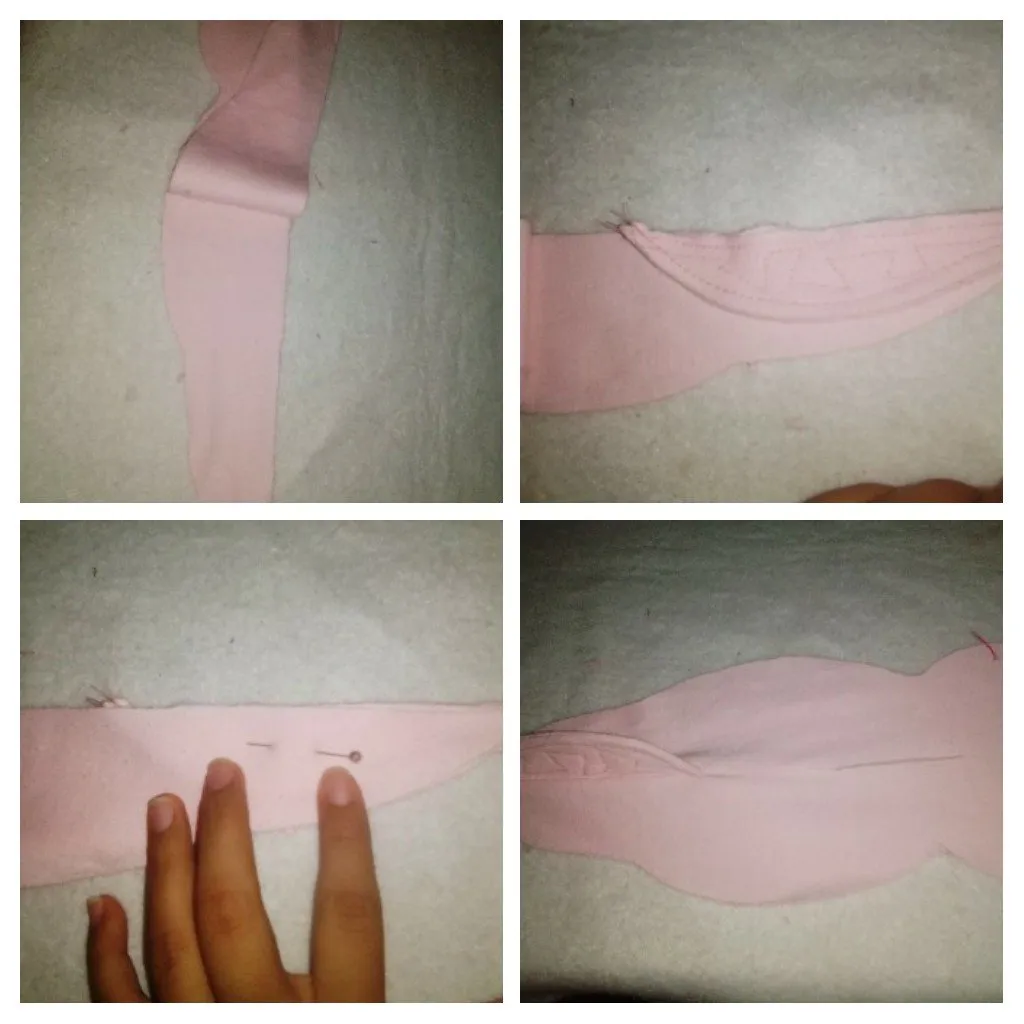
Step 7:
Repeat the previous step but with the upper part of the salamander, we will place the fin completely from the beginning of the opening.
Paso 7:
Repetimos el paso anterior pero con la parte de arriba de la salamandra, a está si le colocaremos la aleta por completo desde el inicio de la abertura.
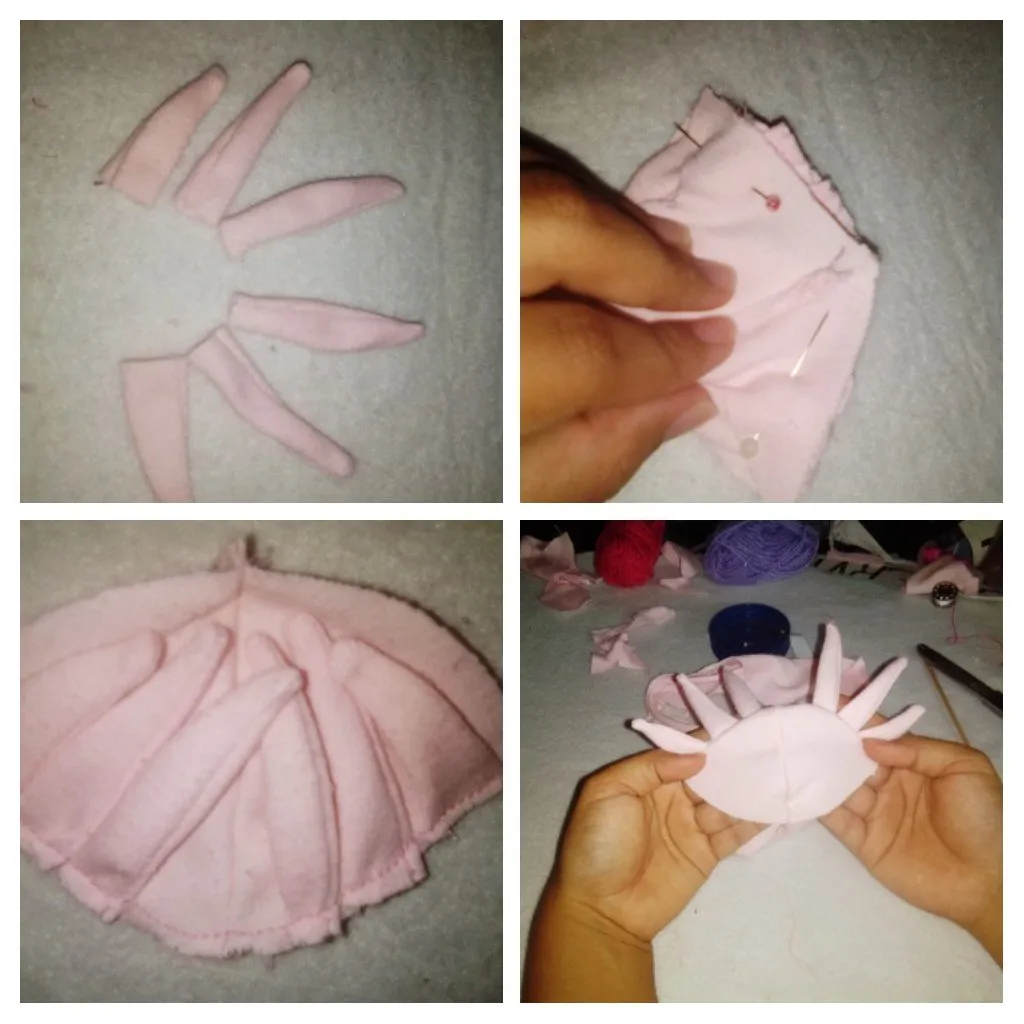
Step 8:
We will make the gills that will go on the head, these should have 3 different sizes. We sew on the edge and flip over.
Paso 8:
Haremos las branquias que irán en la cabeza, estas deben tener 3 tamaños diferentes. Cosemos en la orilla y volteamos.
Step 9:
In this step we can shape the head. Arrange the gills by size on top of the piece we cut with the help of the pins and seal well.
Paso 9:
En este paso podremos darle forma a la cabeza. Ordenamos las branquias por tamaño encima de la pieza que cortamos ayudándonos con los alfileres y sellamos bien.
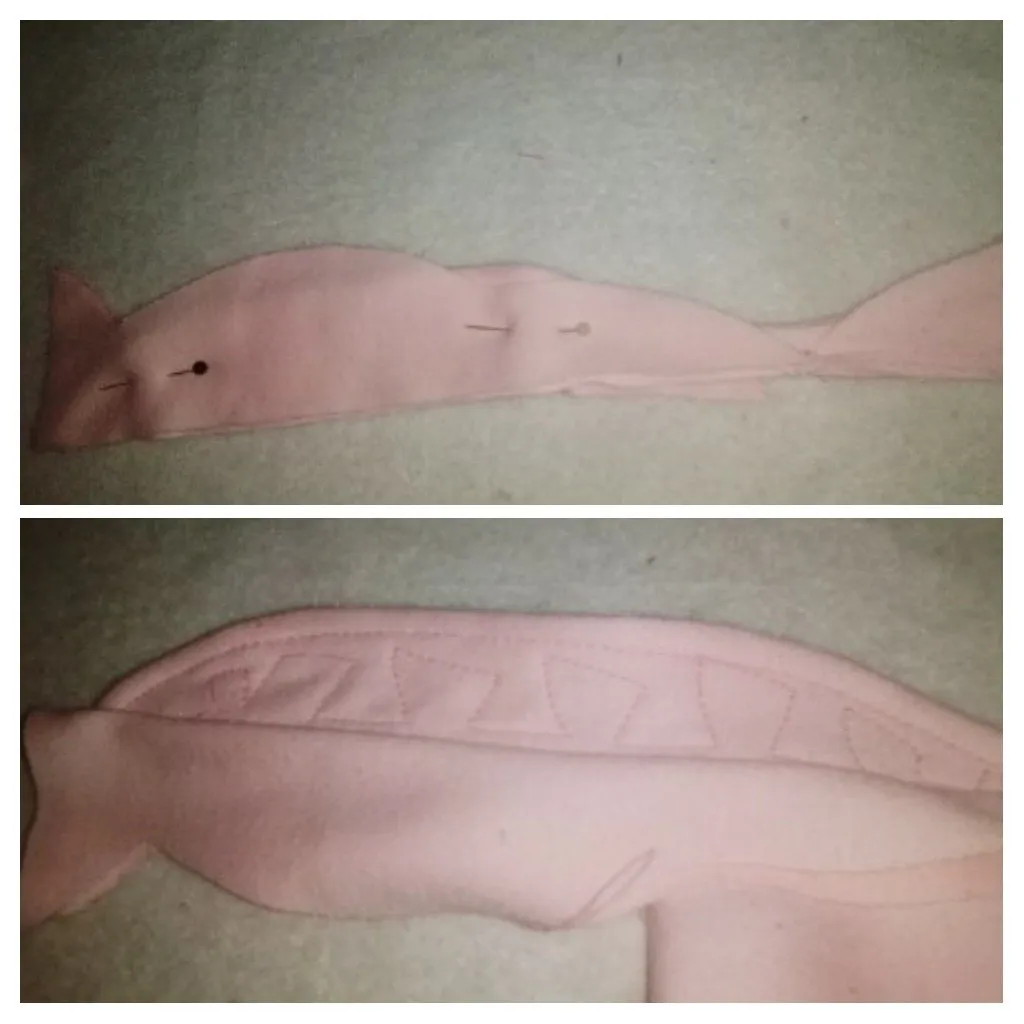
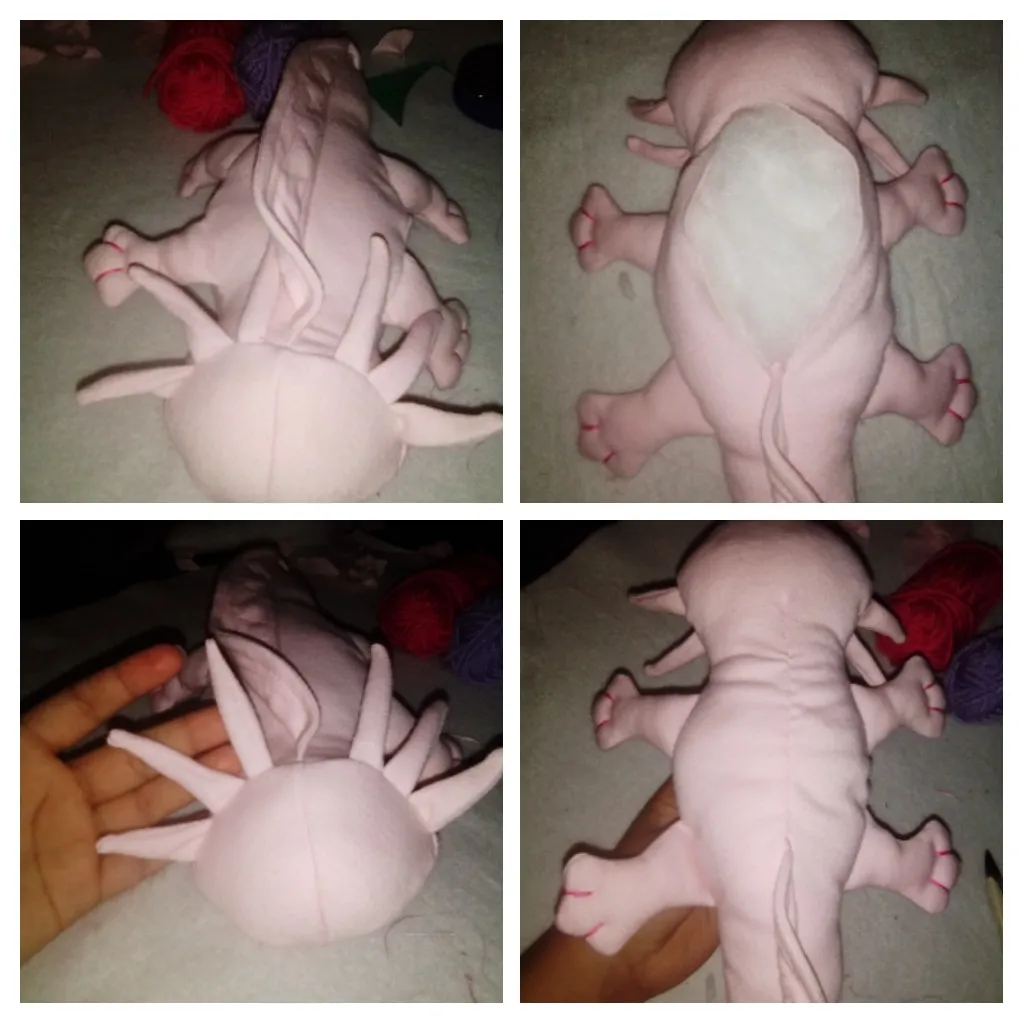
Step 10:
We place the legs and join the top part with the part of the belly. We must finish off very well where the legs will go and secure the seam, we will turn around the opening of the belly.
Paso 10:
Colocamos las patitas y unimos la parte de arriba con la parte de la barriga. Debemos rematar muy bien donde iran las patitas así aseguramos la costura, daremos vuelta por la abertura de la barriga.
Step 11:
We will stuff the salamander completely and seal by hand.
Paso 11:
Rellenaremos la salamandra por completo y sellaremos a mano.
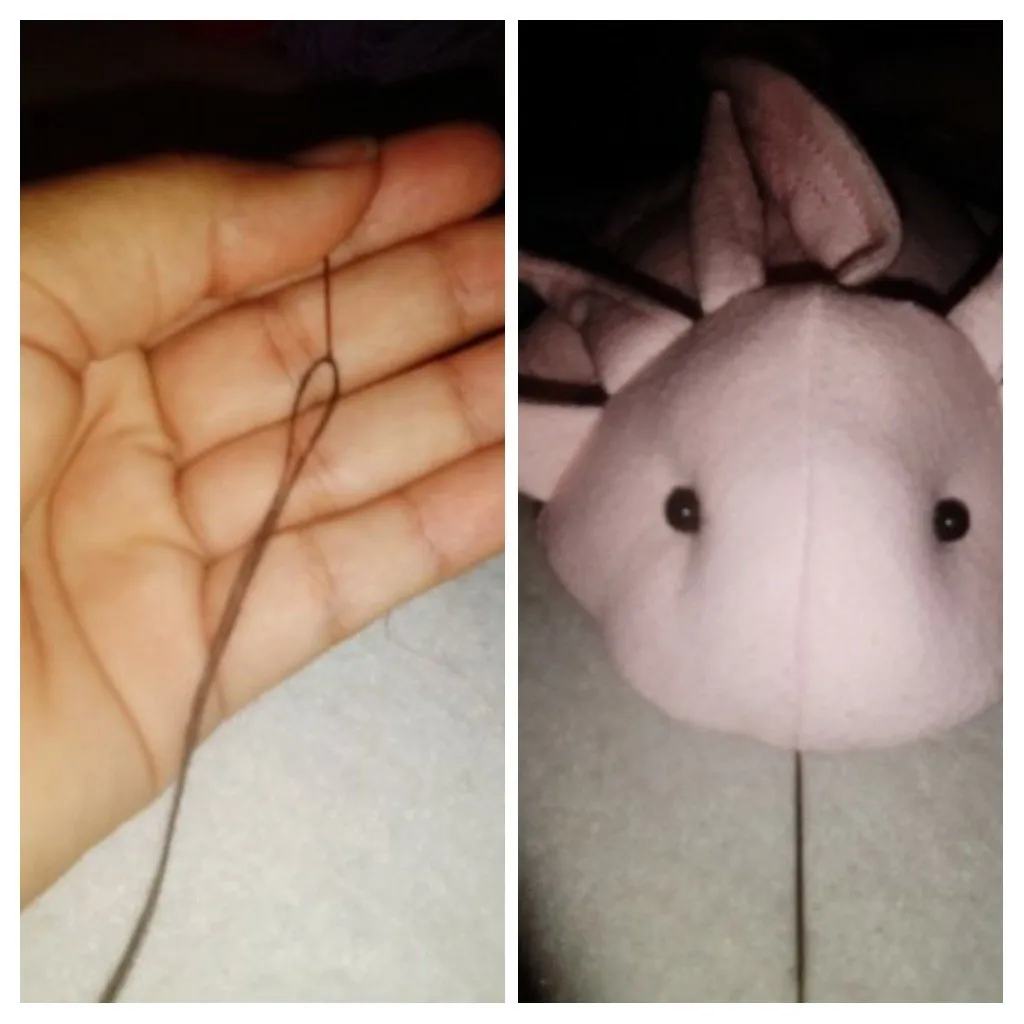
Step 12:
With the needle and black thread we will make the beads that will be the eyes of the salamander and we will make the mouth.
Paso 12:
Con la aguja e hilo negro podremos las cuentas que serán los ojitos de la salamandra y haremos la boca.
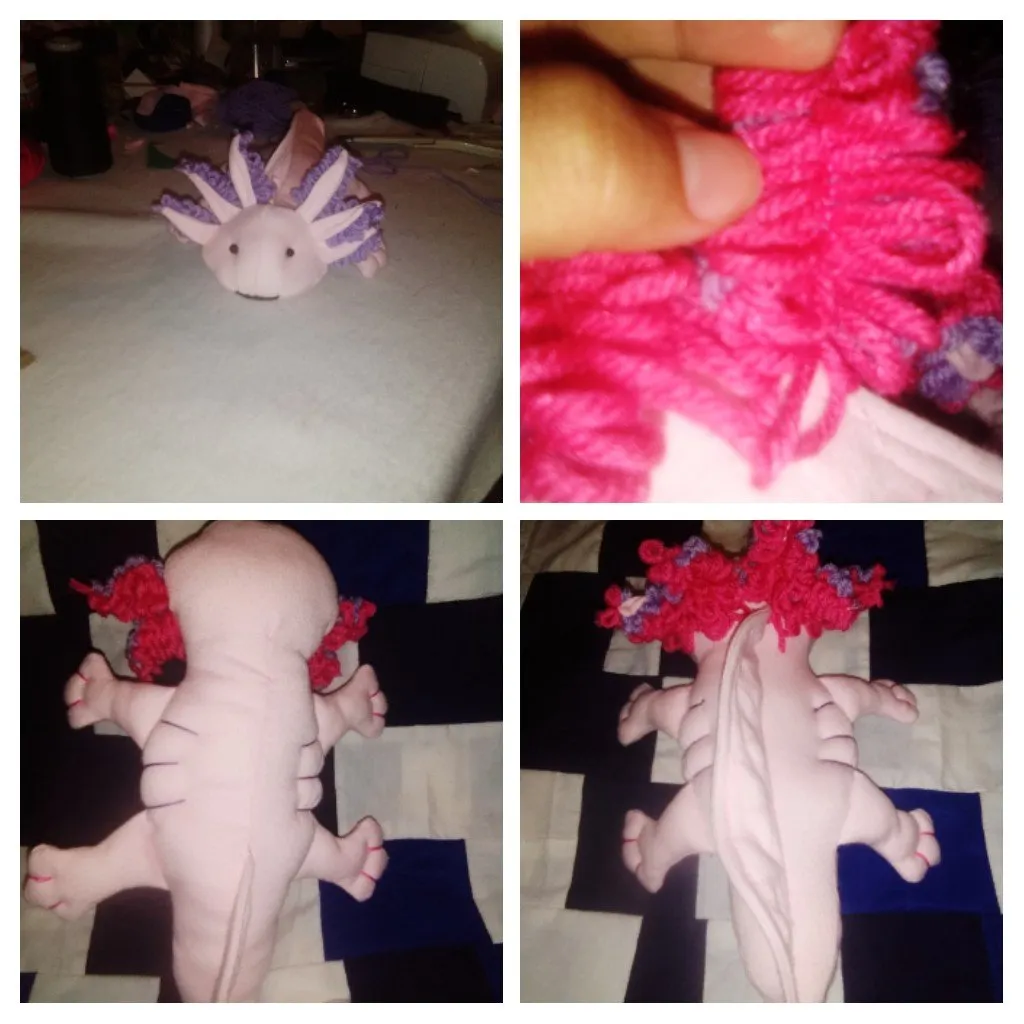
Step 13:
We will make the most colorful part with the yarn. We will sew very well placing a purple layer and then a fuchsia one. We will also make the gills on the sides with purple thread.
Paso 13:
Haremos las parte más colorida con el estambre. Coseremos muy bien colocando una capa morada y luego una fucsia. También haremos las branquias de los costados con hilo morado.
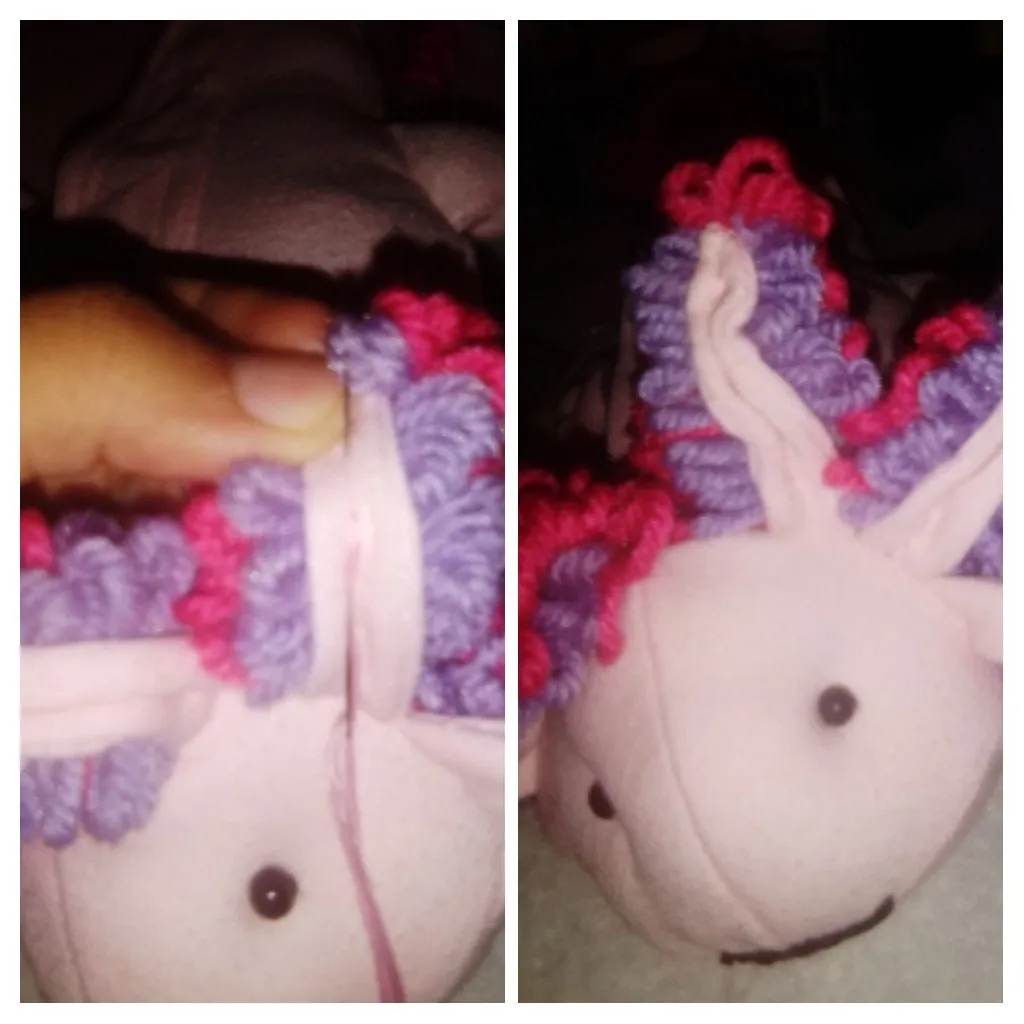
Step 14:
We will secure the yarn well sewing the gills of the head from the front with light pink thread in this way we will also give more rigidity. With this we finish the stuffed salamander.
Paso 14:
Aseguraremos bien el estambre cosiendo las branquias de la cabeza desde el frente con hilo rosa claro de está manera también daremos más rigidez. Con esto terminamos la salamandra de peluche.
I find it a little curious the fact that this creature being so beautiful is in danger of extinction. We are the cause of this, since we have not only affected the habitat where they live, but there are also those who consume it.
Me parece un poco curioso el hecho de que esta criatura siendo tan hermosa esté en peligro de extinción. Somos la causa de esto, ya que no solo hemos afectado el hábitat donde viven, sino que también hay quienes la consumen.

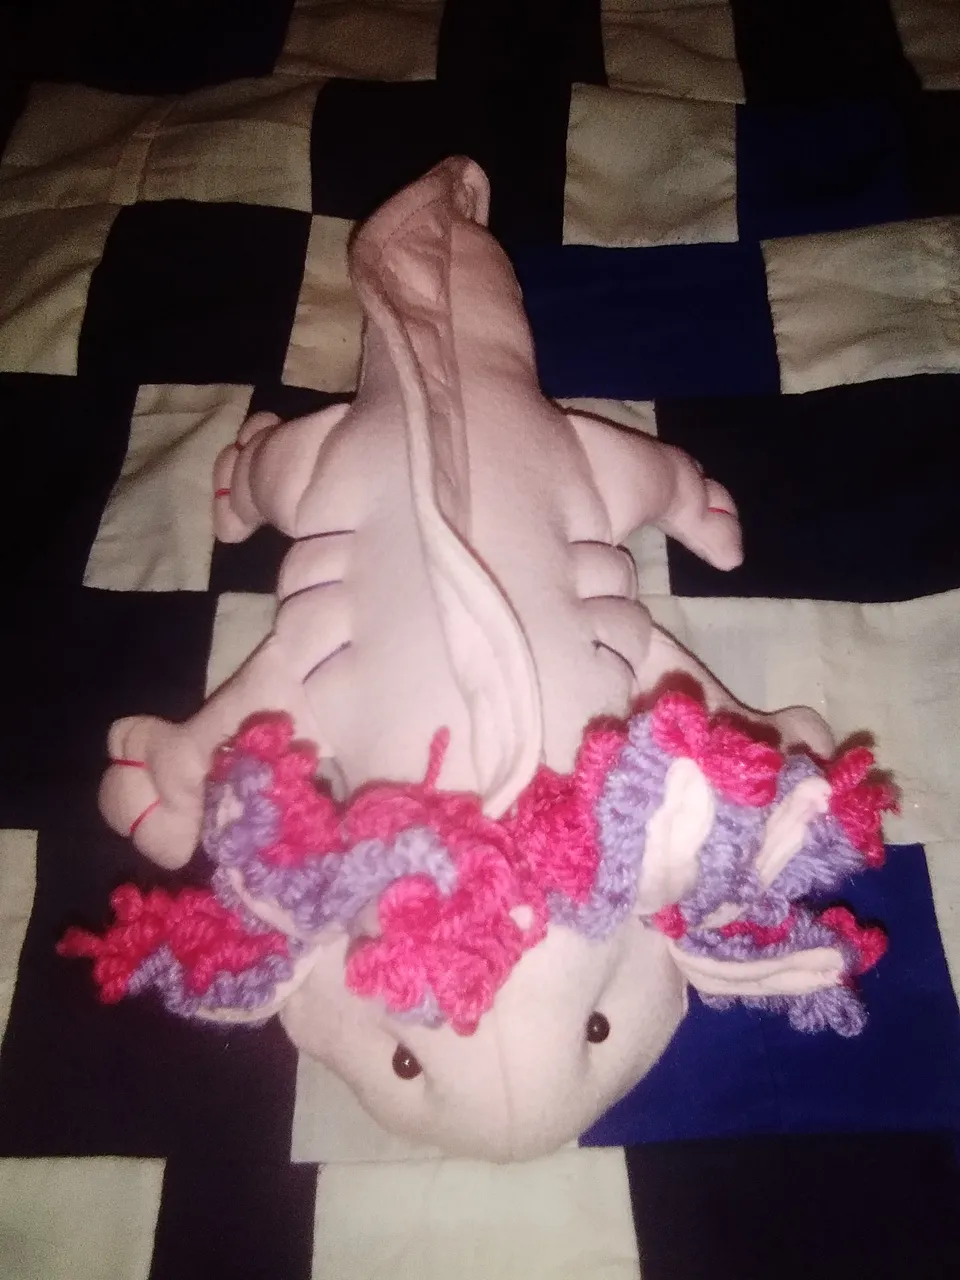
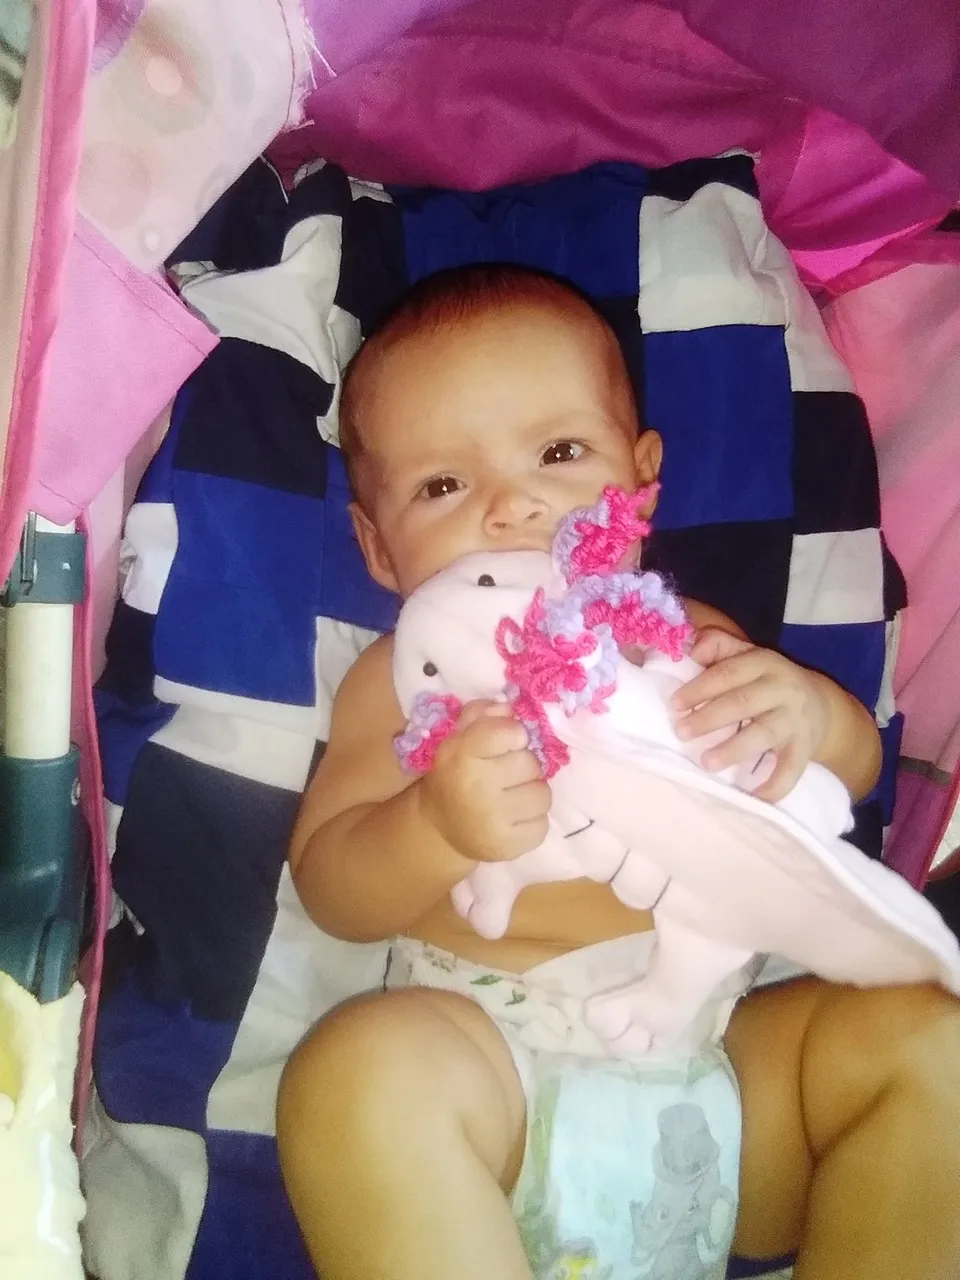
I feel happy because my baby got a lot of attention from this stuffed animal. I imagine it must be because of the shape and the colors. I hope that like her, you liked this beautiful work.
Me siento feliz porque a mí bebé le llamó mucho la atención este peluche. Imagino que debe ser por la forma y los colores. Espero que al igual que a ella a ustedes les haya gustado este lindo trabajo.
Thanks for reading. Leave your comments friends, I will be happy to answer. A big hug from afar.
Gracias por leerme. Dejen sus comentarios amigos, yo estaré contenta de responder. Un abrazo fuerte desde la distancia.
Fotos tomadas con teléfono Alcatel X1.
Traducción hecha con DeepL Translate.