
Hello! I'm happy to be back to Needlework Monday :)
For a long time I wanted to write a post that encourages people who only have a basic sewing machines to use it for sewing stretch fabric.
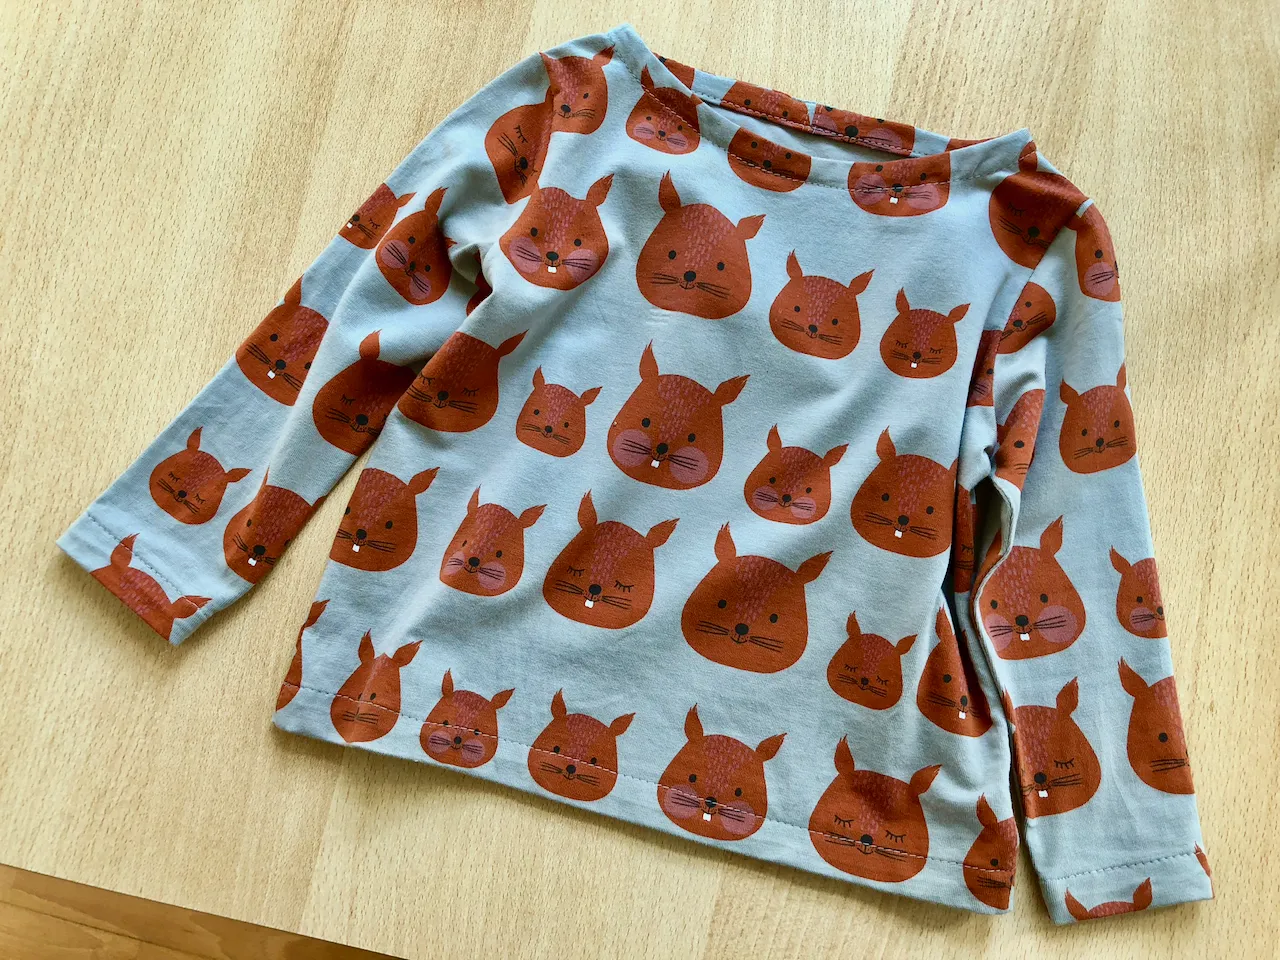
I use Singer Tradition 2250, a simple home use sewing machine. Its current price online is less than 100 Euro. I sewed my daughter's shirt on top of this post last week with the sewing machine. The shirt looks and works fine :)
Before I started sewing clothes for my daughter, I didn't imagine that I could sew stretch fabric such as jersey with a basic sewing machine. I simply believed that I needed an overlock.
Thanks to the owner of my favorite fabric store, she encouraged me to sew jersey with my sewing machine. It was the time when I visited her shop for the first time to see fabric for my daughter's pant.
Here I share three tips I learned in the last years. Actually the techniques can be used for cotton or and other type of fabric too. No additional special materials and tools are needed :)
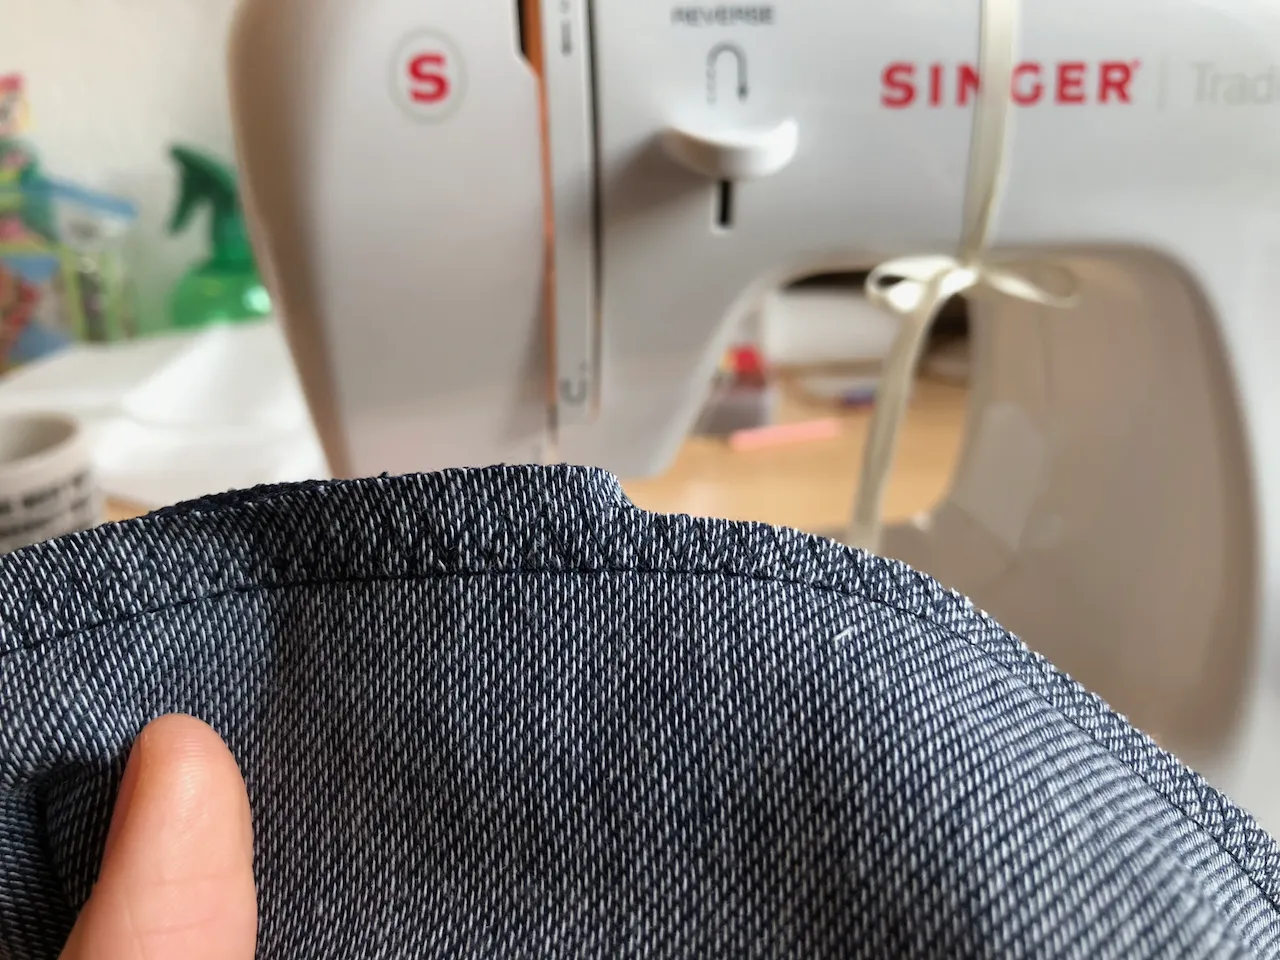
1. Keep 1cm+ stitch allowance
Cut the edge along the zigzag stitches. The reason to do this is to prevent fabric to stuck in sewing machine. It looks & works like over-edge chain stitches :)
2. Zigzag stitch on two or more fabric layers
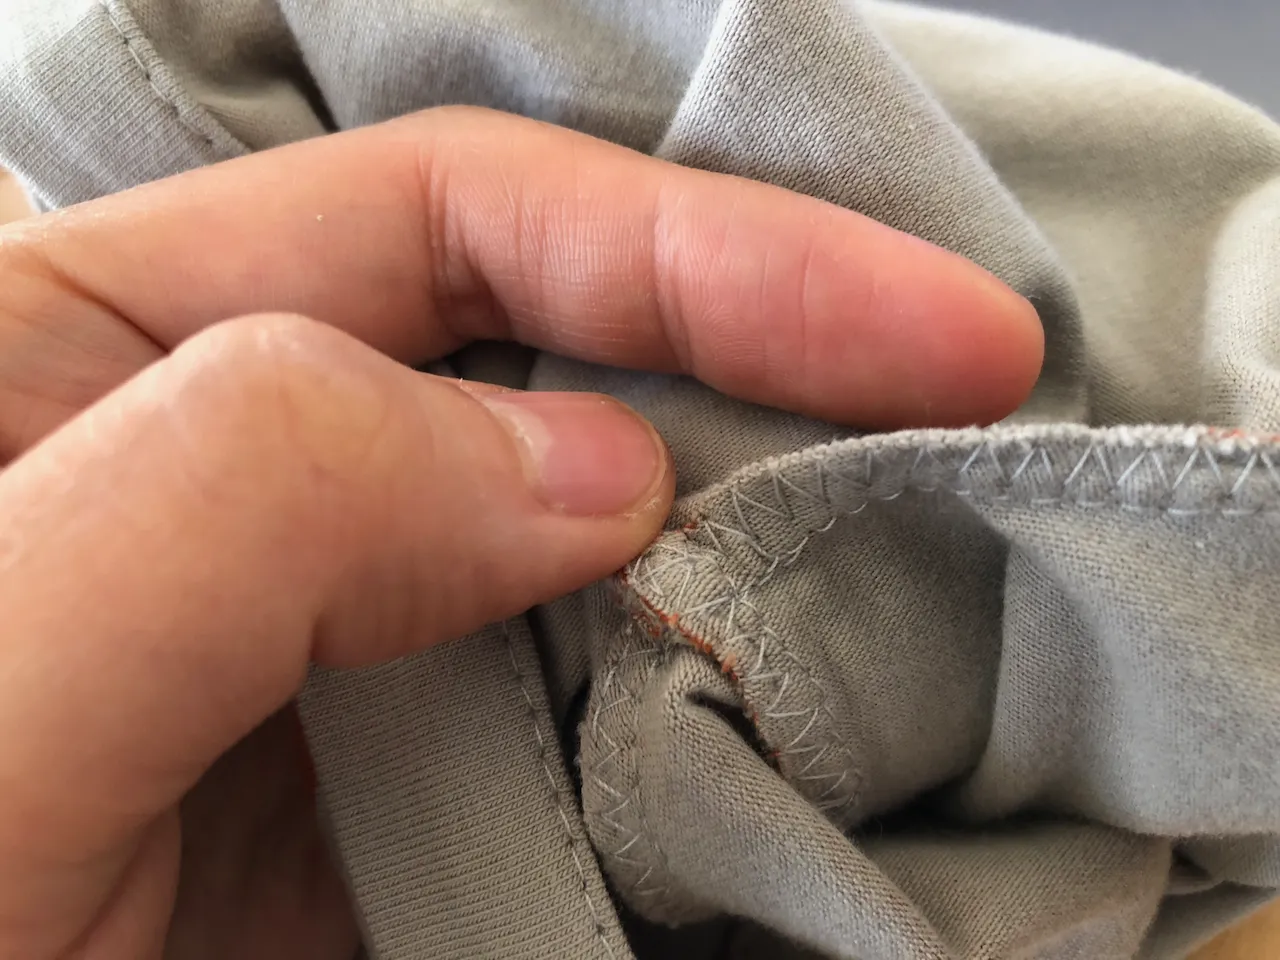
It is difficult to make good looking zigzag stitches on jersey especially thin one even there is enough stitch allowance. For this case making zigzag stitches on two or more layers works. I did this for shoulders and sides of my daughter's shirt above.
3. Think about sewing with zigzag stitches instead of straight stitches
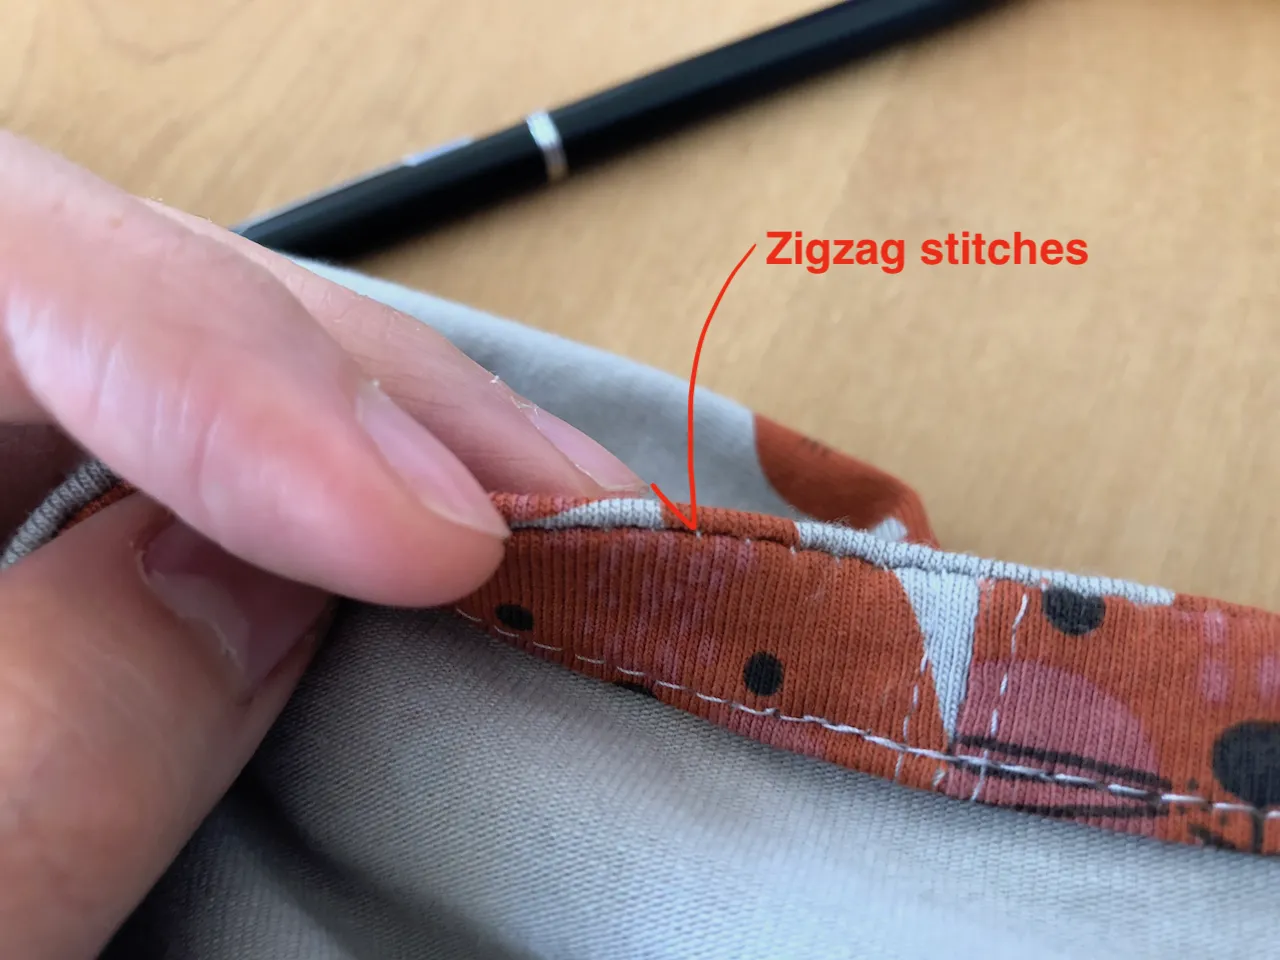
It can be an option for parts where might be stretched a lot or often. Zigzag stitches are more tolerant for stretching than straight stitches. It doesn't look good especially on printed fabric with multiple colors ... but for single color fabric with matching thread or hidden part it's fine. Inner part of the neck of my daughter's shirt above zigzag stitches are hidden.
That's it! I wish this post encourages you to sew jersey with a basic sewing machine :)
Happy Needlework Monday!
子どものシャツを縫いました。私が使っているのは1万円ほどの家庭用ミシンですが、使い慣れてくるといろいろなものが縫えます。冒頭の子どものシャツもこのミシンで縫いました。
ジャージのような伸びる素材はロックミシンがないと縫えないと思いがちですが(私がそうでした)シャツくらいでしたら縫えます。ネットで調べてみると紙やすりや特別な押さえ金具、伸縮性のある糸を使うといった方法がみつかります。生地屋さんに伸びる糸を買いに行くと「普通ので縫えるよ」とのことで子どもの成長とともに私の試行錯誤の日々が始まりました。
そんな中で身につけたきれいにかつ実用的に仕上げるテクニックをNeedlework Mondayでシェアしたいなと長いこと考えていました。詳しくは英文の方に書いたので概略を。
- 縫い代を少し多め1cmくらい取っておいて、ジグザグミシンをかけた後に落とす(ロックミシンのように)。これでロックミシンみたいに仕上がります。手間はかかりますが、ロックミシンも糸をかけるのとかメンテナンスとか結構面倒なので。。
- 特に薄い布は一枚だときれいにジグザグミシンをかけにくいので2枚まとめてかけるように工夫する。脇、袖付け、肩などで使えます。本によっては一枚ずつジグザグミシンをかけて縫い代を割る方法が紹介されていて、縫い代を割ると確かに厚みが出ずによいものの、二枚重ねても不自然ではなく、何よりジグザグがきれいにかかるのが気持ちいいです。
- 首回りなど伸びる部分は、見た目が気にならなければ直線縫いではなく伸びに強いジグザグを使うのもひとつの手。子どもが無理に伸ばしがちな首回りなど。糸と布がぴったり、布が単色の場合などは袖口や裾に使うのもありです。
そんなこんなの久しぶりのNeedlework Mondayでした。やっぱり洋裁たのしいな :)
Needlework Monday is initiated by @crosheille and @crystalize. Now it has its own account @needleworkmonday. Thank you to the team for hosting this wonderful & fun weekly tag!
針仕事の月曜日は@crosheilleさんと@crystalizeさんが始めた月曜日の針仕事コミュニティーです。和気藹々針仕事の話題で盛り上がります。英語の投稿にヘルプが必要でしたら discord などでお気軽に声をかけてください :)