
Not sure if you agree, but I think apart from creating new things, one of the other best things about sewing, crocheting and even knitting is that you can do all sorts of alterations to your wardrobe or anything for that matter, upcycling and redesigning clothes you no longer wear, either because it is too big, too small, too long, too short, too old or anything. And just by adding a few touches here and there (e.g. lengthening a skirt by adding a lace, adding a patchwork to a torn jeans, adding some embroidery, cutting some sleeves away, cut an old pair of jeans, you will end up with a brand new wardrobe or a brand new something!
This week, I shortened my jeans because it was getting torn and folding it up was getting annoying. I wanted to keep the original hem, and I did a bit of Googling and found some helpful videos and decided to try it myself. Over here, to shorten a pair of jeans can cost up to USD6-USD10, which is not cheap due to the currency difference. So, being able to do this myself is really cost saving.
I used the sewing needle for jeans because you will need a strong needle to go through the thick material, especially where the inner and outer seams meet.
Here is how I did the alteration (please refer to the pics below):
First cut the jeans to the length you want (sorry, I forgot to take a photo of the jeans before it was cut.. my excitement to work on this got ahead of me).
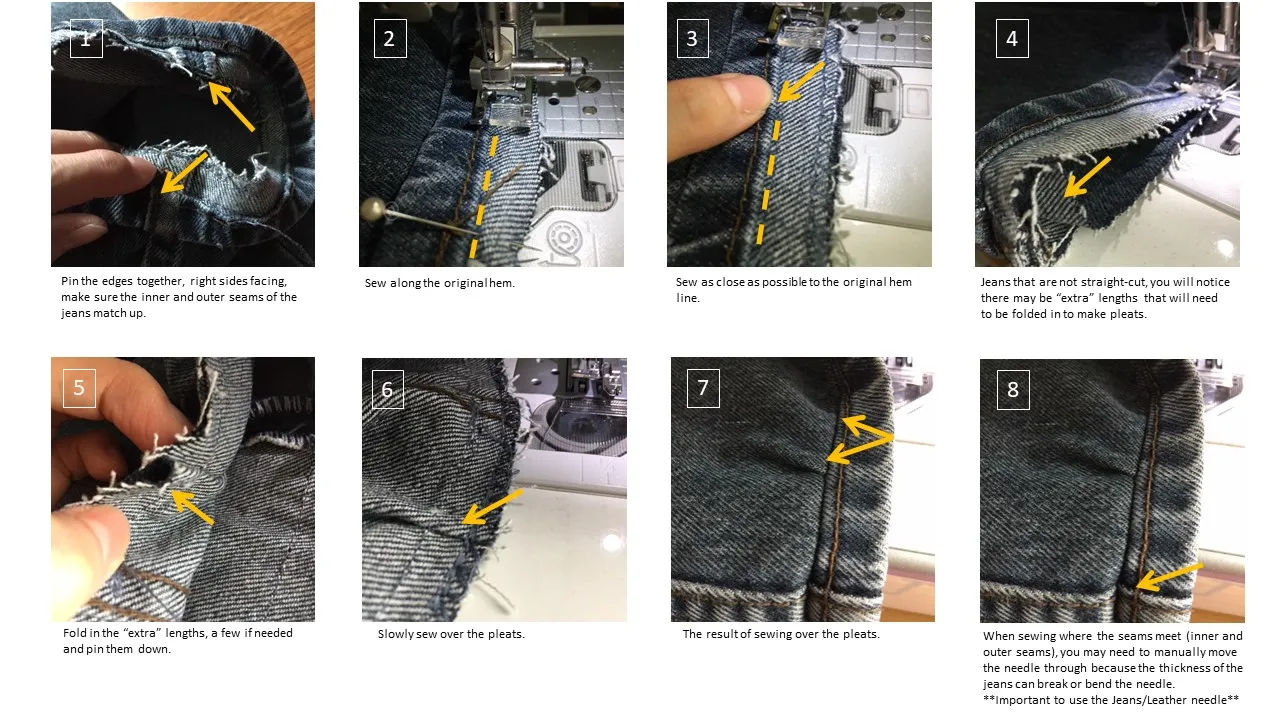
Place the edges together, right sides facing, and pin to make sure the inner and outer seams match (Pic 1).
Sew as closely to the original hem as possible (Pics 2 & 3).
Jeans that are not straight-cut, you will notice there may be “extra” lengths that will need to be folded-in to make pleats. Then, slowly sew over the pleats (Pics 4, 5, 6, 7).
Be careful when you sew over the inner and outer seams of the jeans because they can be really thick, too thick for the sewing machine to handle. Before you reach the seams, stop using the foot pedal and use the manual dial of your sewing machine to poke the needle through the material and keep turning the dial to slowly sew over the seams (Pic 8).
Once you are done, you can hem along the edges to minimize fraying (Pic 9) and top-stitch for a neater finish (Pic 10 & 11).
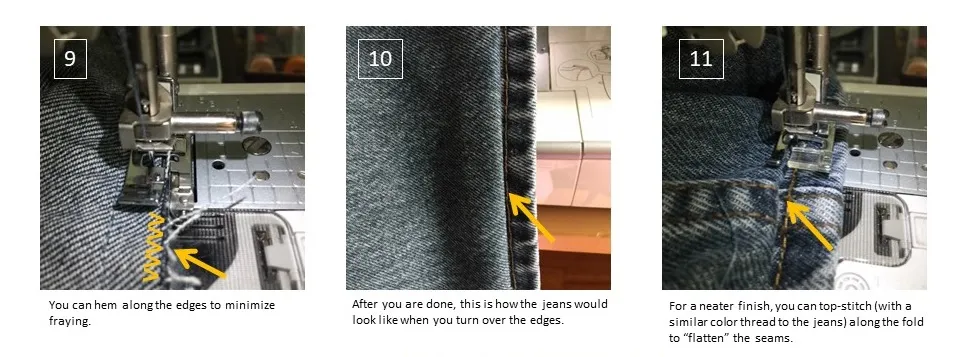
And then, this is how the end result looks like (with the cut pieces) - interesting how the color of the jeans look different in sewing machine light and sunlight.
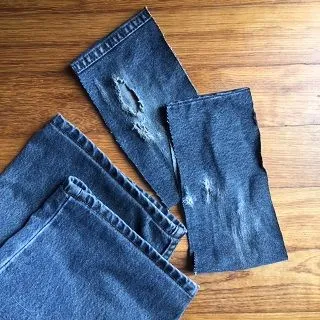
Now, what can I do with the cut pieces of the jeans... 🤔
That is it for this week and thank you for reading! Have a good week everyone!