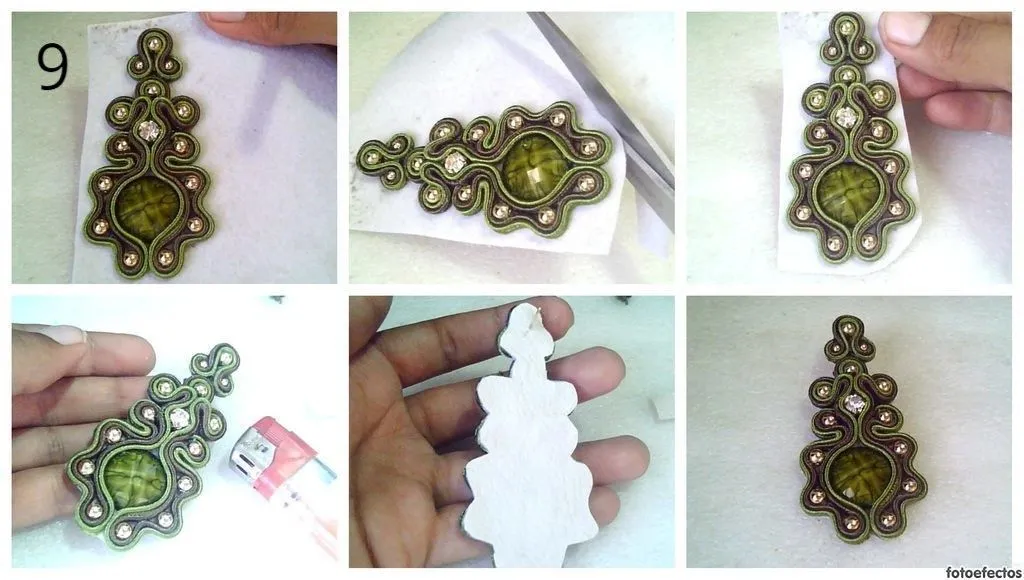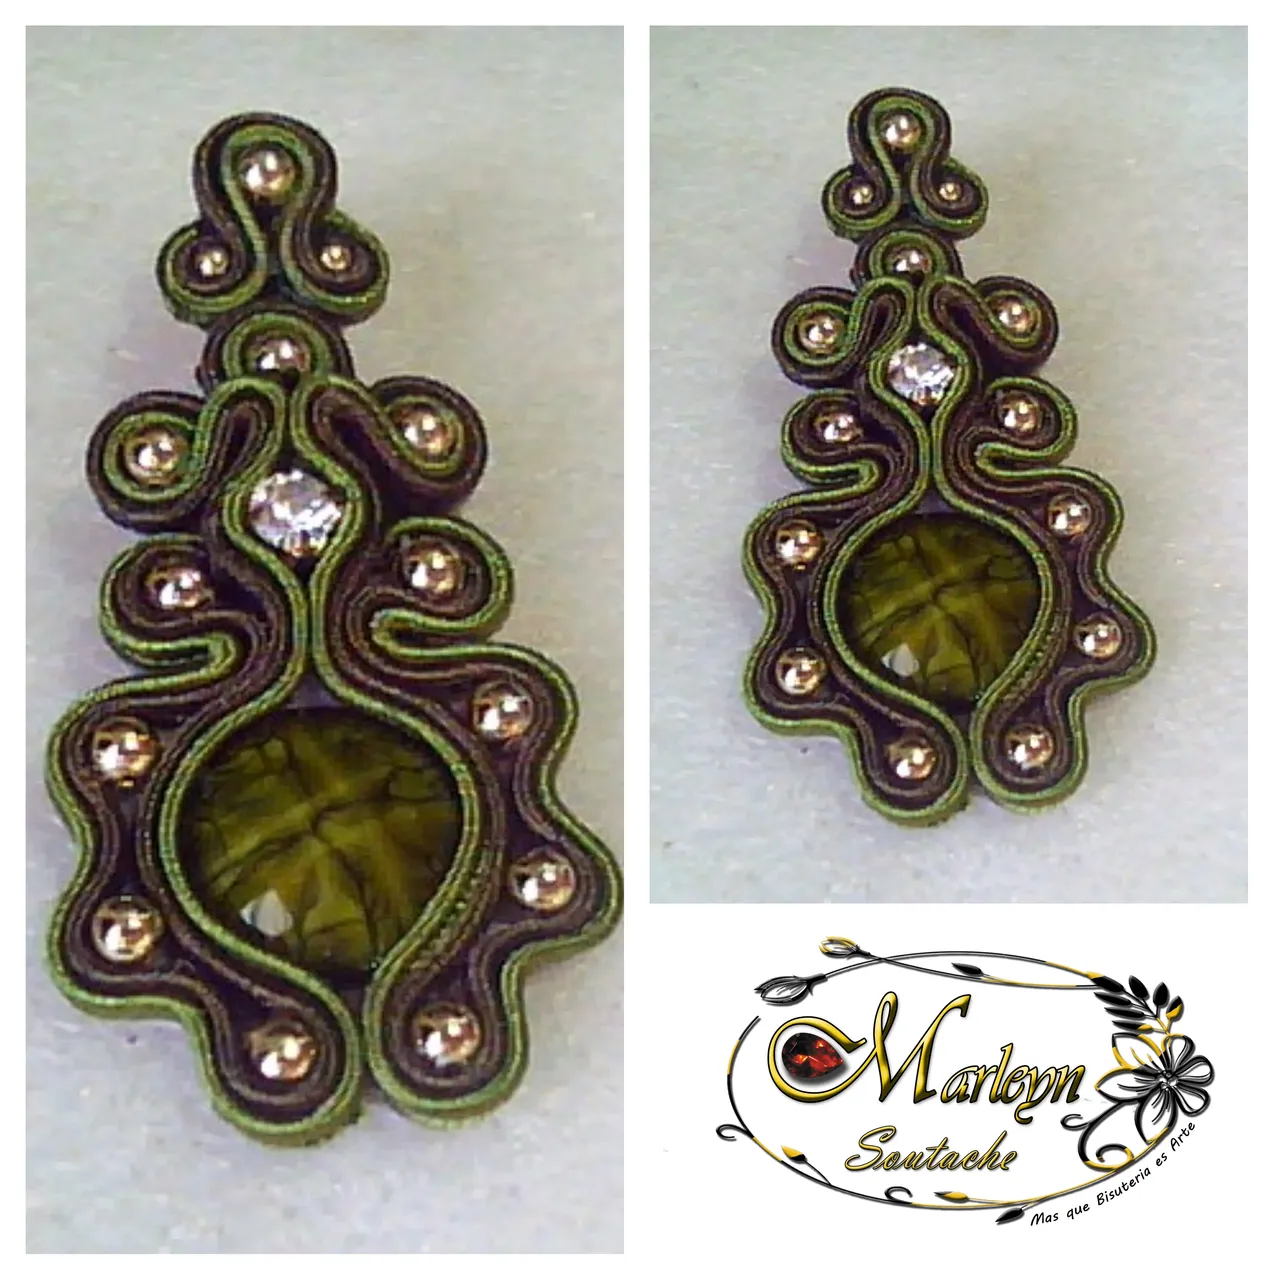
Hello my beautiful friends readers; New day new model !!! This model is simple, easy to manufacture and can be used with a casual oufit for work, done with earth colors. The process explained in detail, I will explain it little by little according to the sequence of images, all the photos were taken by me as I made this delicate piece.
If you have a question write me a comment, I will be happy to help you with any detail, I hope that my designs like them as much as I like, learn with pleasure ... Thank you for your support and your incentives and donations with that I can buy more material and follow every day with the tutorials!

Never forget that Power is Wanting and if you want You can ...
You are Light you are Energy, YOU CAN ... That the infinite universe Conspire so that everything always is better ... They are wanted ...
The collage is done with an excellent page called Befunky I recommend it is easy and practical to use, the Watermark and the number are placed with fotoefectos. I wish you like it, this more than my work is my passion, I love what I do, I share it with you with a lot of love ...

If you have any concerns do not hesitate to write me, I will be happy to help you.

Materials:
Soutache yarn or rayon braid
Lighter
24 Balines 2 mm
4 Balines 1 mm
Fabric or Coarse Leather
Flat tendril base
Strass 5 mm, 2 stones
Apply round 2 cm in diameter
Scissors
Liquid silicone
Encourage base use when working.
Eyebrow tweezers
Love, encouragement and patience ... Step by step we will learn !!!
Let's work: 🤗

STEP 1: Cut a piece of leather or thick fabric 10 cm high, 7 cm wide, cut 2 threads of the color of your choice, fold them to form a drop, make a Test that between the peel or balin of 2 mm, cut burn and paste them in the center of the leather about 2.5 cm away from the top as I show you in the sequence of images.

STEP 2: Place a little liquid silicon on the side of the piece we made in the previous step, cut 2 threads of approximately 15 cm long, burn the tips and proceed to paste them just in the tip of the piece that we already made upwards, fold and form a semi - circle, place a little liquid silicon on top of the piece already made and mount the thread on it as you will see in the sequence of the images, you can help with a clamp, when it is already glued we will place more liquid silicon in the bottom part and proceed to stick a 5 mm strass stone, place a little liquid silicon around it and stick the thread as shown in the last image.
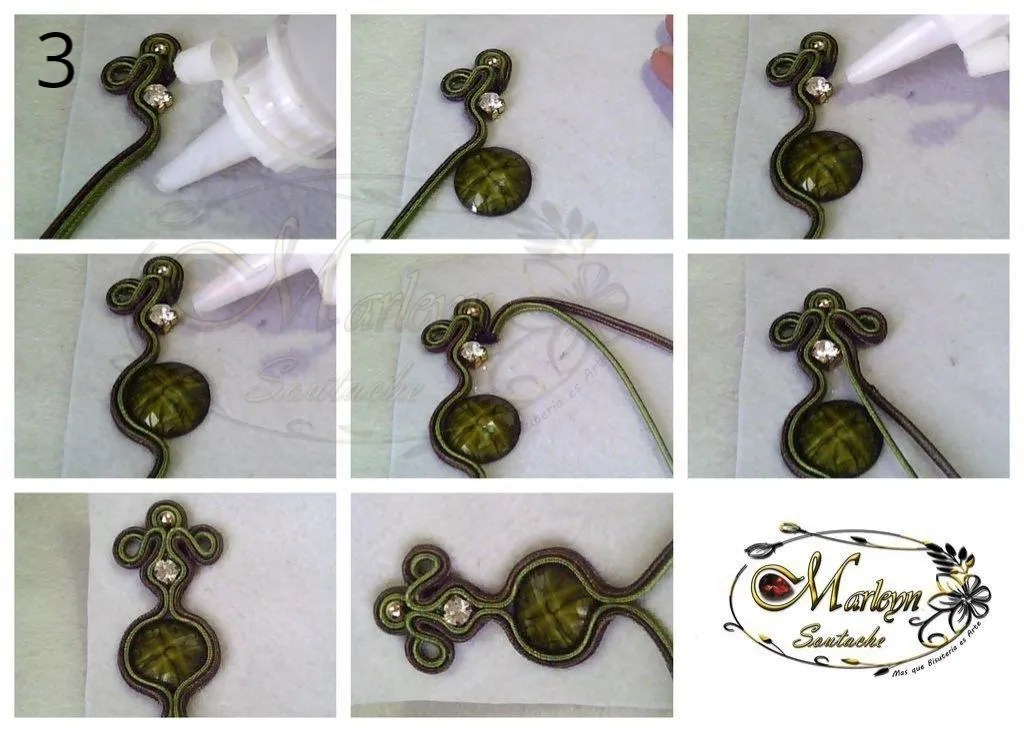
STEP 3: In this step we must leave 1 cm of distance between the strass stone and the round sconce, place a little liquid silicon to fix the sconce, after sticking the apply we must distribute liquid silicon around it and stick the remaining threads to the middle of the stone.
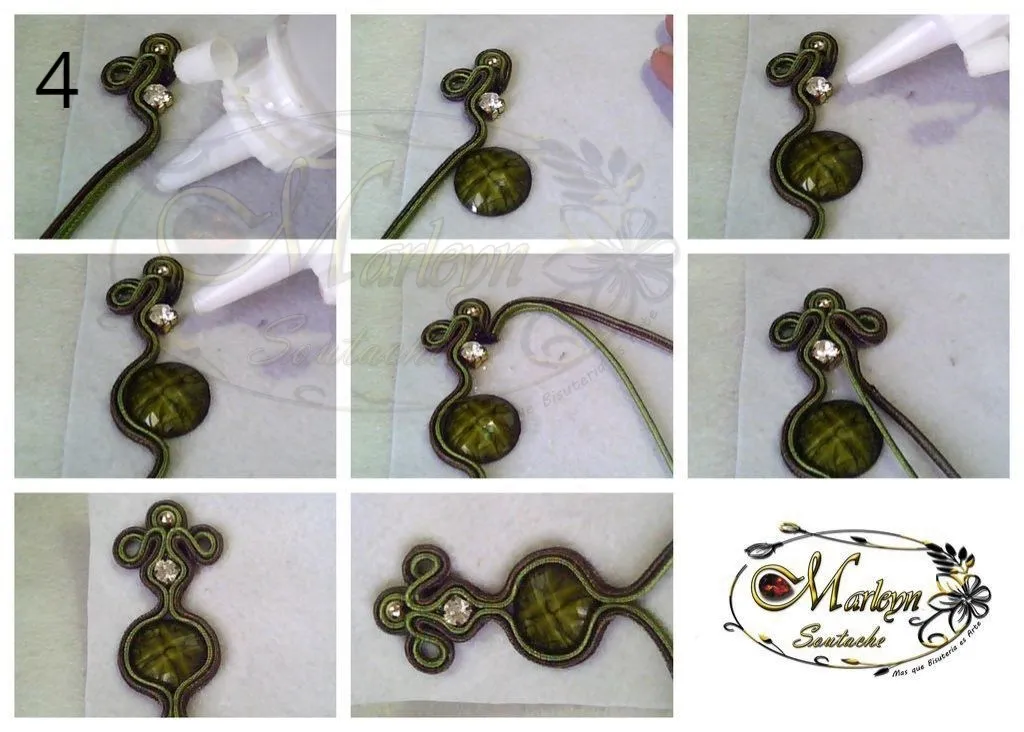
STEP 4: At this stage we must repeat step 3 on the other side of tendril, carefully we can help the clamp to not fill our piece of liquid silicone on the top for better presentation.
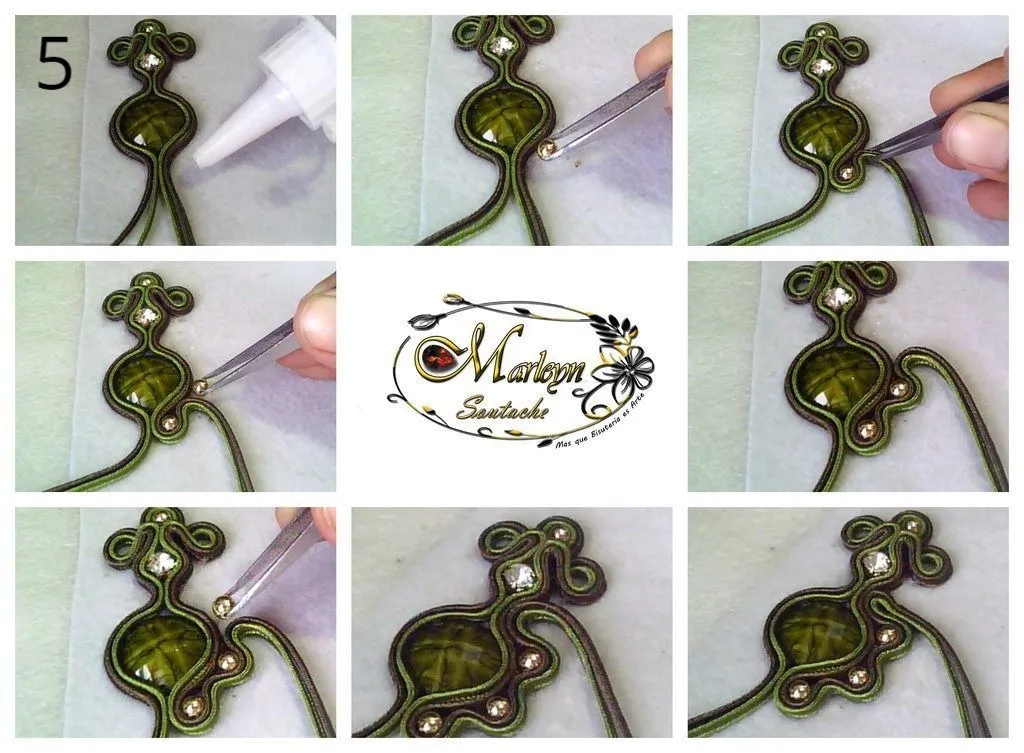
STEP 5: In the lower part of the tendril, place liquid silicone and with the help of the clamp we will place the pellets or stones one by one, the process is very easy to place a glue stone the thread, return to place a stone, again to stick the thread, so we will place 3 stones to reach the top we return to place silicon liquid and stick again the thread will be as I show you in the sequence of images.
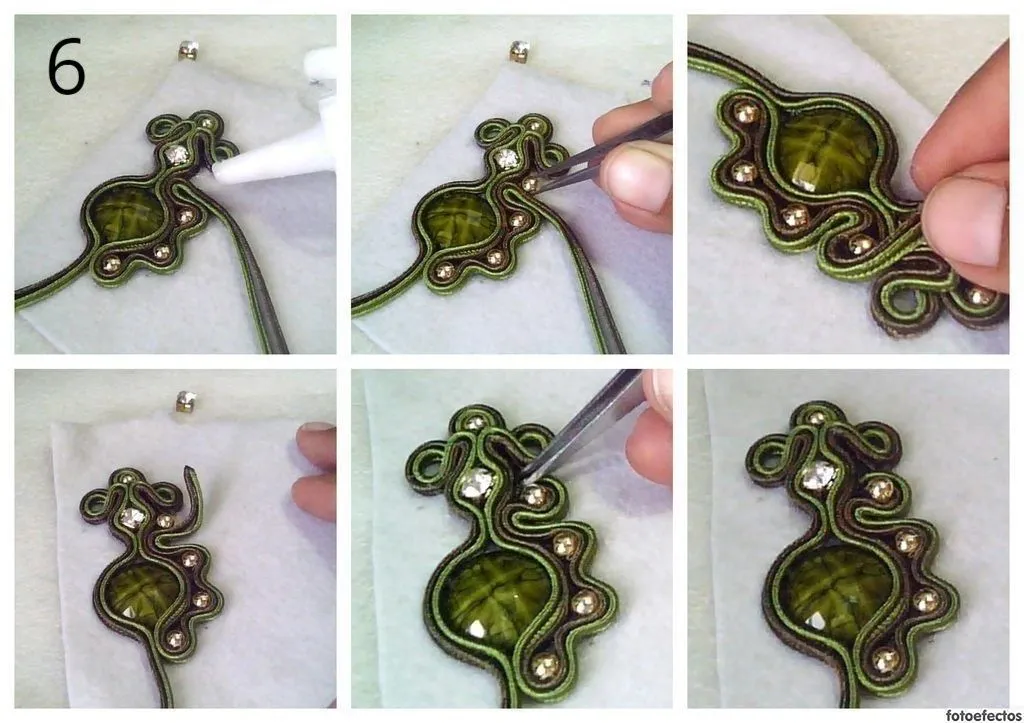
STEP 6: When we reach this stage we have almost ready the first part of our beautiful tendril, now we must put a little liquid silicon and with the help of the eyebrow tweezers we will place a balin or stone we bend the thread inwards, mark, cut the rest and with the help of the clip we introduce the remaining thread below the previously stuck so that the tips are not visible and you have a better finish.
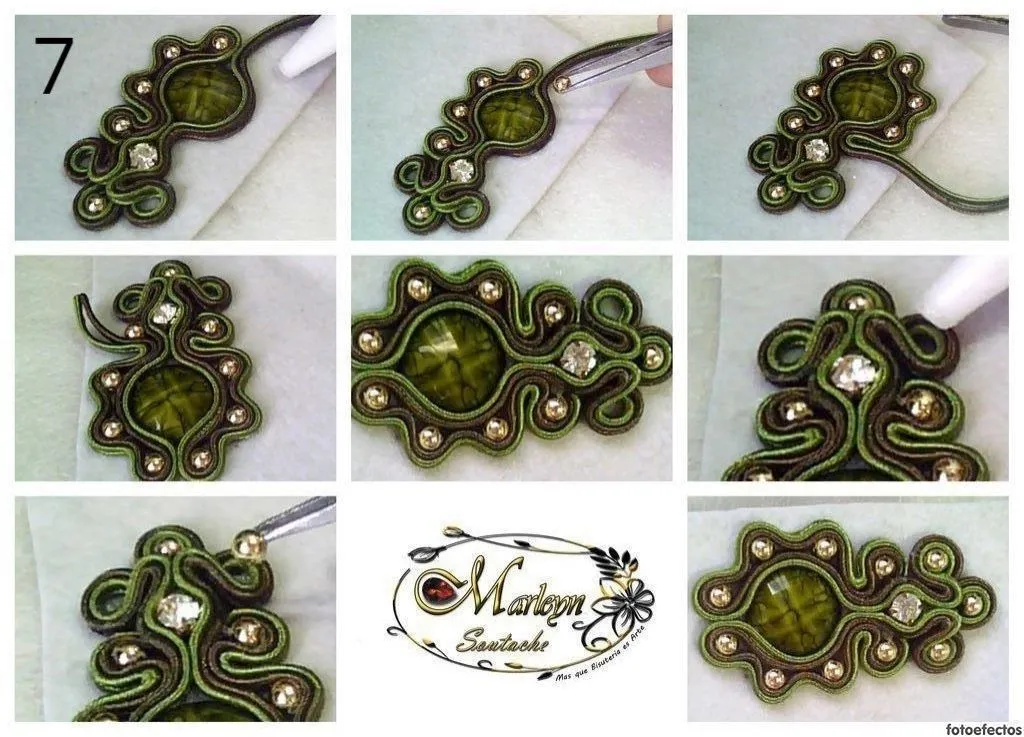
STEP 7: Repeat step 5 and step 6 little by little so that everything is the same size and distance from the other side.
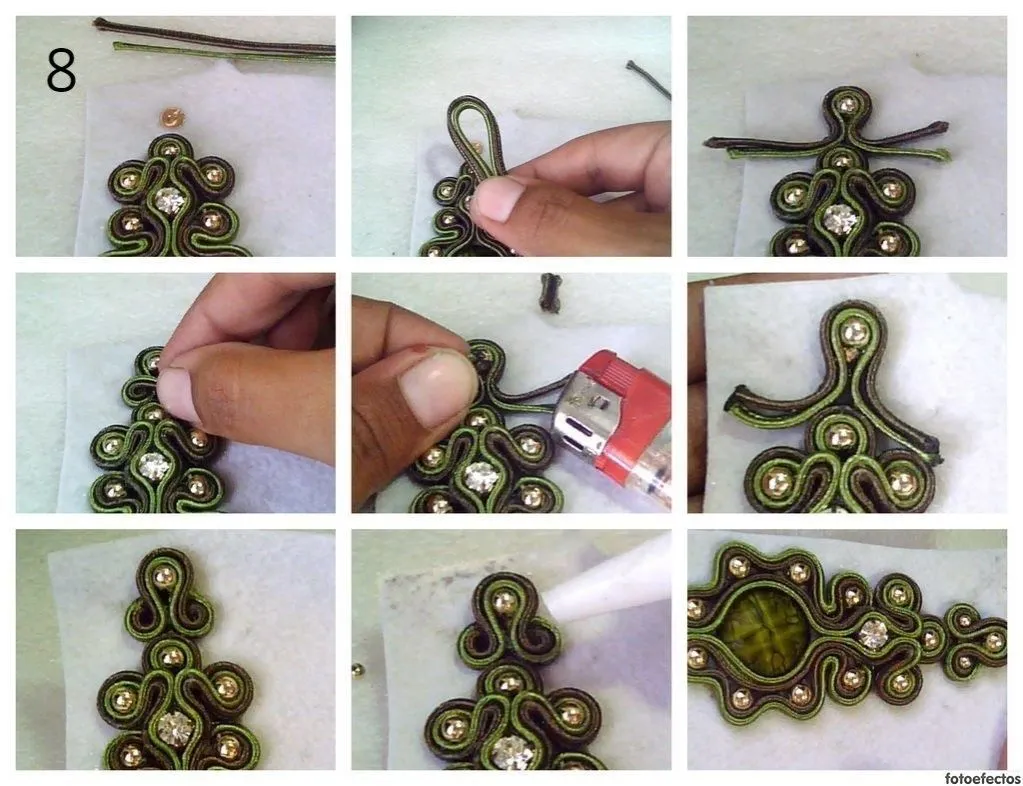
STEP 8: At this stage of our tendril we already have the lower part of it finished, now at the top right in the middle we will introduce a base of flat tendril, we will cut 2 threads of approximately 6 cm each, we will place liquid silicon on the base and proceed to stick the threads in half giving a drop shape so that in the middle between a balin or stone of 2 mm in diameter should be like the third image, we put liquid silicone on the sides, bend the thread mark, cut the remaining, burn the tips and with the help of the pliers insert the tips below the threads already stuck little by little and should be like this the last image.