
I've been making swatches and planning my next two top-down cardigans. Swatching was always one of those aspects of knitting that was shrouded in mystery (how did you make it work and come up with the right number of rows and stitches, as prescribed by the pattern) and a right boring pain to do.
I have always painstakingly made a swatch because, you know, you should but it hasn't really made any difference. I spent hours swatching for a lace cardigan last summer and then many more hours making the cardigan and it was still far too big: big enough for a giant woman!
I've had a little more success more recently, by making much larger swatches - knitting perhaps as much as a ball before checking the gauge - and then knitting another swatch with the revised needles and so on, until I had a close approximation of the desired tension. It did work and my last cardigan was a perfect fit :)
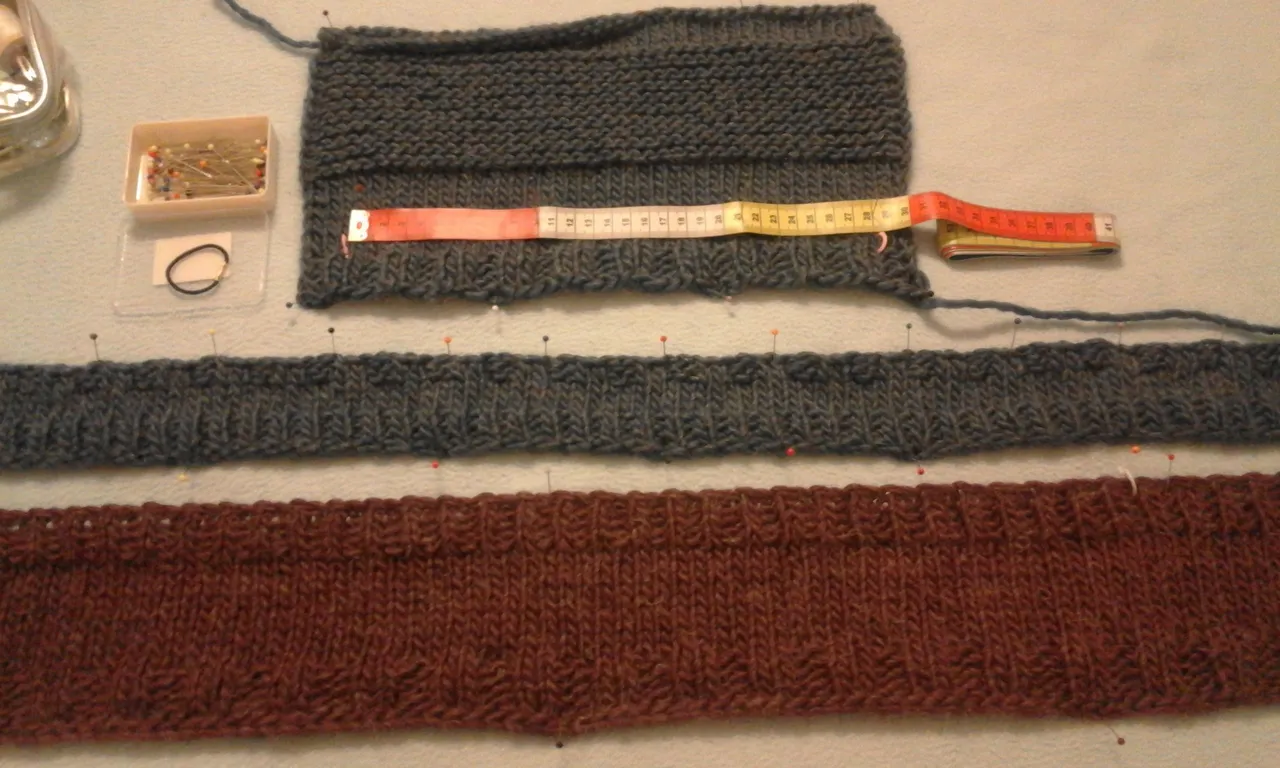
I've started taking a different approach to swatching, making a long "swatch-tape" based on my bust measurement. The swatch is long and thin, has single ribbing (k1, p1) at one edge and double ribbing (k2, p2) at the other edge and about 10cms of stocking stitch in between, using the size and type of needles (eg circulars) and yarn that will be used in the final garment.
In the top swatch, I have checked the number of stitches in one quarter of my bust measurement and then used that to calculate how many stitches I need for the swatch tape. I've also tried garter stitch (nice as a border, but not for the whole garment) and tried out a different neck finish (a rolled stocking stitch) in the sample.
The idea for swatchtaping came from J's Knit and Pearl Jam, which she explains in this video:
J explains her ideas about swatch-tapes - actually using your swatch like a tape measure to check the fit and find out how many stitches you will need. She also talks about how to calculate how many stitches to cast on.
The single and double ribbing at the edges is inspired: it makes it so easy to distinguish your starting and ending stitches and to count the number in between. I can't remember if she says it in this video, but two other things that J stresses are: to stretch your knitting out before you start counting stitches and to round the number of stitches to a number divisible by four.
I've started to really enjoy swatching as an activity in itself, rather than as a necessary evil that didn't seem to serve any purpose. Instead of trying to adapt my natural knitting tension and rhythm to an arbitrary designer's gauge, it's more about finding out what the gauge is if I use the recommended yarn and needles, and then using that to design a garment that fits me. Yay!
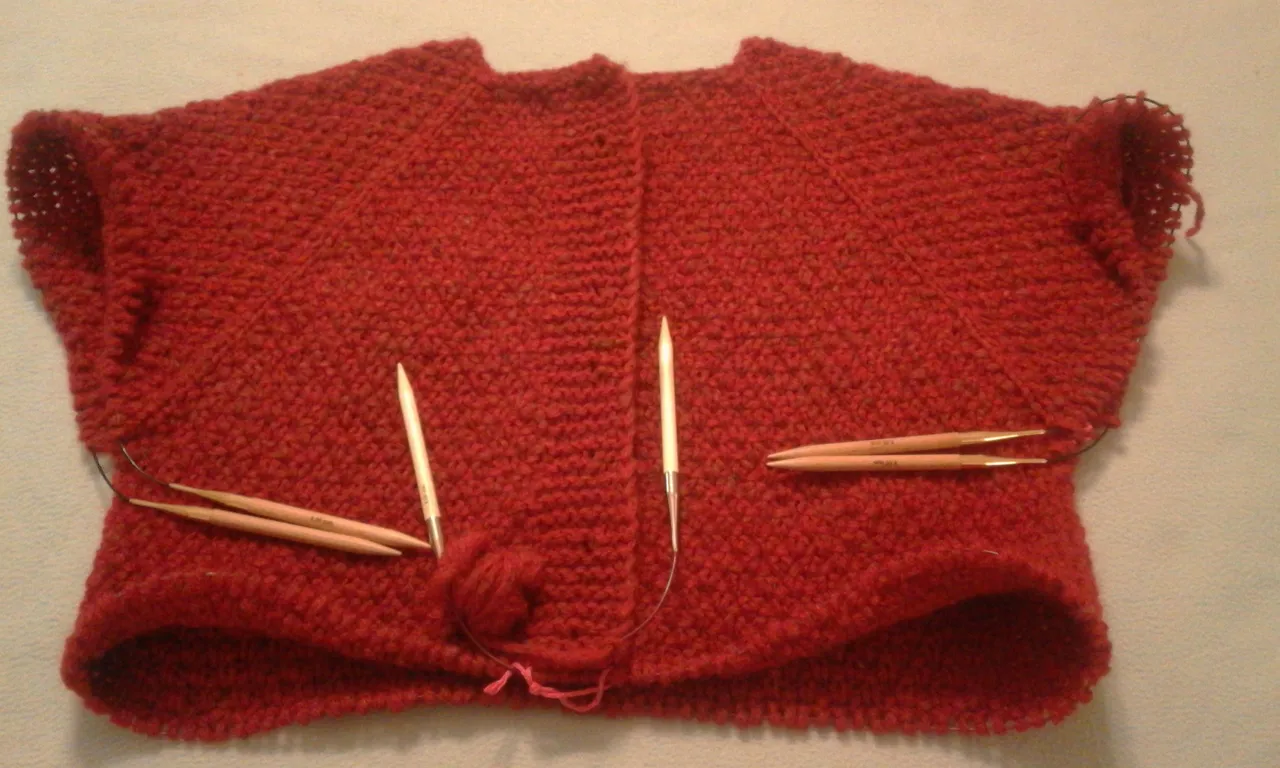
Here's the progress with my first top down cardigan. It fits perfectly and feels really comfortable. The neckline looks a little odd here, but sits very nicely when the garment is being worn.
Another tip from J is having multiple sets of circular needles in the same size with different cable lengths. I went out and bought a set with a 150cm cable for the main body - so much easier than keep putting the stitches on to waste yarn to check the fit (which you might want to do every few rows at some stages). You can also work on both sleeves at the same time, avoiding the "I've finished the first sleeve and now I can't bear to do it all again" syndrome.
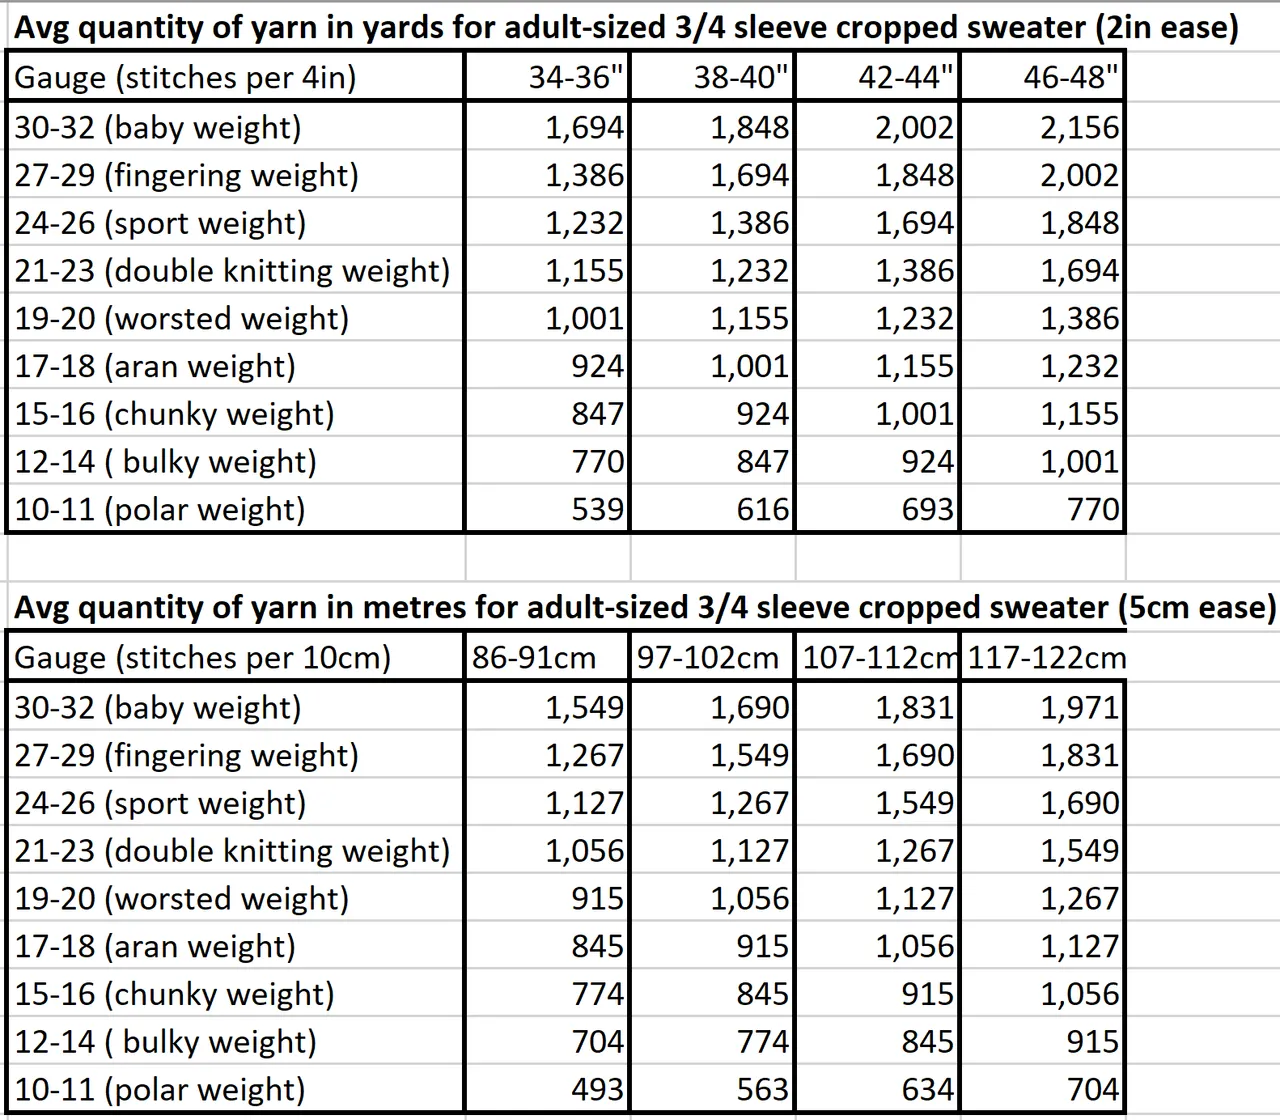
The other tool I've learned about is the yarn calculator:
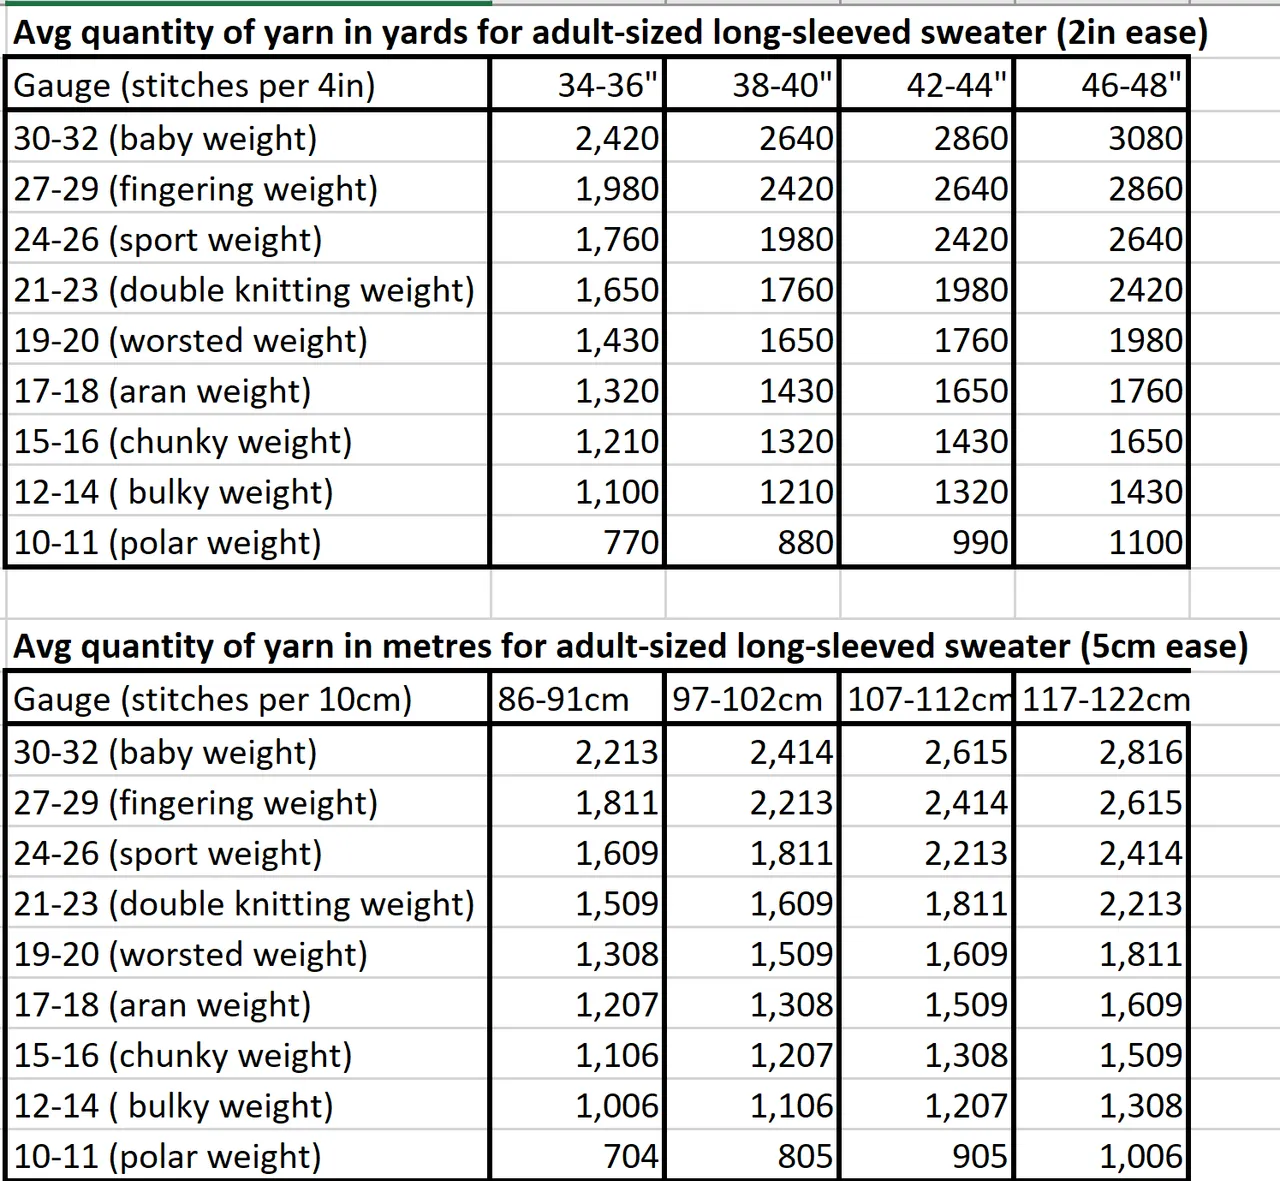
Working with stitches to 10cms/4 inches makes it so much easier to calculate average quantities for a sweater or cardigan. For short sleeves: calculate 20% less, for sleeveless: 30% less; for multi-colour garments: 20% more.
I've adapted this for the three-quarter sleeve cropped style that I prefer:
I'm really enjoying "finding my numbers" as J. would say - the basic construction for my size and style of garment. Once I have the numbers, I can start to design patterns.