It's Been Almost 30 Days ..
Since I found a bit of inspiration from a Steemit friend, @daveks and embarked on the start of another sunset painting. Today, I AM OFFICIALLY FINISHED!!!!! YayYayYay...!
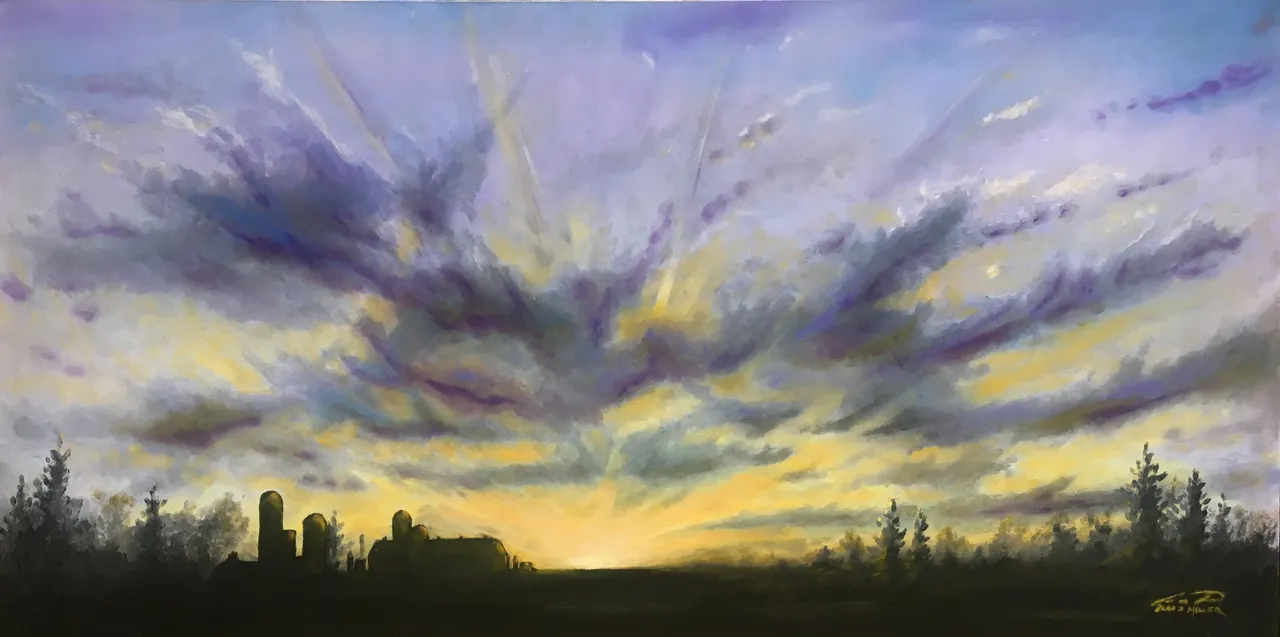
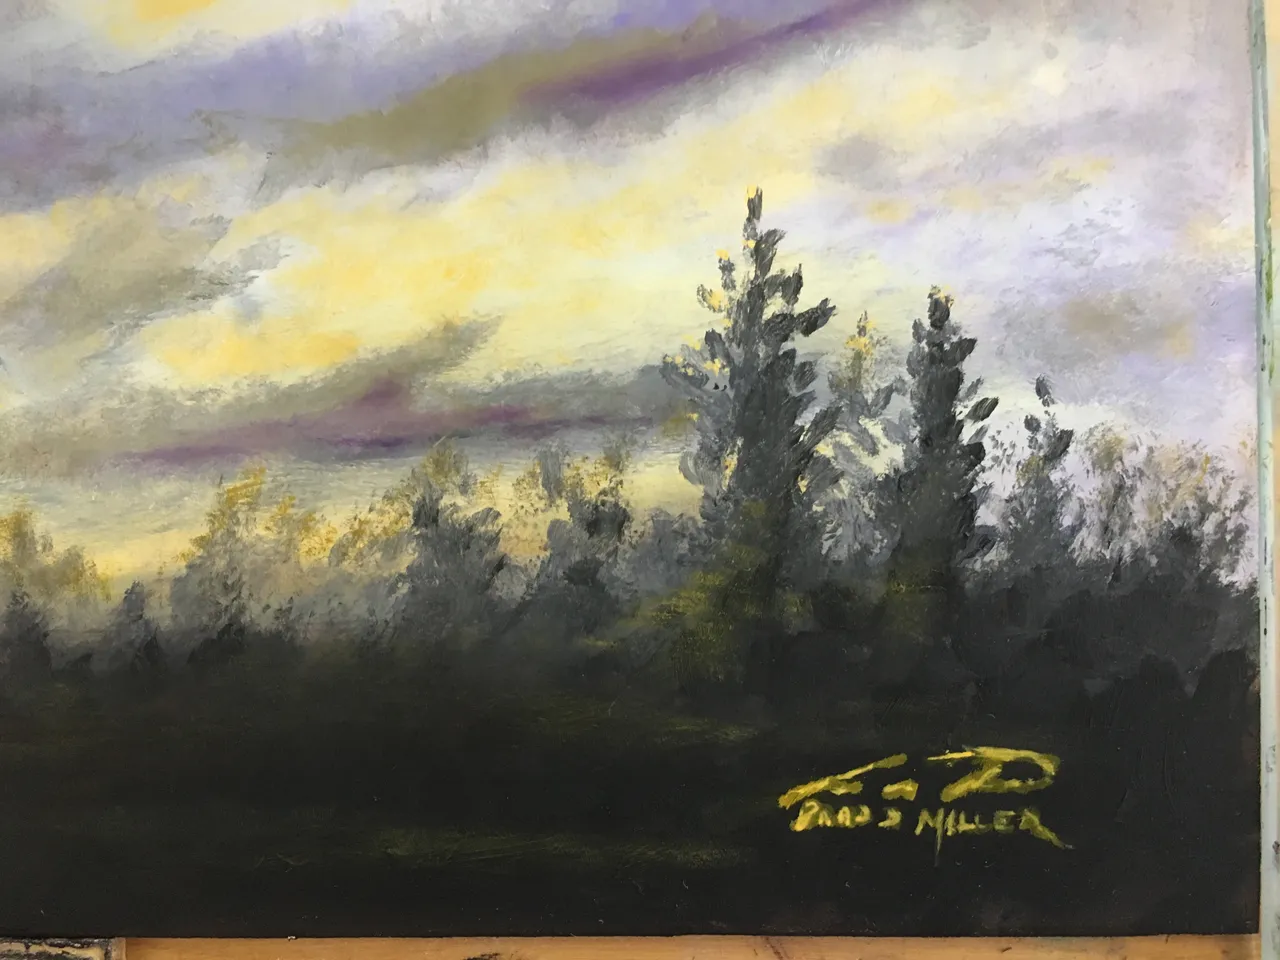
I Introduce To You ..
'Sunset Over The Farm'
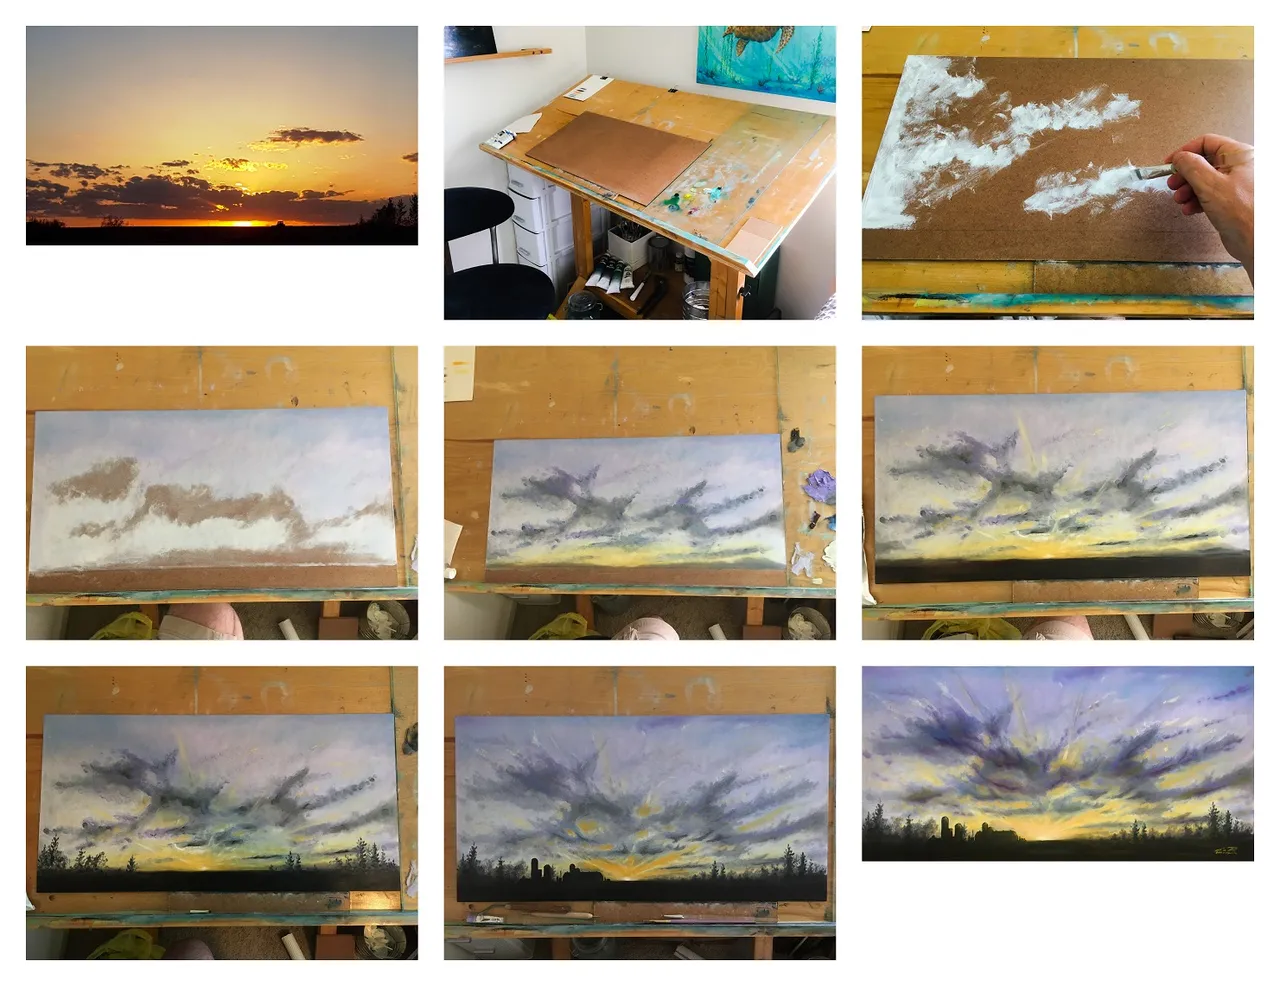
Original Photo Of Inspiration ..
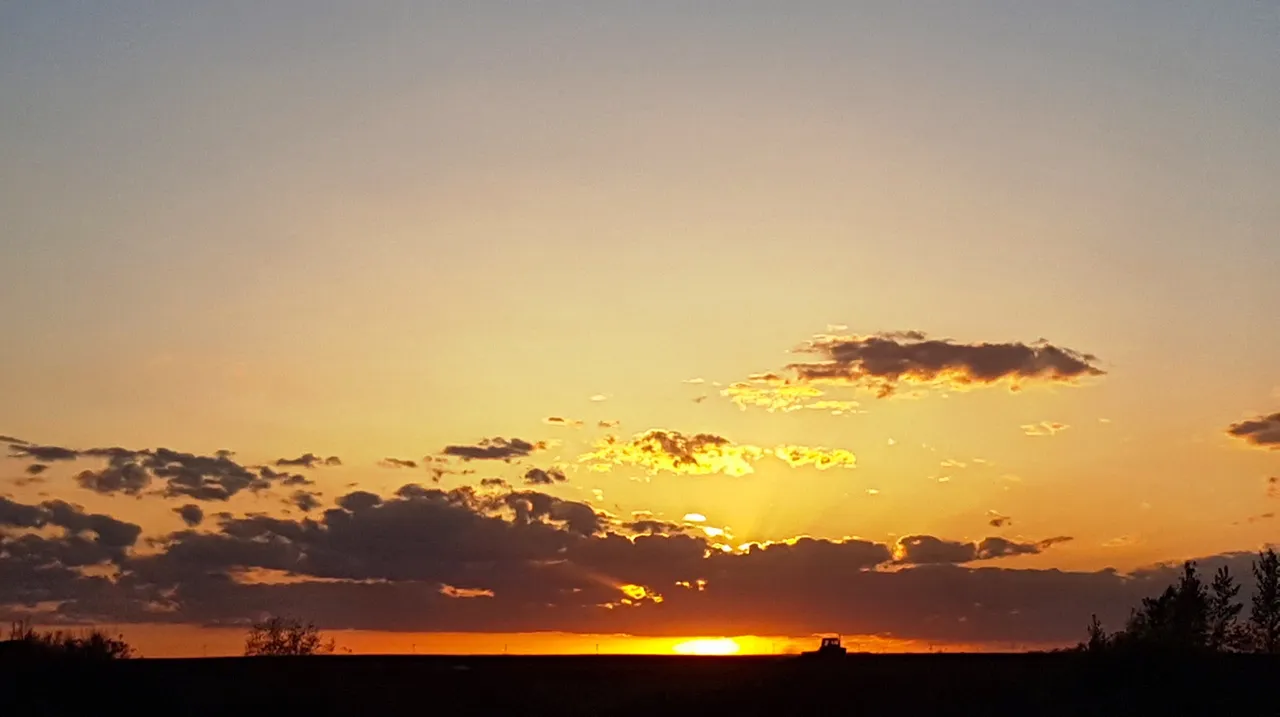
Photo by @daveks - Sunset
I received permission ..
From @daveks to use his photo for inspiration and he agreed! Although looking at the end result here, you may not see a ton of similarities. To me inspiration comes from almost everything I interact with in my daily routine. I gather that inspiration and let it guide my artisitic visions. I'd rather my work NOT be a duplicate version of what inspired me, but rather an interpretation of how it made me feel. This is exactly how this photo by @daveks influenced this piece.
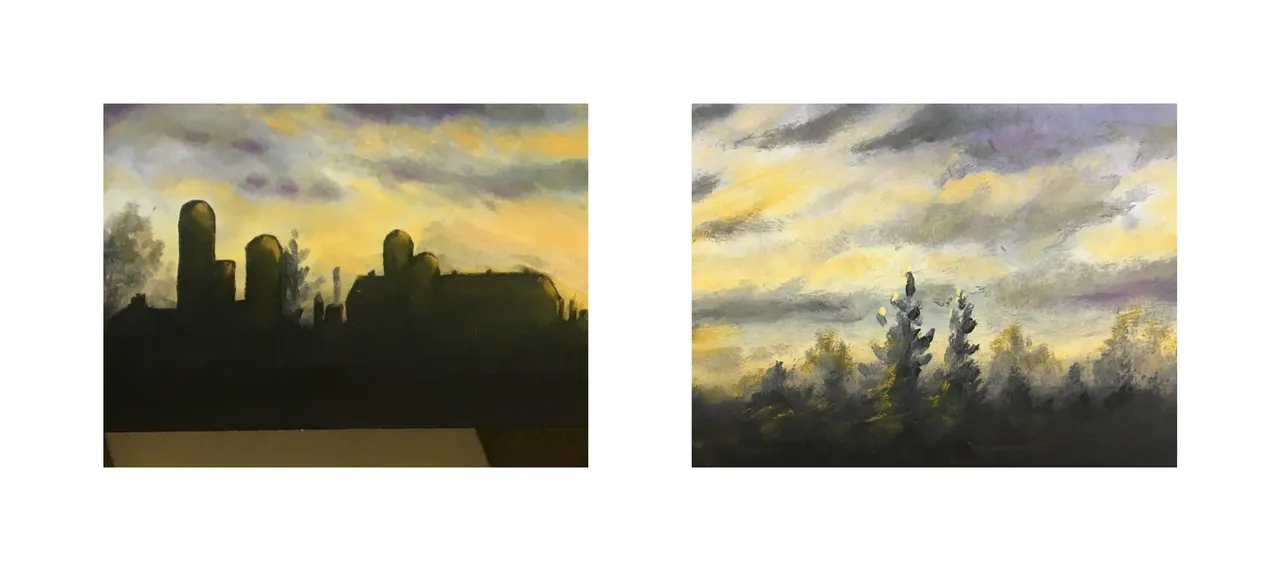
If you study the two pieces side by side, what I took away from his photo slowly reveal themselves..
- The colors .. although possibly not as bold, they are there
- The purples, yellows, blues, and dark gray tones
- The tree line
- The siloettes
- The low horizon line
- The Farm Inspiration
I got carried away with the clouds. I have a problem with this. I always go for a more dramatic sky even though I truly believe that less is more. I just have a hard time sticking to that small piece of advice (at least when painting). I decided to go with farm buildings instead of the tractor. That would have been a nice touch, but not sure my version of a tractor would of looked right or believable.
From Start To Finish ..
I'll somewhat summarize my Part 1 post first, then blend in the new stuff since then (27 days ago). I will call them 'Steps', even though there are so many more in between these. If I documented every one of them, we would be here for a long time.
Step 1 ..
I choose the right size painting surface. I went with Masonite for this one primarily because it is my favorite choice of surface and secondly, I have a bunch of pieces cut to size and ready to go. This painting measures 24 inches wide by 12 inches high. I have it set up on my home made drafting/easel that I made many a year ago. I can lock the painting surface down, have it just resting on a ledge and adjust the angle however I see fit. It works perfectly for my needs (thus the reason I made one instead of buying one .. plus cheaper. hahaha).
Step 2 ..
I scrape the old paint away. Time For You To GO!! gone. I prefer to mix my paints on glass. Glass is easy to clean and paint seems to blend well on it. The piece of glass you see here is from an old entertainment center I threw out a while back. It is about 10"x18" and sits nicely on my table. Not so easy to hand hold so I have a smaller tiny piece I use for that. I grab a hold of my razor blade (I buy these in bulk) and start removing the half dry and half wet paint from the glass. Pretty easy with a nice sharp blade.
Step 3 ..
I clean up all the little bits of paint and scrapings left behind. I do this with a rag or paper towel and a tiny bit of paint thinner. I absolutely hate it when tiny pieces of dried old paint make there ways into my painting. Then I have to sit there and try to delicately pick them out. Who has time for that! ha! So I take my time cleaning the palette now. The blue paint you see is actually under the glass and dried onto the table. Most likely from one of my Caribbean paintings.
Step 4 ..
Now that I have managed to gather some inspiration, set up my painting surface, and have a nice clean palette in order to mix my paints, I am ready to start the painting. I pencil in where I want my horizon line to be and that's about it for sketching and guidance. The rest will just have to flow naturally. I use a base value of Titanium White. I have no clue why. I just know I like the way the paint flows after I use this as a base. I am self taught with no schooling, so be easy on me if your reading this and were educated in the field. (please give me advise if you are or are not, that I love) I often use Linseed Oil or paint thinner to help give my paint more flexibility and movement. I recently started using the linseed oil. So far I like it and it doesn't add that much more time to the drying process.
I'm now 'Off To The Races' on this one. There's no turning back now..
I dip my brush .. no clue what this brush is called but its a bit wide and gives me the strokes I am looking for .. into the Titanium White and start applying it. I always like to work from the background to the foreground. So I will start with the sky, which will also be the largest portion of this painting. Here we gooooooo.....
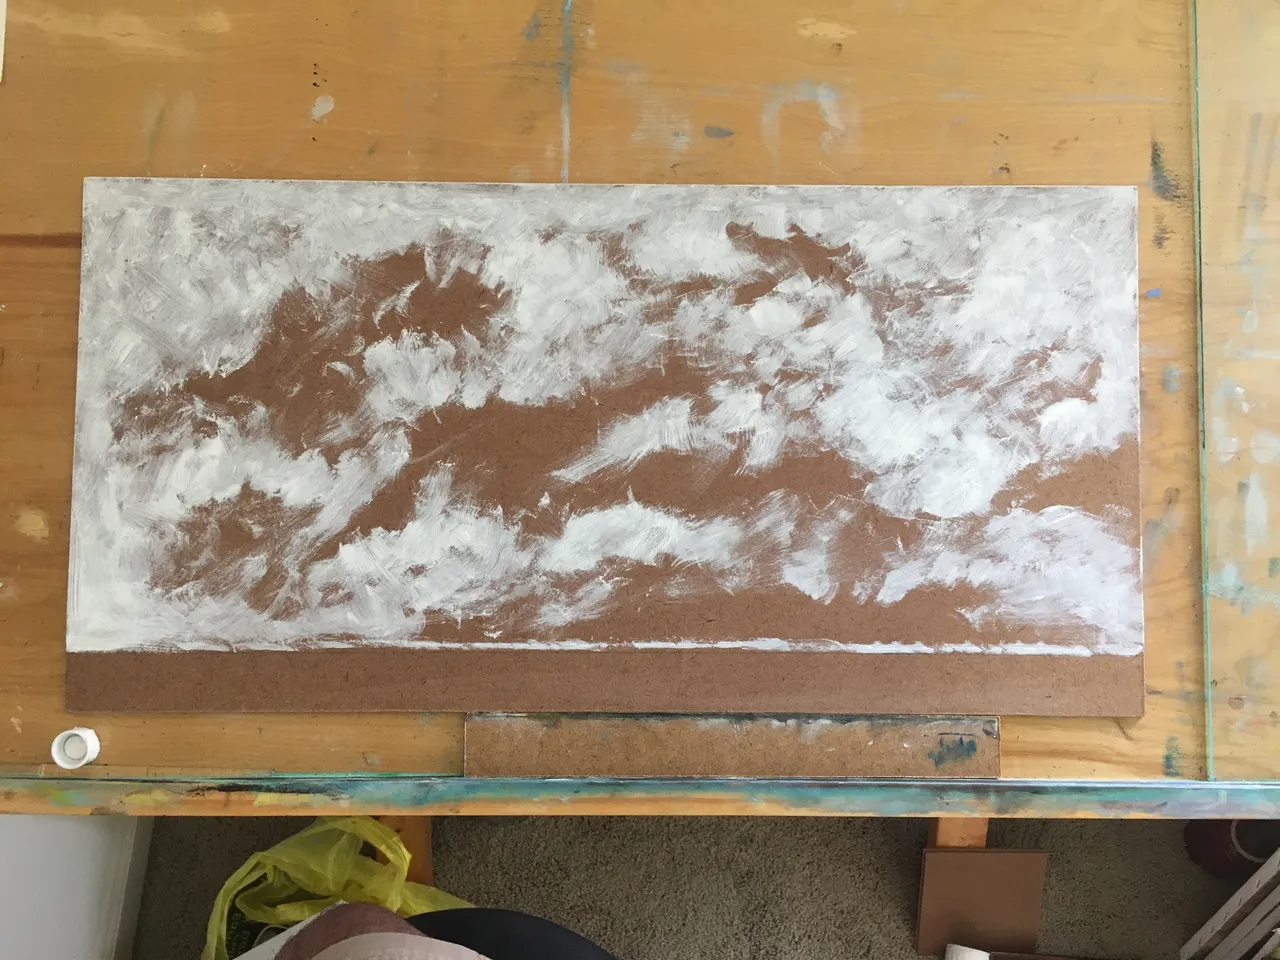
Steps 1, 2, 3 and 4

Step 5 ..
Now that I have the basic idea coming to life in my mind and have the first few brush strokes of Titanium white laid out, I feel confident and relaxed. I am moving onward to brushing in how I want the sky to fall in around the clouds, thus creating the areas for the clouds. This may be a strange way to go about it, but it works for me.
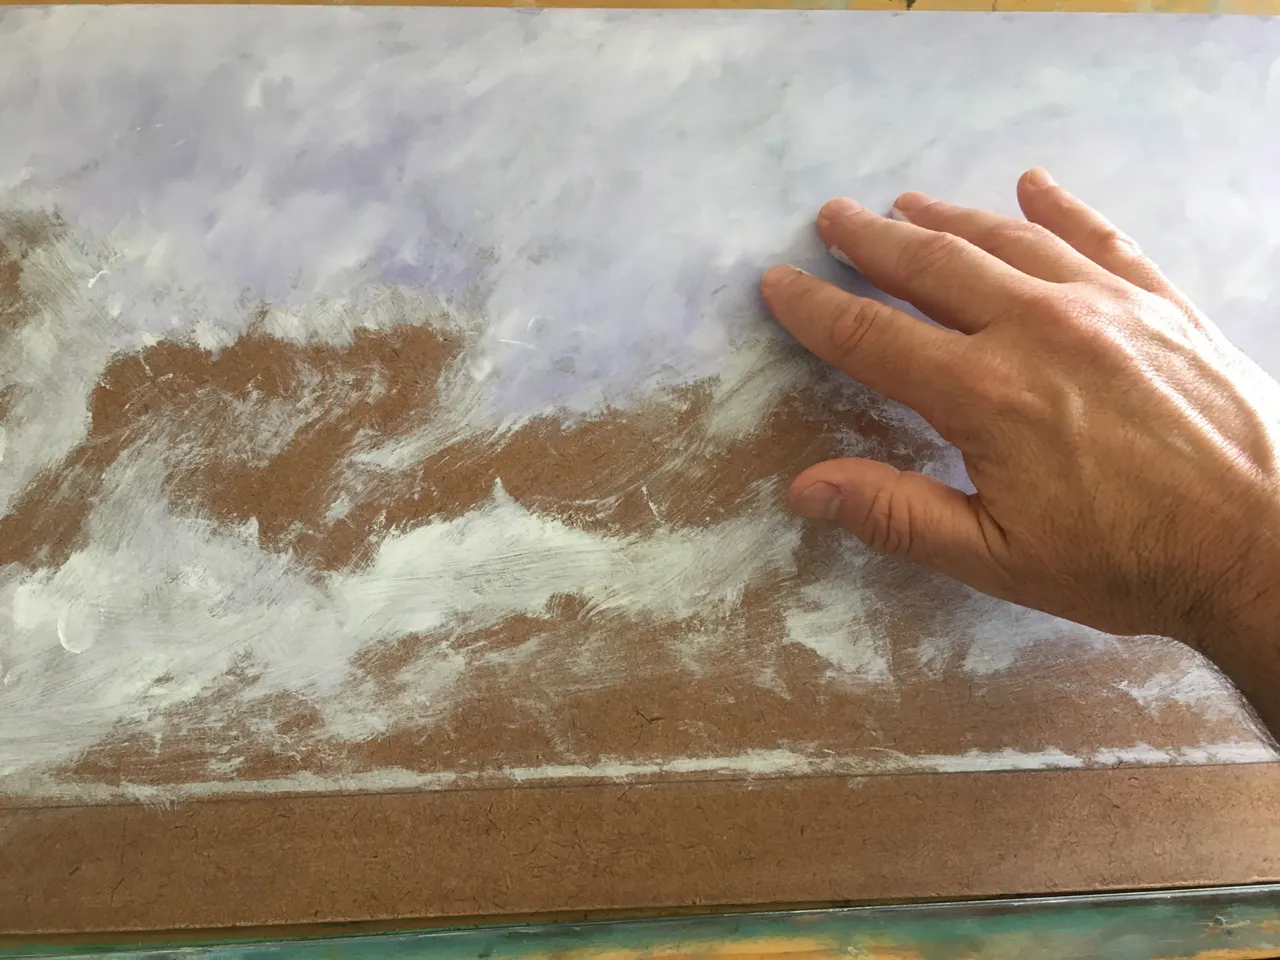
Step 6 ..
After the majority of the first layer of Titanium White is down, I go ahead and introduce some other colors. In this case I am using Violet and Cobalt Blue Hue. I often like using the tips of my fingers to blend the paint into the painting surface. I fingerprint will most likely be missing for a few days (due to the constant friction), but it will grow back. Sometimes it can be a bit too abrasive to do this.
Step 7 ..
Add more White, Violet, Blue and then blend more and more and more...
Step 8 ..
I'll be using Naples Yellow Light and Cadmium Yellow for the yellows of the sunset. I just place a tad bit along the bottom of the painting. I am only using my fingers right now.
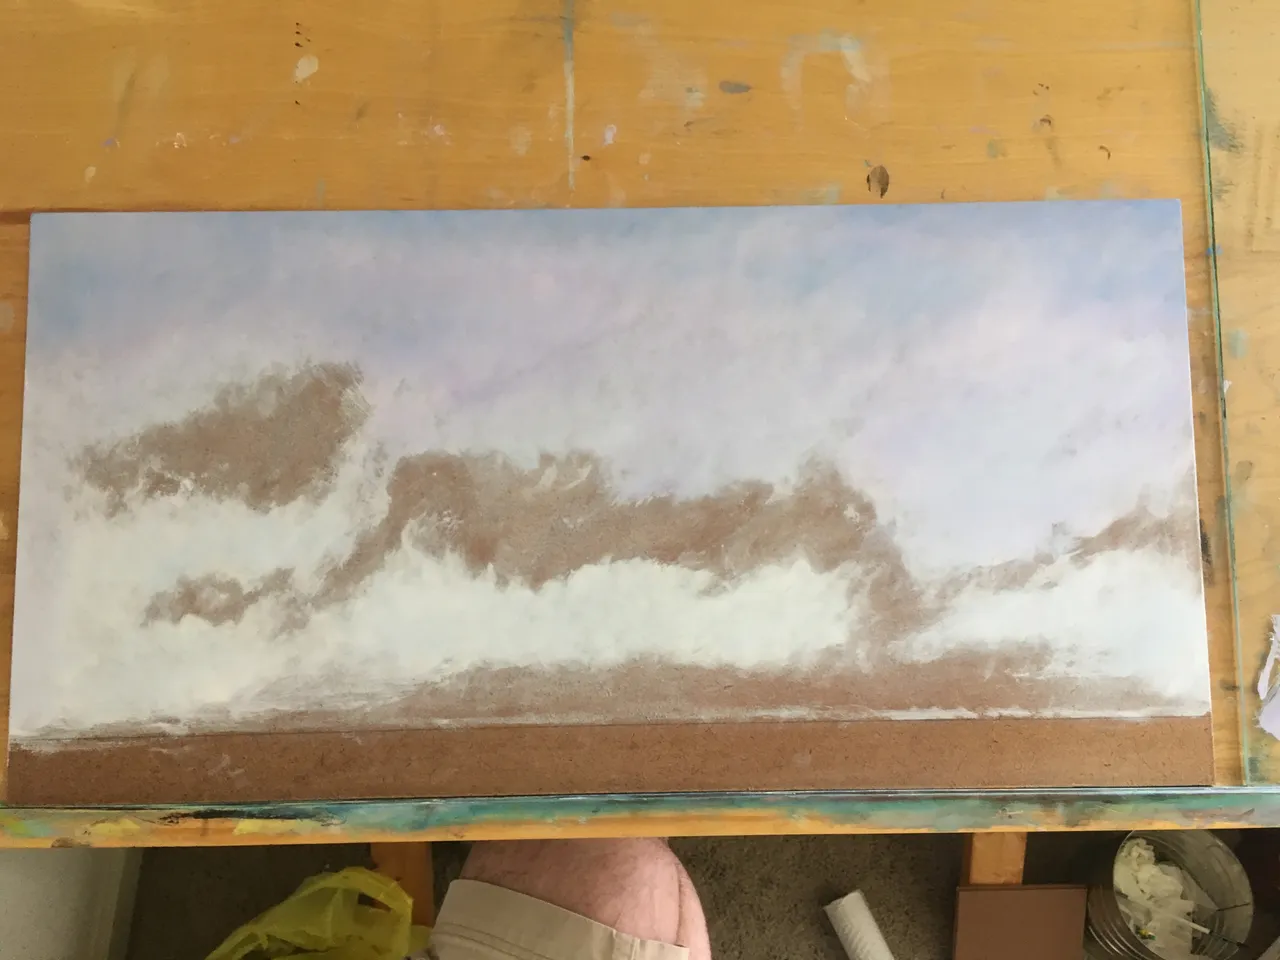
Step 9 ..
I move on to placing in and building up the clouds. I am using the Cobalt Blue Hue and Violet along with some Ivory Black. While doing this, I lay in where I want the sun to be dipping below the horizon as well as a few rays shooting up through the clouds. As you can see here, I have been layering in more of the yellows of the sunset and define my landscape with a nice layer of Black! Ouch..Hope its where I want it. Hard to move it after it there. I'm happy with where it sits at this point.
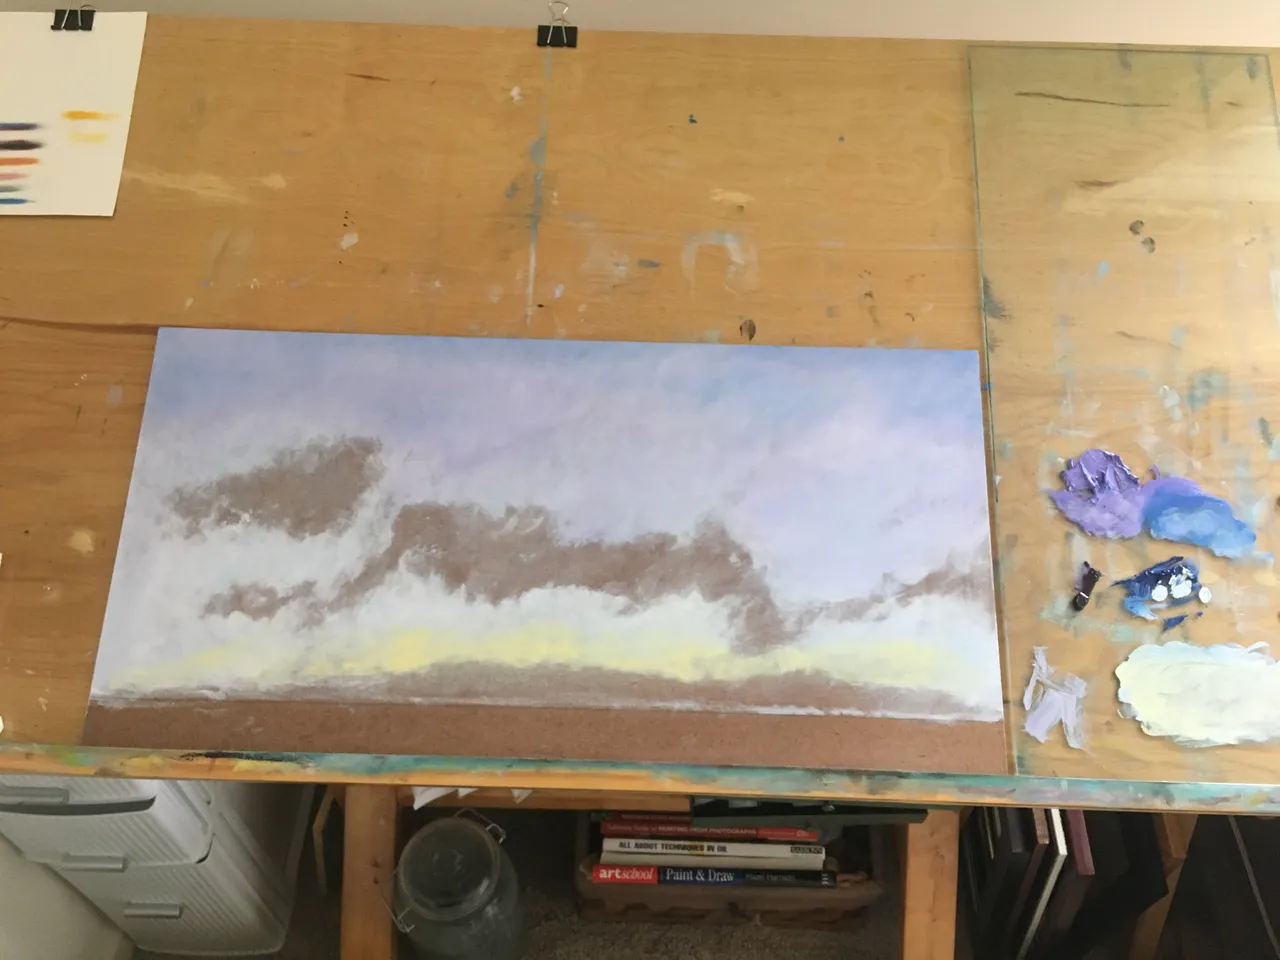
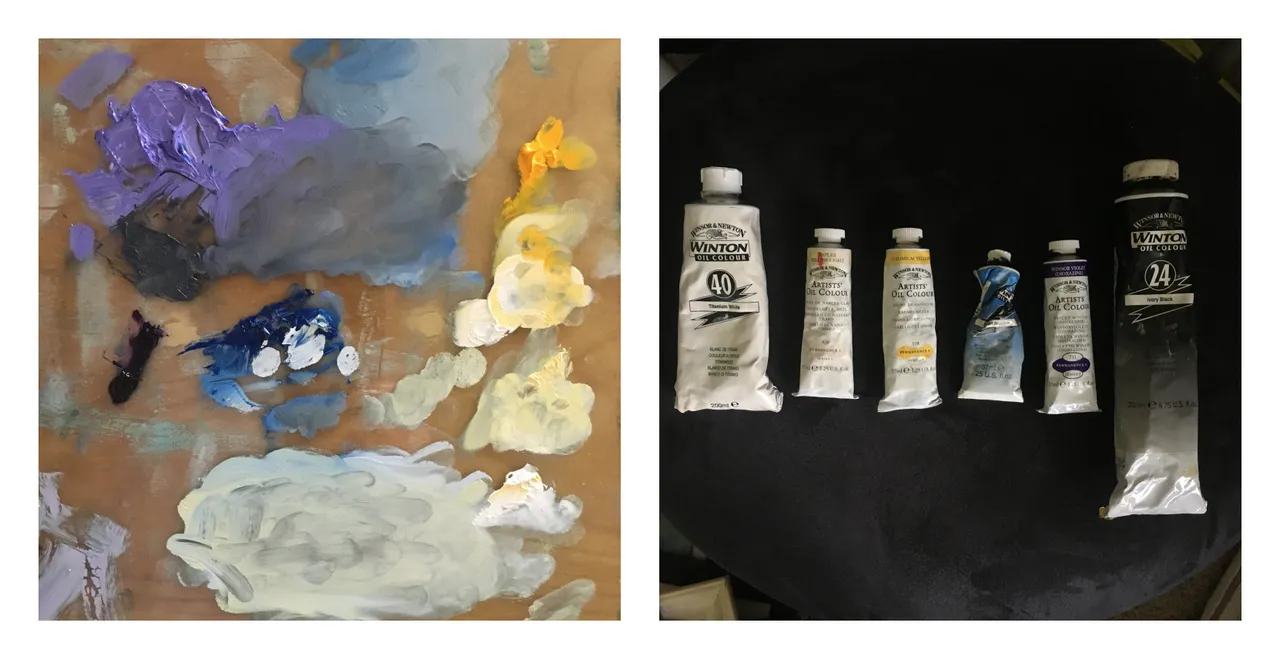
The paints I am using ..
I thought I would quickly throw in a pic of the paint I am using for this painting and a shot of my glass palate.
Step 10 ..
Here I am adding in some bits of interest within the landscape. This will be similar to the inspiration photo by @daveks (see top of post). I like the way the tree line is minimal, to the edges, and flows inward as depicted in the photo. Everything is sort of guiding your eye toward the star of the show..the Sun setting.
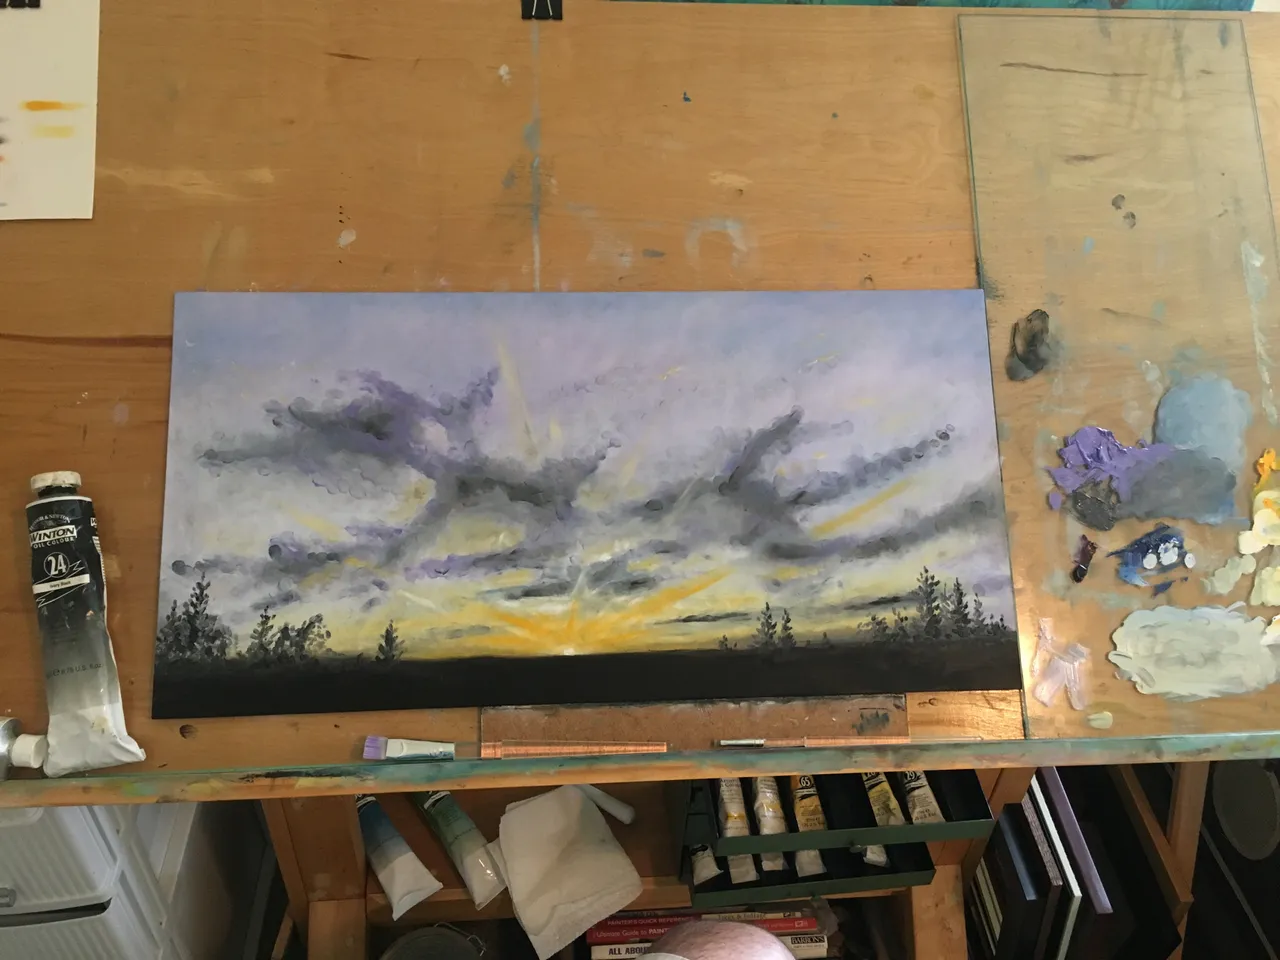
Step 11 ..
I'm adding in the buildings. I went with buildings instead of the tractor. It's just what I decided to do. Maybe some day I will practice drawing mechanical farm equipment so that I can incorporate that into another painting.
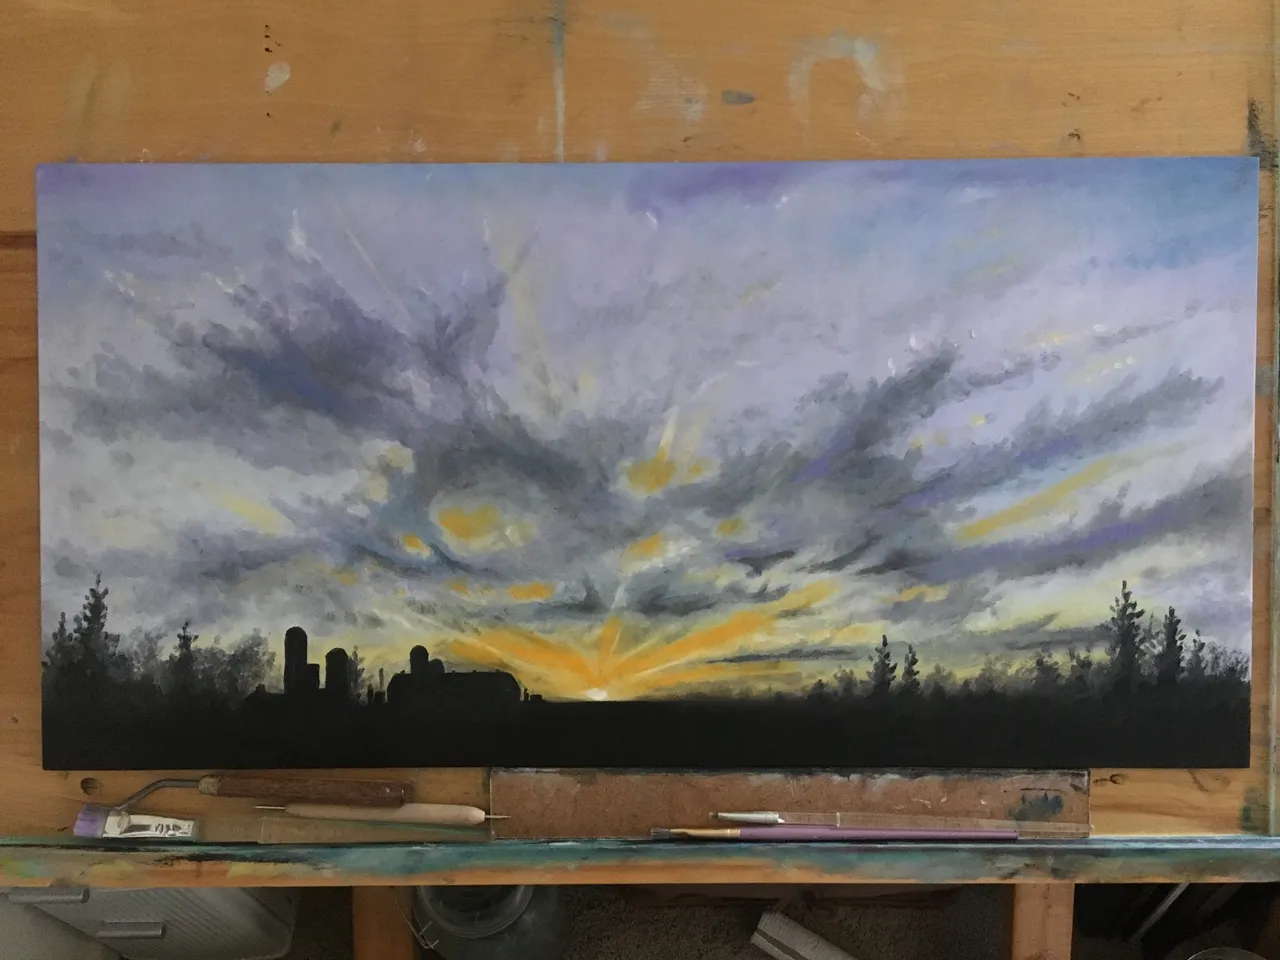
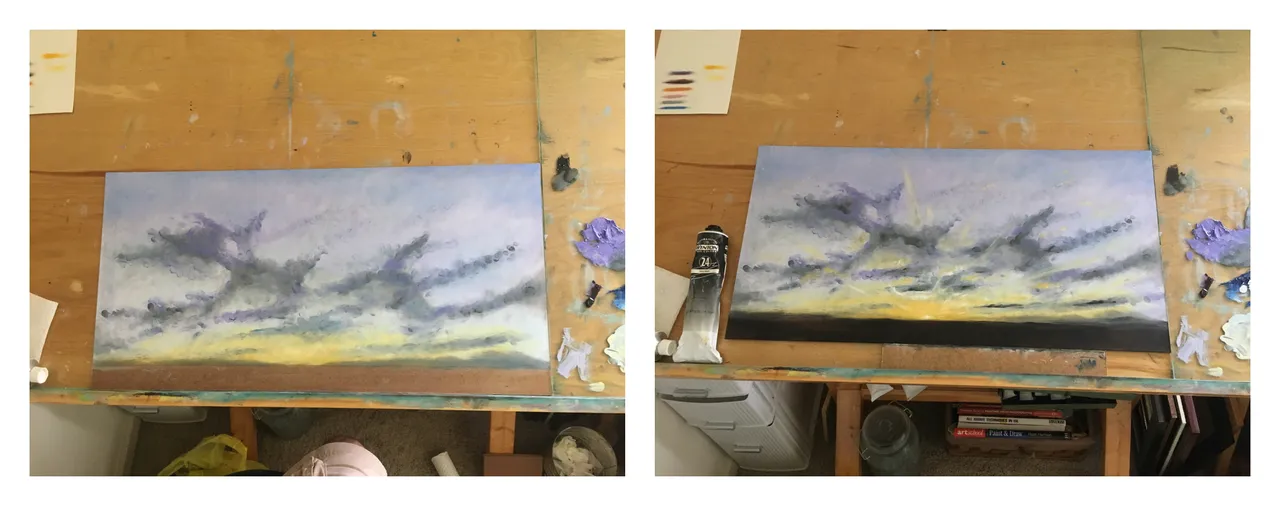
Step 12 ..
There is a lot of little steps in here that I will skip. Basically building in layers, shading, highlighting, yada yada.. After Highlighting the buildings and tips of trees, as seen here ...
... I realize that I don't like the shade of the yellow in the overall painting. I re-blend a shade that appeals to me and slowly work this in and over what I already applied. Took a few hours to do this, but I was satisfied with the end results. When It dried (things change as it dries - colors darken or lighten, colors bleed through - stuff like that) I couldn't of been happier.
Step 13 ..
Lucky Step 13! But I won't end on that note. Its dry enough for my signature, so in it goes!! I pick a color that won't stand out too much. Usually one of the colors I used creating the painting. Naples Yellow Light mixed with a bit of Linseed Oil.
Step 14 ..
It's Finished!!!!!!! After a few weeks I will take it out doors and apply three coats of a sealer in order to help protect it from UV light, fading and dust. It will smell like a pine tree for a few weeks. At least that's what I think it smells like.
What a fun painting to paint! ..
I enjoyed the process and hope you did as well. If you have any pointers, advise or criticism, I am open to it. Please feel free to comment them below.
Thanks @daveks for taking such a beautiful picture and allowing me to squeeze some inspiration from it!
Now on to the next one :-)
If Your Interested In Purchasing Any Of My Work:
Make me an offer (in SBD) in the comments section of this post. I will consider all offers.
If we agree on a price, you can transfer the SBD to my wallet. I will then ship the painting to you. (shipping costs will be determined by your location and also payable in SBD).
Thank you for swinging by my blog and checking out the post. Have a great day!
;-)