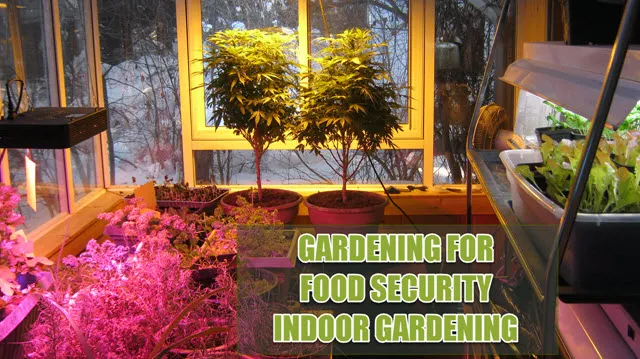
Come on a walk-thru in my sun room to see what's happening this week with my indoor garden project.
New this week is the cuttings on the light stand.
Making Cuttings
There is a number of different methods for cloning/making cuttings of your plants, depending on what you are trying to clone.
A very simple method I use for cloning my coleus is in water.
Take a cutting from a strong healthy part of your plant that has a few leaf nodes, cut just below the leaf node on a diagonal cut and immediately put it into water. Trim off all the leaves except a few smaller ones at the top. If the leaves are large cut the leaf back so it doesn't lose too much moisture through transpiration. Once the cuttings start to root out then pot them up in some seed starting mix.
The cuttings in the video were from our cannabis mother plants.
We are rooting them in peat pellets that we soaked for about 20 min in warm water which we added some hydrogen peroxide to.
With a clean razor blade we cut of branches with green wood about 4 - 6 inches long.
We quickly dunked them into some water to rinse off any bugs they may have (we had some aphids in our grow room) and quickly put them into water again with some hydrogen peroxide in it.
Next we made our final cut just under a leaf node, cutting on a diagonal, dipped it into some rooting gel and put it into the soaked peat pellet, pushing the edges of the peat pot against the stem of the new cutting.
They were set on a tray we had placed on a heating mat, temperature set around 75 degrees F.
We placed a humidity dome over it, that had vents you could open to regulate the humidity. You want the humidity at around 90%.
We misted our plants a couple of times per day and after a few days we gave them some foliar feed.
The plants were put under the CPF light at 18 and 6 for light.
Then we wait patiently (yes patiently) until we can see roots growing and into pots of seedling mix they go. New plants established.
Did you know you can take cuttings of your tomato plants too? To multiply or keep your favorite tomato plants going. You can use the method above or place the new cuttings into a light seed starter mix of soil. Keep a humidity dome of some sort over them and give them the care the same as above.
Vigilance is the best thing you can do for your plants. Always watch closely to catch any problems early.
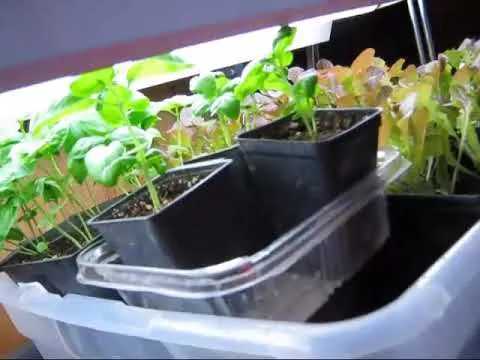
I checked the young plants of lettuce, basil, spinach and arugula. We have begun eating some of the leaves but figured it would have been good if I had sown the seeds real thick as micro greens, for more early pickings!
Growing Micro Greens
Gather up a small, food grade, plastic container, bag of seed starting mix, seeds (lettuce, kale, endive, beets, spinach, radish, watercress and peas are good to grow). You'll also need a drainage tray and some paper towel.
Directions:
Make sure your container has drainage holes in it. Fill up the containers with seed starting mix and water until quite wet.
Sow seeds thickly and evenly across the top and gently press them into the soil.
Place a damp paper towel across the top and put them on a drainage tray. Place them by a sunny window and watch them grow!
Care:
Once or twice a day, take off the paper towel to mist the seeds, replacing with a new paper towel.
As soon as the seeds start to germinate remove the paper towel. Still keep up the misting until the seeds take root and start to leaf out. Then you can switch to watering the seedlings.
Once they have a couple of true leaves you can begin harvesting them.
Just tip up your tray almost to it's side and cut off the greens.
My other seedlings are ready to pot up into their permanent pots replacing some of the older plants under the LED grow light. this will keep a fresh supply of greens happening.
Tune in next time as I continue making changes and updating in my "Gardening for Food Security - Indoor Gardening Project"
See the whole series about the indoor garden project at:
Part 1 - @porters/gardening-for-food-security-indoor-gardening-new-project-beginning
Part 2 - @porters/gardening-for-food-security-indoor-gardening-new-project-beginning-part-2
Part 3 - @porters/gardening-for-food-security-indoor-gardening-project-part-3-the-experiment-worked
Part 4 - @porters/video-tour-gardening-for-food-security-indoor-gardening-project-part-4
Part 5 - @porters/why-i-brought-my-gardening-indoors-indoor-gardening-project-part-5
Part 6 - @porters/gye4b7sv
I love engaging with folks here so please feel free to leave any comments or questions..
Please don’t hesitate to follow me here on Steemit at @porters