Here’s the final episode of the pyjama top - its making process. You might recall that I started it from scratch and have told you about the planning and then drafting the pattern pieces.
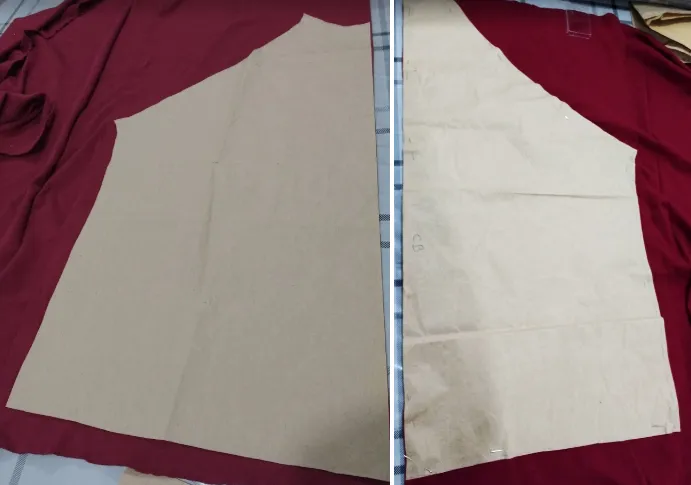
Below you can see how I have laid down the front and back pattern pieces on top of the fabric...
I changed my chosen fabric because the sleeves were too big for the fabric I had set my mind on. Then I thought I might as well treat my husband to a whole new pyjama top.
Both the black sleeve fabric and the red front and back fabric are cotton jersey. The difference is that the sleeve fabric is a single jersey (ie just like in knitting there’s a wrong side) and the red fabric is slightly heavier double knit jersey (both sides look the same). In both cases there’s no spandex, ie no extra elasticity.
Incidentally, whenever I use jersey I think ‘will this make good t-shirt yarn? If you recall my post some time ago, you just need to cut strips of the jersey fabric and then stretch it and the strip rolls in. That method would only work with the black material. The red material would only yield a ‘ribbon-like’ yarn which would remain the same if stretched…
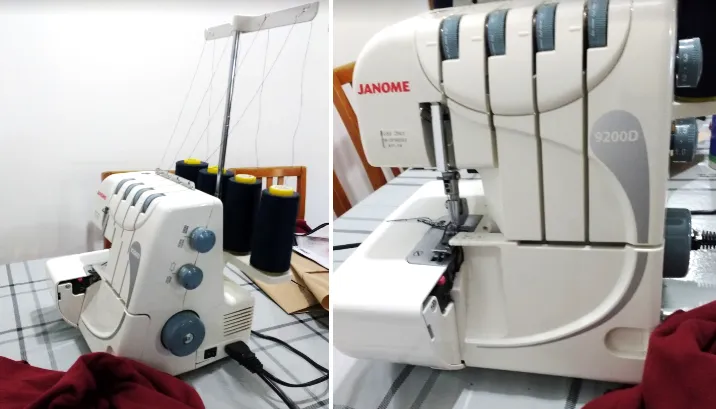
I've included two photos of my overlocker / serger because most of the sewing was done using that type of machine. It cuts as it sews so there's no need to worry about 'neatening the seams'... The main issue is that you have to be accurate because there's no turning back after the cutting.
Sewing the sides and the sleeves was very straightforward.
The next step was the neckline… This is a bit more stressful process for me …
I measure the width, in this case it was 63 cm… I then multiplied this figure by 0.85. This gave me the neckband width to cut. This method has always worked really well so thanks should go to this craftstylish page.
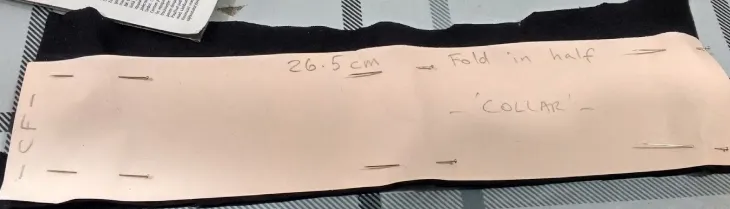
I then just needed to join the 53cm strip / neckband and attach it…
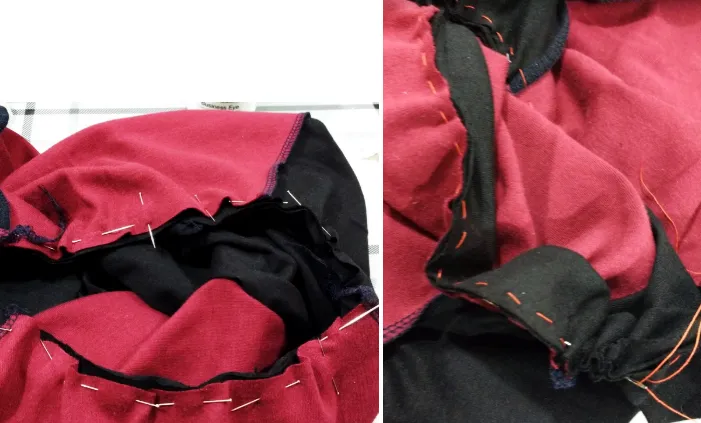
Firstly I pinned the neckband to the collar edge and had to stretch the neckband to fit in the hole… As there were so many pins I decided to actually ‘tack’ using that orange thread… I thought it would be easier to then use the machine to sew it.
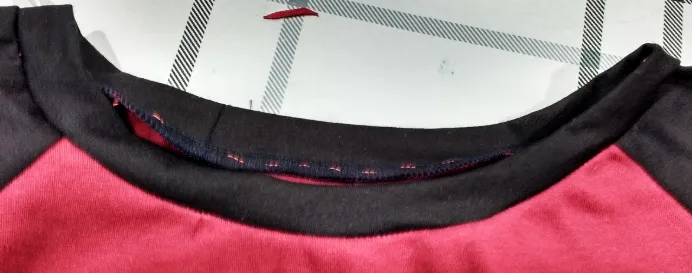
It worked quite well and then I just pulled the tacking threads off so now it doesn’t show - I need to add a fashion label ...
Hemming
I have always had issues hemming garments. I have used a twin needle in the past, but it didn’t work well with this type of material so I thought of finding other options… The easiest way to do the hem is by using a separate piece or as it’s called in this article a fabric band - a similar method to the neckband above really.
My usual preferred option is the band because I can just use one machine to do everything. I find out the width of the hips and decrease the width of the fabric band by about 3 cm. As the fabric is stretchy I know it will give, but I do not want it too tight either.
For this pyjama top, I cut a length of the red material; sewed it to join it and then folded it in half.
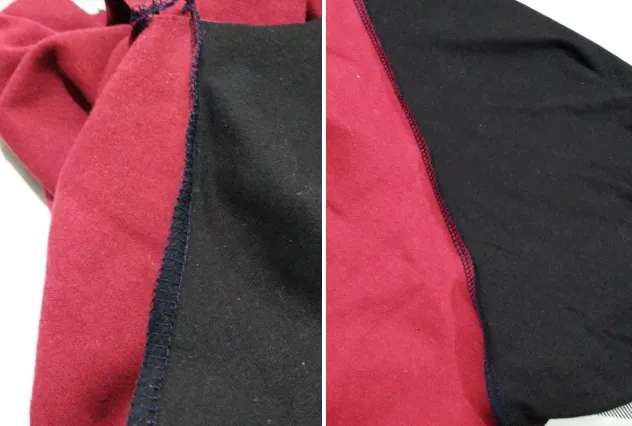
I then overlocked (serged) along the bottom of the garment and it looks very neat…

The sleeve cuffs were to have a different hemming method, ie a ‘blind hem’. Some years ago I found a website with a tutorial and I still use it because of the clear photos but there have been other tutorials since then I am sure… Please notice that this link is dated 2013 so it’s quite dated perhaps, but the instructions are clear. I have also found that this site has a good line drawing of what I’m doing
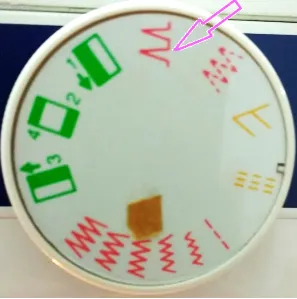
Below I show you the dial of my sewing machine and I have put an arrow on the stitch that I use.
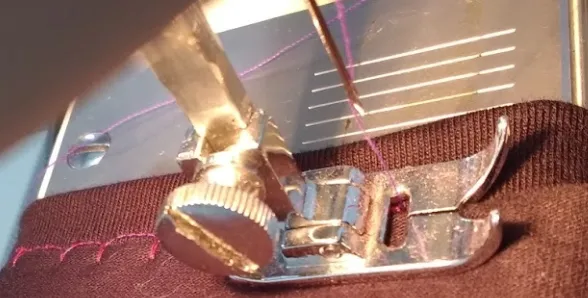
The photo below shows you the cuff folded so that the sewing just catches the edge of the side that shows (I know it sounds rather tricky, but it makes sense if you try it). The process is indeed extremely straightforward, but I hadn’t done machine sewing for ages.
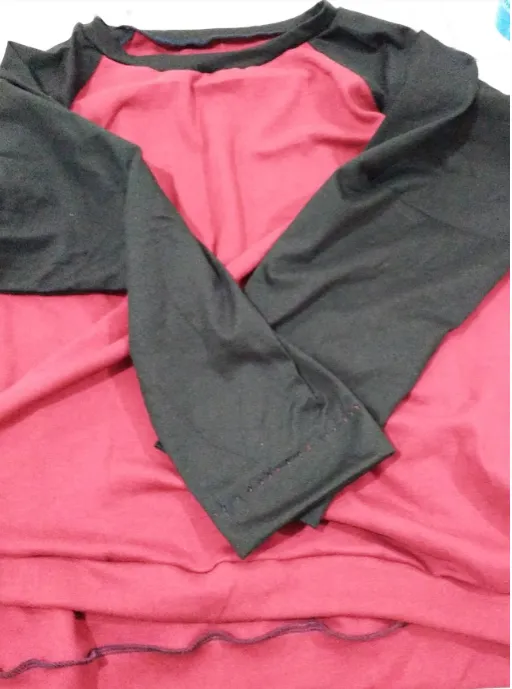
Things do not always go according to plan; the method actually worked but I obviously used too thick a needle and you can see the holes left on the fabric...
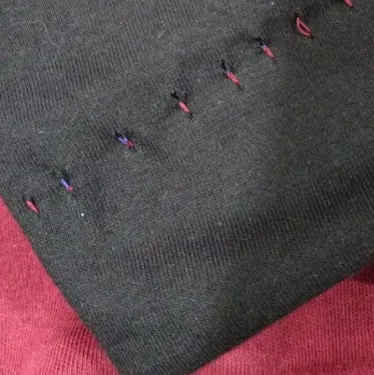
I contained myself quite well (I thought… considering…) while my husband didn’t even notice the holes (he’s so nice and encouraging like that). I can just cut that area and insert a cuff using the same fabric band method I described for the waistband hem…
The moral is ‘always check what size needle is already there.
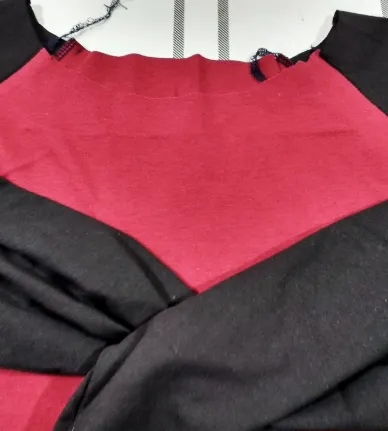
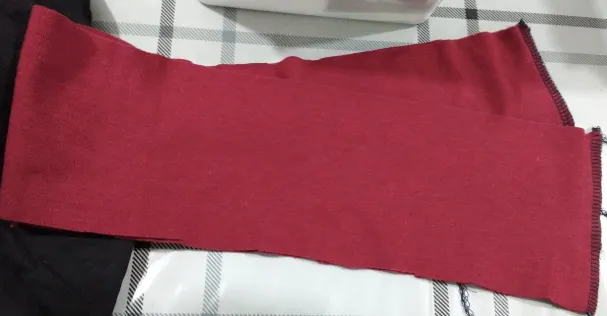
The finished top… The photo’s not so good, but it fits well and hubby’s happy. While making the top I got a lot of comments from the daughters saying… ‘it looks just like a star trek shirt’... so … I couldn’t deprive them …

I will be posting how I made that start trek insignia soon - you never know when you’ll need one 😂
Apologies for the long post... I look forward to seeing your projects...
All photos and musings by @cryptocariad
Episode 1 : Planning a new pyjama top - considerations...
Episode 2 : Drafting the pyjama top
With thanks to @crosheille and @crystalize for hosting #needleworkmonday and thanks for your patience reading all this 💓