
Hi there everyone!
Happy #NeedleworkMonday!! 😊
Many thanks again to 🌷🌸@crosheille 😘 for starting and hosting this cool community and to @crystalize for co-hosting it 🌻🌹. If you love to do anything with needles, come and join the fun with us here every Monday!
6 months ago, I wrote about altering the length of jeans and since then, I have collected quite a number of leftover jeans pieces.
Today, I will share with you the idea and steps to upcycle one of these pieces into a Steem hair scrunchy 😁:
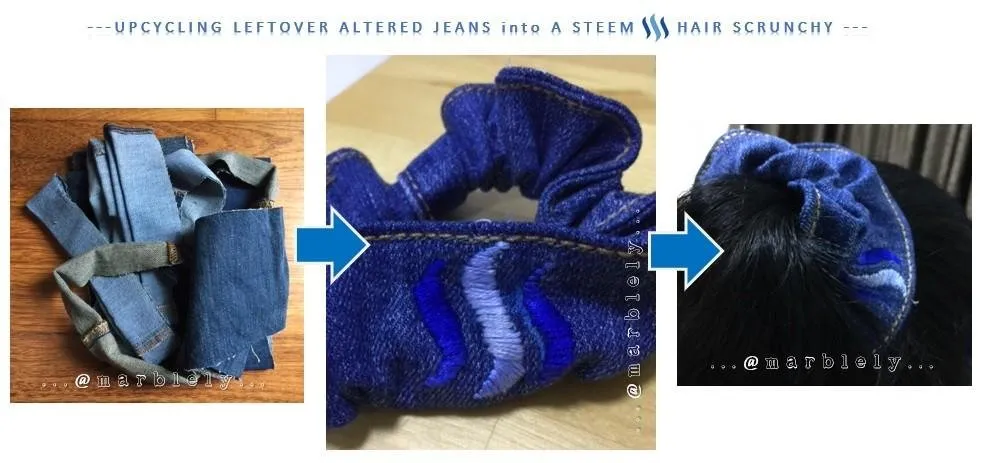
Hair scrunchies are cool because you can use any leftover fabric of any colour and pattern or design to make one. You can dress your hair by mixing and matching it with your clothes, shoes, earrings, anything really or spicing up your hair with a totally different colour compared to what you are wearing.
For this post, I will share with you on repurposing one of the leftover jeans pieces 👖 into a fashionable hair scrunchy, with a Steem embroidery 😎 (Practicing the embroidery for my brown water stained shoes 😅).
And it all starts with picking that very piece of leftover jeans:

[1] Look at your stash and find that one leftover piece that you like in terms of colour, texture, the jean's grainline, etc.
[2] I chose one that is slightly stretchy and quite thin and even coloured. It is about 3inches by 8.5inches.
Note:
These leftover jeans pieces has the shorter ends already nicely joined/sewn together, so that would be 2 sides less sewing to do.
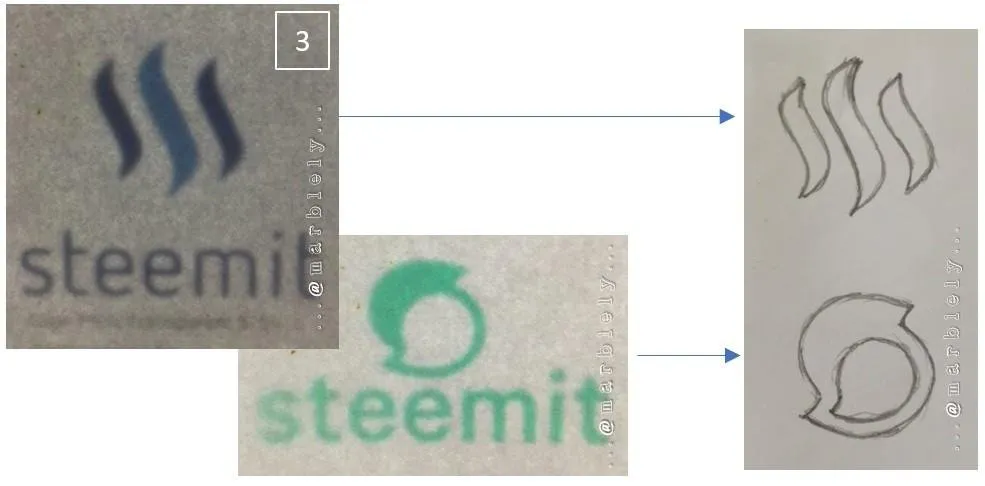
[3] Next, we trace the Steem logo. I also traced the Steemit logo to see which look nicer on the jeans. I basically traced from my phone screen 😅.
Note:
I was a little confused at first with which is the correct logo but I later found this @steemitblog post that the new Steemit logo is the green one and the older one is the blue one but now, the blue one remains as the Steem logo.
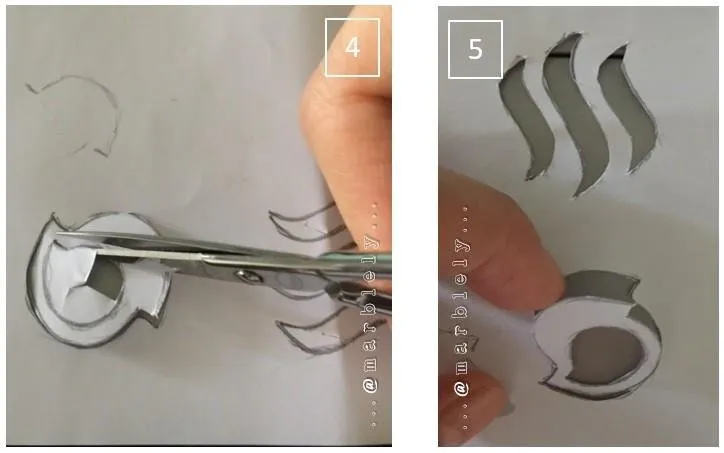
[4] Time to cut out the logos, so that we can trace them onto the fabric later.
[5] This is how the cutout looks like. For the Steemit logo, I kept one little side intact to the paper so that I can still trace the inner cutout without losing the position.
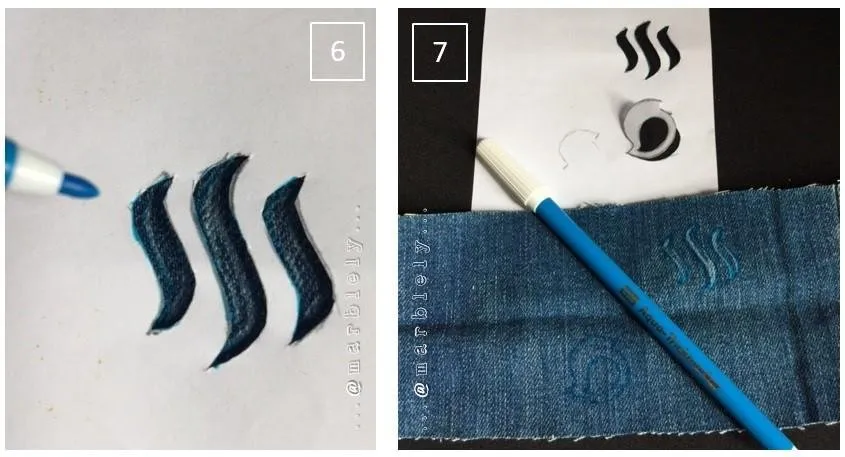
[6] Using a fabric marker pen (where the ink can be washed away with water when you wash it later), I drew the pattern onto the chosen leftover jeans.
[7] Position the logo nearer to the center because we will be sewing the raw edges later.
Note:
I drew both the Steem logo and the Steemit logo to see which one works better. I was half thinking to embroider both but ended up just embroidering one.
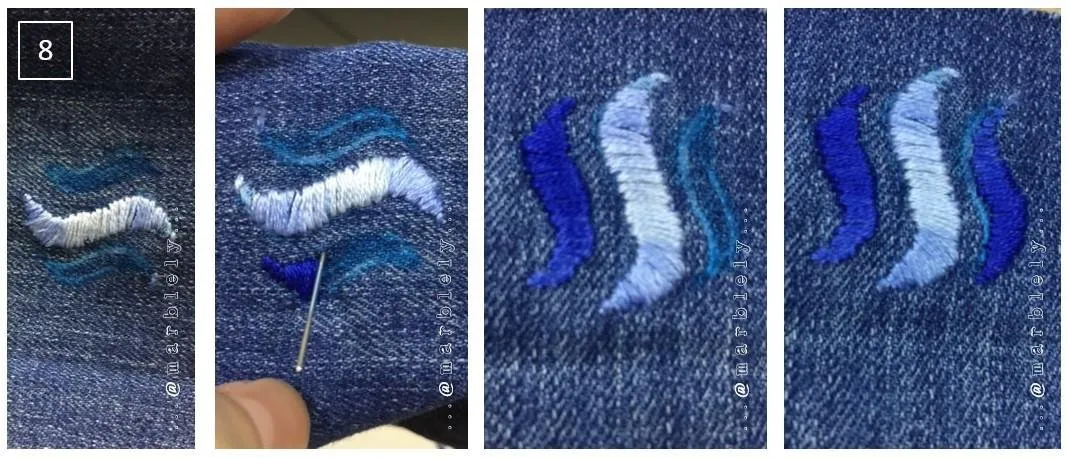
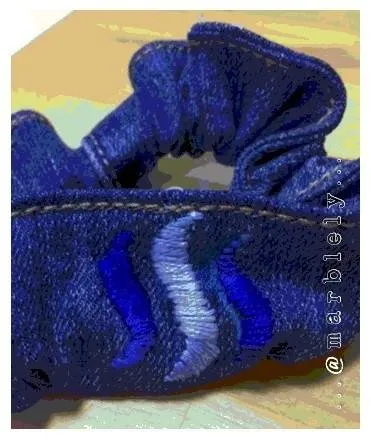
[8] Embroidery process begins!
Note:
Just to let you know, I did this process many rounds 😅.
I stitched, removed the stitches, then stitched again, then removed them again and stitched again until I lost count the number of times I removed the stitches. In the end, after I thought I was finally quite successful, I realised one of the darker blue "steam" is smaller than the other. Darn 🤦.
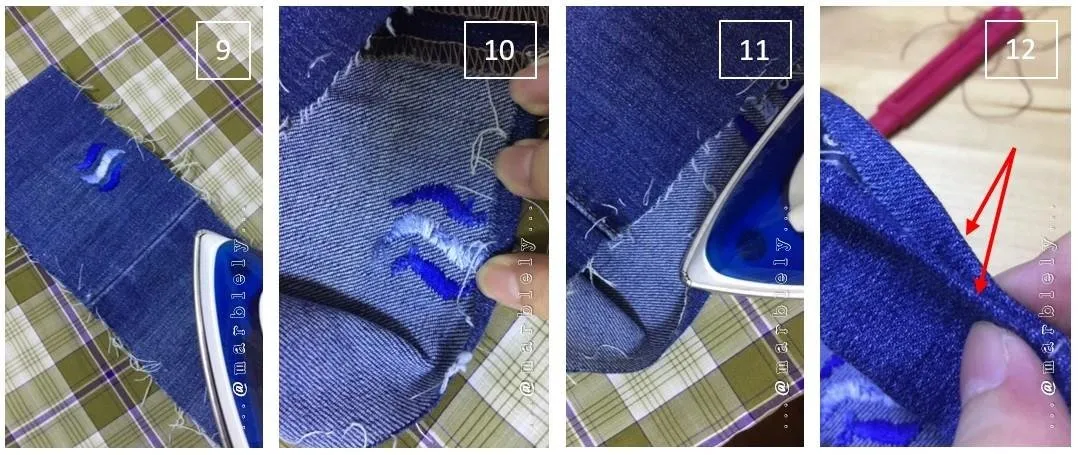
[9] Iron the embroidered leftover jeans to remove any existing creases.
[10] Fold in the raw edges by about 0.5cm (wrong sides facing).
[11] Iron the folded raw edge all around the leftover jeans.
[12] Once both sides of the raw edges have been ironed, fold the center of the leftover jeans so that the folded raw edges meet (shown by the red arrows).
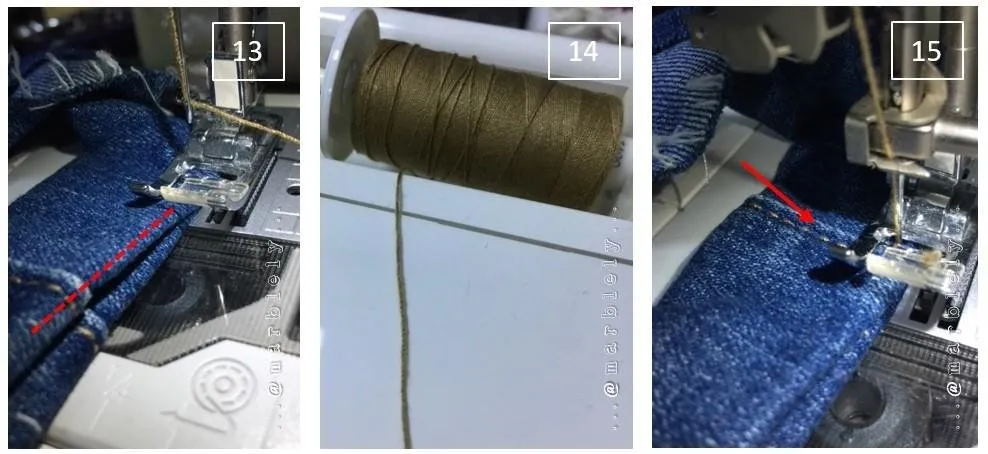
[13] Using the needle for jeans, start sewing all around the leftover jeans where the folded raw edges meet (following the dotted red line).
[14] I used a spool of brown jeans thread since this is a piece of jeans fabric to "preserve" the jeans look 😎.
[15] Be careful when you reach the thickest part of the fabric where the folded hems meet (marked by the red arrow). I would suggest to manually move your sewing machine's dial to poke the needle through and keep going on until you pass the thickness, so that the machine doesn't get jammed up.
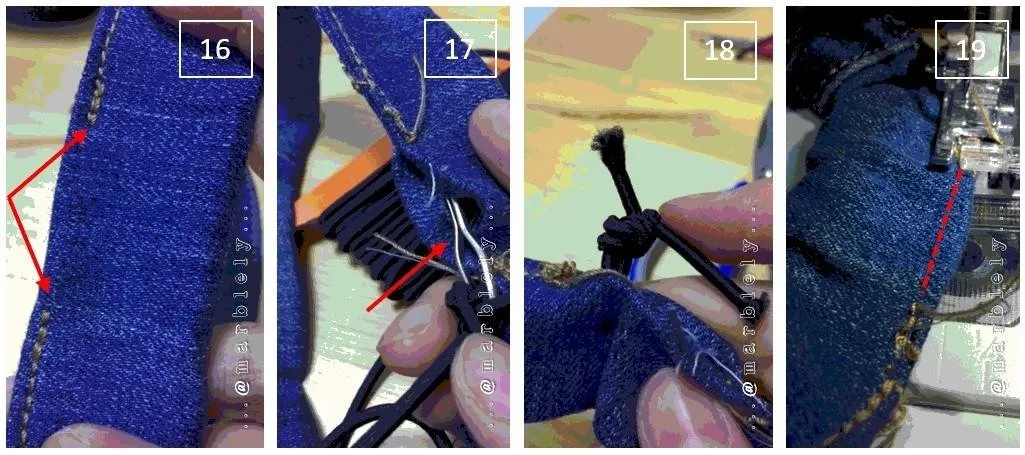
[16] Do not sew all the way, leave about 1 to 2inches of length to insert an elastic string through to create the scrunchy. The length of the elastic should be enough for you to tie your hair. It can be between 5 to 7 inches in length depending on how loose or tight the elastic is.
[17] Insert the elastic string (the one we use for our waistband - but not the super tight and wide ones) using either a rubber / string pin insert or a hair pin or a safety pin.
[18] Tie a knot at the end and insert the knot into the scrunchy.
[19] Sew the opening where the elastic was inserted just now to close it off.
We are done! A new Steemscrunchy for your hair!
(or you can use it to tie anything, really 😁)
Hope you try this. It is so fun to upcycle ⏫🚲!

