
If this is your first time seeing this series, I recommend starting at the beginning.
Building A New Nas
You can find all the other posts below, this is the 10th post in the series.
Reflections on this project
I am mostly done with the project, I haven't yet made the NAS active in terms of housing all my data. I am still planning the final configuration on RAID levels, software configuration, and some other things.
I have Ubuntu 18.04 up and running, I have a ZFS pool active and a SAMBA share running for testing purposes. I also have Docker and KVM setup for testing Virtual Machines.
Everything is running great, but a few things I have thought about that I wish I did differently.
5400 RPM hard drives
I picked up 16 Seagate 7200 RPM SAS 4TB drives. I ended up paying $45 a piece shipped. This is a fantastic price for an Enterprise class drive. Thinking back though, I really wish I went 5400 RPM. Speed was my primary concern, but I didn't think too much about thermals and power usage.
/dev/sda: SPCC Solid State Disk: 33°C
/dev/sdb: SPCC Solid State Disk: 33°C
/dev/sdc: SEAGATE ST4000NM0023: 47°C
/dev/sdd: SEAGATE ST4000NM0023: 59°C
/dev/sde: SEAGATE ST4000NM0023: 59°C
/dev/sdf: SEAGATE ST4000NM0023: 58°C
/dev/sdg: SEAGATE ST4000NM0023: 54°C
/dev/sdh: SEAGATE ST4000NM0023: 53°C
/dev/sdi: SEAGATE ST4000NM0023: 54°C
/dev/sdj: SEAGATE ST4000NM0023: 51°C
/dev/sdk: SEAGATE ST4000NM0023: 52°C
/dev/sdl: SEAGATE ST4000NM0023: 52°C
/dev/sdm: SEAGATE ST4000NM0023: 56°C
/dev/sdn: SEAGATE ST4000NM0023: 49°C
/dev/sdo: SEAGATE ST4000NM0023: 48°C
/dev/sdp: SEAGATE ST4000NM0023: 51°C
While I don't have heat problems, and the drives are under their tolerable levels, I would still have 90% of the speed for considerably less heat and power usage. The case I am using puts the drives pretty close and the cooling is ok but not fantastic, even with replaced fans.
I originally planned on Western Digital Red 10TB 5400 NAS drives. They are $200-280 a piece compared to $45. There was a recent sale right after I bought these drives for $140, the lowest historically.
Hot Swap
Initially, I didn't worry too much about a hot swap case, but after building this I really regret not getting one. While it is rare I will ever need to swap out a drive, when I do it is going to be a pain in the butt to find the drive that failed. With a good quality hot swap case, you can blink a light to find the failed drive, you also can pull each drive out while the unit is offline and check serial numbers easily. Finally, wiring would be simpler with a hot swap case as there is a SAS backplane that handles all the drive wiring.
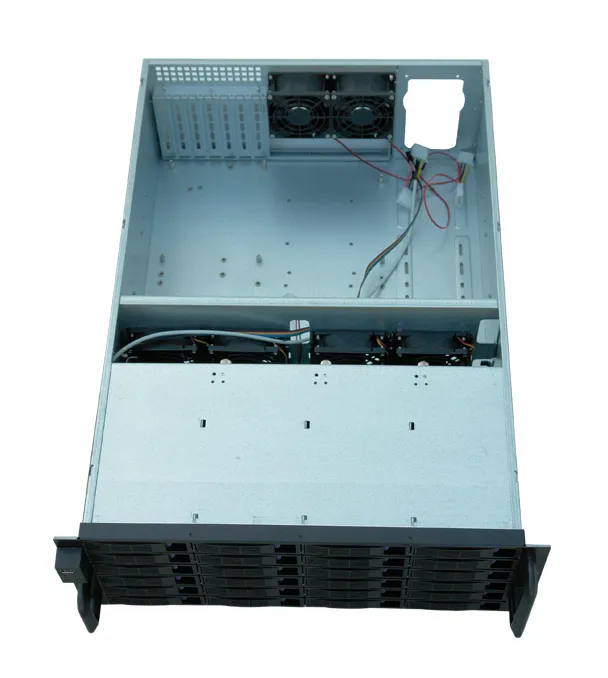
For example, this 24 bay hot swap case would have been a much better option. The price is significantly higher though at around $650 vs $144. I did see a few other options that were in the $200-400 range and would happily spend another $100-200 on a better a case but wouldn't go $500 more.
Another option which I really like would have been to use a Super Micro case which includes a motherboard already and really nice hot swap system. I was pretty set on the current motherboard due to the fact it had built-in 10GBit, SAS Controller, and IPMI but I could have added them to a much in exchange for a much better enclosure. I would have also likely gained two power supplies, although rarely ever a problem would have been a nice addition.
Larger SSD drives
I should have spent the extra $30 USD per drive for 512GB or even larger SSD drives. I have some spare 1TB Samsung SSD I might throw in.
Initially, the SSD drives were only to run the operating system and that's it. 256GB was more than enough. Then I ran into an unexpected issue that I haven't quite solved yet anyway.
The block size of ZFS is 128K as mentioned in my Introduction to ZFS post. The way ZFS works it will wait until it can write out a full slab (128K) before writing to disk. This helps minimize the fragmentation issue with a Copy-On-Write file system.
(If this doesn't make sense, read the post linked earlier).
When running virtual machines, you want to use a 4K block size or you can experience as much as 32x performance hit. Using a 4K block size with Raidz will reduce your available storage by 67%! 60TB would immediately become 20TB due to the two parity block with every block written. For Virtual machines with ZFS it is highly recommended to use mirror vdevs, which has a much higher disk cost than Raidz.
I had four options I could do:
- Use 4K zvol on my 3xRaidz array and have poor virtual machine performance and 67% space reduction on top of the Raidz disk requirements.
- Use stripped mirrors for the virtual machines and have much better random IO for virtual machines at a much higher disk cost. I could run 2 or even 4 disks dedicated to virtual machines depending on how many I am doing.
- Use default 128k block size and take a massive hit for IO performance when using Virtual machines
- Use the boot SSDs to store the virtual machines and use SAMBA/NFS or mapped volumes in docker for any significant file storage need in the virtual machines.
I believe I am going the last option, while my virtual machines are not likely going to be large, you do over allocate space for each one and 256GB will get crowded quite fast. I can easily clone these drives and upgrade them later.
I am still working these details out, the project has taken a back seat to other things pressing.
Custom SATA Power Cords
I wish I planned ahead, and purchased the parts to make custom SATA power cables from the power supply all the way to the drive.
This was one of the hardest parts of the build, dealing with those pre-made connectors and customizing them. While it was easy, it was very tedious as the connectors were difficult to get off. The price would have been a little more but I could have made perfect cables that plugged right into the power supply directly.
More efficient CPUs
I might have gone overboard with two Xeon 2690 8 Core CPUs. I wanted the fastest money could buy without getting "expensive". The Xeon 2690 8 Core CPUs were the best value per performance, especially since I was able to pick up two for $110 shipped combined.
I am not sure if they will be just perfect for the VM's I want to run or overkill. I think they will be overkill but I won't know until I figure out all the VM's I plan to run. I didn't put a lot of thought into the power draw of the hard drives or CPU, assuming it won't be all that big of a deal in the end. I will do some power efficiency testing with my Kill-A-Watt meter soon and will post my findings when I do.
I suspect I am going to be looking at $10-20/month in power usage when said and done. Once I do some testing I under normal usage I will know for sure.
If you plan on doing a build like this, consider your needs and power usage accordingly. I was mostly focused on performance and much of what I did is overkill. You could easily cut the ram in half and use a more energy efficient CPU, doing so would also allow you to use the stock heat sinks which are included with the motherboard and silent. You could also easily use 5400 RPM drives with a small performance hit on disk speed.
NAS 2019 Build Series
- Building A New Nas
- NAS Build 2019 Step 1 - Ordering Parts
- NAS Build 2019 Step 2 - First parts delivery
- NAS Build 2019 Step 3 - Fan Upgrades
- NAS Build 2019 Step 4 - Power Supply Installation
- NAS Build 2019 Step 5 - Final Parts Delivery
- NAS Build 2019 Step 6 - CPU Installation
- NAS Build 2019 Step 7 - Hard Disks!
- NAS Build 2019 Step 8 - Firmware Updates
- NAS Build 2019 Step 9 - OS Install & Initial Testing
- NAS Build 2019 Step 10 - Introduction to ZFS